


背景
RabbitMQ 即一个消息队列,主要是用来实现应用程序的异步和解耦,同时也能起到消息缓冲,消息分发的作用。消息中间件最主要的作用是解耦,中间件最标准的用法是生产者生产消息传送到队列,消费者从队列中拿取消息并处理,生产者不用关心是谁来消费,消费者不用关心谁在生产消息,从而达到解耦的目的。在分布式的系统中,消息队列也会被用在很多其它的方面,比如:分布式事务的支持,RPC的调用等等。
1、消息队列
对于消息队列,我们一般知道有三个概念:消息发送者、队列、消息接收者,RabbitMQ 在这个基本概念之上,多做了一层抽象,在发消息者和队列之间,加入了交换器(Exchange)这样发消息者和队列就没有直接联系,转而变成发消息者把消息给交换器,交换器根据调度策略再把消息再给队列。
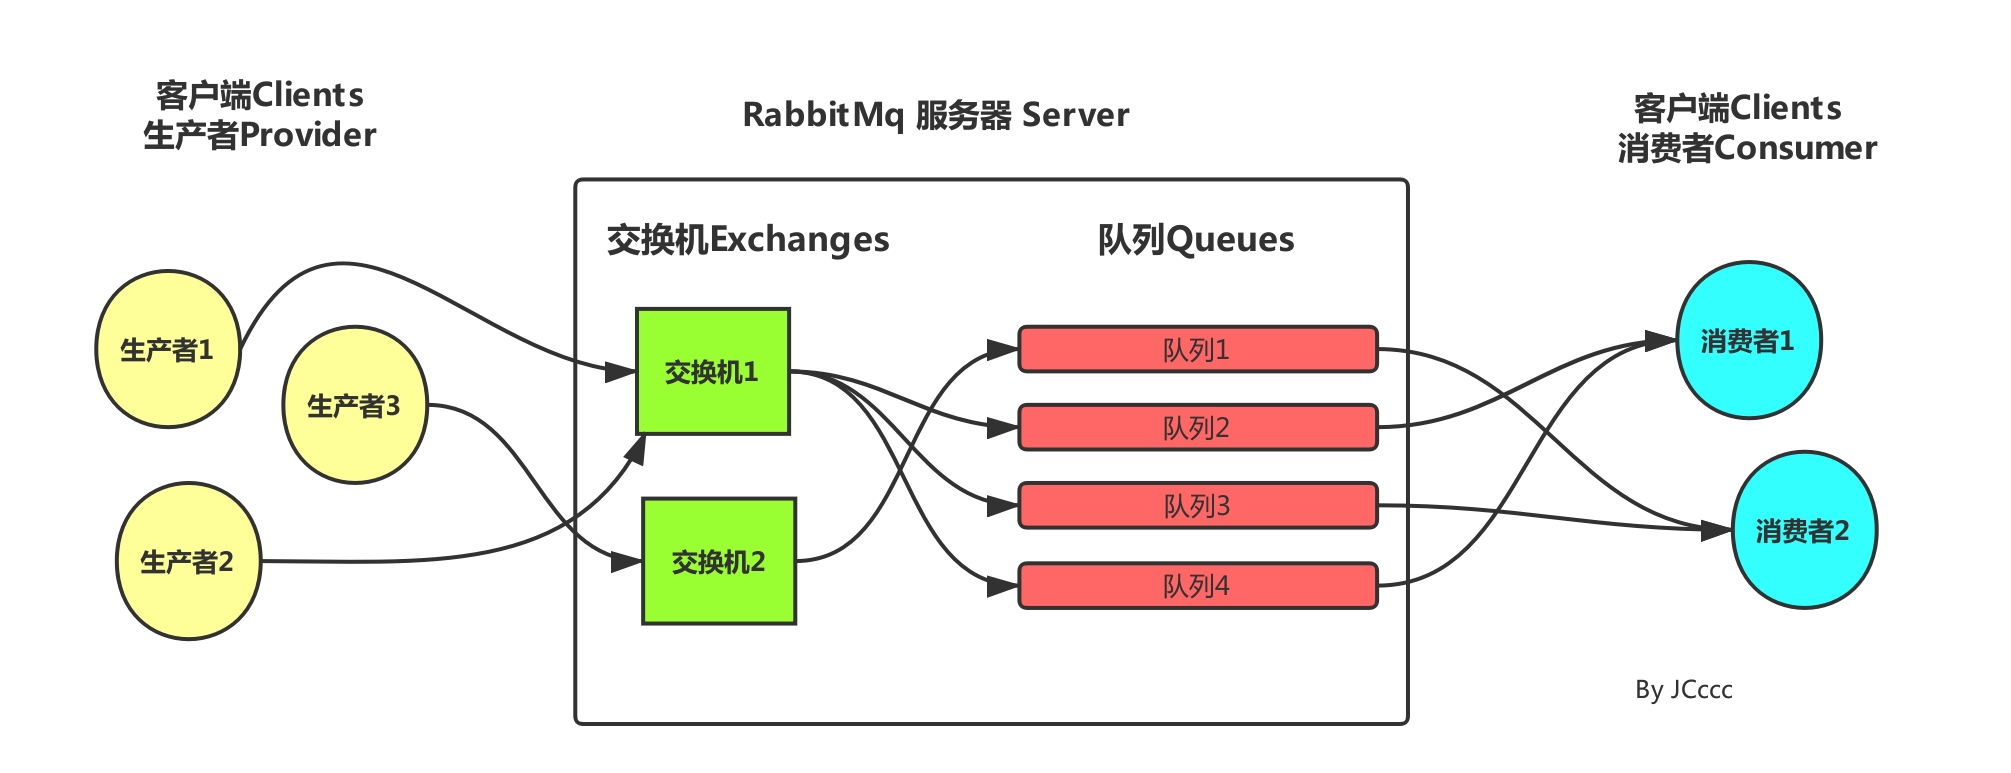
左侧是生产者,也就是往RabbitMQ发消息的程序。
中间即是RabbitMQ,其中绿色的是交换机,红色的通道代表队列。
右侧是消费者,也就是往RabbitMQ 拿消息的程序。
交换机
交换机的功能主要是接收消息并且转发到绑定的队列。交换机类型主要有:Direct类型、Topic类型、Headers类型和Fanout类型。
1、Direct Exchange
直连型交换机,是RabbitMQ默认的交换机模式,也是最简单的模式。初始化时队列绑定到一个直连交换机上,同时赋予一个路由键BindingKey。当发送者发送消息的时候它会携带着路由值Key。当Key和消息队列的BindingKey一致的时候,消息将会被发送到该消息队列中。
2、Topic Exchange
主题交换机,转发信息主要是依据通配符,队列和交换机的绑定主要是依据一种模式(通配符+字符串),而当发送消息的时候,只有指定的Key和该模式相匹配的时候,消息才会被发送到该消息队列中。简单地介绍下规则:
* (星号) 用来表示一个单词 (必须出现的)
# (井号) 用来表示任意数量(零个或多个)单词
通配的绑定键是跟队列进行绑定的,举个小例子
队列Q1绑定键为 *.TT.*
队列Q2绑定键为 TT.#
如果一条消息携带的路由键为 A.TT.B,那么队列Q1将会收到;如果一条消息携带的路由键为TT.AA.BB,那么队列Q2将会收到;
当一个队列的绑定键为 "#"(井号) 的时候,这个队列将会无视消息的路由键,接收所有的消息。当 * (星号) 和 # (井号) 这两个特殊字符都未在绑定键中出现的时候,此时主题交换机就拥有的直连交换机的行为。所以主题交换机也就实现了扇形交换机的功能,和直连交换机的功能。
3、Headers Exchange :
头交换机,是根据一个规则进行匹配,在消息队列和交换机绑定的时候会指定一组键值对规则,而发送消息的时候也会指定一组键值对规则,当两组键值对规则相匹配的时候,消息会被发送到匹配的消息队列中。
4、Fanout Exchange :
扇型交换机,是路由广播的形式,这个交换机没有路由键概念,就算你绑了路由键也是无视的。 这个交换机在接收到消息后,会直接转发到绑定到它上面的所有队列。
添加maven依赖
<!-- rabbitmq依赖 -->
<dependency>
    <groupId>org.springframework.boot</groupId>
    <artifactId>spring-boot-starter-amqp</artifactId>
</dependency>
编写applicaiton.properties文件
#配置rabbitmq的安装地址、端口以及账户信息
#注意port 15672是管理端的端口
spring.application.name=spirng-boot-rabbitmq-sender
spring.rabbitmq.host=127.0.0.1
spring.rabbitmq.port=5672
spring.rabbitmq.username=guest
spring.rabbitmq.password=guest
Direct Exchange实例
本次实例教程需要创建2个springboot项目,一个 SpringBoot_Rabbitmq_DirectProvider (生产者),一个SpringBoot_Rabbitmq_DirectCustomer(消费者)。
1、生产者的结构代码图如下:

2、创建配置类DirectRabbitConfig
import org.springframework.amqp.core.Binding;
import org.springframework.amqp.core.BindingBuilder;
import org.springframework.amqp.core.DirectExchange;
import org.springframework.amqp.core.Queue;
import org.springframework.context.annotation.Bean;
import org.springframework.context.annotation.Configuration;

@Configuration
public class DirectRabbitConfig {

	// 创建一个队列名称为directQueue
	@Bean
	public Queue directQueue() {
		/**
		 * 在new Queue()的时候是有3个构造方法的,由于参数的不同,创建的结果也不一样,下面说下里面的参数
		 *durable:是否持久化,默认是false,持久化队列:会被存储在磁盘上,当消息代理重启时仍然存在,暂存队列:当前连接有效
		 *exclusive:默认也是false,只能被当前创建的连接使用,而且当连接关闭后队列即被删除。此参考优先级高于durable
		 *autoDelete:是否自动删除,当没有生产者或者消费者使用此队列,该队列会自动删除。
		 * 一般设置一下队列的持久化就好,其余两个就是默认false
		 */
		return new Queue("directQueue",true);
	}
	// 创建一个Direct交换机起名为TestDirectExchange
	@Bean
	public DirectExchange directExchange() {
		return new DirectExchange("directExchange",true,false);
	}
	// 将队列和交换机绑定, 并设置用于匹配键:directRouting
	@Bean
	public Binding bindingDirect() {
		return BindingBuilder.bind(directQueue()).to(directExchange()).with("directRouting");
	}
}3、创建消息的提供者MessageProvider
import java.util.Date;

import org.springframework.amqp.core.AmqpTemplate;
import org.springframework.beans.factory.annotation.Autowired;
import org.springframework.scheduling.annotation.Scheduled;
import org.springframework.stereotype.Component;

@Component
public class MessageProvider {

    @Autowired
    private AmqpTemplate rabbitTemplate;

    @Scheduled(fixedRate=5000,initialDelay=3000)
    public void send() {
            String context = "hello " + new Date();
            System.out.println("Sender : " + context);
            this.rabbitTemplate.convertAndSend("directExchange", "directRouting", context);
    }
}4、启动类Application
@SpringBootApplication
@EnableScheduling
public class Application{
public static void main( String[] args ){
SpringApplication.run(Application.class, args);
}
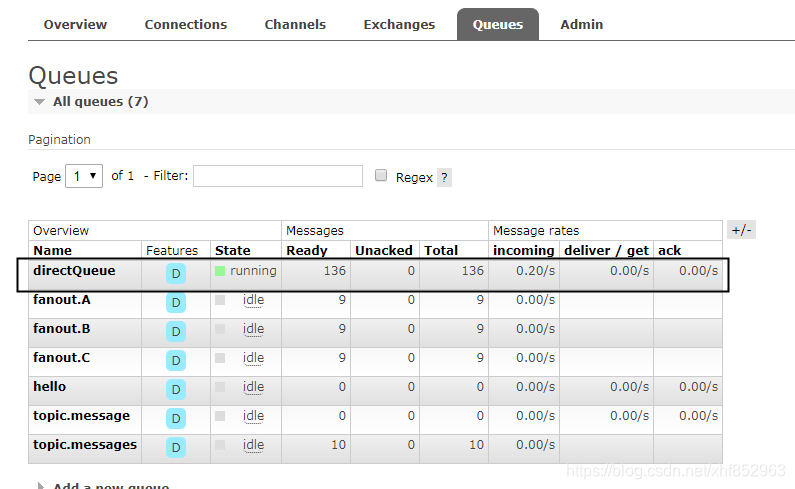
}5、启动项目,此时的消息没有被消费的,我们去rabbitMq管理页面看看,是否推送成功
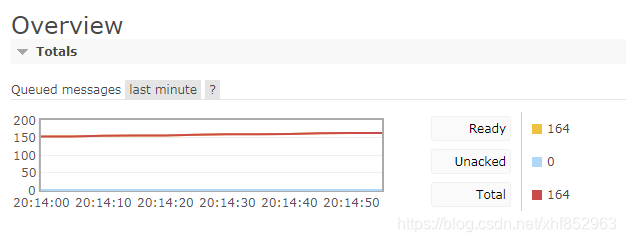
我们可以发现,消息已经推送到rabbitMq服务器上面了。
6、创建消费者SpringBoot_Rabbitmq_DirectCustomer,工程目录如下所示:
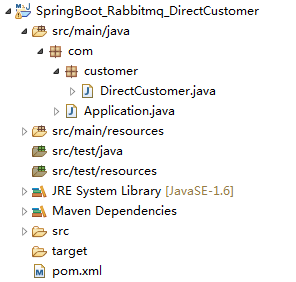
7、创建消费者类DirectCustomer
@Component
@RabbitListener(queues = "directQueue")
public class DirectCustomer {

     @RabbitHandler
     public void process(String hello) {
            System.out.println("Receiver1  : " + hello);
     }

}8、创建启动类Applicaiton
@SpringBootApplication
public class Application{

    public static void main( String[] args ){
        SpringApplication.run(Application.class, args);
    }
}9、启动消费者,查看是否可以成功消费rabbitmq里面的消息
10、创建消费者DirectCustomer2,测试这种交换机模式是否存在重复消费
@Component
@RabbitListener(queues = "directQueue")
public class DirectCustomer2 {
@RabbitHandler
public void process(String hello) {
System.out.println("Receiver2 : " + hello);
}
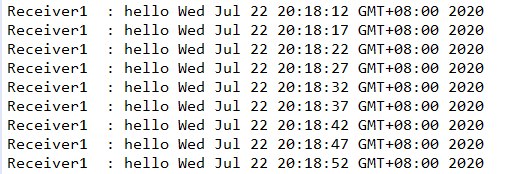
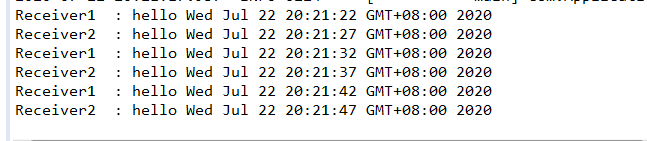
}11、输出结果如下所示,我们发现不存在重复消费的情况
Topic Exchange实例
本次实例教程需要创建2个springboot项目,一个 SpringBoot_Rabbitmq_TopicProvider (生产者),一个SpringBoot_Rabbitmq_TopicCustomer(消费者)。
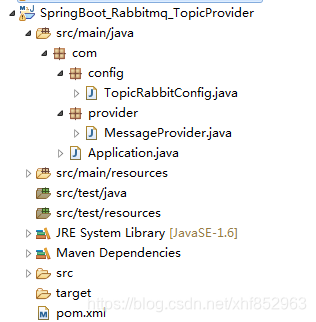
1、生产者的结构代码图如下:
2、创建配置类TopicRabbitConfig
@Configuration
public class TopicRabbitConfig {

	// 设置绑定键
	final static String man = "topic.man";
	final static String woman = "topic.woman";


	// 创建queueMan队列
	@Bean
	public Queue queueMan() {
		return new Queue(TopicRabbitConfig.man);
	}
	// 创建queueWoman队列
	@Bean
	public Queue queueWoman() {
		return new Queue(TopicRabbitConfig.woman);
	}
	// 创建一个topicExchange交换机
	@Bean
	public TopicExchange exchange() {
		return new TopicExchange("topicExchange");
	}

	/*将queueMan队列和topicExchange进行绑定,而且绑定的键值为topic.key,
	 * 这样只要是消息携带的路由键是topic.key,才会分发到该队列
	*/
	@Bean
	Binding bindingExchangeMessage() {
		return BindingBuilder.bind(queueMan()).to(exchange()).with("topic.key");
	}

	/*将queueWoman和topicExchange绑定,而且绑定的键值是用上通配路由键规则topic.#
	   * 这样只要是消息携带的路由键是以topic.开头,都会分发到该队列
	 */
	@Bean
	Binding bindingExchangeMessage2() {
		return BindingBuilder.bind(queueWoman()).to(exchange()).with("topic.#");
	}
}3、创建消息的提供者MessageProvider,这里我们创建了两个方法分别向不同的队列推送数据,我们这里先注释掉一个
@Component
public class MessageProvider {

	@Autowired
	private AmqpTemplate rabbitTemplate;

	/*
	@Scheduled(fixedRate=5000,initialDelay=3000)
	public void sendTopicMessage1() {
		String context = "I am from topicMessage1";
		System.out.println("生产者生产的消息为:" + context);
		this.rabbitTemplate.convertAndSend("topicExchange", "topic.key", context);
	}*/

	@Scheduled(fixedRate=5000,initialDelay=3000)
	public void sendYopicMessage2() {
		String context = "I am from topicMessage2";
		System.out.println("生产者生产的消息为:" + context);
		this.rabbitTemplate.convertAndSend("topicExchange", "topic.woman", context);
	}
}4、启动类Application
@SpringBootApplication
@EnableScheduling
public class Application{

    public static void main( String[] args ){
        SpringApplication.run(Application.class, args);
    }
}5、启动项目,此时的消息没有被消费的,我们去rabbitMq管理页面看看,是否推送成功
6、创建消费者SpringBoot_Rabbitmq_TopicCustomer,工程目录如下所示:
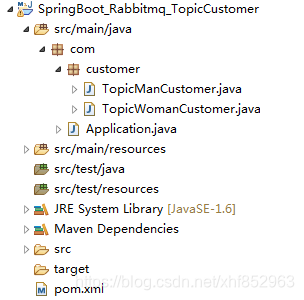
7、创建消费者类TopicManCustomer和TopicWomanCustomer
@Component
@RabbitListener(queues = "topic.man")
public class TopicManCustomer {

	@RabbitHandler
	public void process(String message) {
		System.out.println("TopicManCustomer收到的消息为        : " + message);
	}

}
@Component
@RabbitListener(queues = "topic.woman")
public class TopicWomanCustomer {
@RabbitHandler
public void process(String message) {
System.out.println("TopicWomanCustomer收到的消息为 : " + message);
}
}8、创建启动类Applicaiton
@SpringBootApplication
public class Application{

    public static void main( String[] args ){
        SpringApplication.run(Application.class, args);
    }
}9、启动消费者,查看是否可以成功消费rabbitmq里面的消息,我们可以发现消息被消费了
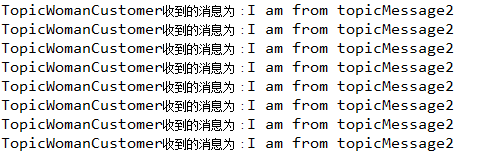
10、注释掉MessageProvider这个类里面的sendTopicMessage1()方法,打开sendTopicMessage2()方法,然后重新启动生产者和消费者,输出结果如下:

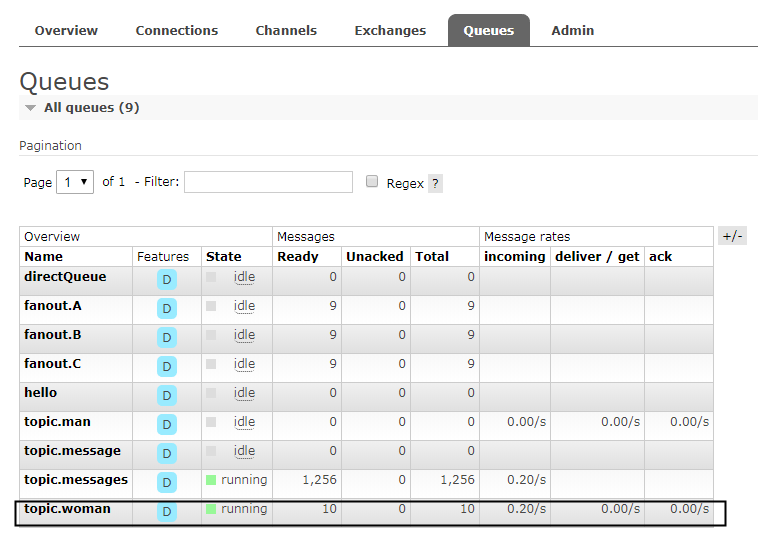
11、当前系统的状态图如下所示:
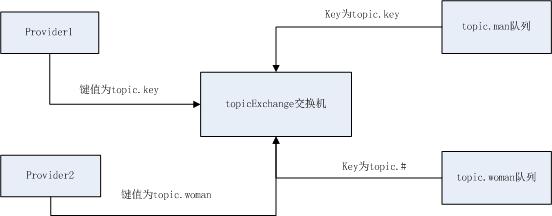
总结:当sendTopicMessage1()执行时,它的消息会被交换机分别发送到topic.man队列和topic.woman队列,而当sendTopicMessage2()执行时,它的消息交换机模糊匹配发送到topic.woman的队列上,这样才有了上面的输出结果。
Fanout Exchange实例
本次实例教程需要创建2个springboot项目,一个 SpringBoot_Rabbitmq_TopicProvider (生产者),一个SpringBoot_Rabbitmq_TopicCustomer(消费者)。
1、生产者的结构代码图如下:

2、创建配置类FanoutRabbitConfig
@Configuration
public class FanoutRabbitConfig{

	/**
	 *  创建三个队列 :fanout.A   fanout.B  fanout.C
	 *  将三个队列都绑定在交换机 fanoutExchange 上
	 *  因为是扇型交换机, 路由键无需配置,配置也不起作用
         */

	// 创建队列
	@Bean
	public Queue queueA() {
		return new Queue("fanout.A");
	}
	// 创建队列
	@Bean
	public Queue queueB() {
		return new Queue("fanout.B");
	}
	// 创建队列
	@Bean
	public Queue queueC() {
		return new Queue("fanout.C");
	}
	// 创建Fanout交换机
	@Bean
	FanoutExchange fanoutExchange() {
		return new FanoutExchange("fanoutExchange");
	}
	// 将对列绑定到Fanout交换器
	@Bean
	Binding bindingExchangeA() {
		return BindingBuilder.bind(queueA()).to(fanoutExchange());
	}
	// 将对列绑定到Fanout交换器
	@Bean
	Binding bindingExchangeB() {
		return BindingBuilder.bind(queueB()).to(fanoutExchange());
	}
	// 将对列绑定到Fanout交换器
	@Bean
	Binding bindingExchangeC() {
		return BindingBuilder.bind(queueC()).to(fanoutExchange());
	}

}3、创建消息的提供者FanoutMessageProvider
@Component
public class FanoutMessageProvider {

	@Autowired
	private AmqpTemplate rabbitTemplate;

	@Scheduled(fixedRate=5000,initialDelay=3000)
	public void send() {
            String context = "The current time is " +new Date();
            System.out.println("Sender : " + context);
            this.rabbitTemplate.convertAndSend("fanoutExchange","", context);
        }
}4、启动类Application
@SpringBootApplication
@EnableScheduling
public class Application{

    public static void main( String[] args ){
        SpringApplication.run(Application.class, args);
    }
}5、启动项目,此时的消息没有被消费的,我们去rabbitMq管理页面看看,是否推送成功

6、创建消费者SpringBoot_Rabbitmq_FanoutCustomer,工程目录如下所示:
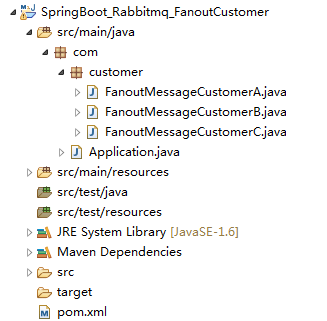
7、创建消费者类FanoutMessageCustomerA和FanoutMessageCustomerB和FanoutMessageCustomerC
@Component
@RabbitListener(queues = "fanout.A")
public class FanoutMessageCustomerA {

	@RabbitHandler
	public void process(String message) {
		 System.out.println("FanoutReceiverA消费者收到消息  : " +message);
	}
}
@Component
@RabbitListener(queues = "fanout.B")
public class FanoutMessageCustomerB {
@RabbitHandler
public void process(String message) {
System.out.println("FanoutReceiverB消费者收到消息 : " +message);
}
}@Component
@RabbitListener(queues = "fanout.C")
public class FanoutMessageCustomerC {
@RabbitHandler
public void process(String message) {
System.out.println("FanoutReceiverC消费者收到消息 : " +message);
}
}
8、创建启动类Applicaiton
@SpringBootApplication
public class Application{

    public static void main( String[] args ){
        SpringApplication.run(Application.class, args);
    }
}9、启动消费者,查看是否可以成功消费rabbitmq里面的消息,可以看到只要发送到 fanoutExchange 这个扇型交换机的消息, 三个队列都绑定这个交换机,所以三个消息接收类都监听到了这条消息。

Headers Exchange实例
本次实例教程需要创建2个springboot项目,一个 SpringBoot_Rabbitmq_HeadersProvider (生产者),一个SpringBoot_Rabbitmq_HeadersCustomer(消费者)。
1、生产者的结构代码图如下:
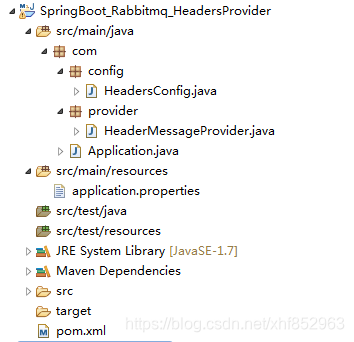
2、创建配置类HeadersConfig
import java.util.HashMap;
import java.util.Map;
import org.springframework.amqp.core.Binding;
import org.springframework.amqp.core.BindingBuilder;
import org.springframework.amqp.core.HeadersExchange;
import org.springframework.amqp.core.Queue;
import org.springframework.context.annotation.Bean;
import org.springframework.context.annotation.Configuration;
@Configuration
public class HeadersConfig {
/**
* 设想这样一个场景:你现在缺钱,可以向银行贷款,也可以向第三方的金融机构贷款
* 但是他们需要你提供的东西不一样,你向银行贷款,必须提供房本和车本,而你向第三方金融机构贷款
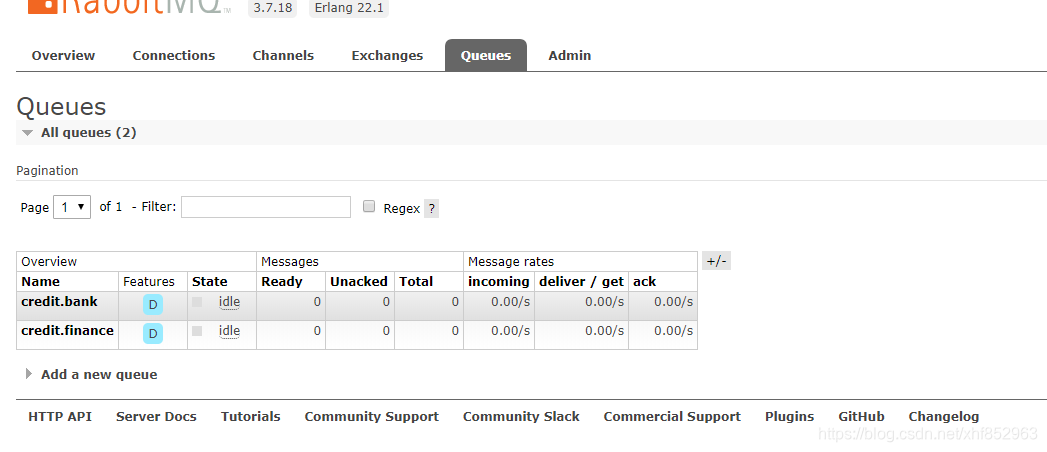
* 只需要提供房本和车本其中一个就可以,即只要有一个满足就行
* 创建两个队列 :credit.bank、credit.finance
* 将两个队列分别绑定在交换机 creditBankExchange和 creditFinanceExchange上
*/
// 创建银行机构队列
@Bean
public Queue creditBankQueue() {
return new Queue("credit.bank");
}
// 创建第三方金融机构队列
@Bean
public Queue creditFinanceQueue() {
return new Queue("credit.finance");
}
// 创建银行机构交换机
@Bean
public HeadersExchange creditBankExchange() {
return new HeadersExchange("creditBankExchange");
}
// 创建第三方金融机构交换机
@Bean
public HeadersExchange creditFinanceExchange() {
return new HeadersExchange("creditFinanceExchange");
}
// 将银行机构队列与银行机构交换机绑定,并规定必须提供两样东西才可以贷款
@Bean
public Binding bindingCreditBankExchange() {
Map<String,Object> headerValues = new HashMap<String, Object>();
headerValues.put("housePermit", "location");
headerValues.put("carPermit", "carType");
return BindingBuilder.bind(creditBankQueue()).to(creditBankExchange()).whereAll(headerValues).match();
}
// 将第三方金融机构队列与第三方金融机构交换机绑定,并规定只需要提供两样东西中的一种就可以贷款
@Bean
public Binding bindingCreditBExchange(Queue creditFinanceQueue,HeadersExchange creditFinanceExchange) {
Map<String,Object> headerValues = new HashMap<String, Object>();
headerValues.put("housePermit", "location");
headerValues.put("carPermit", "carType");
return BindingBuilder.bind(creditFinanceQueue()).to(creditFinanceExchange()).whereAny(headerValues).match();
}
}3、创建消息的提供者FanoutMessageProvider
@Component
public class HeaderMessageProvider {

	@Autowired
	private AmqpTemplate rabbitTemplate;

	@Scheduled(fixedRate=5000,initialDelay=3000)
	public void send1() {
		Map<String,Object> head = new HashMap<>();
		head.put("housePermit", "location");
		this.rabbitTemplate.convertAndSend("creditBankExchange","credit.bank", getMessage(head,"我只提供房本,我从银行带不了款"));
	}
	/*
	@Scheduled(fixedRate=5000,initialDelay=3000)
	public void send2() {
		Map<String,Object> head = new HashMap<>();
		head.put("carPermit", "carType");
		this.rabbitTemplate.convertAndSend("creditBankExchange","credit.bank", getMessage(head,"我只提供车本,我从银行带不了款"));
	}
	@Scheduled(fixedRate=5000,initialDelay=3000)
	public void send3() {
		Map<String,Object> head = new HashMap<>();
		head.put("housePermit", "location");
		head.put("carPermit", "carType");
		this.rabbitTemplate.convertAndSend("creditBankExchange","credit.bank", getMessage(head,"我提供房本了房本和车本,我可以从银行贷款"));
	}
	@Scheduled(fixedRate=5000,initialDelay=3000)
	public void send4() {
		Map<String,Object> head = new HashMap<>();
		head.put("housePermit", "location");
		this.rabbitTemplate.convertAndSend("creditFinanceExchange","credit.finance", getMessage(head,"我只提供房本,我可以从第三方金融机构贷款"));
	}
	@Scheduled(fixedRate=5000,initialDelay=3000)
	public void send5() {
		Map<String,Object> head = new HashMap<>();
		head.put("carPermit", "carType");
		this.rabbitTemplate.convertAndSend("creditFinanceExchange","credit.finance", getMessage(head,"我只提供车本,我可以从第三方金融机构贷款"));
	}
	@Scheduled(fixedRate=5000,initialDelay=3000)
	public void send6() {
		Map<String,Object> head = new HashMap<>();
		head.put("housePermit", "location");
		head.put("carPermit", "carType");
		this.rabbitTemplate.convertAndSend("creditFinanceExchange","credit.finance", getMessage(head,"我提供了房本和车本,我可以从第三方金融机构贷款"));
	}
	 */

	private Message getMessage(Map<String, Object> head, Object msg){
		MessageProperties messageProperties = new MessageProperties();
		for (Map.Entry<String, Object> entry : head.entrySet()) {
			messageProperties.setHeader(entry.getKey(), entry.getValue());
		}
		MessageConverter messageConverter = new SimpleMessageConverter();
		return messageConverter.toMessage(msg, messageProperties);
	}
}4、启动类Application
@SpringBootApplication
@EnableScheduling
public class Application{

    public static void main( String[] args ){
        SpringApplication.run(Application.class, args);
    }
}5、启动项目,首先执行send1()方法,我们去rabbitMq管理页面看看,我们发现数据并没有推送到rabbitmq上。

6、注释掉send1(),执行send2()方法, 我们去rabbitMq管理页面看看,我们发现数据也没有推送到rabbitmq上。
7、注释掉send2(),执行send3()方法, 我们去rabbitMq管理页面看看,我们发现数据可以推送到rabbitmq上。
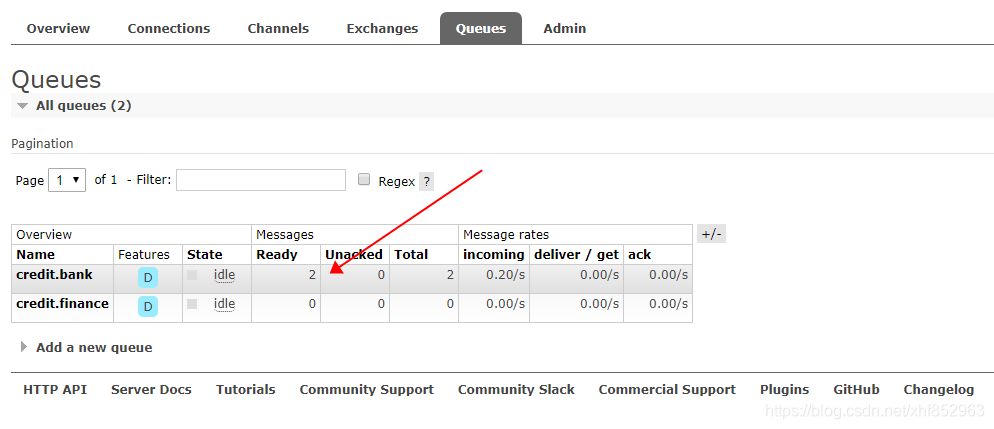
8、注释掉send3(),执行send4()方法, 我们去rabbitMq管理页面看看,我们发现数据可以推送到rabbitmq上。
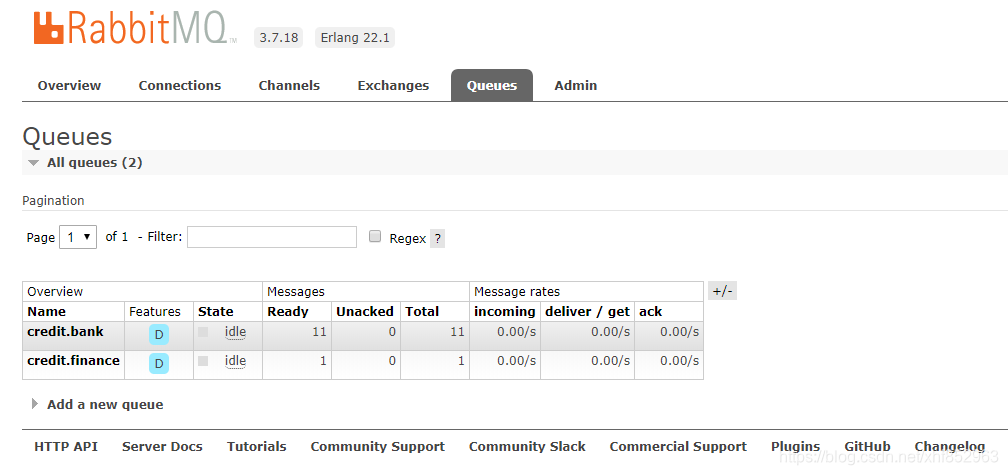
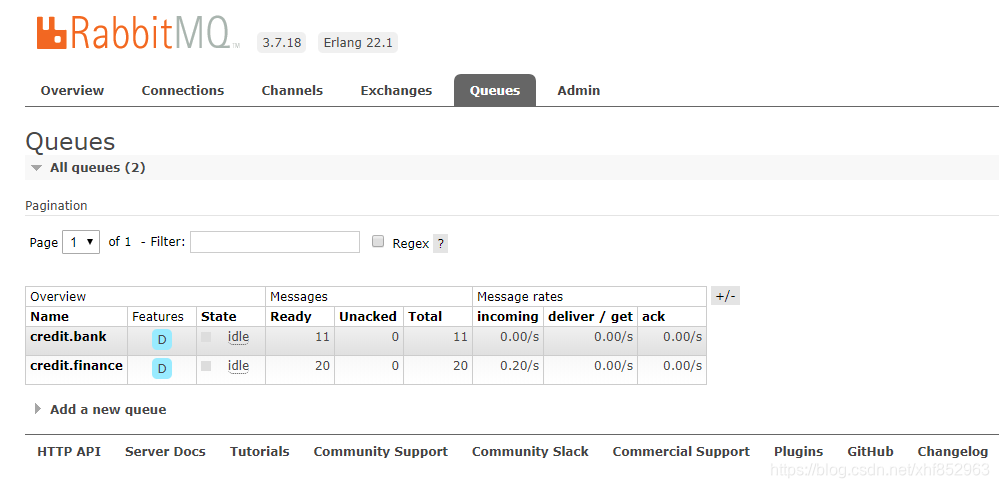
9、注释掉send4(),执行send5()方法, 我们去rabbitMq管理页面看看,我们发现数据可以推送到rabbitmq上。
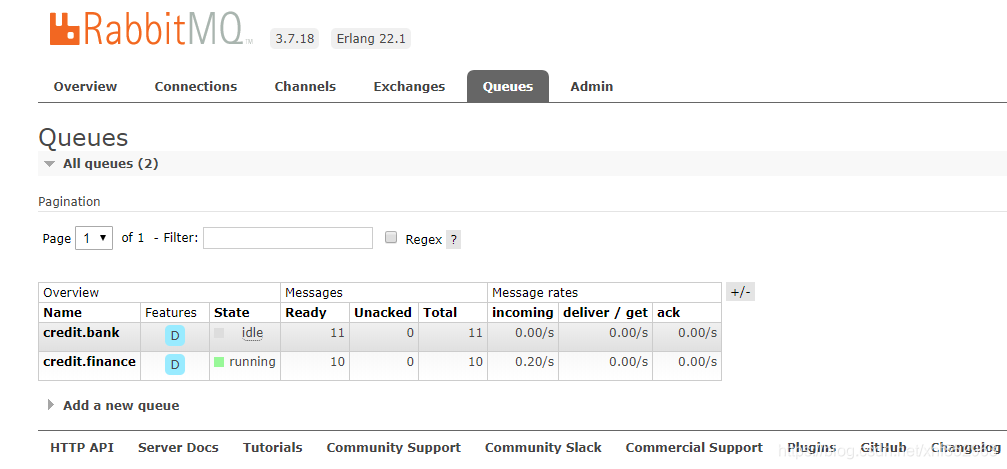
10、注释掉send5(),执行send6()方法, 我们去rabbitMq管理页面看看,我们发现数据可以推送到rabbitmq上。
11、创建消费者SpringBoot_Rabbitmq_HeadersCustomer,工程目录如下所示:
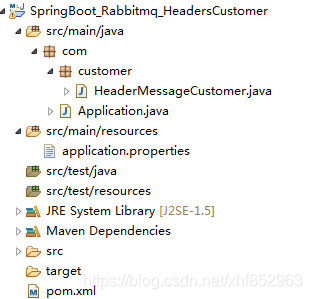
12、创建消费者类HeaderMessageCustomer
@Component
public class HeaderMessageCustomer {

	@RabbitHandler
    @RabbitListener(queues = "credit.bank")
    public void creditBank(String msg) {
           System.out.println("credit.bank receive message: "+msg);
    }

	 @RabbitHandler
     @RabbitListener(queues = "credit.finance")
     public void creditFinance(String msg) {
           System.out.println("credit.bank receive message: "+msg);
     }
}13、创建启动类Applicaiton
@SpringBootApplication
public class Application{

    public static void main( String[] args ){
        SpringApplication.run(Application.class, args);
    }
}
14、启动消费者,打印内容如下所示:
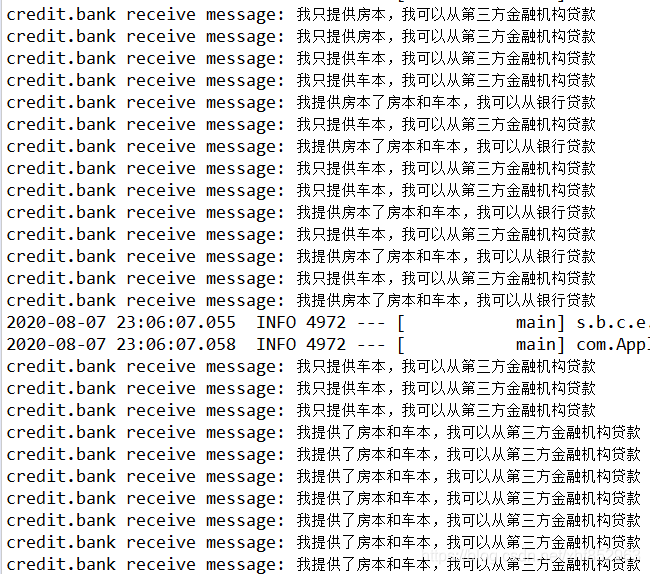
15、我们发现,打印内容并没有“我只提供房本,我从银行带不了款”和"我只提供车本,我从银行带不了款"的内容输出,因为他们不满足条件,所以无法进行消息的推送。


 被折叠的 条评论
为什么被折叠?
被折叠的 条评论
为什么被折叠?
 到【灌水乐园】发言


