


 本文介绍了JavaScript事件对象,包括如何获取元素尺寸、鼠标位置、浏览器窗口尺寸等,并讲解了鼠标跟随事件、事件传播机制(冒泡和捕捉)、事件委托以及如何阻止浏览器默认行为。还特别强调了事件委托在节省资源和处理动态添加节点的优势。
事件对象
事件绑定:元素节点.on+事件类型 = 匿名函数;
事件对象的产生:在事件绑定完成后,就自动生成了一个事件对象。
获取事件对象:
在标准浏览器中。
直接在事件处理函数上定义一个形参。
会在事件触发的时候,由浏览器自动传递实参。
IE低版本
window.event
在标准浏览器下也可以使用
兼容写法:var event = event || window.event;
<script>
        window.onload = function(){
        var box = document.querySelector(".box");
        box.onclick = function(event){
          var event = event || window.event;
          console.log(event);
        }
    }
</script>
<body>
   <div class="box">
         123
     </div>
</body>


生成参数
- 鼠标事件对象
属性:
button:用来表示咱们按下的是哪一个按键
0 左键
1 滚轮
2 右键
    <style>
        .box {
            width: 300px;
            height: 300px;
            background-color: cyan;
        }
    </style>
    <script>
        window.onload = function() {
            var box = document.querySelector(".box");
            // 鼠标左键0   滑轮1   鼠标右键2
            box.onmousedown = function(event) {
                // 兼用
                var event = event || window.event;
                console.log(event.button);
                // window.event是对于低版IE作用的
            }
        }
    </script>
</head>

<body>
    <div class="box">

    </div>
</body>

</html>

- 获取当前鼠标的位置(原点不同)
clienX 可视窗口的左上角为原点
clienY
pageX 整个页面的左上角为原点
pageY
screenX 电脑屏幕的左上角为原点
screenY
offsetX 以事件触发的元素为原点
offsetY
    <style>
        * {
            margin: 0;
            padding: 0;
        }

        .box {
            width: 300px;
            height: 300px;
            background-color: cyan;
            margin: 100px 100px;
        }
    </style>
    <script>
        window.onload = function() {
            var box = document.querySelector(".box");
            box.onclick = function(event) {
                // 兼用
                var event = event || window.event;
                // 可视窗口的左上角为原点
                console.log("clientX=" + event.clientX);
                console.log("clientY=" + event.clientY);
                // 整个页面的左上角为原点
                console.log("pageX=" + event.pageX);
                console.log("pageY=" + event.pageY);
                // 电脑屏幕的左上角为原点
                console.log("screenX=" + event.screenX);
                console.log("screenY=" + event.screenY);
                // 以事件元素的左上角为原点,当前元素
                console.log("offsetX=" + event.offsetX);
                console.log("offsetY=" + event.offsetY);
            }
        }
    </script>
</head>
<body>
    <div class="box">
    </div>
</body>
</html>

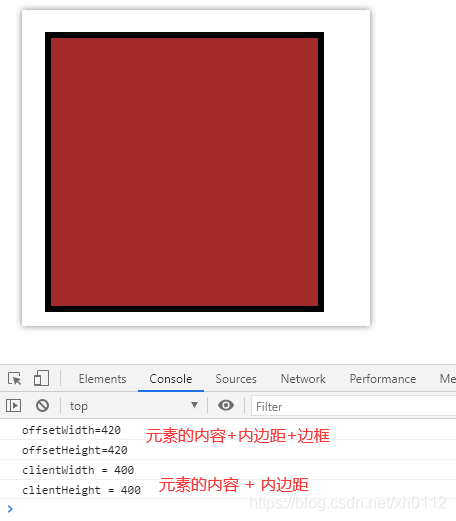
获取元素的尺寸
获取元素尺寸
元素的占地面积
(宽高+内边距+边框) IE盒模型 设置的宽高就是元素的占地尺寸
offsetWidth
offsetHeight
元素的内容+内边距+边框
clientWidth
clientHeight
元素的内容 + 内边距
    <style>
        .box {
            width: 300px;
            height: 300px;
            padding: 50px;
            border: 10px solid;
            margin: 100px auto;
            background-color: brown;
        }
    </style>
    <script>
        window.onload = function() {
            var box = document.querySelector(".box");
            console.log("offsetWidth=" + box.offsetWidth);
            console.log("offsetHeight=" + box.offsetHeight);
            console.log("clientWidth = " + box.clientWidth);
            console.log("clientHeight = " + box.clientHeight);
        }
    </script>
</head>

<body>
    <div class="box">

    </div>
</body>
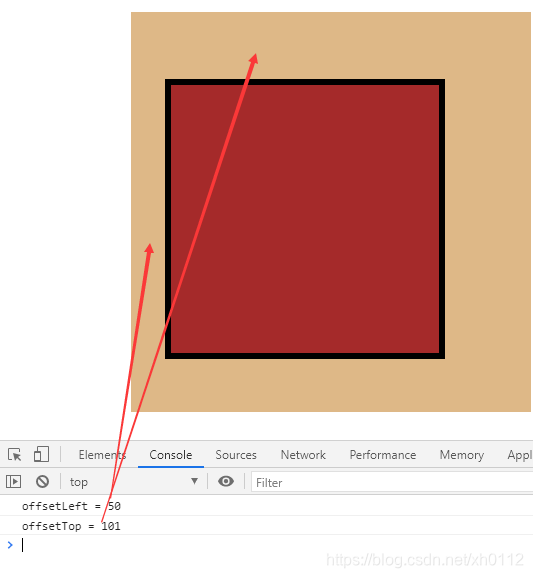
获取元素的偏移量
一个元素对于参考系的坐标位置。
- offsetParent
语法:元素.offsetParent
作用:拿到该元素获取偏移量时的参
默认以body为参考系,如果父辈
性,则获取该父辈元素。 - offsetLeft offsetTop
语法:元素.offsetLeft 元素.offsetTop
作用:拿到元素相对于参考系的相对偏移量。
   <style>
        * {
            margin: 0;
            padding: 0;
        }

        .father {
            position: relative;
            background-color: burlywood;
            width: 600px;
            height: 600px;
            margin: 200px;
            overflow: hidden;
        }

        .box {
            width: 300px;
            height: 300px;
            padding: 50px;
            border: 10px solid;
            margin: 100px auto;
            margin-left: 50px;
            background-color: brown;
        }
    </style>
    <script>
        window.onload = function() {
            var box = document.querySelector(".box");
            console.log("offsetLeft = " + box.offsetLeft);
            console.log("offsetTop = " + box.offsetTop);
        }
    </script>
    <body>
    <div class="father">
        <div class="box">
        </div>
    </div>

</body>
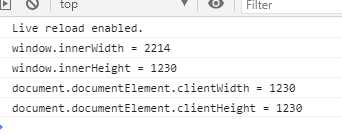
获取浏览器窗口尺寸
BOM
innerWidth
innerHeight
DOM 文档 html的元素尺寸
document.documentElement.clientWidth
document.documentElement.clientHeight
<script>
        window.onload = function(){

            console.log("window.innerWidth = "+window.innerWidth);
            console.log("window.innerHeight = "+window.innerHeight);
            console.log("document.documentElement.clientWidth = "+document.documentElement.clientHeight);
            console.log("document.documentElement.clientHeight = "+document.documentElement.clientHeight);
        }

    </script>
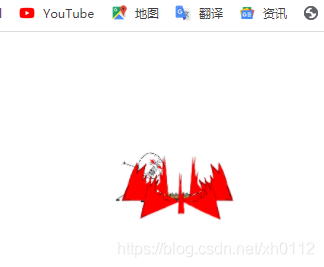
鼠标移动页面小块跟随移动
源代码
<!DOCTYPE html>
<html lang="en">

<head>
    <meta charset="UTF-8">
    <meta name="viewport" content="width=device-width, initial-scale=1.0">
    <title>Document</title>
    <style>
        body {
            background-color: #fff;
        }

        #box {
            width: 300px;
            height: 200px;
            background-image: url("./img/3.gif");
            background-size: contain;
            position: absolute;
        }
    </style>
    <script>
        window.onload = function() {
            var box = document.getElementById("box");
            // 鼠标移动事件
            document.onmousemove = function(event) {
                var event = event || window.event;
                var l = event.pageX;
                var t = event.pageY;
                box.style.left = l - box.offsetWidth / 2 + "px";
                box.style.top = t - box.offsetHeight / 2 + "px";
            }
        }
    </script>
</head>
<body>
    <div id="box"></div>
</body>
</html>
鼠标移动图片跟随移动
事件传播机制
当你在一个元素上触发行为的时候,
会按照父级的顺序,从下往上进行传
window为止.
事件传播只会传播同一类型的事件。
<style>
    #div1{
        background-
    }
    #div2{
        background-
    }
    #div3{
        background-
    }
    #div1,#div2,#di
        padding: 50
    }
</style>
<script>
    window.onload  = function(){
        var boxs = document.getElementsByTagName
("div");
        for (var i = 0; i < boxs.length; i++) {
            boxs[i].dataset.index = i+1;
           boxs[i].onclick = function(){
               alert("div" + this.dataset.index);
           }
        }
        var div3 = document.getElementById("div3");
        div3.onmousemove = function(){
            console.log("123");
        }
    }
</script>
<body>
    <div id="div1">
        <div id="div2">
            <div id="div3"></div>
        </div>
        <div id="other">
        </div>
    </div>
</body>
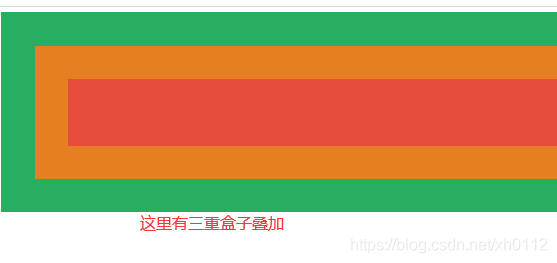
这就是事件传播机制
冒泡和捕捉
在事件的对象中,有一个属性叫做 target
表示本次事件触发,准确触发的对象。
事件目标。
事件:事件源,事件类型,事件处理函数
在低版本的IE中不支持
IE支持:srcElement
兼容写法:
var event = event || window.event;
var target = event.srcElement || event.target;
冒泡:
从 事件目标 到 window 的顺序来执行所有
的事件。
捕获:
从 window 到 事件目标 的顺序来执行所有
的事件。
addEventListener 第三个参数为true的话 表示
捕获。 false 表示 冒泡。
<script>
        window.onload = function () {
            var boxs = document.getElementsByTagName("div");
            for (var i = 0; i < boxs.length; i++) {
                boxs[i].dataset.index = i + 1;
                boxs[i].addEventListener("click",function(){
                    alert("div" + this.dataset.index);
                });
             }
         }
</script>
<body>
    <div id="div1">
        <div id="div2">
            <div id="div3"></div>
        </div>
    </div>
 与上属性相同。
mouseenter mouseleave 他们不会进行事件传播。
mouseenter 鼠标移入
mouseleave 鼠标移出
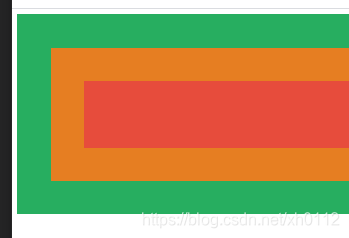
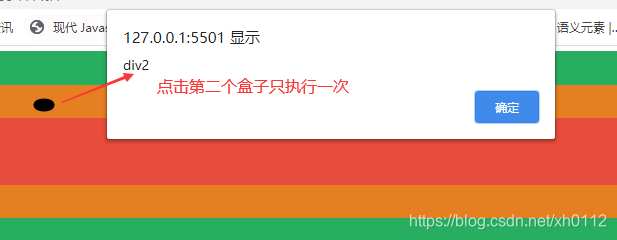
阻止事件传播
在标准浏览器中:
event.stopPropagation();
【注意】 书写在事件处理函数中
在IE低版本中:
event.cancelBubble = true;
- 兼容写法:
if (event.stopPropagation) {
event.stopPropagation();
} else {
event.cancelBubble = true;
}
  <style>
        #div1{
            background-color: #27ae60;
        }
        #div2{
            background-color: #e67e22;
        }
        #div3{
            background-color: #e74c3c;
        }
        #div1,#div2,#div3,#other{
            padding: 50px;
        }
    </style>
    <script>
        window.onload  = function(){
            var boxs = document.getElementsByTagName("div");
            for (var i = 0; i < boxs.length; i++) {
                boxs[i].index = i+1;
                boxs[i].onclick = function(event){
                    var event = event || window.event;
                    alert("div" + this.index);
                    //阻止事件传播
                    if (event.stopPropagation) {
                        event.stopPropagation();
                    } else {
                        event.cancelBubble = true;
                    }

                    // event.stopPropagation();
               }
            }
        }
    </script>
    <body>
    <div id="div1">
        <div id="div2">
            <div id="div3"></div>
        </div>
    </div>
</body>
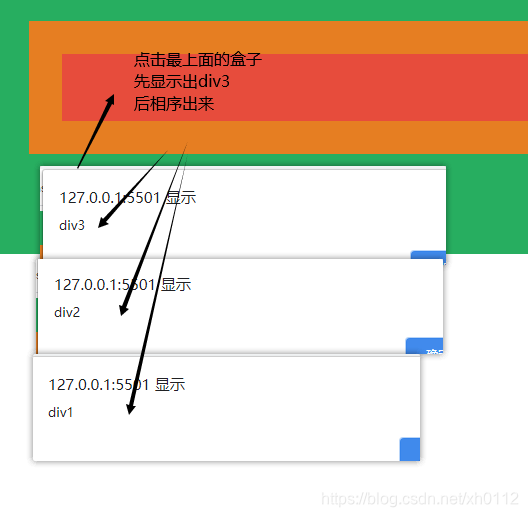
上面看过事件传播点击最上面的一个将执行全部属性
治疗阻止事件传播
事件委托
循环绑定事件:
1.资源浪费
2.新增的节点没有绑定事件,需要手动再绑定一次。
事件委托:
原理:冒泡
步骤:
1.找到要操作的节点的共同的父节点或者祖先节点。
2.将事件添加到父节点上。
3.找到事件目标,判断事件目标是否是想要触发的对象,如果是,则触发响应的事件。
获取焦点:
元素节点.focus()
事件委托:
表格的删除操作用事件委托来写:
       <script>
            // 事件委托删除事件
            tbody.onclick = function(event) {
                var event = event || window.event;
                var target = event.target || event.srcElement;
                if (target.nodeName == "BUTTON") {
                    target.parentNode.parentNode.remove();
                }
            }
            </script>
阻止浏览器的默认行为
默认行为:
a标签 自带点击效果
form 表单自己会提交
框选
鼠标右键菜单
表单事件:
失去焦点
blur
获取焦点
focus
提交:
submit
重置:
reset
阻止浏览器默认行为:
要在你阻止的行为中添加阻止方法。
标准浏览器:
event.preventDefault();
IE低版本:
event.returnValue = false;
兼容写法:
if(event.preventDefault){
event.preventDefault();
}else{
event.returnValue = false;
}
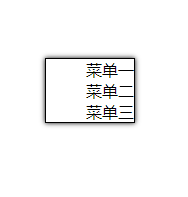
自定义右键菜单
<!DOCTYPE html>
<html lang="en">
<head>
    <meta charset="UTF-8">
    <meta name="viewport" content="width=device-width, initial-scale=1.0">
    <title>Document</title>
    <style>
        ul{
            display: none;
            list-style: none;
            position: absolute;
            border: 1px solid;
            box-shadow: 0 0 5px  black;
        }
    </style>
    <script>
        window.onload = function(){
            // 阻止浏览器的右键菜单
            document.oncontextmenu = function(event){
                var event = event || window.event;
                if (event.preventDefault) {
                    event.preventDefault();
                }else{
                    event.returnValue = false;
                }
            }
            var myMenu = document.querySelector(".box");
            //实现自定义右键菜单
            // 事件  ==  右键按下
            // 事件添加给  == document
            // 事件实现:  让ul显示。 位置应该在鼠标位置上。
            document.onmousedown = function(event){
                var event = event || window.event;
                if (event.button == 2) {
                    myMenu.style.display = 'block';
                    myMenu.style.left = event.clientX + "px";
                    myMenu.style.top = event.clientY + "px";
                }else{
                    myMenu.style.display = 'none';
                }
            }
        }
    </script>
</head>
<body>
    <ul class="box">
        <li>菜单一</li>
        <li>菜单二</li>
        <li>菜单三</li>
    </ul>
</body>
</html>
鼠标右击显示


 被折叠的 条评论
为什么被折叠?
被折叠的 条评论
为什么被折叠?
 到【灌水乐园】发言


