


 本文详细指导如何在CentOS 7系统上下载、解压、安装MySQL 5.7版本,包括创建用户组、用户,设置my.cnf配置,初始化数据库,修改root密码,开启远程登录,并将其添加为系统服务。
环境:
1、操作系统:CentOS 7 x64
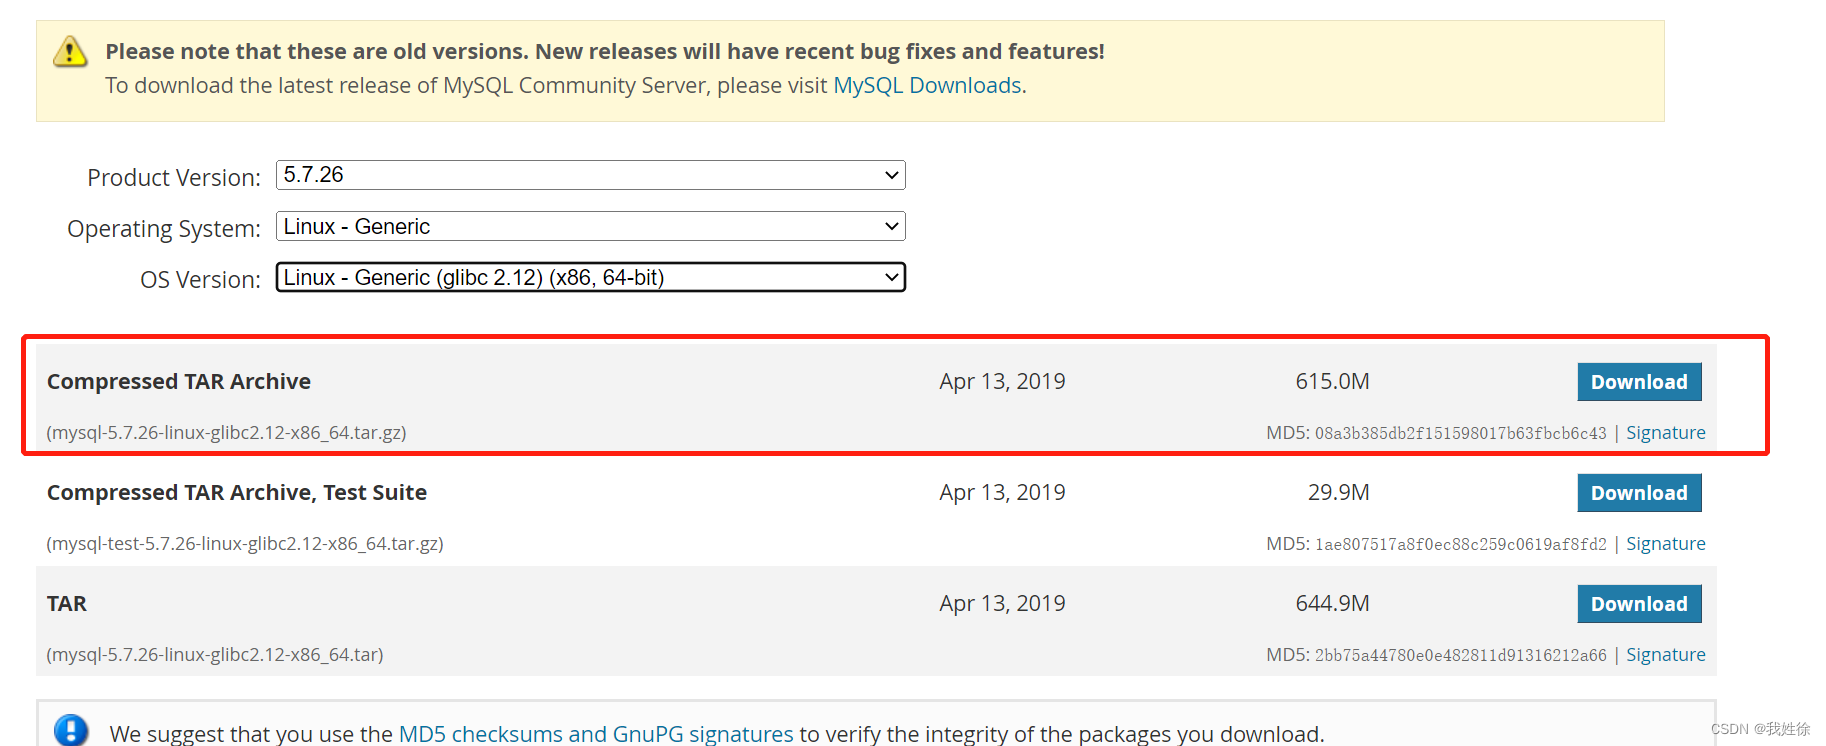
2、安装版本: mysql-5.7.26-linux-glibc2.12-x86_64.tar.gz
3、下载地址:MySQL :: Download MySQL Community Server
4、下载说明:上边的下载地址是最新版的,如果想下载老版本可以点击页面中的超链接“Looking for previous GA versions?”
5、特殊说明:Linux下MySQL5.6与MySQL5.7安装方法略有不同,本文以5.7为主
下载MySQL5.7
解压 mysql 5.7
tar -zxvf mysql-5.7.26-linux-glibc2.12-x86_64.tar.gz
把解压后的文件移动到 /usr/local/mysql 目录下面
mv mysql-5.7.36-linux-glibc2.12-x86_64 /usr/local/mysql
创建mysql 用户组和 用户 并修改权限
# 1、创建用户组 groupadd mysql # 2、创建用户,把用户放到mysql 组中 useradd -r -g mysql mysql
创建数据目录并赋予权限
 # 1.创建数据目录
 mkdir -p  /data/mysql
 # 2.赋予权限(赋予mysql用户操作 /data/mysql 目录的权限)
 chown mysql:mysql -R /data/mysql
配置my.cnf
vim /etc/my.cnf
[mysqld]
bind-address=0.0.0.0
port=3306
user=mysql
basedir=/usr/local/mysql
datadir=/data/mysql
socket=/tmp/mysql.sock
log-error=/data/mysql/mysql.err
pid-file=/data/mysql/mysql.pid
character_set_server=utf8mb4
lower_case_table_names=1
max_allowed_packet=100M
explicit_defaults_for_timestamp=true
# Disabling symbolic-links is recommended to prevent assorted security riskssymbolic-links=0
# Settings user and group are ignored when systemd is used.
# If you need to run mysqld under a different user or group,
# customize your systemd unit file for mariadb according to the
# instructions in http://fedoraproject.org/wiki/Systemd
#
# include all files from the config directory
#
!includedir /etc/my.cnf.d备注:
basedir=/usr/local/mysql 是 mysql 解压后的目录
user=mysql是刚才创建的mysql 用户
初始化mysql 数据库
# 1.进入mysql 的bin目录 cd /usr/local/mysql/bin # 2.初始化mysql数据库命令 ./mysqld --defaults-file=/etc/my.cnf --basedir=/usr/local/mysql/ --datadir=/data/mysql/ --user=mysql --initialize
查看密码
cat /data/mysql/mysql.err
2021-10-29T03:52:36.800587Z 0 [Warning] InnoDB: New log files created, LSN=45790
 2021-10-29T03:52:36.820455Z 0 [Warning] InnoDB: Creating foreign key constraint system tables.
 2021-10-29T03:52:36.874433Z 0 [Warning] No existing UUID has been found, so we assume that this is the first time that this server has been started. Generating a new UUID: a7c106fd-386b-11ec-a788-000c2969c071.
 2021-10-29T03:52:36.875787Z 0 [Warning] Gtid table is not ready to be used. Table 'mysql.gtid_executed' cannot be opened.
 2021-10-29T03:52:37.712094Z 0 [Warning] A deprecated TLS version TLSv1 is enabled. Please use TLSv1.2 or higher.
 2021-10-29T03:52:37.712103Z 0 [Warning] A deprecated TLS version TLSv1.1 is enabled. Please use TLSv1.2 or higher.
 2021-10-29T03:52:37.712627Z 0 [Warning] CA certificate ca.pem is self signed.
2021-10-29T03:52:37.914828Z 1 [Note] A temporary password is generated for root@localhost: p.-z?pF2Hq8u最后的那一行就是密码A temporary password is generated for root@localhost: p.-z?pF2Hq8u
密码是 p.-z?pF2Hq8u
启动mysql,并更改root密码
 # 先将mysql.server放置到/etc/init.d/mysql中
 cp /usr/local/mysql/support-files/mysql.server /etc/init.d/mysql
启动
# 启动mysql service mysql start 看到 ``Starting MySQL. SUCCESS! `` 就说明启动成功了!
到这里,就已经成功安装并启动了mysql 数据库!!!!
修改mysql 的root 密码
前面的密码是随机生成的
 #注意: 还是在 mysql 的bin 目录下面 进行修改:
 ./mysql -u root -p
输入刚刚看到密码后,登录成功,再执行下面的三步操作
 # 1.设置root 用户的密码为:  123456
 SET PASSWORD = PASSWORD('123456');
 # 2.修改用户的密码永不过期
 ALTER USER 'root'@'localhost' PASSWORD EXPIRE NEVER;
 # 3.让修改的生效
 FLUSH PRIVILEGES;
开放远程登录功能
grant all privileges on *.* to root@'%' identified by '123456';
flush privileges;
将MySQL加入Service系统服务
chkconfig --add mysqld
chkconfig mysqld on
service mysqld restart
service mysqld status


 3382
3382

 被折叠的 条评论
为什么被折叠?
被折叠的 条评论
为什么被折叠?
 到【灌水乐园】发言


