一、整体概述
先看一段简单的使用代码:
<?xml version="1.0" encoding="utf-8"?>
<!--协调者布局CoordinatorLayout-->
<androidx.coordinatorlayout.widget.CoordinatorLayout
    xmlns:android="http://schemas.android.com/apk/res/android"
    xmlns:app="http://schemas.android.com/apk/res-auto"
    android:layout_width="match_parent"
    android:layout_height="match_parent">

    <!--顶部区域-->
    <com.google.android.material.appbar.AppBarLayout
        android:id="@+id/appbarLayout"
        android:layout_width="match_parent"
        android:layout_height="wrap_content">
        <TextView
            android:id="@+id/tv1"
            ...
            app:layout_scrollFlags="scroll" />
        <TextView
            android:id="@+id/tv2"
            ...
            app:layout_scrollFlags="scroll" />
        <...>
    </com.google.android.material.appbar.AppBarLayout>

    <!--列表区域-->
    <androidx.core.widget.NestedScrollView
        android:id="@+id/scrollView"
        android:layout_width="match_parent"
        android:layout_height="wrap_content"
        app:layout_behavior="@string/appbar_scrolling_view_behavior">
        <TextView
            ..../>
    </androidx.core.widget.NestedScrollView>

</androidx.coordinatorlayout.widget.CoordinatorLayout>
CoordinatorLayout:翻译过来是协调者布局
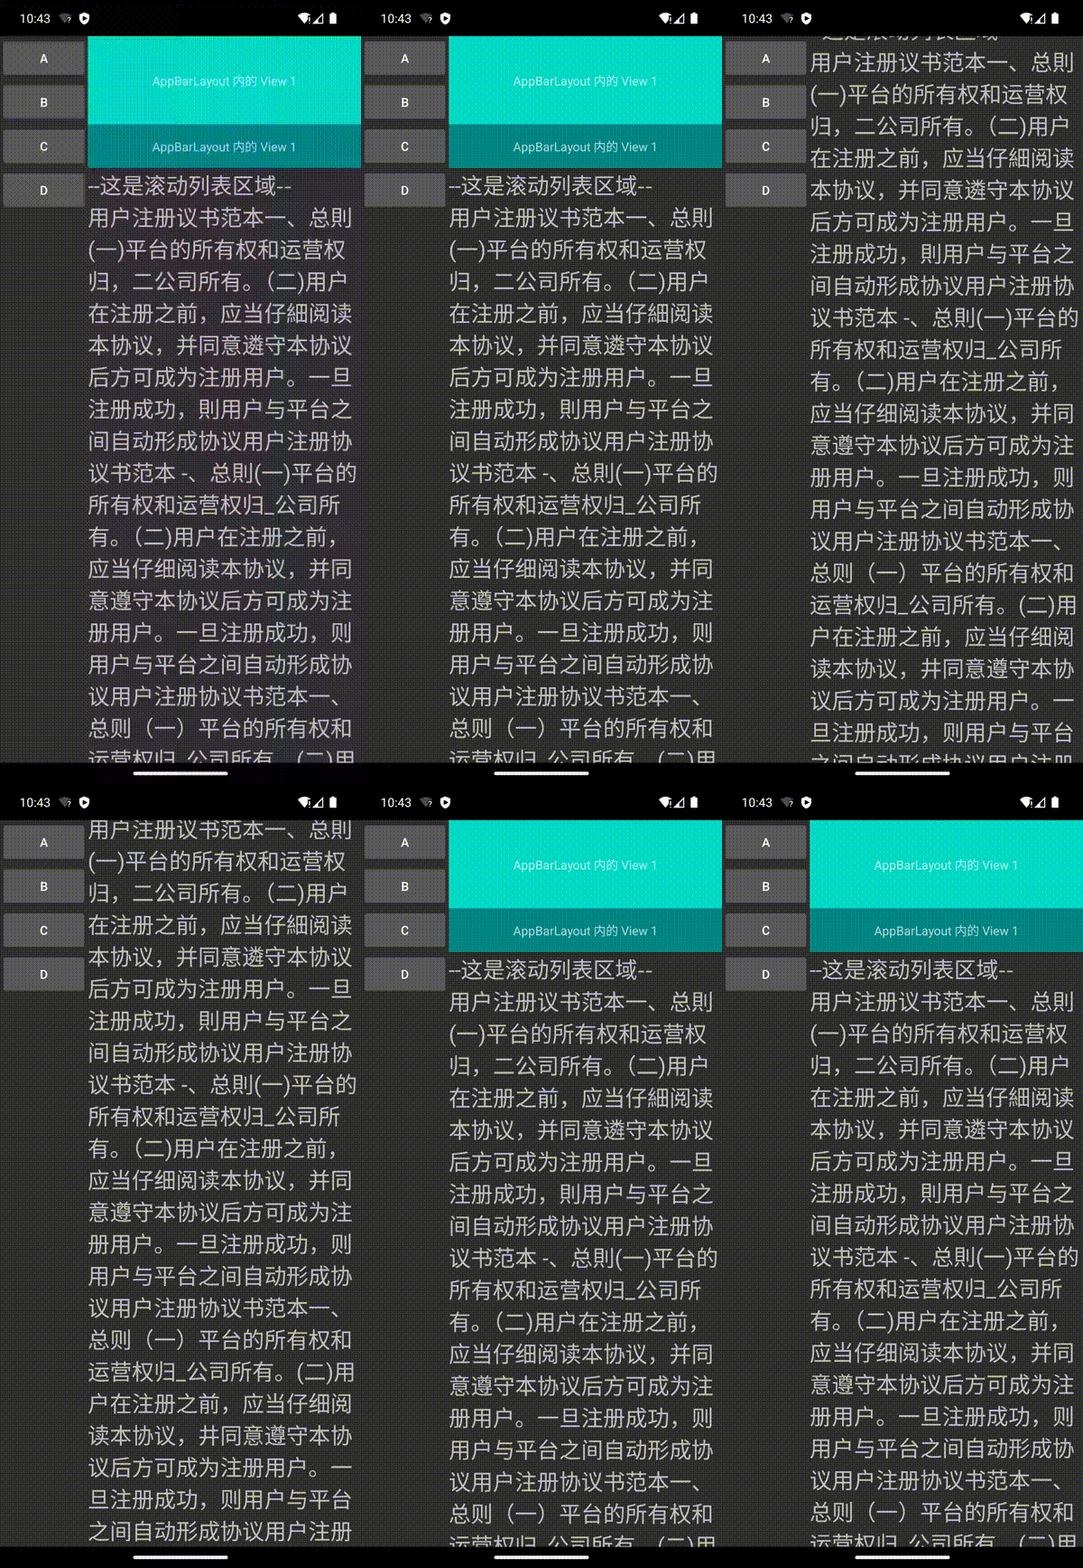
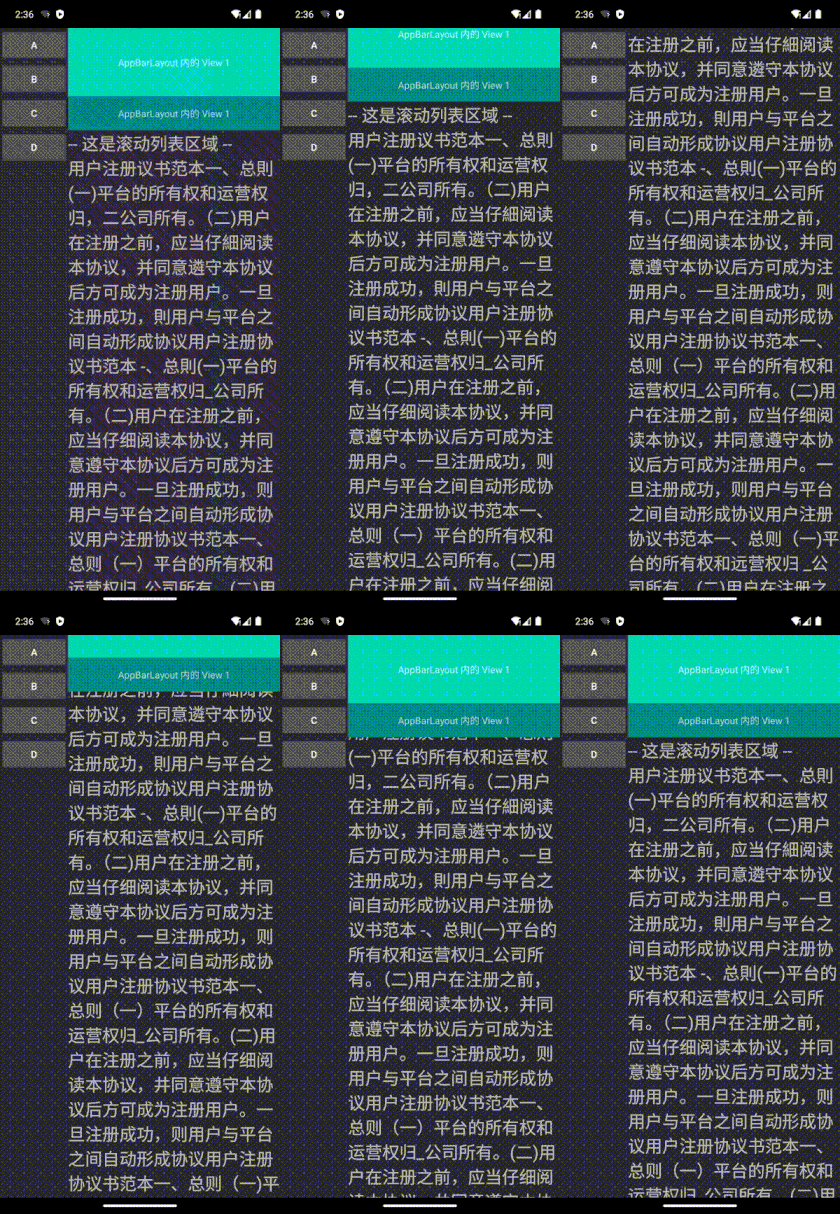
以上面代码为例,当用户 滑动屏幕时,用于协调 顶部区域 和 列表区域的滚动效果,比如
- 下左图: 向下滑动时 顶部区域 和 列表区域同时下滑,就像一个整体 scroll
- 下右图: 向下滑动时顶部区域先出来,列表区域再滑动 scroll|enterAlways
1、CoordinatorLayout 一定要搭配 AppBarLayout 使用吗?app:layout_scrollFlags
不是!
- AppBarLayout 是官方帮我们实现了一些常用的交互样式,我们只用在 xml 里配置 app:layout_scrollFlags 就可以实现很多效果,scroll | enterAlways | enterAlwaysCollapsed | exitUntilCollapsed
- 我们自己也可以自定义 View 继承 NestedScrollingChild 实现想要的效果,当然 AppBarLayout 也继承了 NestedScrollingChild,其他的还有 RecyclerView、NestedScrollView 等。CoordinatorLayout 则是实现了 NestedScrollingParent 接口
- AppBarLayout 是一个垂直方向的 LinearLayout
2、app:layout_behavior="@string/appbar_scrolling_view_behavior" 是什么?
先看 CoordinatorLayout,继承自 FrameLayout,肯定会有疑问,
CoordinatorLayout 是 FrameLayout,为什么顶部区域 和 列表区域 的 View 没有覆盖,而是类似 LinearLayout 布局排列?
这就是 layout_behavior 的效果了。
@string/appbar_scrolling_view_behavior 指向 -> com.google.android.material.appbar.AppBarLayout$ScrollingViewBehavior
看代码:
class ScrollingViewBehavior {

    // child: ScrollView 或 RecyclerView
    // dependency: AppbarLayout
    @Override
    public boolean onDependentViewChanged(
        CoordinatorLayout parent, View child, View dependency) {

      // ScrollView 相对 AppbarLayout 的位置偏移多少 来 计算 ScrollView 的位置
      offsetChildAsNeeded(child, dependency);
      return false;
    }
}
可以看到,layout_behavior 内计算了 ScrollView 的排列位置,如果去掉 layout_behavior,可以看到两个区域就会重合。
二、细节
1、app:layout_scrollFlags 值解释:
- exit:离开 即 划出屏幕(向上滑动)
- enter:进入 即 划入屏幕(向下滑动)
scroll:
- 整体滚动,就想在一个 ScrollView 里一样,如 上图左
- app:layout_scrollFlags = "scroll"
enterAlways:
- 翻译过来 始终进入
- 划入屏幕(向下滑动)时,总是它先滑进来,然后列表区域再开始滑动,如 上图右
- app:layout_scrollFlags = "scroll | enterAlways"
enterAlwaysCollapsed
- 翻译过来:始终进入最小高度;
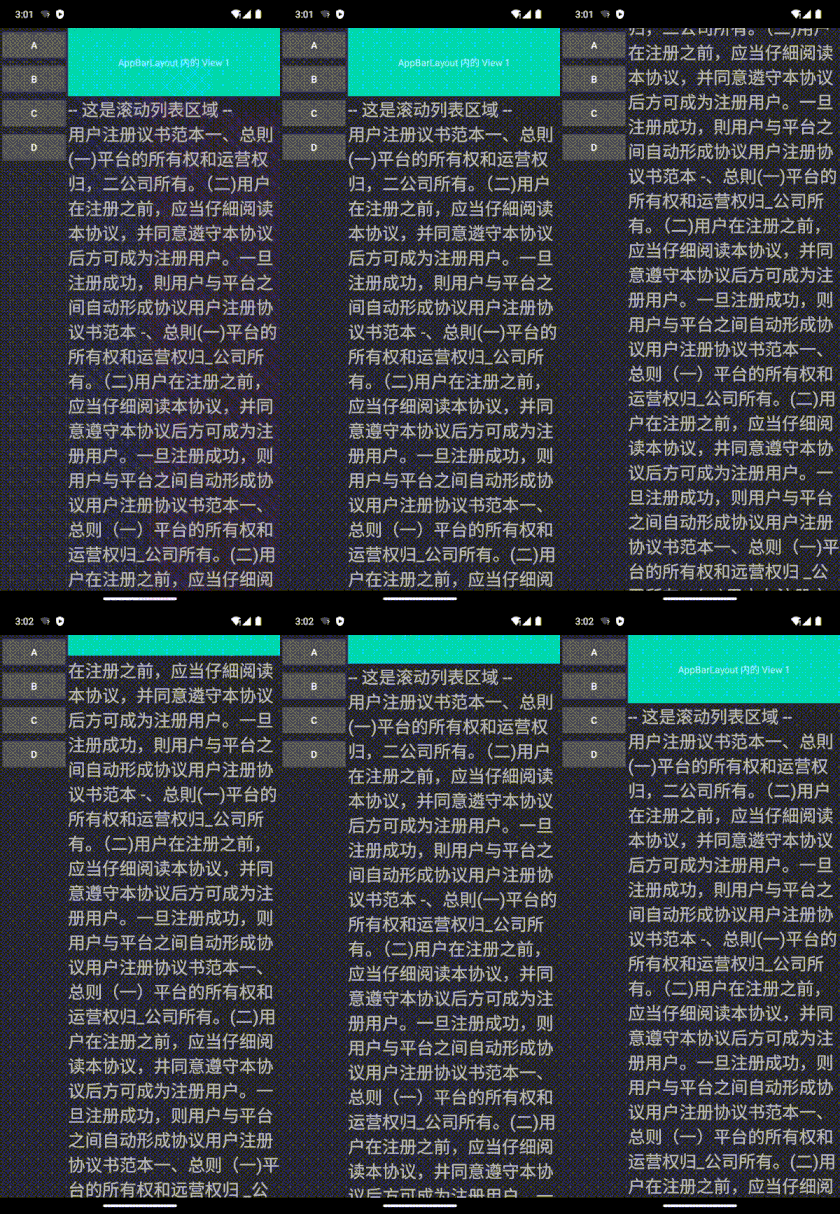
- 划入屏幕(向下滑动)时,总是它先滑进来,但值划入 最小高度的距离,然后列表区域再开始滑动,等列表区域滑动完毕,再划入剩余高度
- 需要配合 minHeight 属性 enterAlyways 属性使用
- app:layout_scrollFlags = "scroll | enterAlways | enterAlwaysCollapsed"
exitUntilCollapsed
- 地方
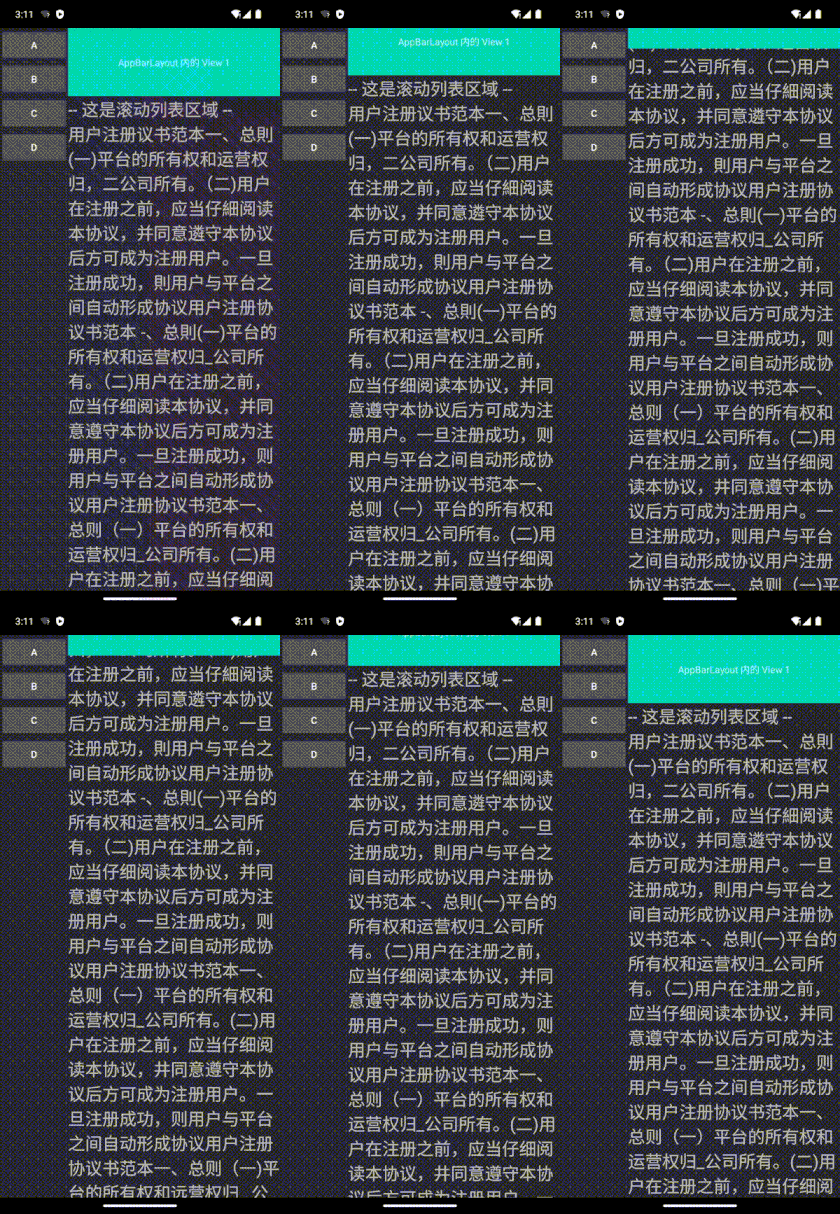
- 划出屏幕(向上滑动)时,这个 View 一直划出屏幕,直到剩下最小高度,然后列表区域再开始滑动
- 需要配合 minHeight 属性
- app:layout_scrollFlags = "scroll | exitUntilCollapsed"
2、Behavior
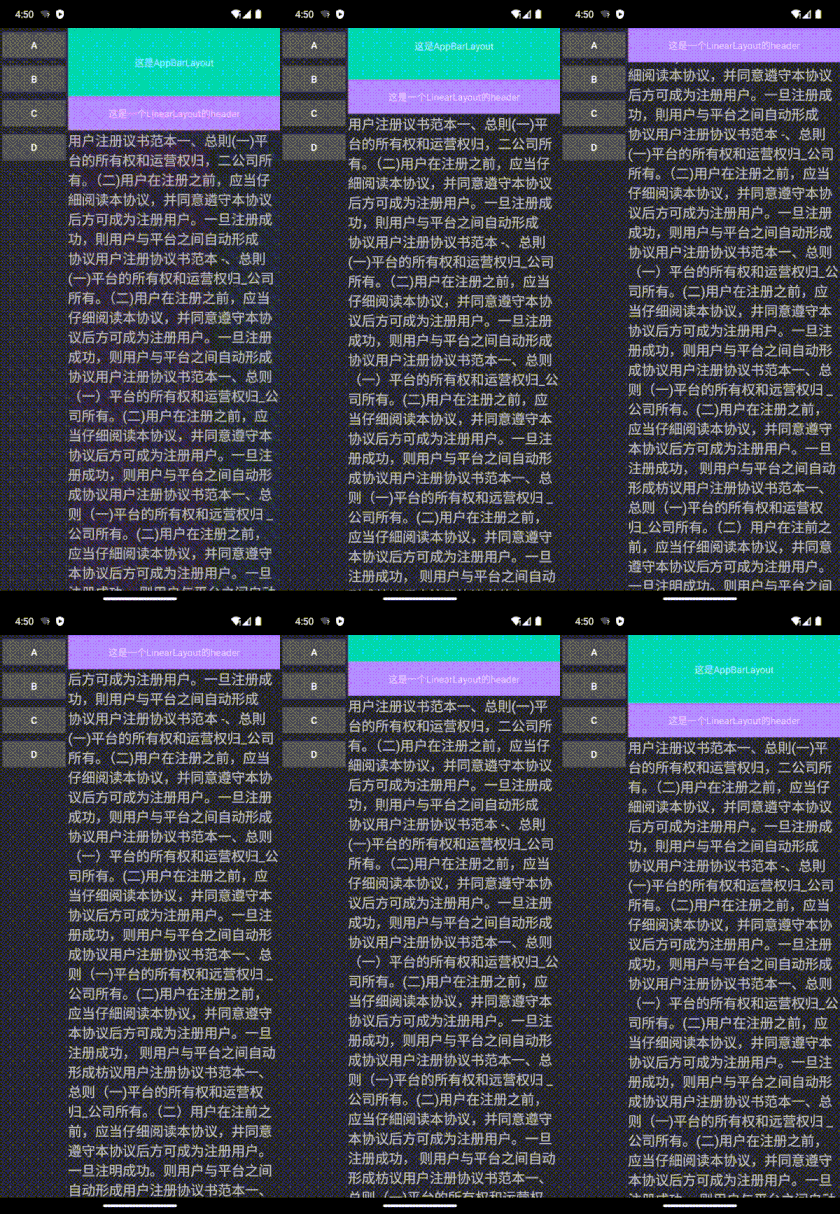
CoordinatorLayout 的直接子 View 可以不是 NestedScrollView、RecyclerView 等,我可以给一个 LinearLayout 设置一个 behavior,来实现一个吸顶效果,xml 如下图所示。
<?xml version="1.0" encoding="utf-8"?>
<androidx.coordinatorlayout.widget.CoordinatorLayout xmlns:android="http://schemas.android.com/apk/res/android"
    xmlns:app="http://schemas.android.com/apk/res-auto"
    android:layout_width="match_parent"
    android:layout_height="match_parent">

    <com.google.android.material.appbar.AppBarLayout>
        <TextView
            android:text="这是AppBarLayout"
            app:layout_scrollFlags="scroll" />
    </com.google.android.material.appbar.AppBarLayout>

    <LinearLayout
        android:id="@+id/llContent"
        android:oritation="vertical
        app:layout_behavior="com.xx.xx.xxBehavior">

        <!--吸顶的TextView-->
        <TextView
            android:text="这是一个LinearLayout的header"
            app:layout_scrollFlags="scroll" />

        <androidx.core.widget.NestedScrollView>
            <TextView
                android:text="这是一个滚动布局"/>
        </androidx.core.widget.NestedScrollView>

    </LinearLayout>

</androidx.coordinatorlayout.widget.CoordinatorLayout>
效果:
如何定义这个 Behavior?很简单
class CustomBehavior(context: Context, attributeSet: AttributeSet): Behavior<View>(context, attributeSet) {

    private var initPos = 0

    override fun layoutDependsOn(
        parent: CoordinatorLayout,
        child: View,
        dependency: View
    ): Boolean {
        return dependency is AppBarLayout
    }

    override fun onDependentViewChanged(
        parent: CoordinatorLayout,
        child: View,
        dependency: View
    ): Boolean {
        if (initPos == 0) {
            initPos = dependency.height
        }
        child.translationY = initPos - abs(dependency.y)
        return true
    }
}
先看 layoutDependsOn 方法,使用 CustomBehavior 的 View 要依赖的 View 的类型
- parent:就是 CoordinatorLayout
- child:使用 CustomBehavior 的 View,就是例子中的 LinearLayout
- dependency:依赖的 View,例子中的 AppBarLayout
再看 onDependentViewChanged 方法
child.translationY:设置 child(使用 CustomBehavior 的 View) 的位置
initPos = dependency.height:child 的初始位置是 AppBarLayout 的高度,即在 AppBarLayout 下边
initPos - abs(dependency.y):根据 dependency 的位置 实时更新 child 的位置
NestedScrollingChild NestedScrollingParent 待续........


 1万+
1万+

 被折叠的 条评论
为什么被折叠?


