


- 设置表单
前端表单要求:为了能上传文件,必须将表单的method设置为POST,并将enctype设置为multipart/form-data。只有在这样的情况下,浏览器才会把用户选择的文件以二进制数据发送给服务器;
-
对表单中的 enctype 属性做个详细的说明:
-
application/x-www=form-urlencoded:默认方式,只处理表单域中的 value 属性值,采用这种编码方式的表单会将表单域中的值处理成 URL 编码方式。
multipart/form-data:这种编码方式会以二进制流的方式来处理表单数据,这种编码方式会把文件域指定文件的内容也封装到请求参数中,不会对字符编码。 -
text/plain:除了把空格转换为 “+” 号外,其他字符都不做编码处理,这种方式适用直接通过表单发送邮件。
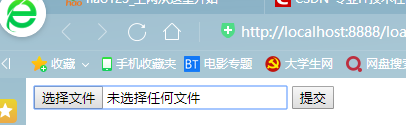
<%@page contentType="text/html;charset=UTF-8" language="java" %>
<html>
<body>
<form enctype="multipart/form-data" method="post" action="${pageContext.request.contextPath}/upload1">
    <input type="file" name="file">
    <input type="submit">
</form>
Spring MVC为文件上传提供了直接的支持,这种支持是用即插即用的MultipartResolver实现的。Spring MVC使用Apache Commons FileUpload技术实现了一个MultipartResolver实现类:CommonsMultipartResolver。因此,SpringMVC的文件上传还需要依赖Apache Commons FileUpload的组件。
- 配置springmvc-servlet.xml文件
<?xml version="1.0" encoding="UTF-8"?>
<beans xmlns="http://www.springframework.org/schema/beans"
       xmlns:xsi="http://www.w3.org/2001/XMLSchema-instance"
       xmlns:context="http://www.springframework.org/schema/context"
       xmlns:mvc="http://www.springframework.org/schema/mvc"
       xsi:schemaLocation="http://www.springframework.org/schema/beans
        http://www.springframework.org/schema/beans/spring-beans.xsd
        http://www.springframework.org/schema/context
        http://www.springframework.org/schema/context/spring-context.xsd
        http://www.springframework.org/schema/mvc
        http://www.springframework.org/schema/mvc/spring-mvc.xsd">

<context:component-scan base-package="com.wang.controller"/>

    <mvc:default-servlet-handler/>
    <mvc:annotation-driven/>

    <bean class="org.springframework.web.servlet.view.InternalResourceViewResolver">
        <property name="prefix" value="/WEB-INF/jsp/"/>
        <property name="suffix" value=".jsp"/>
    </bean>
    <!--ID必须为multipartResolver,否则就400问题-->

    <bean id="multipartResolver" class="org.springframework.web.multipart.commons.CommonsMultipartResolver">
        <property name="defaultEncoding" value="utf-8"/>
        <property name="maxUploadSize" value="1048576"/>
        <property name="maxInMemorySize" value="40960"/>
    </bean>

</beans>
注意!!!这个bena的id必须为:multipartResolver , 否则上传文件会报400的错误!
除此之外,我们还需要导入文件上传的jar包,commons-fileupload , Maven会自动帮我们导入他的依赖包 commons-io包;
    <!--文件上传和下载的包commons-fileupload,依赖于commons-io-->
    <!-- https://mvnrepository.com/artifact/commons-fileupload/commons-fileupload -->
    <dependency>
      <groupId>commons-fileupload</groupId>
      <artifactId>commons-fileupload</artifactId>
      <version>1.3.3</version>
    </dependency>
  </dependencies>
- 实现类
@Controller
public class FileUploadController {
    //文件上传流
    @RequestMapping(value = "/upload",produces ="application/json;charset=utf-8")
    @ResponseBody
    public String upload(@RequestParam("file") CommonsMultipartFile file, HttpServletRequest request) throws IOException {
        //1获得文件名
        String filename = file.getOriginalFilename();
        if ("".equals(filename)){
            return "文件不存在";
        }
        //2.上传文件保存路径
        String path = request.getServletContext().getRealPath("/upload");
        File file1 = new File(path);
        if (!file1.exists()){
            file1.mkdir();
        }
        //3.上传文件
        InputStream is = file.getInputStream();
        FileOutputStream os= new FileOutputStream(new File(file1, filename));
         int len=0;
         byte [] buffer=new byte[1024];
        while ((len = is.read(buffer)) != -1) {

            os.write(buffer,0,len);
            os.flush();
        }
   //1.关闭流
        os.close();
        is.close();
        return "上传完毕";
    }
注意:必须加上 @RequestParam , 否则也会报错!作用是用来实现封装!
方式二
采用file.Transto 来上传
配置和上面那个方法配置文件一样,只是实现的方法不同
@RequestMapping(value = "/upload2")
    @ResponseBody
    public String upload2(@RequestParam("file") CommonsMultipartFile file,HttpServletRequest request) throws IOException {

        //上传文件保存路劲
        String path = request.getServletContext().getRealPath("/upload");
        File realPath = new File(path);
        if (!realPath.exists()){
            realPath.mkdir();
        }
        //transferTo:将文件写入到磁盘,参数就是一个文件
        file.transferTo(new File(realPath+"/"+file.getOriginalFilename()));

        return "上传完毕";
    }
实现文件的下载
文件下载步骤:
- 设置 response 响应头
- 读取文件 – InputStream
- 写出文件 – OutputStream
- 执行操作
- 关闭流 (先开后关)
代码实现:
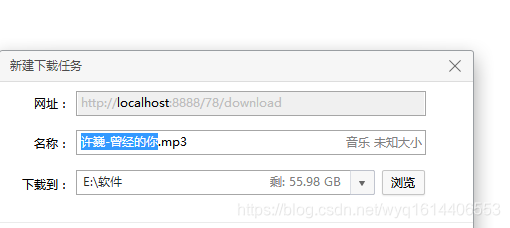
 @RequestMapping(value = "/download")
    public String download(HttpServletResponse response) throws IOException {

        //要下载的图片路径,服务器有没有墙,一般下载都有自己公司的图厂,地址
        String path="E://";
        String filename="许巍-曾经的你.mp3";

        //设置响应头信息;【固定的不用急,保存即可】
        response.reset();//让页面不缓存
        response.setCharacterEncoding("UTF-8");
        response.setContentType("multipart/form-data");//二进制流传输数据
        response.setHeader("Content-Disposition","attachment;filename="+ URLEncoder.encode(filename,"UTF-8"));

        File file = new File(path, filename);

        FileInputStream input = new FileInputStream(file);

        ServletOutputStream out = response.getOutputStream();

        //执行操作
        int len=0;
        byte [] buffer=new byte[1024];

        while ((len=input.read(buffer))!=-1){
            out.write(buffer,0,len);
            out.flush();
        }
        out.close();
        input.close();

        return null;
    }
}


 被折叠的 条评论
为什么被折叠?
被折叠的 条评论
为什么被折叠?
 到【灌水乐园】发言


