


目录
15. @Pointcut(“execution...”) 10
19. @AfterThrowing(value = "切入点",throwing = "异常对象") 12
36. @PropertySource和@PropertySources. 23
37. @Import和@ImportResource. 25
39. @ ConfigurationProperties(prefix = "xxx") 27
41. @ SpringBootApplication. 30
42. @ SpringBootConfiguration. 30
43. @ EnableAutoConfiguration. 31
1.MyBatis中常见注解
public interface StudentMapper {

    /**

     * 添加数据

     * @param studentBean

     * @return

     */

    @Insert("insert into t_student values(null,#{stuname},#{stuage},#{stuaddress});")

    boolean insertStudent(StudentBean studentBean);


    /**

     * 修改数据

     * @param studentBean

     * @return

     */

    @Update("update t_student set stu_name=#{stuname},stu_age=#{stuage},stu_address=#{stuaddress}" +

            "where stu_id=${stuid};")

    boolean updateStudent(StudentBean studentBean);


    /**

     * 删除数据

     * @param stuid

     * @return

     */

    @Delete("delete from t_student where stu_id=#{stuid};")

    boolean deleteStudent(int stuid);


    /**

     * 查询单个学生信息

     * @param stuid

     * @return

     */

    @Results(id = "stuMapid",value = {

            @Result(column = "stu_id",property = "stuid"),

            @Result(column = "stu_name",property = "stuname"),

            @Result(column = "stu_age",property = "stuage"),

            @Result(column = "stu_address",property = "stuaddress"),

    })

    @Select("select * from t_student where stu_id=#{stuid};")

    StudentBean selectStudentById(int stuid);


    /**

     * 查询所有学生信息

     * @return

     */

    @Results(id = "stuMap",value = {

            @Result(id = "stu_id",property = "stuid"),

            @Result(column = "stu_name",property = "stuname"),

            @Result(column = "stu_age",property = "stuage"),

            @Result(column = "stu_address",property = "stuaddress"),

    })

    @Select("select * from t_student;")

    List<StudentBean> selectAllStudent();

}
1. @Insert("")
作用在数据访问层XXXX.Mapper接口上,并且书写在接口中的抽象方法上,设置添加数据的SQL语言,代替XXXMapper.xml文件中的SQL语言。
2. @Update("")
作用在数据访问层XXXX.Mapper接口上,并且书写在接口中的抽象方法上,设置修改数据的SQL语言,代替XXXMapper.xml文件中的SQL语言。
3. @Delete("")
作用在数据访问层XXXX.Mapper接口上,并且书写在接口中的抽象方法上,设置删除数据的SQL语言,代替XXXMapper.xml文件中的SQL语言。
4. @Select("")
作用在数据访问层XXXX.Mapper接口上,并且书写在接口中的抽象方法上,设置查询数据的SQL语言,代替XXXMapper.xml文件中的SQL语言。查询会有返回值,需要与@Results并用。
5. @Results("")和@Result
作用在数据访问层XXXX.Mapper接口上,并且书写在接口中的抽象方法上,与@Select并用,设置查询结果集,成员变量与数据库表列名的映射关系。 当数据库字段名与实体类对应的属性名不一致时,可以使用@Results和@Result映射来将其对应起来, 名字相同的可以省略。column为数据库字段名,porperty为实体类属性名,id为是否为主键。
6. @ResultMap("")
作用在数据访问层XXXX.Mapper接口上,并且书写在接口中的抽象方法上。当这段@Results代码需要在多个方法用到时,为了提高代码复用性,我们可以为这个@Results注解设置id,然后使用@ResultMap注解来复用这段代码。如下代码示例:
@Select({"select id,user_name,user_password from sys_user where id = #{id}"})

@Results(id="userMap", value={

@Result(column="id", property="id", id=true),

       @Result(column="user_name", property="userName"),

       @Result(column="user_password ", property="userPassword"),

       })

SysUser selectUserByUserId(Long id);

@Select({"select * from sys_user"})

@ResultMap("userMap")

List<SysUser> selectUsers();
2.Spring中常见注解
7. @Component
@Component注解用于标注一个普通的组件类,它没有明确的业务范围,只是通知Spring被此注解的类需要被纳入到Spring Bean容器中并进行管理。
可以使用此注解描述Spring中的Bean【创建对象】,但它是一个泛化的概念,仅仅表示一个组件(Bean),并且可以作用在任何层次。使用时只需将该注解标注在相应类上即可。
@Component--默认使用@Component创建的Bean类的名称,首字母小写。
@Component(“name”)--指定的名称。getBean时需要对应。
//@Component

@Component("stud")

public class StudentBean {

    public void testStudent(){

        System.out.println("Stduent的实例方法");

    }

}

public class Test {

    public static void main(String[] args) {

       ApplicationContext applicationContext = new ClassPathXmlApplicationContext("applicationContext.xml");

       //StudentBean student = applicationContext.getBean("studentBean", StudentBean.class);

        StudentBean student = applicationContext.getBean("stud", StudentBean.class);

        student.testStudent();

    }

}
8. @Repository
用于将数据访问层(DAO层)的类上,标识为 Spring 中的 Bean,其功能与 @Component 相同。
@Repository--默认使用@Repository创建的Bean类的名称,首字母小写
@Repository(name)-- 指定的名称。getBean时需要对应。
/**

 * 数据访问层的操作类

 */

//@Repository

@Repository("studao")

public class StudentDaoImpl {

    public  void  insertStudent(){

        System.out.println("数据访问层添加方法");

    }

}
9. @Service
作用在业务层(Service 层)的类上,用于将业务层的类标识为 Spring 中的 Bean,其功能与 @Component 相同。
@Service--默认使用@Service创建的Bean类的名称,首字母小写
@Service(name)--指定的名称。getBean时需要对应。
/**

 * 业务层的操作类

 */

//@Service

@Service("studentService ")

public class StudentServiceImpl {


}
10. @Controller
作用在控制层(Controller)类上,用于将控制层的类标识为 Spring 中的 Bean,其功能与 @Component 相同。
@Controller--默认使用@Controller创建的Bean类的名称,首字母小写
@Controller(name)--指定的名称,getBean时需要对应。
/**

 * 控制层操作类

 */

@Controller

@Controller("studentController")

public class StudentController {

      public  void addStudent(){

        System.out.println("控制层添加方法");

    }

}
11. @Autowired
作用完成依赖注入。用于对 Bean 的属性变量、属性的 Set 方法及构造函数进行标注。默认按照Bean的类型进行依赖注入。也就是说,当使用@Autowired注入时,会去spring容器中找这个类型的Bean,如果这个类型的Bean有多个,就需要配合@Qualifier 注解使用。
@Component

public class StudentBean {

    public String getString(){

        return "竞宝";

    }

}


@Component("per")

public class PersonBean {

    @Autowired

    public StudentBean studentBean;

    public  void  testPer(){

        System.out.println("person的实例方法-------"+studentBean.getString());

    }

}


public class Test {

    public static void main(String[] args) {

        ApplicationContext applicationContext = new ClassPathXmlApplicationContext("applicationContext.xml");

        PersonBean per = applicationContext.getBean("per", PersonBean.class);

        per.testPer();

    }

}
12. @Qualifier
与 @Autowired 注解配合使用,@Qualifier限定哪个bean应该被自动注入。当Spring无法判断出哪个bean应该被注入时,@Qualifier注解有助于消除歧义bean的自动注入。
例:现在有两个User的实例对象,需要在Person类中注入User对象,注入的到底是哪个呢?使用@Autowired解决不了,会报错。
<beanid="user1"class="com.test.User">

<property name="name"value="zhangsan"/>

</bean>

<beanid="user2"class="com.test.User">

<property name="name"value="lisi"/>

</bean>
public class Person{
@Autowired
private User user;
}要解决以上问题,需要使用@Quanlifier注解告诉Spring 哪个bean应该被@autowired。
public class Person{

       @Autowired

       @Qualifier(“user1”)

       private User user;

}
13. @Resource
作用完成依赖注入。其作用与 Autowired 一样。其区别在于 @Autowired 默认按照 Bean 类型装配,而 @Resource 默认按照 Bean 实例名称进行装配。
@Resource 中有两个重要属性:name 和 type。
Spring 将 name 属性解析为 Bean 实例名称,type 属性解析为 Bean 实例类型。如果指定 name 属性,则按实例名称进行装配;如果指定 type 属性,则按 Bean 类型进行装配。如果都不指定,则先按 Bean 实例名称装配,如果不能匹配,则再按照 Bean 类型进行装配;如果都无法匹配,则抛出 NoSuchBeanDefinitionException 异常。
@Component("student")

public class StudentBean {

    public String getString(){

        return "宝儿";

    }

}


@Component("per")

public class PersonBean {

@Resource

//   @Resource(name = "student")   如果指定name,就必须和创建好的对象的名称一样

//    @Resource(type = StudentBean.class)

    private StudentBean studentBean;


    public  void testPerson(){

        System.out.println(studentBean.getString());

    }

}


public class Test {

    public static void main(String[] args) {

        ApplicationContext applicationContext = new ClassPathXmlApplicationContext("applicationContext.xml");

        PersonBean per = applicationContext.getBean("per", PersonBean.class);

        per.testPerson();


    }

}
3.SpringAOP中注解
14. @Aspect
表示当前类为切面类,作用在类上。
15. @Pointcut(“execution...”)
表示切入点,作用在方法上。
execution表达式的具体写法要求如下:
execution(
modifiers-pattern? —修饰符,比如public
ret-type-pattern —标识方法的返回值
declaring-type-pattern? —声明类型模式
name-pattern/param-pattern —指定方法名/指定方法参数的路径
throws-pattern? —抛出模式
)
ret-type-pattern,name-pattern(param-pattern)是必须的.
ret-type-pattern:标识方法的返回值,需要使用全路径的类名如java.lang.String,也可以为*表示任何返回值;
name-pattern:指定方法名,*代表所有,例如set*,代表以set开头的所有方法.
param-pattern:指定方法参数(声明的类型):
(..)代表所有参数
(*)代表一个参数
(*,String)代表第一个参数为任何值,第二个为String类型.
16. @Before(“切入点”)
前置通知,作用在方法上。
17. @After(“切入点”)
后置通知,作用在方法上。
18. @Around(“切入点”)
环绕通知,作用在方法上。
19. @AfterThrowing(value = "切入点",throwing = "异常对象")
异常通知,作用在方法上。
代码示例:
@Component("stu")

public class StudentServiceImpl {

    public  void  insertStudent(){

        System.out.println("添加学生信息的业务方法---insertStudent");

    }

    public  void  updateStudent(){

        System.out.println("修改学生信息的业务方法---updateStudent");

    }

    public  void  deleteStudent(){

        System.out.println("删除学生信息的业务方法---deleteStudent");

    }

    public  void  selectStudent(){

        System.out.println("查询学生信息的业务方法---selectStudent");

        int a=10/0;

    }

}
@Component
@Aspect
public class myAspect {
@Pointcut("execution(* com.weiwei.springAOP.StudentServiceImpl.insertStudent())")
//切点,使用execution表达式设置insertStudent方法为切入点,保存到point1()中;
public void point1(){}
@Pointcut("execution(* com.weiwei.springAOP.StudentServiceImpl.deleteStudent())")
public void point2(){}
@Pointcut("execution(* com.weiwei.springAOP.StudentServiceImpl.updateStudent())")
public void point3(){}
@Pointcut("execution(* com.weiwei.springAOP.StudentServiceImpl.selectStudent())")
public void point4(){}
@Before("point1()")
public void saveLog1(){
System.out.println("记录系统运行日志");
}
@After("point2()")
public void saveLog2(){
System.out.println("记录系统运行日志");
}
//测试环绕通知
@Around("point3()")
public Object myAround(ProceedingJoinPoint proceedingJoinPoint)throws Throwable {
saveLog1(); // 开始
Object obj = proceedingJoinPoint.proceed(); // 执行当前目标方法
saveLog1(); // 结束
return obj;
}
@AfterThrowing(value = "point4()",throwing = "e")
public void myAfterThrowing(Throwable e) {
System.out.println("异常通知" + "出错了" + e.getMessage());
}
}public class App {
public static void main( String[] args ) {
ApplicationContext applicationContext = new ClassPathXmlApplicationContext("applicationContext.xml");
StudentServiceImpl stu = applicationContext.getBean("stu", StudentServiceImpl.class);
stu.insertStudent();
System.out.println("---------------------------");
stu.deleteStudent();
System.out.println("---------------------------");
stu.updateStudent();
System.out.println("---------------------------");
stu.selectStudent();
}
}输出:
记录系统运行日志
添加学生信息的业务方法---insertStudent
---------------------------
删除学生信息的业务方法---deleteStudent
记录系统运行日志
---------------------------
记录系统运行日志
修改学生信息的业务方法---updateStudent
记录系统运行日志
---------------------------
查询学生信息的业务方法---selectStudent
异常通知出错了/ by zero
Exception in thread "main" java.lang.ArithmeticException: / by zero
20. @Transactional
启用事务管理,作用在方法上。
4. SpringMVC中注解
21. @RequestMapping
@RequestMapping注解的主要用途是将Web请求与请求处理类中的方法进行映射。设置控制器类/请求处理方法的访问路径的。
@RequestMapping可以作用在java类上,表示配置这个java类的访问路径;
@RequestMapping可以作用在请求处理方法上,表示配置这个请求处理方法的访问路径。
@RequestMapping注解有2个配置属性,value:映射的请求URL或者其别名,method:兼容HTTP的方法名, 如果不配置method,则以任何请求形式都可以。
提示:在使用@RequestMapping之前,请求处理类还需要使用@Controller或@RestController进行标记
@Controller

public class MySpringMVC {

    @RequestMapping("/hello")

public String getString(){

       return “张三”;

}
22. @RequestBody
@RequestBody在处理请求方法的参数列表中使用,它可以将请求主体中的参数绑定到一个对象中, 将请求体里面所有的json数据传到后端,后端再进行解析,封装成java对象,把传过来的json解析成java对象。
@Controller

@RequestMapping("/stutest")

public class StudentController {

    @RequestMapping(value = "/test1", method = RequestMethod.POST)

    public void getParam1(@RequestBody StudentBean studentBean) {

        System.out.println("测试提交的json数据");

        int stuid = studentBean.getStuid();

        String stuname = studentBean.getStuname();

        int stuage = studentBean.getStuage();

        String stuaddress = studentBean.getStuaddress();

        System.out.println(stuid+"\t"+stuage+"\t"+stuaddress+"\t"+stuname);

    }

}
23. @ResponseBody
@ResponseBody会自动将控制器中方法的返回值写入到HTTP响应中。将java对象转为json格式的数据。特别的,@ResponseBody注解只能用在被@Controller注解标记的类中。如果在被@RestController标记的类中,则方法不需要使用@ResponseBody注解进行标注。@RestController相当于是@Controller和@ResponseBody的组合注解。
@RequestMapping(value = "/test3", method = RequestMethod.POST)

    @ResponseBody

    public ResBean getParam3(@RequestBody StudentBean studentBean) {

        try{

            System.out.println("测试添加用户信息");

            int stuid = studentBean.getStuid();

            String stuname = studentBean.getStuname();

            int stuage = studentBean.getStuage();

            String stuaddress = studentBean.getStuaddress();

            System.out.println(stuid+"\t"+stuage+"\t"+stuaddress+"\t"+stuname);

            //拿到了传过来的值,然后添加到数据库中,假设添加数据库成功

            return new ResBean(true,"添加成功");

        }catch(Exception e){

            e.printStackTrace();

            return new ResBean(false,"添加失败");

        }

    }
24. @RestController
@RestController是在Spring 4.0开始引入的,这是一个特定的控制器注解。此注解相当于@Controller和@ResponseBody的快捷方式。当使用此注解时,不需要再在方法上使用@ResponseBody注解。
25. @GetMapping
@GetMapping注解用于处理HTTP GET请求,并将请求映射到具体的处理方法中。具体来说,@GetMapping是一个组合注解,它相当于是@RequestMapping(method=RequestMethod.GET)的快捷方式。
26. @PostMapping
@PostMapping注解用于处理HTTP POST请求,并将请求映射到具体的处理方法中。@PostMapping与@GetMapping一样,也是一个组合注解,它相当于是@RequestMapping(method=HttpMethod.POST)的快捷方式。
27. @PathVariable
@PathVariable注解是将方法中的参数绑定到请求URI中的模板变量上。可以通过@RequestMapping注解来指定URI的模板变量,然后使用@PathVariable注解将方法中的参数绑定到模板变量上。@PathVariable注解允许我们使用value或name属性来给参数取一个别名。模板变量名需要使用{ }进行包裹,如果方法的参数名与URI模板变量名一致,则在@PathVariable中就可以省略别名的定义。
@RequestMapping(value = "/testreq4/{username}/{password}")

    public  void  getParam(@PathVariable("username") String name,

                           @PathVariable("password") String pass){

        System.out.println("username==="+name+"\t"+"password===="+pass);

    }
方法中的参数使用@PathVariable注解,几个参数就几个@,逗号隔开,username为@RequestMapping中设置的格式的名称,拿到之后保存到name变量中。
http请求:
http://localhost:8080/springmvcdemo2/test/testreq4/zhangsan/123456
28. @RequestParam
定义在方法上,获取请求中通过key=value方式传递的参数数据。基本上同@PathVariable注解。
   @RequestMapping("/testreq5")

    public void getParam2(@RequestParam("username") String name,

                          @RequestParam("password") String pass){

        System.out.println("username==="+name+"\t"+"password===="+pass);

}
http请求:
http://localhost:8080/springmvcdemo2/test/testreq5?username=张三&password=123456
4.SpringBoot中常见注解
29. @CrossOrigin
@CrossOrigin注解将为请求处理类或请求处理方法提供跨域调用支持。如果我们将此注解标注类,那么类中的所有方法都将获得支持跨域的能力。使用此注解的好处是可以微调跨域行为,不能解决所有的跨域问题。使用此注解的示例如下:
@RestController

//实现跨域注解

//origin="*"代表所有域名都可访问

//maxAge飞行前响应的缓存持续时间的最大年龄,简单来说就是Cookie的有效期 单位为秒

//若maxAge是负数,则代表为临时Cookie,不会被持久化,Cookie信息保存在浏览器内存中,浏览器关闭Cookie就消失

@CrossOrigin(origins = "*",maxAge = 3600)

public class UserController {

    @Resource

    private IUserFind userFind;


    @GetMapping("finduser")

    public User finduser(@RequestParam(value="id") Integer id){

        //此处省略相应代码

    }

}
30. @ComponentScan
@ComponentScan注解用于配置Spring需要扫描的被组件注解注释的类所在的包。可以通过配置其basePackages属性或者value属性来配置需要扫描的包路径。value属性是basePackages的别名。
@SpringBootApplication

@ComponentScan(basePackages = "com.weiwei.springbootdemo1")

public class Springbootdemo1Application {


    public static void main(String[] args) {

        SpringApplication.run(Springbootdemo1Application.class, args);

    }


}注意:主类所在的包及其所在包下的子包会被默认扫描到,不需要配置扫描包。如果主类所在的包和其他地方的包是同一级别,那么不会自动扫描到其他级别的包中,就需要配置高级别的扫描包路径。
31. @Bean
@Bean注解主要的作用是告知Spring,被此注解所标注的类将需要纳入到Bean管理工厂中。其返回值将作为一个bean定义注册到Spring的IoC容器,方法名将默认成为该bean定义的id属性。
1.@Bean注解相当于spring的xml配置文件<bean>标签,告诉容器注入一个bean。
2.@Bean注解的方法上如果没通过bean指定实例名,默认实例名与方法名相同。
3.@Bean注解默认为单例模式,可以通过@Scope("prototype")设置为多例
public class StudentConfig {

    @Bean

    public PersonBean personBean(){

        return new PersonBean();

    }

}
32. @Scope
@Scope注解是springIoc容器中的一个作用域,在 Spring IoC 容器中具有以下几种作用域:基本作用域singleton(单例)、prototype(多例),Web 作用域(reqeust、session、globalsession),自定义作用域
- singleton单例模式(默认):全局有且仅有一个实例
- prototype原型模式:每次获取Bean的时候会有一个新的实例
- request: request表示该针对每一次HTTP请求都会产生一个新的bean,同时该bean仅在当前HTTP request内有效
- session :session作用域表示该针对每一次HTTP请求都会产生一个新的bean,同时该bean仅在当前HTTP session内有效
- global session : global session作用域类似于标准的HTTP Session作用域,不过它仅仅在基于portlet的web应用中才有意义
直接使用字符串容易出问题,spring有默认的参数:
- ConfigurableBeanFactory.SCOPE_PROTOTYPE,即“prototype”
- ConfigurableBeanFactory.SCOPE_SINGLETON,即“singleton”
- WebApplicationContext.SCOPE_REQUEST,即“request”
- WebApplicationContext.SCOPE_SESSION,即“session”
使用:直接在bean对象方法上增加@Scope注解就可以
@Scope(value = ConfigurableBeanFactory.SCOPE_PROTOTYPE)
33. @Primary
当系统中需要配置多个具有相同类型的bean时,@Primary可以定义这些Bean的优先级。
@Componet

public class EmailMessageServiceImpl implements MessageService{

       xxxxxxx

}

@Componet

@Primary

public class WechatMessageServiceImpl implements MessageService{

       xxxxxxx

}

@Componet

public class QQMessageServiceImpl implements MessageService{

       xxxxxxx

}


@RestController

public class MessageController{

@Autowired 这里注入的就是优先级的那个实现类

private MessageService messageService;

xxxxx

}
34. Lombok插件注解
@Setter :在JavaBean或类JavaBean中使用,使用此注解会生成对应的setter方法;
@Getter:在JavaBean或类JavaBean中使用,使用此注解会生成对应的getter方法;
@ToString:在JavaBean或类JavaBean中使用,使用此注解会自动重写对应的toStirng方法;
@NoArgsConstructor:在JavaBean或类JavaBean中使用,使用此注解会生成对应的无参构造方法;
@Data:在JavaBean或类JavaBean中使用,这个注解包含范围最广,它包含上述注解【Setter,Getter,ToString,NoArgsConstructor】,即当使用当前注解时,会自动生成包含的所有方法;
@AllArgsConstructor:在JavaBean或类JavaBean中使用,使用此注解会生成对应的有参构造方法;
@Log(这是一个泛型注解,具体有很多种形式)
@EqualsAndHashCode:在JavaBean或类JavaBean中使用,使用此注解会自动重写对应的equals方法和hashCode方法;
@Getter

@Setter

@AllArgsConstructor

@ToString

public class UserBean {

    private int userid;

    private String username;

}
35. @Test
@Test注解是JUnit测试的基础,JUnit 4的优势就在于支持了注解。
@Test的使用 是该方法可以不用main方法调用就可以测试出运行结果,是一种测试方法,一般函数都需要有main方法调用才能执行,注意被测试的方法必须是public修饰的。
   @Autowired

    private DataConfig dataConfig;

    @Test

    public void test1(){

        System.out.println(this.dataConfig.getPassword());

}
36. @PropertySource和@PropertySources
@PropertySource("classpath:db.properties")读取从resources下xxxx.properties资源文件【有@Configuration的java类上,特别是数据源配置类】
代替了xml配置文件中<context:property-placeholder
location="classpath:db.properties"></context:property-placeholder>
@PropertySources---加载resources下一组xxxx.properties资源文件
@PropertySources({
@PropertySource("classpath:1.properties"),
@PropertySource("classpath:2.properties"), ...
})
@PropertySource是Spring boot为了方便引入properties配置文件提供的一个注解,可以标注在SpringBoot的启动类上,还可以标注在配置类(使用@Configuration标注的类)上。使用@Value("${key}")取值。
//标注在主类上

@SpringBootApplication

@PropertySource(value = "classpath:mydata.properties")

public class Springbootdemo1Application {


    public static void main(String[] args) {

        SpringApplication.run(Springbootdemo1Application.class, args);

    }


}

//控制类测试

@Controller

public class DataController {

    @Value("${jdbc.username}")

    private String username;

    @RequestMapping("/test")

    @ResponseBody

    public void testUsername(){

        System.out.println(username);//root

    }

}


//标注在配置类上

@Component

@Configuration

@PropertySource(value = "classpath:mydata.properties")

@Getter

public class DataConfig {

    @Value("${jdbc.driver}")

    private String driver;

    @Value("${jdbc.url}")

    private String url;

    @Value("${jdbc.username}")

    private String username;

    @Value("${jdbc.password}")

private String password;

}


//测试

@Autowired

    private DataConfig dataConfig;

    @Test

    public void test1(){

        System.out.println(this.dataConfig.getPassword());//123456

    }
37. @Import和@ImportResource
在 XML 形式的配置中,我们通过 <import resource="XXX.xml"/> 的形式将多个分开的容器配置合到一个配置中,在 JavaConfig 形式的配置中,我们则使用 @Import 这个 Annotation 完成同样目的:
@ImportResource方式
其参数指定的是配置文件路径
比如你写了一个xxx.xml配置文件,springBoot容器是不知道这是干啥的,是不会去解析的,只有你在某一个类上导入@ImportResource(classpath:xxxx,xml)才会去解析。
@Import方式-------将多个分开配置类【@Configuration的java类】,合并到一个配置类中
其参数指定的是Class信息,也就是指向配置类
public class Test1 {

       public void printMsg(String msg) {

              System.out.println("test1 : " + msg);

       }

}


public class Test2 {

       public void printMsg(String msg) {

              System.out.println("test2 : " + msg);

       }

}


@Configuration

public class Test1Config {

       @Bean

       public Test1 test1() {

              return new Test1();

       }

}


@Configuration

public class Test2Config {

       @Bean

       public Test2 test2() {

              return new Test2();

       }

}


@Configuration

@Import({ Test1Config.class, Test2Config.class })

public class AppConfig {}
测试:
ApplicationContext context = new AnnotationConfigApplicationContext(AppConfig.class);

Test1 test1 = (Test1) context.getBean("test1");

test1.printMsg("Hello test1");


Test2 test2 = (Test2) context.getBean("test2");

test2.printMsg("Hello test2");目的主要就是我们项目搭建的时候要多使用这种分模块开发的方式,不要一个配置文件把所有的Bean都放在里面,尽量按某一个维度来分开,分开之后的聚合就是使用Import相关标签来实现。
38. @ Configuration
Spring3.0开始,@Configuration用于定义配置类,定义的配置类可以替换xml文件,一般和@Bean注解联合使用。
@Configuration注解主要标注在某个类上,相当于xml配置文件中的<beans>
@Bean注解主要标注在某个方法上,相当于xml配置文件中的<bean>
注意:@Configuration注解的配置类有如下要求:
- @Configuration不可以是final类型;
- @Configuration不可以是匿名类;
- 嵌套的configuration必须是静态类。
@Configuration里面有一个@component组件来标识,说明此类也是一个bean,可以被调用。
@Configuration

public class StudentConfig {

    @Bean

    public PersonBean personBean(){

        return new PersonBean();

    }

}
39. @ ConfigurationProperties(prefix = "xxx")
@ ConfigurationProperties完成配置绑定。具体用法:
(1)可以搭配@bean使用,标注在方法上,绑定3方属性。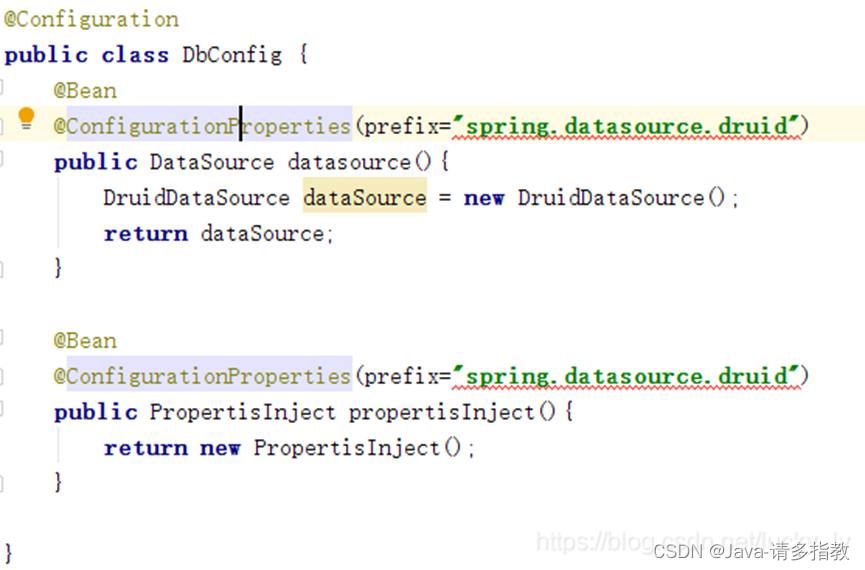
(2)标注在类上,绑定属性值。这里必须用@component修饰,否则在容器无法获取。如果只使用@ConfigurationProperties需要结合
@EnableConfigurationProperties(PropertisInject.class)将其注册到spring容器中。
①读取application.properties/yml文件给类中的成员变量绑定值:
@Data

@Component

@ConfigurationProperties(prefix = "person")

public class PersonBean {

    private Integer age;

    private Boolean boss;

    private String username;

    private Date birth;

    private Pet pet;

    private String[] interests;

    private List<String> animal;

    private Set<Double> salarys;

    private Map<String, Object> score;

    private Map<String, List<Pet>> allPets;

}
②读取自定义名字的xxx.properties文件给类中成员变量绑定值
@Data

@Component

@ConfigurationProperties(prefix = "user")这个不能少

@PropertySource(value = "classpath:sss.properties")这个不能少

public class UserBean {

    private Integer age;

    private Boolean boss;

    private String username;

    private Date birth;

    private Pet pet;

    private String[] interests;

    private List<String> animal;

    private Set<Double> salarys;

    private Map<String, Object> score;

    private Map<String, List<Pet>> allPets;

}
sss.properties
#int boolean  String Date

user.age=27

user.boss=true

user.birth=2022/03/25

user.username=张三

#数组型

user.interests=喵喵,汪汪,兔兔

#list集合型写法1

#user.animal=喵喵,汪汪,兔兔

user.animal[0]=喵喵

user.animal[1]=汪汪

user.animal[2]=兔兔


#d对象型

user.pet.name=喵喵

user.pet.weight=111

#set集合类型

user.salarys=20,30,22

#Map<String, Object>类型

user.score.english=120

user.score.math=130

#Map<String, List<Pet>>类型

user.all-pets.sick[0].name=喵喵

user.all-pets.sick[0].weight=12.23

user.all-pets.sick[1].name=汪汪

user.all-pets.sick[1].weight=22

user.all-pets.health[0].name=兔兔

user.all-pets.health[0].weight=33

user.all-pets.health[1].name=牛牛

user.all-pets.health[1].weight=44
40. @ Value
@Value注解使用于将数据值直接绑定到bean类中的成员变量上,对象类型不适用。
(1)绑定int、boolean、date、String、List、Set类型时直接@Value(“值”)
@Data

@Component

public class UserBean {

    @Value("100")

    private Integer age;

    @Value("true")

    private Boolean boss;

    @Value("张三")

    private String username;

    @Value("2022/03/25")

    private Date birth;

    @Value("足球,篮球,羽毛球")

    private String[] interests;

    @Value("喵喵,牛牛,猪猪")

    private List<String> animal;

    @Value("11,22,33")

    private Set<Double> salarys;

}
(2)对象类型--@Value不支持复杂类型,不能直接注入对象类型的数据
(3)Map集合类型
@Data

@Component

public class UserBean {

  @Value("#{{english:120,math:140}}")

    private Map<String, Object> score;

}
41. @ SpringBootApplication
主类上的注解,内部包含三个重要的注解:
@SpringBootConfiguration 下面讲解
@EnableAutoConfiguration 下面讲解
@ComponentScan 上面已讲解
@SpringBootApplication

public class Springbootdemo3Application {


    public static void main(String[] args) {

        SpringApplication.run(Springbootdemo3Application.class, args);

    }

}
42. @ SpringBootConfiguration
@SpringBootConfiguration注解包含了@Configuration注解,@Configuration注解标注在哪一个java类上,那么这个java类就是一个JavaConfig配置类,这个JavaConfig 配置类可以代替掉Spring配置文件【applicationContext.xml】,当我们在主类上标注@SpringBootApplication时,意味着主类是一个JavaConfig 配置类,因此我们在创建SptingBoot项目的时候才不用去编写Spring配置文件【applicationContext.xml】。
43. @ EnableAutoConfiguration
内部含有一个重点注解@Import({AutoConfigurationImportSelector.class}),这个里面引入了AutoConfigurationImportSelector.class这个文件:
-
- 利用getAutoConfigurationEntry(annotationMetadata)给容器中批量导入一些组件;
- 调用getCandidateConfigurations方法获取到所有需要到导入到容器中的配置类;
- 利用工厂加载loadSpringFactories得到所有的组件
- 从META-INF/spring.factories位置加载一个文件,默认扫描我们当前系统里面所有META-INF/spring.factories位置的文件,spring-boot-autoconfigure-2.6.4.jar包里面也有META-INF/spring.factories
它里面有# Auto Configure 127个
loadFactories方法,整段代码实现了把配置文件中的信息通过反射实例化成为@Configuration的配置文件,然后通过@Configuration最后汇总到容器当中;


 被折叠的 条评论
为什么被折叠?
被折叠的 条评论
为什么被折叠?
 到【灌水乐园】发言


