


 本文详细介绍了如何使用Python的xml.etree.ElementTree模块来处理XML数据,包括读写XML文件、设置和获取属性、格式化输出以及转换为JSON和Pandas DataFrame。此外,还对比了XML和JSON的特点,指出JSON在某些场景下更优。文章提供了具体的代码示例,展示了如何创建XML结构,使用XPath遍历XML文档,以及处理XML异常。最后,文章讨论了如何将XML数据转换为Pandas DataFrame以及使用xmltodict库将XML转换为JSON。
引言
本文主要介绍有关 Python 对 XML 文件格式的读写,及格式化,序列化,更多 Python 进阶系列文章,请参考 Python 进阶学习 玩转数据系列
内容提要:
- JSON vs. XML
- Python 对 XML 数据读写模块
- xml ElementTree API
- 设置获取 XML 属性 .set() and .get()
- 格式化 XML 输出
- Pretty Printing of the XML Tree
- xml ElementTree 解析 XML
- XPath 遍历 XML 例子
- 处理 XML Exceptions
- 读取 XML 转换成 Pandas DataFrame
- 用 xmltodict 转换 XML 成 JSON
JSON vs. XML
XML: Extensible Markup Language
JSON:JavaScript Object Notation
Example
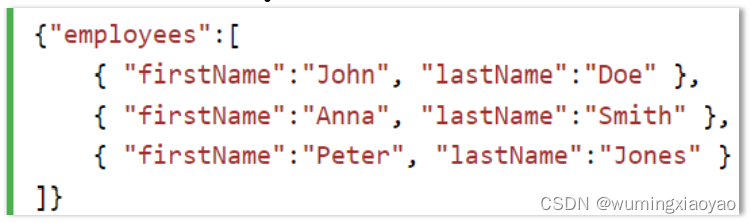
JSON Example:
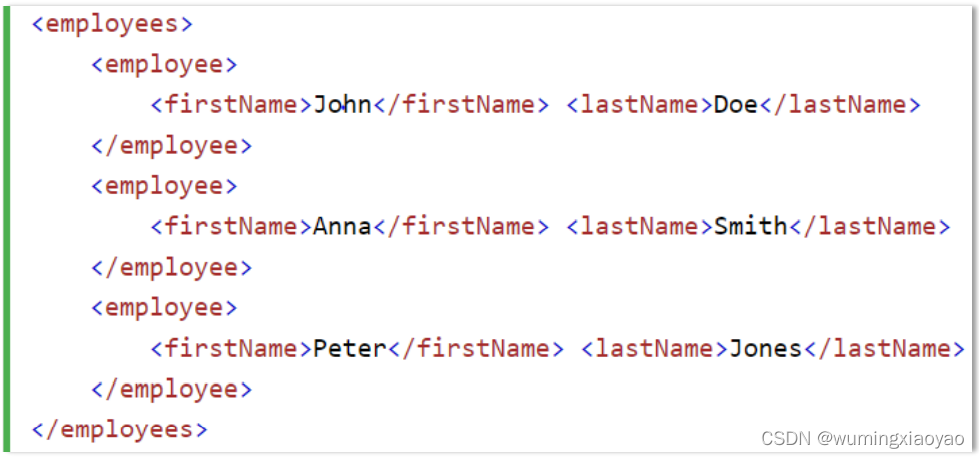
XML Example:
比较
- 相似:
● 两者都是自我描述性语言,可读性强
● 两者都是层级式结构
● 两者都可以被多种语言解析并使用
● 两者都可以从一个 XMLHttpRequest 获取 - 不同:
● JSON 不用结束标签 tag
● JSON 更短
● JSON 读写更快
● JSON 可以用数组
● XML 只能通过 XML parser 解析
● JSON 可以被普通的 JavaScript function 解析 - 为什么 JSON 比 XML 更好?
● XML 比 JSON 更难解析
● JSON 可以解析成现在的 JavaScript 对象.
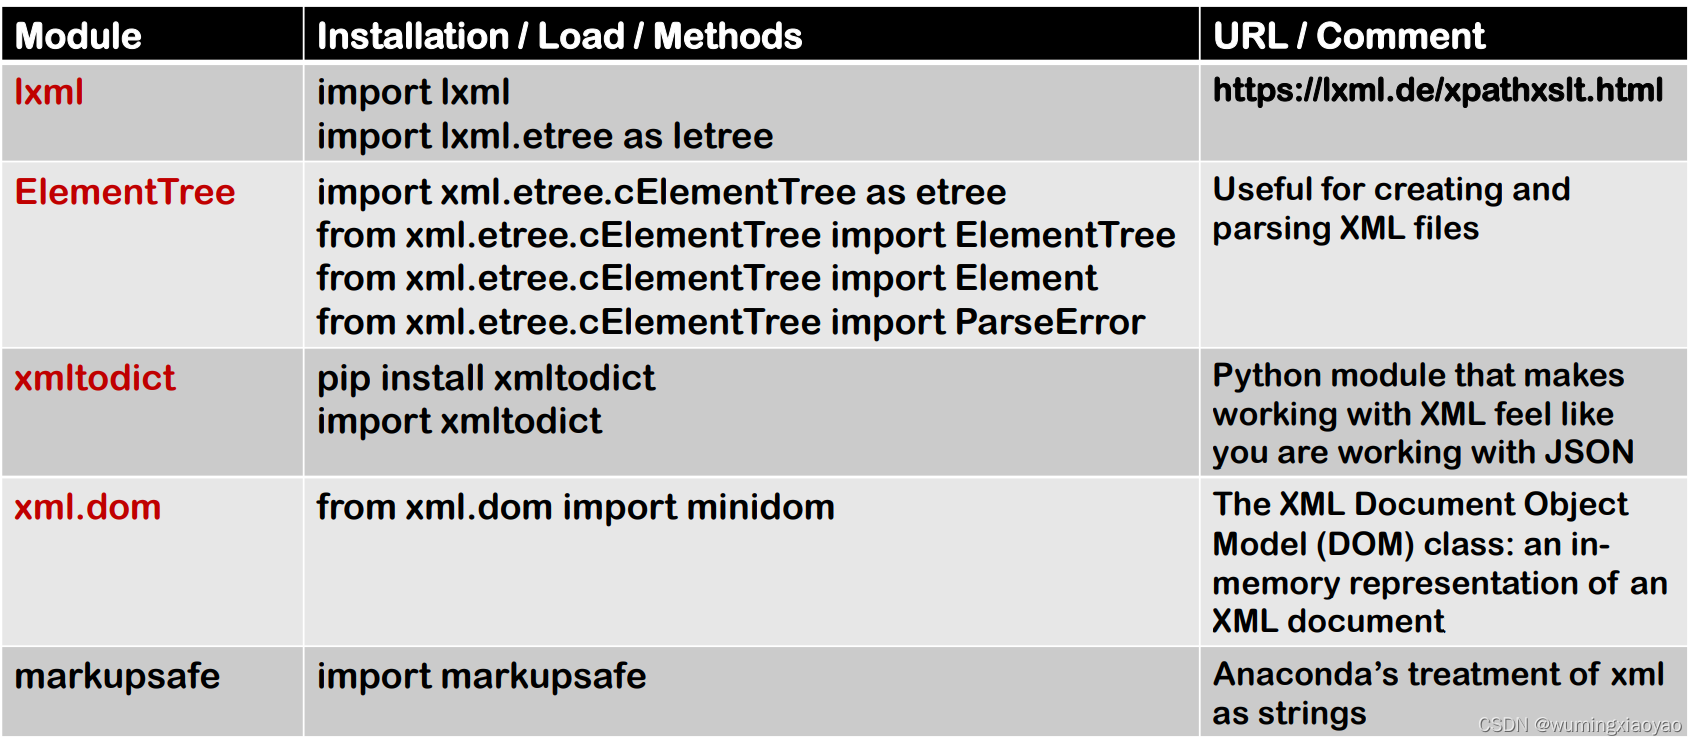
Python 对 XML 数据读写模块
相关资料
- XML to JSON with xmltodict
● https://micropyramid.com/blog/how-to-convert-xml-content-into-json-using-xmltodict/
● https://pypi.org/project/xmltodict/ - XML to Pandas DataFrame
● http://gokhanatil.com/2017/11/python-for-data-science-importing-xml-to-pandas-dataframe.html - XML Pretty Printing with lxml
● https://lxml.de/tutorial.html - XML Parser: lxml
● https://lxml.de/xpathxslt.html
xml ElementTree API
用来创建和解析 XML
- 两个主要的类:
● ElementTree - XML and document 操作
● Element - XML element 的封装 - ElementTree.find() 和 ElementTree.findall() 方法:
提供 XPath 搜索
• XPath 代表 XML Path Language
• XPath 使用路径的格式来定位 XML 文档中的 nodes 节点
创建 XML:
- 用 Element 创建一个 root node
- 用 ElementTree 创建基于 root node 的一个 tree
- 用 tree.write() 将 XML Tree 保存到一个 XML 文件
from xml.etree.cElementTree import ElementTree
from xml.etree.cElementTree import Element
root = Element("root")
tree = ElementTree(root)
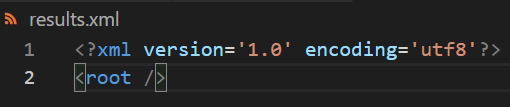
tree.write('results.xml', encoding='utf8')
输出:
生成的 results.xml 内容:
举例:
from xml.etree.cElementTree import ElementTree
from xml.etree.cElementTree import Element
from collections import namedtuple

root = Element('contacts') # <contacts>
tree = ElementTree(root)

# create ContactRecord class, its fields are first, last, age and email
Contact = namedtuple("ContactRecord", 'first last age email')
# Information to populate XML tree with
records = [
    Contact('Tom', 'Smith', 53, 'tsmith@boo.com'),
    Contact('Phil', 'Hammer', 42, 'phammer@boo.com'),
    Contact('Mary', 'Fast', 22, 'mfast@boo.com'),
    Contact('Jessica', 'Rest', 33, 'jrest@goo.com')
]

records.sort(key=lambda a: a.age, reverse=True)

print("records:\n{}".format(records))

# Now build and append nodes to the XML tree:
for record in records:
    contact = Element('contact') # <contact>
    name    = Element('name')
    first   = Element('first') # <first>
    last    = Element('last')
    email   = Element('email')

    name.attrib = {'age': str(record.age)} # < name age='43'>
    first.text = record.first
    last.text = record.last
    email.text = record.email
    name.append(first) # <name><first>John</first></name>
    name.append(last)
    contact.append(name)
    contact.append(email)
    root.append(contact)

#  save the built XML tree as an XML file:
tree.write('results.xml', encoding='utf8')
输出:
records:
[ContactRecord(first='Tom', last='Smith', age=53, email='tsmith@boo.com'), ContactRecord(first='Phil', last='Hammer', age=42, email='phammer@boo.com'), ContactRecord(first='Jessica', last='Rest', age=33, email='jrest@goo.com'), ContactRecord(first='Mary', last='Fast', age=22, email='mfast@boo.com')]
生成的 results.xml 内容:
设置获取 XML 属性 .set() and .get()
设置和获取属性的方法:
.set(): 设置属性
element.set(name, value)
.attrib(): 设置属性
element.attrib = {name:value}
element.attrib[name] = value
.get(): 获取属性
element.get(name)
element.get(name, default value)
举例:
from xml.etree.cElementTree import ElementTree
from xml.etree.cElementTree import Element
from collections import namedtuple

root = Element('contacts') # <contacts>
tree = ElementTree(root)

# create ContactRecord class, its fields are first, last, age and email
Contact = namedtuple("ContactRecord", 'first last age email')
# Information to populate XML tree with
records = [
    Contact('Tom', 'Smith', 53, 'tsmith@boo.com'),
    Contact('Phil', 'Hammer', 42, 'phammer@boo.com'),
    Contact('Mary', 'Fast', 22, 'mfast@boo.com'),
    Contact('Jessica', 'Rest', 33, 'jrest@goo.com')
]

records.sort(key=lambda a: a.age, reverse=True)

print("records:\n{}".format(records))

# Now build and append nodes to the XML tree:
for record in records:
    name = Element('name')
    name.set('age', str(record.age))
    # or
    name.attrib = {'age':str(record.age)}
    # or
    name.attrib['age'] = str(record.age)
    # ... the rest of the code

    # possible KeyError
    print("age attribute is", name.attrib['age'])
    # possible None
    print("age attribute is", name.get('age'))
    # will use a default
    print("no age_foo attribute, default is", name.get('age_foo', 50))
输出:
records:
[ContactRecord(first='Tom', last='Smith', age=53, email='tsmith@boo.com'), ContactRecord(first='Phil', last='Hammer', age=42, email='phammer@boo.com'), ContactRecord(first='Jessica', last='Rest', age=33, email='jrest@goo.com'), ContactRecord(first='Mary', last='Fast', age=22, email='mfast@boo.com')]
age attribute is 53
age attribute is 53
no age_foo attribute, default is 50
age attribute is 42
age attribute is 42
no age_foo attribute, default is 50
age attribute is 33
age attribute is 33
no age_foo attribute, default is 50
age attribute is 22
age attribute is 22
no age_foo attribute, default is 50
Pretty Printing of the XML Tree
• xml ElementTree 不支持漂亮的格式输出
• minidom API 可以作为一个 work-around
• lxml 版本的 ElementTree 支持漂亮的格式选项
lxml 版本的 ElementTree
https://lxml.de/xpathxslt.html
● 推荐使用 LXML,有丰富的解析器
● 是基于 libxml2 C++ library 开发的
● 是一个验证解析器: 支持 schema 和 DTDs
● 支持 full XPath 语法, 和 XSLT 能力
● 安装: pip install lxml
XLST 是 XML 样式语言 style sheet language,利用它可以将一个 XML 文档转换成 HTML
DTD 是文档类型定义,一个 DID 定义 XML 文档的结构,合法的元素及其属性
letree.tostring(lroot, pretty_print=True).decode(‘utf8’)
import lxml.etree as letree
from collections import namedtuple

# Example: XML pretty printing with lxml
lroot = letree.Element("root")

Contact = namedtuple("ContactRecord", 'first last age email')

records = [
    Contact('Tom', 'Smith', 53, 'tsmith@boo.com'),
    Contact('Phil', 'Hammer', 42, 'phammer@boo.com'),
    Contact('Mary', 'Fast', 22, 'mfast@boo.com'),
    Contact('Jessica', 'Rest', 33, 'jrest@goo.com')
]
records.sort(key=lambda a: a.age, reverse=True)

for record in records:

    contact = letree.Element('contact') # <contact>
    name    = letree.Element('name')
    first   = letree.Element('first') # <first>
    last    = letree.Element('last')
    email   = letree.Element('email')

    name.set('age', str(record.age))
    first.text = record.first
    last.text = record.last
    email.text = record.email
    name.append(first) # <name><first>John</first></name>
    name.append(last)
    contact.append(name)
    contact.append(email)
    lroot.append(contact)

print(letree.tostring(lroot, pretty_print=True).decode('utf8'))
输出:
<root>
  <contact>
    <name age="53">
      <first>Tom</first>
      <last>Smith</last>
    </name>
    <email>tsmith@boo.com</email>
  </contact>
  <contact>
    <name age="42">
      <first>Phil</first>
      <last>Hammer</last>
    </name>
    <email>phammer@boo.com</email>
  </contact>
  <contact>
    <name age="33">
      <first>Jessica</first>
      <last>Rest</last>
    </name>
    <email>jrest@goo.com</email>
  </contact>
  <contact>
    <name age="22">
      <first>Mary</first>
      <last>Fast</last>
    </name>
    <email>mfast@boo.com</email>
  </contact>
</root>
Minidom API
pretty_xml = minidom.parseString(xml_str).toprettyxml(encoding=‘utf8’)
import xml.etree.cElementTree as etree
from xml.etree.cElementTree import ElementTree
from xml.etree.cElementTree import Element
from collections import namedtuple
from xml.dom import minidom
root = Element('contacts') # <contacts>
tree = ElementTree(root)
# create ContactRecord class, its fields are first, last, age and email
Contact = namedtuple("ContactRecord", 'first last age email')
# Information to populate XML tree with
records = [
Contact('Tom', 'Smith', 53, 'tsmith@boo.com'),
Contact('Phil', 'Hammer', 42, 'phammer@boo.com'),
Contact('Mary', 'Fast', 22, 'mfast@boo.com'),
Contact('Jessica', 'Rest', 33, 'jrest@goo.com')
]
records.sort(key=lambda a: a.age, reverse=True)
print("records:\n{}".format(records))
# Now build and append nodes to the XML tree:
for record in records:
contact = Element('contact') # <contact>
name = Element('name')
first = Element('first') # <first>
last = Element('last')
email = Element('email')
name.attrib = {'age': str(record.age)} # < name age='43'>
first.text = record.first
last.text = record.last
email.text = record.email
name.append(first) # <name><first>John</first></name>
name.append(last)
contact.append(name)
contact.append(email)
root.append(contact)
xml_str = etree.tostring(root)
pretty_xml = minidom.parseString(xml_str).toprettyxml(encoding='utf8')
print(pretty_xml.decode())
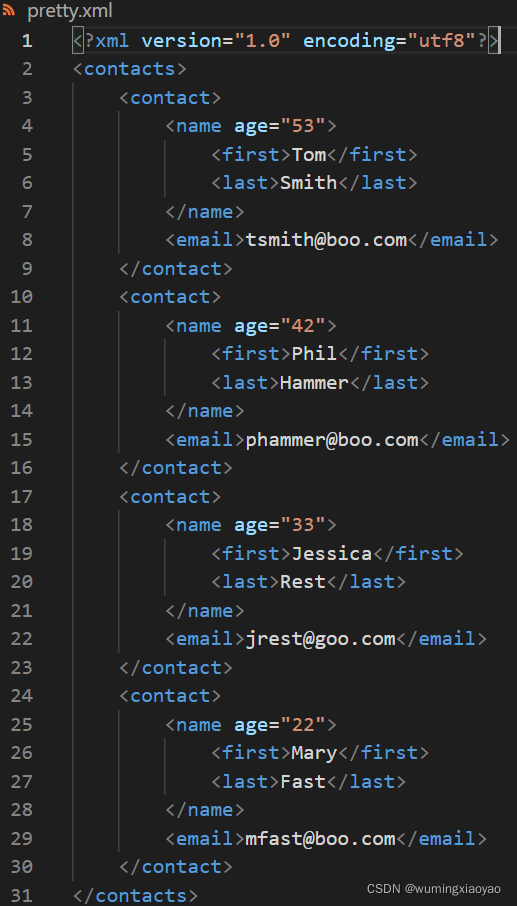
with open("pretty.xml", 'w') as f:
f.write(pretty_xml.decode())
输出:
records:
[ContactRecord(first='Tom', last='Smith', age=53, email='tsmith@boo.com'), ContactRecord(first='Phil', last='Hammer', age=42, email='phammer@boo.com'), ContactRecord(first='Jessica', last='Rest', age=33, email='jrest@goo.com'), ContactRecord(first='Mary', last='Fast', age=22, email='mfast@boo.com')]
<?xml version="1.0" encoding="utf8"?>
<contacts>
        <contact>
                <name age="53">
                        <first>Tom</first>
                        <last>Smith</last>
                </name>
                <email>tsmith@boo.com</email>
        </contact>
        <contact>
                <name age="42">
                        <first>Phil</first>
                        <last>Hammer</last>
                </name>
                <email>phammer@boo.com</email>
        </contact>
        <contact>
                <name age="33">
                        <first>Jessica</first>
                        <last>Rest</last>
                </name>
                <email>jrest@goo.com</email>
        </contact>
        <contact>
                <name age="22">
                        <first>Mary</first>
                        <last>Fast</last>
                </name>
                <email>mfast@boo.com</email>
        </contact>
</contacts>
生成的 pretty.xml 内容:
xml ElementTree 解析 XML
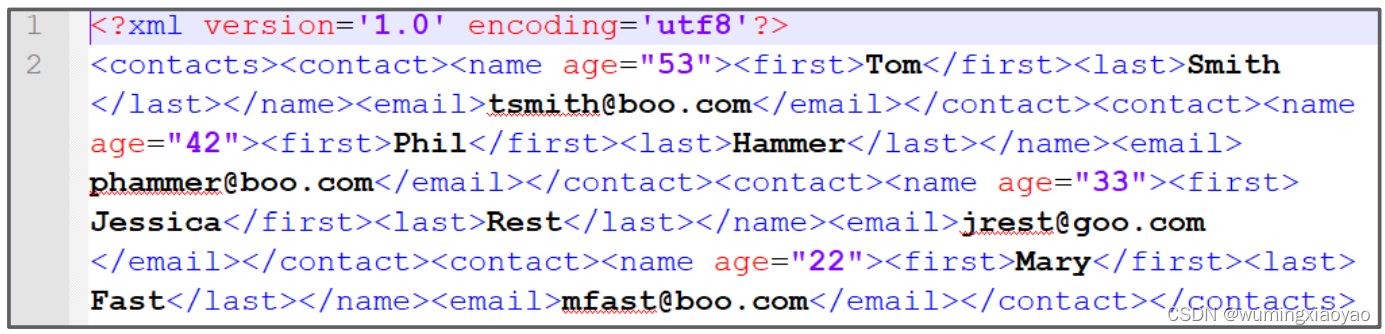
results.xml 内容:
<?xml version='1.0' encoding='utf8'?>
<contacts><contact><name age="53"><first>Tom</first><last>Smith</last></name><email>tsmith@boo.com</email></contact><contact><name age="42"><first>Phil</first><last>Hammer</last></name><email>phammer@boo.com</email></contact><contact><name age="33"><first>Jessica</first><last>Rest</last></name><email>jrest@goo.com</email></contact><contact><name age="22"><first>Mary</first><last>Fast</last></name><email>mfast@boo.com</email></contact></contacts>
解析 results.xml 内容
from xml.etree.cElementTree import ElementTree
from collections import namedtuple

Contact = namedtuple('ContactRecord', 'first last age email')
tree = ElementTree().parse('results.xml')
contacts = []

for contact in tree.getiterator('contact'):
    first = contact.find('.//first').text
    last = contact.find('.//last').text
    age = contact.find('./name').get('age')
    email = contact.find('.//email').text
    contacts.append(Contact(first, last, age, email))
print(contacts)
输出:
[ContactRecord(first='Tom', last='Smith', age='53', email='tsmith@boo.com'), ContactRecord(first='Phil', last='Hammer', age='42', email='phammer@boo.com'), ContactRecord(first='Jessica', last='Rest', age='33', email='jrest@goo.com'), ContactRecord(first='Mary', last='Fast', age='22', email='mfast@boo.com')]
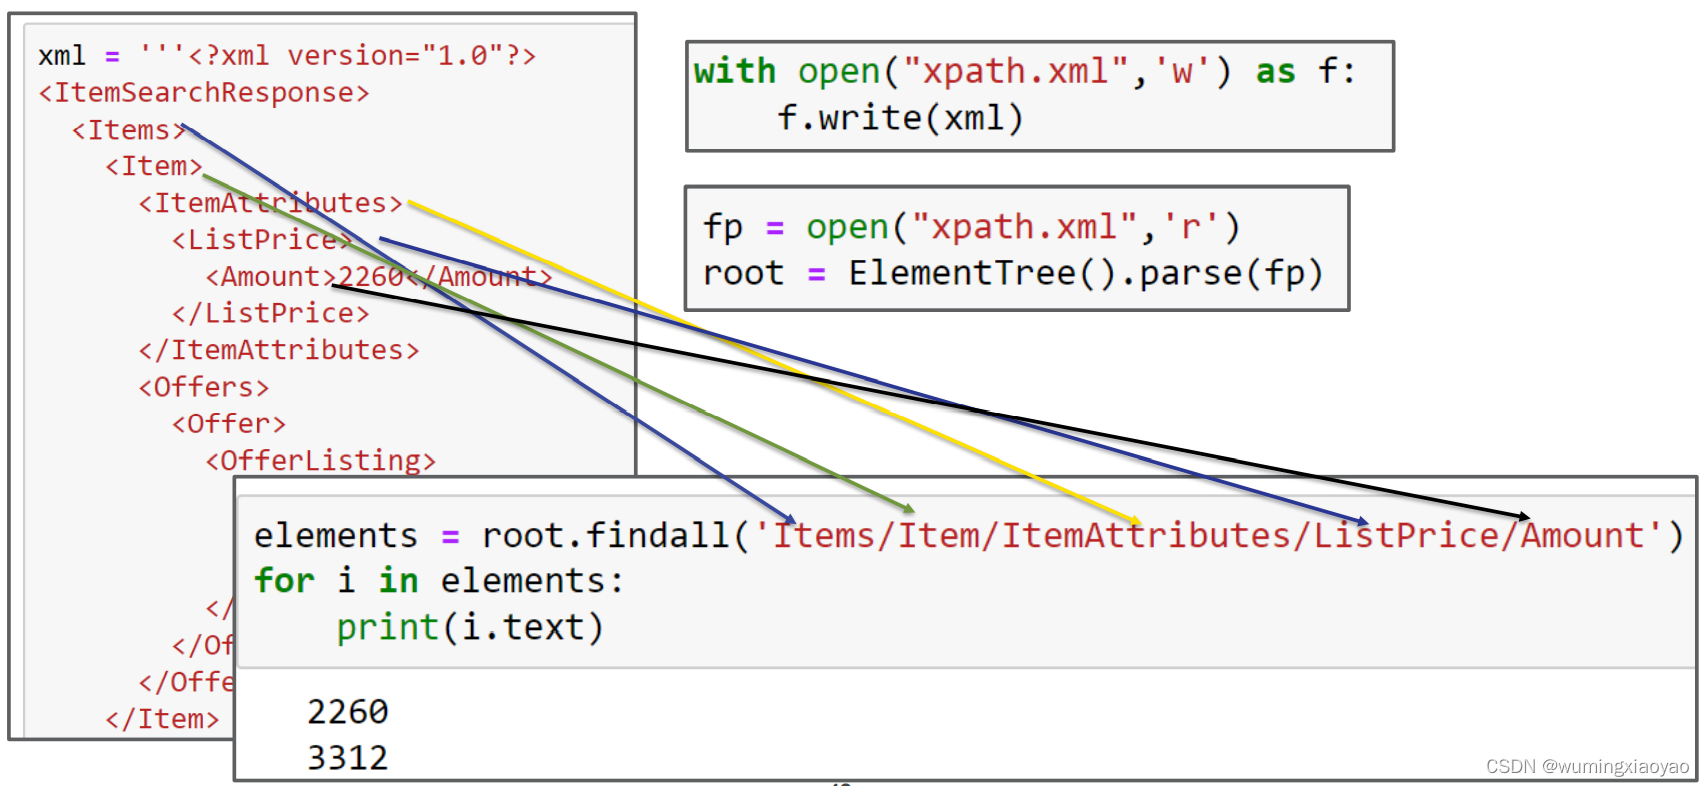
XPath 遍历 XML 例子
from xml.etree.cElementTree import ElementTree

xml = '''<?xml version="1.0"?>
<ItemSearchResponse>
  <Items>
    <Item>
      <ItemAttributes>
        <ListPrice>
          <Amount>2260</Amount>
        </ListPrice>
      </ItemAttributes>
      <Offers>
        <Offer>
          <OfferListing>
            <Price>
              <Amount>1853</Amount>
            </Price>
          </OfferListing>
        </Offer>
      </Offers>
    </Item>
        <Item>
      <ItemAttributes>
        <ListPrice>
          <Amount>3312</Amount>
        </ListPrice>
      </ItemAttributes>
      <Offers>
        <Offer>
          <OfferListing>
            <Price>
              <Amount>1853</Amount>
            </Price>
          </OfferListing>
        </Offer>
      </Offers>
    </Item>
  </Items>
</ItemSearchResponse>'''

with open("xpath.xml",'w') as f:
    f.write(xml)

fp = open("xpath.xml",'r')
root = ElementTree().parse(fp)
elements = root.findall('Items/Item/ItemAttributes/ListPrice/Amount')
for i in elements:
    print(i.text)
输出:
2260
3312
处理 XML Exceptions
XML 操作可能会抛出异常,所以需要用 try-except 来处理异常。
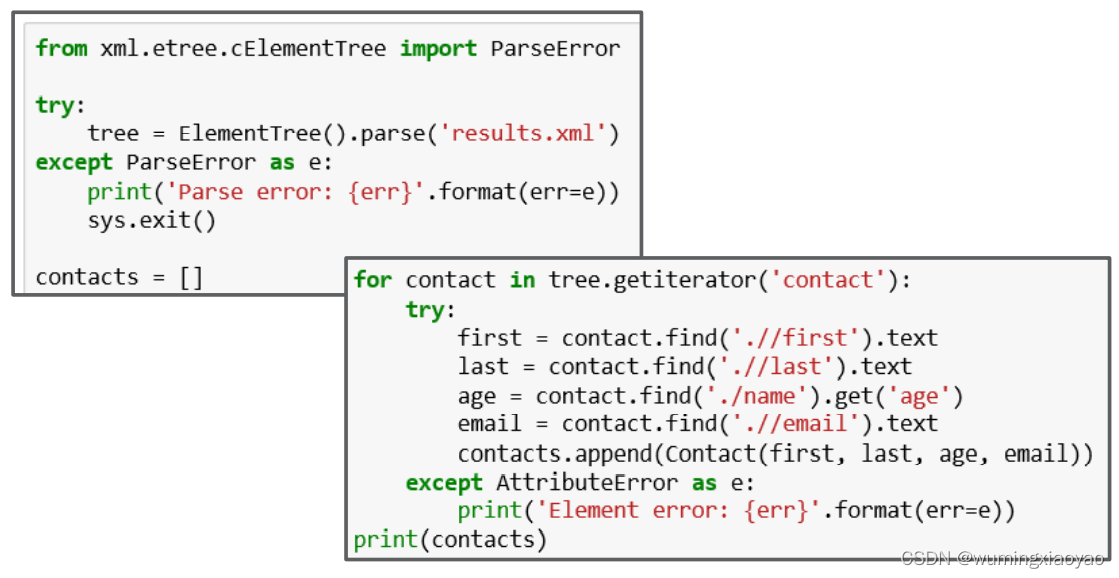
举例:
from xml.etree.cElementTree import ElementTree
from xml.etree.cElementTree import ParseError
from collections import namedtuple
import sys

try:
    tree = ElementTree().parse('results.xml')
except ParseError as e:
    print('Parse error: {err}'.format(err=e))
    sys.exit()

contacts = []
Contact = namedtuple('ContactRecord', 'first last age email')

for contact in tree.getiterator('contact'):
    try:
        first = contact.find('.//first').text
        last = contact.find('.//last').text
        age = contact.find('./name').get('age')
        email = contact.find('.//email').text
        contacts.append(Contact(first, last, age, email))
    except AttributeError as e:
        print('Element error: {err}'.format(err=e))
print(contacts)
输出:
[ContactRecord(first='Tom', last='Smith', age='53', email='tsmith@boo.com'), ContactRecord(first='Phil', last='Hammer', age='42', email='phammer@boo.com'), ContactRecord(first='Jessica', last='Rest', age='33', email='jrest@goo.com'), ContactRecord(first='Mary', last='Fast', age='22', email='mfast@boo.com')]
读取 XML 转换成 Pandas DataFrame
from xml.etree.cElementTree import ElementTree
from xml.etree.cElementTree import ParseError
import pandas as pd
import sys

cols = ['first', 'last','age', 'email']

xml_df = pd.DataFrame(columns = cols,dtype=str)

try:
    tree = ElementTree().parse('results.xml')
except ParseError as e:
    print('Parse error: {err}'.format(err=e))
    sys.exit()

for contact in tree.getiterator('contact'):
    try:
        first = contact.find('.//first').text
        last = contact.find('.//last').text
        age = contact.find('./name').get('age')
        email = contact.find('.//email').text
        xml_df = xml_df.append(
            pd.Series([first, last, age, email],index=cols),
            ignore_index=True)
    except AttributeError as e:
        print('Element error: {err}'.format(err=e))

print("xml_df:\n{}".format(xml_df))
输出:
xml_df:
     first    last age            email
0      Tom   Smith  53   tsmith@boo.com
1     Phil  Hammer  42  phammer@boo.com
2  Jessica    Rest  33    jrest@goo.com
3     Mary    Fast  22    mfast@boo.com
用 xmltodict 转换 XML 成 JSON
• pip install xmltodict
• read XML to OrderedDict
有关 JSON 和 Python Object 序列化和反序列化,请参考Python JSON 操作 - JSON 与 Python 对象,自定义对象 之间的互相转化
解析 results.xml 成 JSON 格式:
<?xml version='1.0' encoding='utf8'?>
<contacts><contact><name age="53"><first>Tom</first><last>Smith</last></name><email>tsmith@boo.com</email></contact><contact><name age="42"><first>Phil</first><last>Hammer</last></name><email>phammer@boo.com</email></contact><contact><name age="33"><first>Jessica</first><last>Rest</last></name><email>jrest@goo.com</email></contact><contact><name age="22"><first>Mary</first><last>Fast</last></name><email>mfast@boo.com</email></contact></contacts>
import xmltodict
import json

with open('results.xml') as f:
    xml_input = f.read()

ordered_dict_object_from_xml = xmltodict.parse(xml_input)
print("ordered_dict_object_from_xml:\n{}".format(ordered_dict_object_from_xml))

# serialize ordered_dict_object to json str
json_str_from_xml = json.dumps(ordered_dict_object_from_xml)
print("json_str_from_xml:\n{}".format(json_str_from_xml))

# deserialize json str to python object
json_from_xml = json.loads(json_str_from_xml)
print("json_from_xml:\n{}".format(json_from_xml))
输出:
ordered_dict_object_from_xml:
OrderedDict([('contacts', OrderedDict([('contact', [OrderedDict([('name', OrderedDict([('@age', '53'), ('first', 'Tom'), ('last', 'Smith')])), ('email', 'tsmith@boo.com')]), OrderedDict([('name', OrderedDict([('@age', '42'), ('first', 'Phil'), ('last', 'Hammer')])), ('email', 'phammer@boo.com')]), OrderedDict([('name', OrderedDict([('@age', '33'), ('first', 'Jessica'), ('last', 'Rest')])), ('email', 'jrest@goo.com')]), OrderedDict([('name', OrderedDict([('@age', '22'), ('first', 'Mary'), ('last', 'Fast')])), ('email', 'mfast@boo.com')])])]))])
json_str_from_xml:
{"contacts": {"contact": [{"name": {"@age": "53", "first": "Tom", "last": "Smith"}, "email": "tsmith@boo.com"}, {"name": {"@age": "42", "first": "Phil", "last": "Hammer"}, "email": "phammer@boo.com"}, {"name": {"@age": "33", "first": "Jessica", "last": "Rest"}, "email": "jrest@goo.com"}, {"name": {"@age": "22", "first": "Mary", "last": "Fast"}, "email": "mfast@boo.com"}]}}
json_from_xml:
{'contacts': {'contact': [{'name': {'@age': '53', 'first': 'Tom', 'last': 'Smith'}, 'email': 'tsmith@boo.com'}, {'name': {'@age': '42', 'first': 'Phil', 'last': 'Hammer'}, 'email': 'phammer@boo.com'}, {'name': {'@age': '33', 'first': 'Jessica', 'last': 'Rest'}, 'email': 'jrest@goo.com'}, {'name': {'@age': '22', 'first': 'Mary', 'last': 'Fast'}, 'email': 'mfast@boo.com'}]}}


 1351
1351

 被折叠的 条评论
为什么被折叠?
被折叠的 条评论
为什么被折叠?
 到【灌水乐园】发言


