


 本文介绍了如何在Vue.js应用中集成vue-context库来创建右键菜单,并展示了具体的使用步骤,包括安装依赖、定义菜单项、监听打开和关闭事件,以及将菜单与图层操作结合。此外,还提供了部分Vue组件和样式配置的示例代码,帮助读者理解如何在实际项目中实现图层管理功能。
一、引入依赖
npm i vue-context-全局安装
import 'vue-context/dist/css/vue-context.css';//引入右击菜单
二、使用
//右键菜单
import ContextMenu from 'vue-context';

//先在当前文件中去引入
components: {

    ContextMenu,

  },
<template>
<div id="app">
<!-- 图层列表 -->
<!-- 操作面板 -->
<!-- 样式配置区域 -->
<!-- <style-sider></style-sider> -->
<!-- 右键菜单 -->
<Context-menu ref="contextMenu">
<li>
<a href="#" @click.prevent="onLayerTop">置顶</a>
</li>
<li>
<a href="#" @click.prevent="onLayerBottom">置底</a>
</li>
<li>
<a href="#" @click.prevent="onLayerUp">上移图层</a>
</li>
<li>
<a href="#" @click.prevent="onLayerDown">下移图层</a>
</li>
<li>
<a href="#" @click.prevent="onLayerRemove">删除</a>
</li>
<!-- 可能会冒泡加stop -->
</Context-menu>
<!-- 对齐线 纵向 -->
<!-- <div></div> -->
</div>
</template>三、打开于关闭事件
1. <Context-menu ref="contextMenu">写入的ref要有
2.
this.$refs.contextMenu.close()//关闭右键菜单
this.$refs.contextMenu.open(e);//打开右键菜单
3.我们封装打开菜单的方法塞给画布中显示的图层,这样右击就可以出现菜单
@contextmenu.native.prevent="onContextMenuOpen($event, item)"这里要注意要添加native.prevent意思是组件要使用native,prevent阻止默认事件
四、代码
<template>
<div id="app">
<!-- 图层列表 -->
<el-tabs v-model="activeName" class="sidebar">
<el-tab-pane label="图层列表" name="layer">
<!-- 图层列表 -->
<div class="layer" v-for="item in list" :key="item.id">
{{ item.label }}
</div>
</el-tab-pane>
<el-tab-pane label="组件列表" name="widget">
<Widget-List :list="widgetList" @onWidgetMouseDown="onWidgetMouseDown" />
</el-tab-pane>
</el-tabs>
<!-- 操作面板 -->
<div class="panel"
@dragover.prevent
@drop="onDrop" >
<Drageer v-for="(item, i) in list"
:key="item.id"
ref="widget"
class="box"
:x="item.x"
:y="item.y"
:z="item.z"
:w="item.w"
:h="item.h"
@contextmenu.native.prevent="onContextMenuOpen($event, item)"
>
<component :value="item.value" class="inner-widget" :is="item.component"
:styles="item.styles" />
</Drageer>
</div>
<!-- 样式配置区域 -->
<!-- <style-sider></style-sider> -->
<!-- 右键菜单 -->
<Context-menu ref="contextMenu">
<li>
<a href="#" @click.prevent="onLayerTop">置顶</a>
</li>
<li>
<a href="#" @click.prevent="onLayerBottom">置底</a>
</li>
<li>
<a href="#" @click.prevent="onLayerUp">上移图层</a>
</li>
<li>
<a href="#" @click.prevent="onLayerDown">下移图层</a>
</li>
<li>
<a href="#" @click.prevent="onLayerRemove">删除</a>
</li>
<!-- 可能会冒泡加stop -->
</Context-menu>
<!-- 对齐线 纵向 -->
<!-- <div></div> -->
</div>
</template>
<script>
let currentId = 0; //id计数器
let widgetX = 0;//差值
let widgetY = 0;//差值
let currentWidget = null;//获取当前点击的图层数据
//右键菜单
import ContextMenu from 'vue-context';
//出现在panel上的组件
import BarChart from '@/components/bar-chart'
import AreaChart from '@/components/area-chart'
import CustomText from '@/components/custom-text'
import CustomVideo from '@/components/custom-video'
import MianjiChart from '@/components/mianji-chart'
//左侧小组件列表
import WidgetList from '@/components/widget-list/'
//静态配置
import * as CONFIG from '@/components/constants/config'
export default {
name: 'App',
components: {
WidgetList,
BarChart,
AreaChart,
CustomText,
CustomVideo,
MianjiChart,
ContextMenu,
},
data(){
return{
activeName:'widget',
list:[],
widgetList: CONFIG.WIDGET_LTST,//组件的数据结构
}
},
methods:{
//放置组件
onDrop(e,i){
//放置的距离左侧的距离-鼠标落下鼠标距离左侧的距离=当前box的x轴位置
let x = e.offsetX - widgetX;
let y = e.offsetY - widgetY;
if (i !== undefined) {
x += this.list[i].x;
y += this.list[i].y;
}
const newItem = ({
id: currentId++,//key绑定id
x,
y,
z: !this.list.length ? 0 : Math.max(...this.list.map(item => item.z)) + 1,//因为一开是空 所以给个默认值0
...currentWidget.default,
// w:this.currentWidget.w,//盒子初始值宽
// h:this.currentWidget.h,
label: currentWidget.label,//文字
component: currentWidget.component, // 新增的组件名
type: currentWidget.type,//新增组件的类型
styles: currentWidget.styles,//新增组件的样式
});
this.list.push(newItem)
// this.clickDrageeronFoucus(newItem)
this.$refs.contextMenu.close()//关闭右键菜单
},
//在小组件鼠标落下的时候
onWidgetMouseDown(e, widget) {
//获取 鼠标距离左侧的距离
widgetX = e.offsetX;
widgetY = e.offsetY;
currentWidget = widget;//当前点击的图层数据赋值
},
//右键菜单打开事件
onContextMenuOpen(e, item) {
this.$refs.contextMenu.open(e);//打开右键菜单
},
}
}
</script>
<style>
body {
margin: 0;
}
#app {
display: flex;
width: 100vw;
height: 100vh;
/* 可视高度的多少1vh=视窗高度的1% */
}
.sidebar {
width: 200px;
background: #e9e9e9;
}
.panel {
flex: 1;
background: #f6f6f6;
position: relative;
/* 给相对定位主要是因为 要根据panel盒子的左上角来进行绝对定位*/
}
.widget {
width: 100px;
height: 100px;
outline: 1px solid red;
font-size: 24px;
text-align: center;
line-height: 100px;
margin: 24px;
}
.box {
/* width: 100px;
height: 100px; */
/* 插件自带宽高 */
/* outline: 1px solid blue; */
outline: 1px solid rgba(0, 0, 0, 0);
position: absolute;
}
.inner-widget {
width: 100%;
height: 100%;
}
.layer {
width: 100%;
height: 50px;
line-height: 50px;
background: #e9e9e9;
}
.layer:hover {
background: #fff;
}
.currentbgm {
background: #fff;
}
.sider {
width: 200px;
background: #e9e9e9;
}
.sider.right {
width: 300px;
}
.standard-line {
width: 2px;
height: 100%;
/* background: rgba(31, 29, 29, 1); */
border-left: 2px #0f0f0f dashed;
position: absolute;
left: 200px;
}
.standard-line.correnct {
/* background: red; */
border-left: 2px red dashed;
}
#frame {
position: absolute;
outline: 2px dashed red;
}
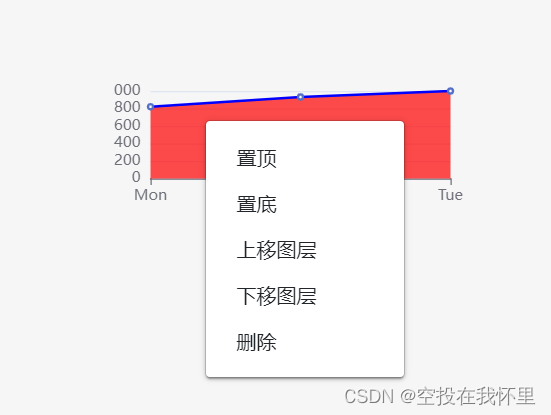
</style>五、效果展示


 被折叠的 条评论
为什么被折叠?
被折叠的 条评论
为什么被折叠?
 到【灌水乐园】发言


