


django celery简单 例子
https://docs.celeryq.dev/en/latest/django/first-steps-with-django.html
pip list
pip install Django4.2.3
pip install redis4.6.0
pip install celery5.3.1
pip install SQLAlchemy2.0.17
source demo1_venv/bin/activate
django-admin startproject proj
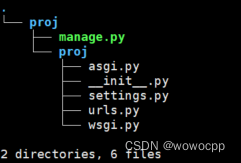
cd proj
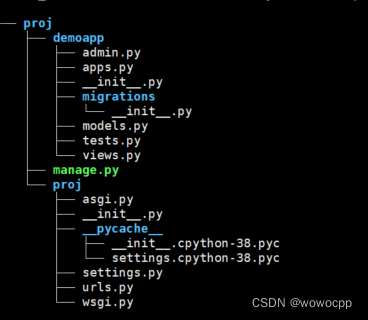
python manage.py startapp demoapp
cd proj
vi settings.py
在最前面添加下面的语句:
import os
# Celery settings

CELERY_BROKER_URL = 'redis://127.0.0.1:6379/4'

#: Only add pickle to this list if your broker is secured
#: from unwanted access (see userguide/security.html)
CELERY_ACCEPT_CONTENT = ['json']
CELERY_RESULT_BACKEND = 'redis://127.0.0.1:6379/3'
CELERY_TASK_SERIALIZER = 'json'
然后在settings的
a
INSTALLED_APPS = [
    'django.contrib.admin',
    'django.contrib.auth',
    'django.contrib.contenttypes',
    'django.contrib.sessions',
    'django.contrib.messages',
    'django.contrib.staticfiles',
    'demoapp',
]
b
vi __init__.py

# This will make sure the app is always imported when
# Django starts so that shared_task will use this app.
from .celery import app as celery_app

__all__ = ('celery_app',)
新建文件celery.py
vi celery.py
import os

from celery import Celery

# Set the default Django settings module for the 'celery' program.
os.environ.setdefault('DJANGO_SETTINGS_MODULE', 'proj.settings')

app = Celery('proj')

# Using a string here means the worker doesn't have to serialize
# the configuration object to child processes.
# - namespace='CELERY' means all celery-related configuration keys
#   should have a `CELERY_` prefix.
app.config_from_object('django.conf:settings', namespace='CELERY')

# Load task modules from all registered Django apps.
app.autodiscover_tasks()


@app.task(bind=True, ignore_result=True)
def debug_task(self):
    print(f'Request: {self.request!r}')
cd …/demoapp
vi models.py
from django.db import models
class Widget(models.Model):
    name = models.CharField(max_length=140)
cat tasks.py
# Create your tasks here

from demoapp.models import Widget

from celery import shared_task


@shared_task
def add(x, y):
    return x + y


@shared_task
def mul(x, y):
    return x * y


@shared_task
def xsum(numbers):
    return sum(numbers)


@shared_task
def count_widgets():
    return Widget.objects.count()


@shared_task
def rename_widget(widget_id, name):
    w = Widget.objects.get(id=widget_id)
    w.name = name
    w.save()
celery -A proj worker -l INFO
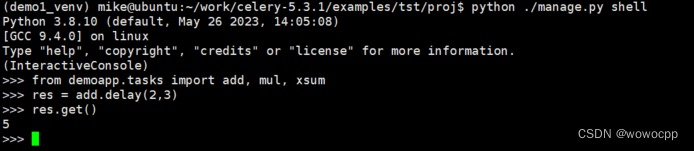
python ./manage.py shell
>>> from demoapp.tasks import add, mul, xsum
>>> res = add.delay(2,3)
>>> res.get()
5
>>>
可以使用了


 被折叠的 条评论
为什么被折叠?
被折叠的 条评论
为什么被折叠?
 到【灌水乐园】发言


