


 本文详细介绍SpringBoot的基础概念,包括其目的、优势及如何通过纯文本、Eclipse和IDEA创建首个HelloWorld项目。涵盖环境配置、Maven依赖管理、代码编写及运行步骤。
文章目录
一、概述
springboot是什么?
引用官方原话:
Spring Boot makes it easy to create stand-alone, production-grade Spring-based Applications that you can run
Spring Boot 的目的是提供一组工具,以便快速构建容易配置的 Spring 应用程序。简单一些,就是一个用来快速创建Spring应用程序的工具。
为什么要使用springboot?
因为spring要写很多配置。用springboot,它可以帮我们配置。当然我们也可以自定义配置
二、纯文本方式的helloworld
2.1 环境要求
这个参考官方文档的System requirment
2.2 maven、gradle
maven、gradle是什么?
用来进行依赖管理的构建工具。
如果上面的弄好之后,真正的HelloWorld项目开始了。
2.3 pom.xml
首先新建项目目录,然后在里面建立pom.xml
<?xml version="1.0" encoding="UTF-8"?>
 <project xmlns="http://maven.apache.org/POM/4.0.0" xmlns:xsi="http://www.w3.org/2001/XMLSchema-instance"xsi:schemaLocation="http://maven.apache.org/POM/4.0.0 http://maven.apache.org/xsd/maven-4.0.0.xsd">
<modelVersion>4.0.0</modelVersion>
<groupId>com.example</groupId>
<artifactId>myproject</artifactId>
<version>0.0.1-SNAPSHOT</version>

<!--进行依赖管理、和一些使用的maven默认配置 -->
<parent>
<groupId>org.springframework.boot</groupId>
<artifactId>spring-boot-starter-parent</artifactId>
<version>2.1.0.RELEASE</version>
</parent>

<!-- Additional lines to be added here... -->
<dependencies>

<!--它们告诉 Spring Boot,该应用程序是 Web 应用程序-->
<dependency>
<groupId>org.springframework.boot</groupId>
<artifactId>spring-boot-starter-web</artifactId>
</dependency>

</dependencies>


</project>
2.4 Example.java
pom.xml配置好后,在项目目录下新建一个目录src/main/java(这是maven的编译路径)。
import org.springframework.boot.*;
import org.springframework.boot.autoconfigure.*;
import org.springframework.web.bind.annotation.*;
@RestController//这个注解用于告诉阅读代码的人、spring这个类是一个拥有特殊决死的类
@EnableAutoConfiguration//这个注解的作用是让springboot给我们自动配置
public class Example {
@RequestMapping("/")//这个注解提供路由信息
String home() {return "Hello World!";}
public static void main(String[] args) throws Exception {
/*将程序委派给SpringApplication,SpringApplication开启应用,开启spring,自动配置Tomcat-server.
*将Example.class作为参数传递给run方法,是为了告诉SpringApplication Example是项目的基本组件。
*/
	SpringApplication.run(Example.class, args);
}

}
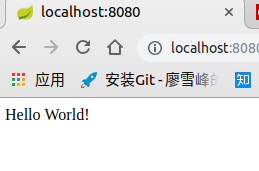
在项目根目录中打开终端,获取权限。执行命令mvn spring-boot:run
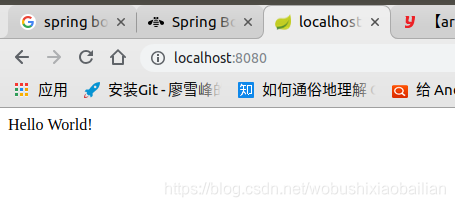
打开浏览器,访问http://localhost:8080,结果
三、 Eclipse下的springboot项目
3.1 配置maven
首先在eclipse上配置maven的安装目录
3.2 编写代码
配置pom.xml
<project xmlns="http://maven.apache.org/POM/4.0.0"
	xmlns:xsi="http://www.w3.org/2001/XMLSchema-instance"
	xsi:schemaLocation="http://maven.apache.org/POM/4.0.0 http://maven.apache.org/xsd/maven-4.0.0.xsd">
	<modelVersion>4.0.0</modelVersion>

	<groupId>com.fengli</groupId>
	<artifactId>helloWorld</artifactId>
	<version>0.0.1-SNAPSHOT</version>
	<packaging>jar</packaging>

	<name>helloWorld</name>
	<url>http://maven.apache.org</url>

	<properties>
		<project.build.sourceEncoding>UTF-8</project.build.sourceEncoding>
	</properties>
	<parent>
		<groupId>org.springframework.boot</groupId>
		<artifactId>spring-boot-starter-parent</artifactId>
		<version>2.1.0.RELEASE</version>
	</parent>

	<dependencies>
		<dependency>
			<groupId>org.springframework.boot</groupId>
			<artifactId>spring-boot-starter-web</artifactId>
		</dependency>

		<dependency>
			<groupId>junit</groupId>
			<artifactId>junit</artifactId>
			<version>3.8.1</version>
			<scope>test</scope>
		</dependency>
	</dependencies>

	<build>
		<plugins>
			<plugin>
				<groupId>org.springframework.boot</groupId>
				<artifactId>spring-boot-maven-plugin</artifactId>
			</plugin>
		</plugins>
	</build>
</project>
配置完pom.xml之后别忘了在项目上右键,update maven。还要记得将maven添加到项目的构建路径中去。
编写Example.java
package com.fengli.helloWorld;

import org.springframework.boot.*;
import org.springframework.boot.autoconfigure.*;
import org.springframework.web.bind.annotation.*;

@RestController
@EnableAutoConfiguration
public class Example {
	@RequestMapping("/")
	String home() {
		return "Hello World!";
	}

	public static void main(String[] args) throws Exception {
		SpringApplication.run(Example.class, args);
	}

}
运行
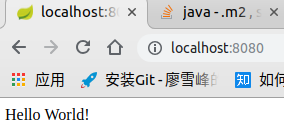
现在直接运行Example.java就行了:

在浏览器中访问http://localhost:8080
四、idea下的springboot
4.1 maven配置
在idea的settings中设置maven的安装目录
4.2 pom.xml
<?xml version="1.0" encoding="UTF-8"?>
<project xmlns="http://maven.apache.org/POM/4.0.0"
         xmlns:xsi="http://www.w3.org/2001/XMLSchema-instance"
         xsi:schemaLocation="http://maven.apache.org/POM/4.0.0 http://maven.apache.org/xsd/maven-4.0.0.xsd">
    <modelVersion>4.0.0</modelVersion>

    <groupId>com.fengli</groupId>
    <artifactId>helloWorld</artifactId>
    <version>1.0-SNAPSHOT</version>
    <!-- Inherit defaults from Spring Boot -->
    <parent>
        <groupId>org.springframework.boot</groupId>
        <artifactId>spring-boot-starter-parent</artifactId>
        <version>2.1.0.RELEASE</version>
    </parent><!-- Add typical dependencies for a web application -->
    <dependencies>
        <dependency>
            <groupId>org.springframework.boot</groupId>
            <artifactId>spring-boot-starter-web</artifactId>
        </dependency>
    </dependencies><!-- Package as an executable jar -->
    <build>
        <plugins>
            <plugin>
                <groupId>org.springframework.boot</groupId>
                <artifactId>spring-boot-maven-plugin</artifactId>
            </plugin>
        </plugins>
    </build>

</project>
4.4 运行
编写代码
package com.fengli;

import org.springframework.boot.*;
import org.springframework.boot.autoconfigure.*;
import org.springframework.web.bind.annotation.*;

@RestController
@EnableAutoConfiguration
public class Example {
    @RequestMapping("/")
    String home() {
        return "Hello World!";
    }

    public static void main(String[] args) throws Exception {
        SpringApplication.run(Example.class, args);
    }
}
配置一个application,主类是Example.class,点击运行:
在浏览器中访问http://localhost:8080/:


 484
484

 被折叠的 条评论
为什么被折叠?
被折叠的 条评论
为什么被折叠?
 到【灌水乐园】发言


