


 本文详述了在Linux服务器上安装Confluence的过程,包括JDK环境配置、MySQL安装、Confluence的安装与破解,以及安装过程中遇到的问题和解决方法,最后讨论了安全问题。
个人服务器(Linux)安装confluence
文章目录
前言
Confluence是一个适用于团队协作的文档管理软件,使用java开发的,功能方面类似Wiki,但是功能比Wiki强大。在安全性方面,Confluence具有完善和精细的权限控制,可以很好地控制用户在Wiki中创建、编辑内容和添加注释。Confluence 直观易于使用,您不需要学习任何新的语言就可以使用它,用所见即所得的方式在Confluence中添加内容。在网上看到许多使用教程,但在实际安装过程中还是会遇到各种各样的问题,在这里特别记录一下自己的安装过程,供以后使用也供各位伙计借鉴。
一、服务器配置
服务器是腾讯云轻量应用服务器,具体配置如下:

二、JDK环境安装
1.下载java8
官网手动下载:https://www.oracle.com/java/technologies/downloads/#java8

选择同意

特别说明:目前在官网下载低于jdk1.8的java jdk的时候需要登陆。
2.上传安装包
使用xftp将jdk源码包,上传到/usr/local。
【xshell、xftp阿里云分享链接「xshell_xftp」https://www.aliyundrive.com/s/DjThCLbt8PY】


3.解压缩并重命名
tar -zxvf jdk-8u321-linux-x64.tar.gz
#删掉安装包
rm -f jdk-8u181-linux-x64.tar.gz
#重命名文件夹
mv jdk1.8.0_321 jdk1.8
4.配置jdk环境变量
/etc/profile文件的改变会涉及到系统的环境,也就是有关Linux环境变量的东西。所以,我们要将jdk配置到/etc/profile,才可以在任何一个目录访问jdk。
vim /etc/profile
#按i进入编辑,在profile文件尾部添加如下内容
#JDK配置
export JAVA_HOME=/usr/local/jdk1.8
export JRE_HOME=${JAVA_HOME}/jre
export CLASSPATH=.:${JAVA_HOME}/lib:${JRE_HOME}/lib:$CLASSPATH
export JAVA_PATH=${JAVA_HOME}/bin:${JRE_HOME}/bin
export PATH=$PATH:${JAVA_PATH}
#Esc --> :wq保存并退出
#通过命令让profile文件立即生效
source /etc/profile
5.测试是否安装成功
执行命令java -version出现如下信息,表示linux下jdk8安装成功
[root@VM-4-2-centos local]# java -version
java version "1.8.0_321"
Java(TM) SE Runtime Environment (build 1.8.0_321-b07)
Java HotSpot(TM) 64-Bit Server VM (build 25.321-b07, mixed mode)
三、安装mysql
安装包:mysql-5.7.22-linux-glibc2.12-x86_64.tar
1.安装流程
卸载mariadb
[root@VM-4-2-centos home]# rpm -qa|grep mariadb
mariadb-libs-5.5.68-1.el7.x86_64
[root@VM-4-2-centos home]# rpm -e --nodeps mariadb-libs-5.5.68-1.el7.x86_64
[root@VM-4-2-centos home]# rpm -qa|grep mariadb
[root@VM-4-2-centos home]#
创建用户组和用户
Root用户是最高权限用户,所以一般都是创建用户和用户组,放置最高权限用户进行操作。
#添加用户组,命名为mysql;
groupadd mysql
#创建用户mysql,并指定所属群组为mysql,会同时创建目录
useradd -g mysql mysql
#验证
[root@VM-4-2-centos mysql]#  id mysql
uid=987(mysql) gid=1001(mysql) groups=1001(mysql)
[root@VM-4-2-centos home]# ll
total 8
drwx------ 3 lighthouse lighthouse 4096 Mar 28 17:58 lighthouse
drwx------ 2 mysql      mysql      4096 Mar 28 18:11 mysql
[root@VM-4-2-centos home]#

#设置登录密码
[root@VM-4-2-centos home]# passwd mysql
Changing password for user mysql.
New password:
Retype new password:
passwd: all authentication tokens updated successfully.
[root@VM-4-2-centos home]# ^C
[root@VM-4-2-centos home]# su mysql
[mysql@VM-4-2-centos home]$ su root
复制MySql压缩包到CentOS中
安装mysql放到/home/目录下

# 进入 /home
cd /home
#解压压缩包
tar -zxvf mysql-5.7.22-linux-glibc2.12-x86_64.tar.gz
#删除安装包
rm -f mysql-5.7.22-linux-glibc2.12-x86_64.tar.gz
#重命名
mv mysql-5.7.22-linux-glibc2.12-x86_64 /home/mysql/mysql5.7
赋权,让用户组和用户具有操作权限
#进入mysql文件夹
cd /home/mysql
#变更mysql用户组具有操作当前文件夹的权限
chgrp -R mysql .
#变更mysql用户具有操作本级目录的权限
chown -R mysql .
修改配置文件
#判断/etc/my.cnf是否存在,如果存在删除
ls /etc/my.cnf #这条命令判断是否存在
#如果存在删除,否则填过本步骤
rm /etc/my.cnf
#创建数据存储文件
mkdir /home/mysql/mysql/data
#赋予权限
[root@VM-4-2-centos mysql]# chgrp -R mysql .
[root@VM-4-2-centos mysql]# chown -R mysql .
#在 etc 下新建配置文件my.cnf
vim /etc/my.cnf
#并在该文件中添加一下代码:【改处将数据存放位置做了变更:datadir=/home/mysql/mysql/data】
[mysql]
# 设置mysql客户端默认字符集
default-character-set=utf8
socket=/home/mysql/mysql5.7/mysql.sock
[mysqld]
skip-name-resolve
#设置3306端口
port = 3306
socket=/home/mysql/mysql5.7/mysql.sock
# 设置mysql的安装目录
basedir=/home/mysql/mysql5.7
# 设置mysql数据库的数据的存放目录
datadir=/home/mysql/mysql5.7/data
# 允许最大连接数
max_connections=200
# 服务端使用的字符集默认为8比特编码的latin1字符集
character-set-server=utf8
# 创建新表时将使用的默认存储引擎
default-storage-engine=INNODB
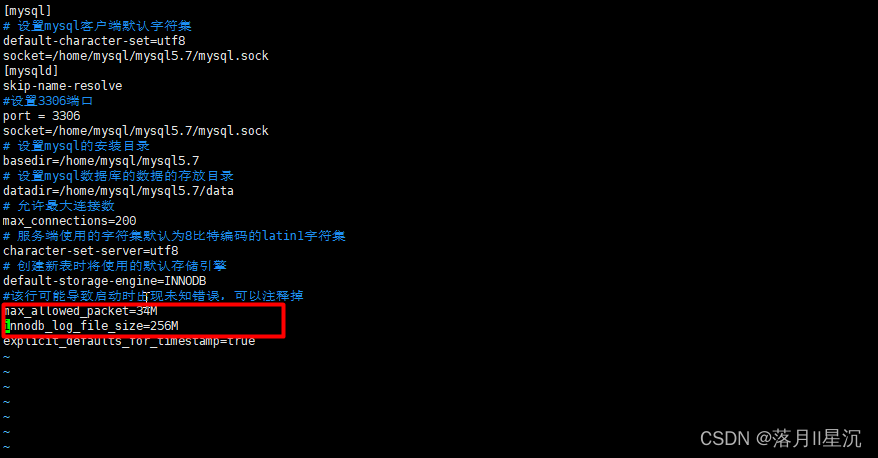
#该行可能导致启动时出现未知错误,可以注释掉
max_allowed_packet=16M
explicit_defaults_for_timestamp=true
启动数据库
#进入安装mysql软件目录
cd /home/mysql/mysql5.7
#执行启动命令
[root@VM-4-2-centos mysql5.7]# ./bin/mysqld --initialize --user=mysql --basedir=/home/mysql/mysql5.7 --datadir=/home/mysql/mysql5.7/data
2022-03-28T10:34:06.720458Z 0 [Warning] InnoDB: New log files created, LSN=45790
2022-03-28T10:34:06.789681Z 0 [Warning] InnoDB: Creating foreign key constraint system tables.
2022-03-28T10:34:06.858903Z 0 [Warning] No existing UUID has been found, so we assume that this is the first time that this server has been started. Generating a new UUID: 98777191-ae82-11ec-b18b-525400e63373.
2022-03-28T10:34:06.862773Z 0 [Warning] Gtid table is not ready to be used. Table 'mysql.gtid_executed' cannot be opened.
2022-03-28T10:34:06.863268Z 1 [Note] A temporary password is generated for root@localhost: scN?EF(2;0id
2022-03-28T10:34:07.974241Z 1 [Warning] 'user' entry 'root@localhost' ignored in --skip-name-resolve mode.
2022-03-28T10:34:07.974270Z 1 [Warning] 'user' entry 'mysql.session@localhost' ignored in --skip-name-resolve mode.
2022-03-28T10:34:07.974278Z 1 [Warning] 'user' entry 'mysql.sys@localhost' ignored in --skip-name-resolve mode.
2022-03-28T10:34:07.974290Z 1 [Warning] 'db' entry 'performance_schema mysql.session@localhost' ignored in --skip-name-resolve mode.
2022-03-28T10:34:07.974294Z 1 [Warning] 'db' entry 'sys mysql.sys@localhost' ignored in --skip-name-resolve mode.
2022-03-28T10:34:07.974303Z 1 [Warning] 'proxies_priv' entry '@ root@localhost' ignored in --skip-name-resolve mode.
2022-03-28T10:34:07.974325Z 1 [Warning] 'tables_priv' entry 'user mysql.session@localhost' ignored in --skip-name-resolve mode.
2022-03-28T10:34:07.974331Z 1 [Warning] 'tables_priv' entry 'sys_config mysql.sys@localhost' ignored in --skip-name-resolve mode.
[root@VM-4-2-centos mysql5.7]#
#记住信息中的数据库密码,登录数据库时需要用到【例如:B6!nZmAD+hdp】
2.安装完成后的额外配置
#授予my.cnf最大权限
chown 777 /etc/my.cnf
#设置开机自启动服务控制脚本:
#切换到安装目录,复制启动脚本到资源目录
cd /home/mysql/mysql5.7/
cp ./support-files/mysql.server /etc/rc.d/init.d/mysqld
#增加mysqld服务控制脚本执行权限
chmod +x /etc/rc.d/init.d/mysqld
#将mysqld服务加入到系统服务
chkconfig --add mysqld
#检查mysqld服务是否已经生效
[root@VM-4-2-centos mysql]# chkconfig --list mysqld
#命令输出类似下面的结果:
Note: This output shows SysV services only and does not include native
      systemd services. SysV configuration data might be overridden by native
      systemd configuration.

      If you want to list systemd services use 'systemctl list-unit-files'.
      To see services enabled on particular target use
      'systemctl list-dependencies [target]'.

mysqld         	0:off	1:off	2:on	3:on	4:on	5:on	6:off
#表明mysqld服务已经生效,在2、3、4、5运行级别随系统启动而自动启动,以后可以使用service命令控制mysql的启动和停止
#命令为:service mysqld start和service mysqld stop
#启动报错
[root@VM-4-2-centos mysql5.7]# service mysqld start
Starting MySQL.Logging to '/home/mysql/mysql5.7/data/VM-4-2-centos.err'.
 SUCCESS!
[root@VM-4-2-centos mysql5.7]#
#将mysql的bin目录加入PATH环境变量,编辑 ~/.bash_profile文件
[root@localhost mysql]# vim ~/.bash_profile
#在文件最后添加如下信息:
export PATH=$PATH:/usr/local/mysql/bin
#然后按ESC键 -->>:wq回车
#执行下面的命令是修改的内容立即生效:
[root@localhost mysql]# source ~/.bash_profile
登录mysql
#登录
[root@VM-4-2-centos mysql5.7]# mysql -uroot -p
Enter password:
Welcome to the MySQL monitor.  Commands end with ; or \g.
Your MySQL connection id is 2
Server version: 5.7.22

Copyright (c) 2000, 2018, Oracle and/or its affiliates. All rights reserved.

Oracle is a registered trademark of Oracle Corporation and/or its
affiliates. Other names may be trademarks of their respective
owners.
Type 'help;' or '\h' for help. Type '\c' to clear the current input statement.
mysql> use mysql;
ERROR 1820 (HY000): You must reset your password using ALTER USER statement before executing this statement.
mysql> alter user 'root'@'localhost' identified by '复杂密码';
Query OK, 0 rows affected (0.00 sec)
mysql> use mysql;
Reading table information for completion of table and column names
You can turn off this feature to get a quicker startup with -A
Database changed
mysql>
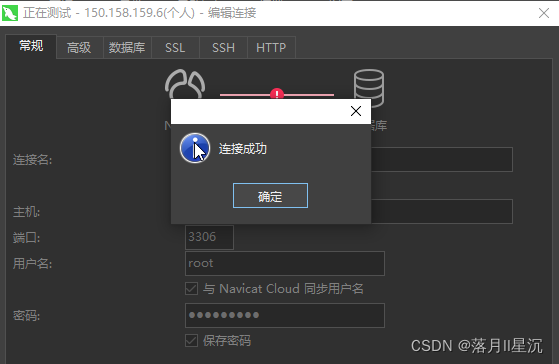
远程连接出现问题
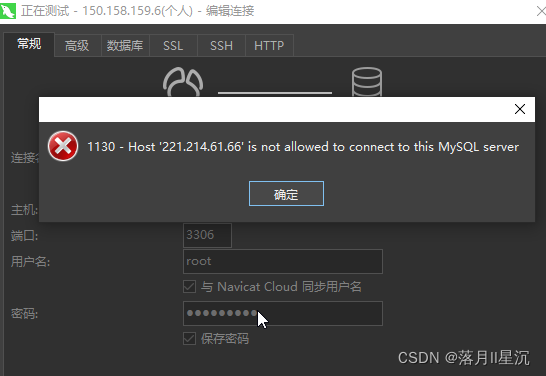
解决方案
mysql> use mysql;
Database changed
mysql> update user set host = '%' where user ='root';
Query OK, 1 row affected (0.00 sec)
Rows matched: 1  Changed: 1  Warnings: 0
mysql> flush privileges;
Query OK, 0 rows affected (0.00 sec)
mysql>
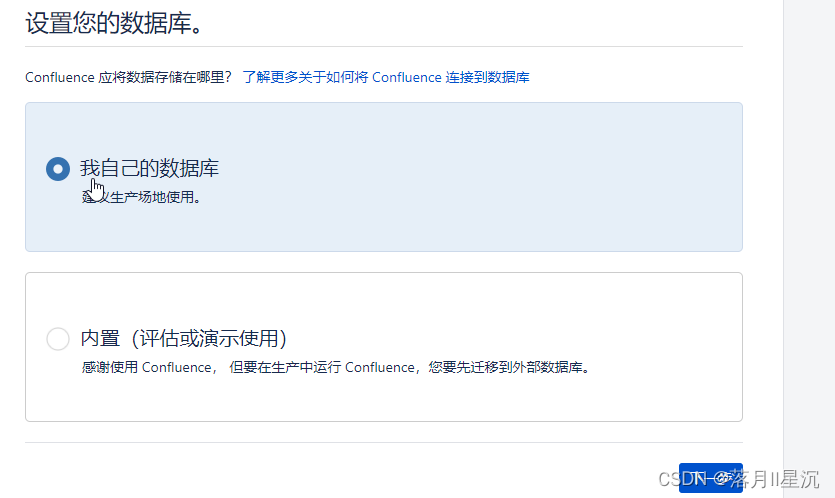
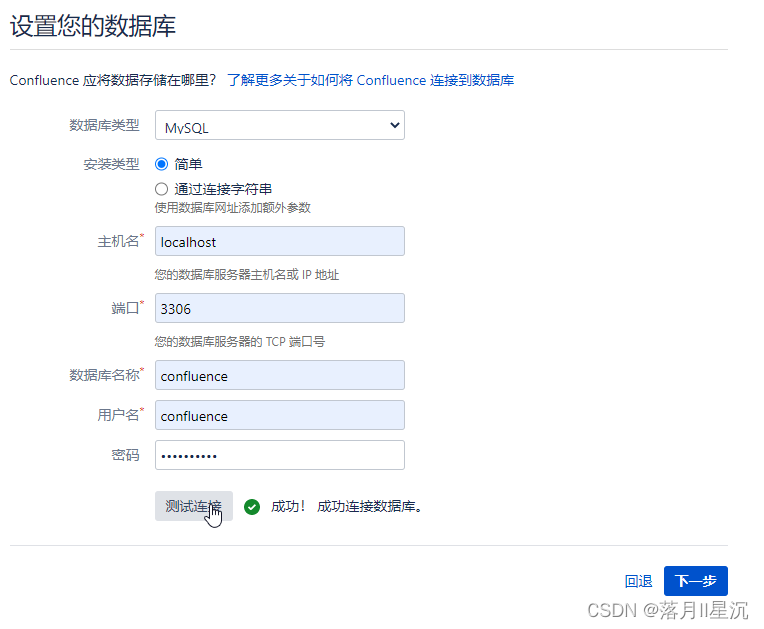
3.confluence数据库配置
创建对应的数据库并授权指定用户
[root@VM-4-2-centos mysql5.7]# mysql -uroot -p
Enter password:
Welcome to the MySQL monitor.  Commands end with ; or \g.
Your MySQL connection id is 7
Server version: 5.7.22 MySQL Community Server (GPL)
Copyright (c) 2000, 2018, Oracle and/or its affiliates. All rights reserved.
Oracle is a registered trademark of Oracle Corporation and/or its
affiliates. Other names may be trademarks of their respective
owners.
Type 'help;' or '\h' for help. Type '\c' to clear the current input statement.
mysql> create database confluence character SET utf8 COLLATE utf8_bin;
Query OK, 1 row affected (0.00 sec)
mysql> SET GLOBAL tx_isolation='READ-COMMITTED';
Query OK, 0 rows affected, 1 warning (0.00 sec)
mysql>  grant all on confluence.* to confluence@"%" identified by "复杂密码xxx";
Query OK, 0 rows affected, 1 warning (0.00 sec)
mysql> FLUSH PRIVILEGES;
Query OK, 0 rows affected (0.00 sec)
mysql>
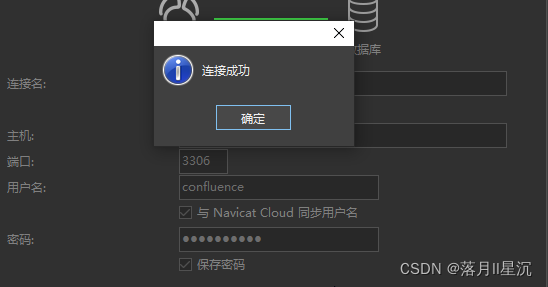
验证数据创建成功
四、安装Confluence
下载安装
去官网下载最新的安装包(传送门)。
引用一下别人的下载连接:原文章
1、请将confluence7.4破解包下载到本机电脑上
https://down.whsir.com/downloads/confluence7.4pojie.zip
2、请将java8程序下载安装到本机电脑上
https://down.whsir.com/downloads/jdk-8u172-windows-x64.exe
注:安装java用于运行confluence7.4破解程序
3、将MySQL驱动插件下载至CentOS服务器上
https://down.whsir.com/downloads/mysql-connector-java-5.1.46.tar.gz
4、在CentOS服务器上添加wlnmp一键安装包源
rpm -ivh https://mirrors.wlnmp.com/centos/wlnmp-release-centos.noarch.rpm
5、下载confluence7.4安装包至CentOS服务器上
https://down.whsir.com/downloads/atlassian-confluence-7.4.6-x64.bin
上传文件
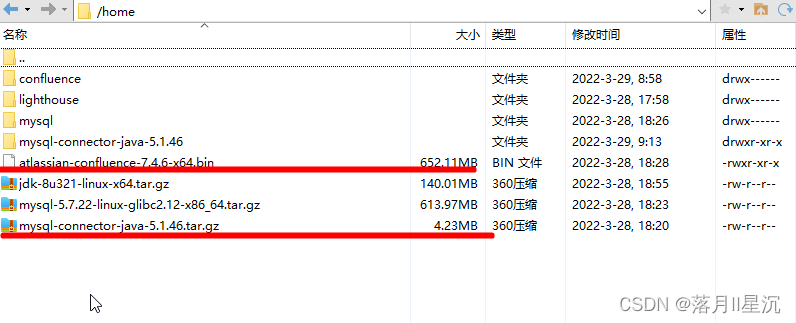
开始安装
#添加运行的权限
[root@VM-4-2-centos home]# chmod +x atlassian-confluence-7.4.6-x64.bin
#运行上述文件:
[root@VM-4-2-centos home]# ./atlassian-confluence-7.4.6-x64.bin
Unpacking JRE ...
Starting Installer ...

This will install Confluence 7.4.6 on your computer.
OK [o, Enter], Cancel [c]
o	#键盘输入回车确认
Click Next to continue, or Cancel to exit Setup.

Choose the appropriate installation or upgrade option.
Please choose one of the following:
Express Install (uses default settings) [1],
Custom Install (recommended for advanced users) [2, Enter],
Upgrade an existing Confluence installation [3]
1	#键盘输入回车确认

See where Confluence will be installed and the settings that will be used.
Installation Directory: /opt/atlassian/confluence
Home Directory: /var/atlassian/application-data/confluence
HTTP Port: 8090
RMI Port: 8000
Install as service: Yes
Install [i, Enter], Exit [e]
i	#键盘输入回车确认

Extracting files ...


Please wait a few moments while we configure Confluence.

Installation of Confluence 7.4.6 is complete
Start Confluence now?
Yes [y, Enter], No [n]
y #键盘输入回车确认

Please wait a few moments while Confluence starts up.
Launching Confluence ...

Installation of Confluence 7.4.6 is complete
Your installation of Confluence 7.4.6 is now ready and can be accessed via
your browser.
Confluence 7.4.6 can be accessed at http://localhost:8090
Finishing installation ...
[root@VM-4-2-centos home]#
# 关闭服务
sudo service confluence stop
# 启动服务
sudo service confluence start
#Confluence的卸载:
sudo /opt/atlassian/confluence/uninstall
# 手动删除两个路径
sudo rm -rf /opt/atlassian /var/atlassian
配置MySQL驱动
root@VM-4-2-centos home]# tar zxf mysql-connector-java-5.1.46.tar.gz
[root@VM-4-2-centos home]# cd mysql-connector-java-5.1.46
[root@VM-4-2-centos mysql-connector-java-5.1.46]# mv mysql-connector-java-5.1.46-bin.jar /opt/atlassian/confluence/confluence/WEB-INF/lib
[root@VM-4-2-centos mysql-connector-java-5.1.46]#
五、破解Confluence
jar包替换
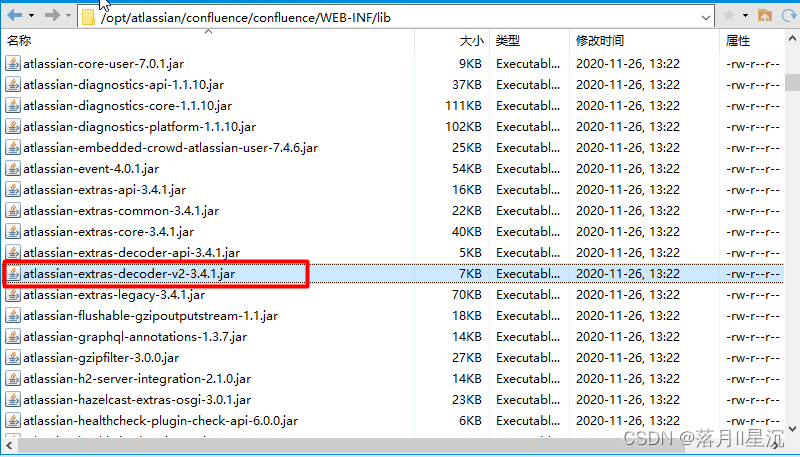
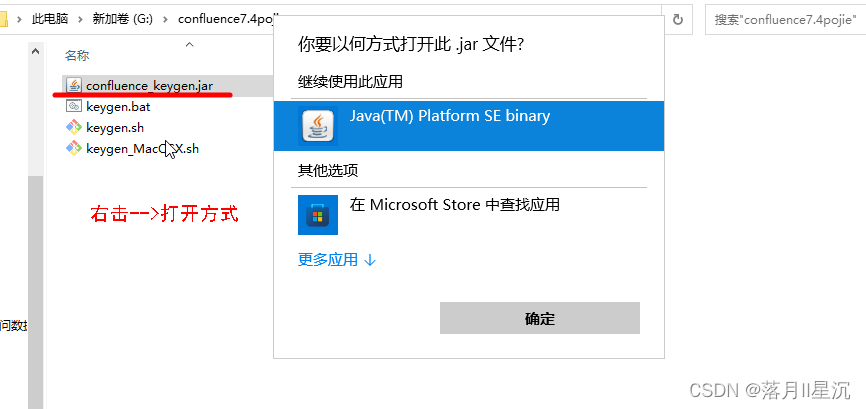
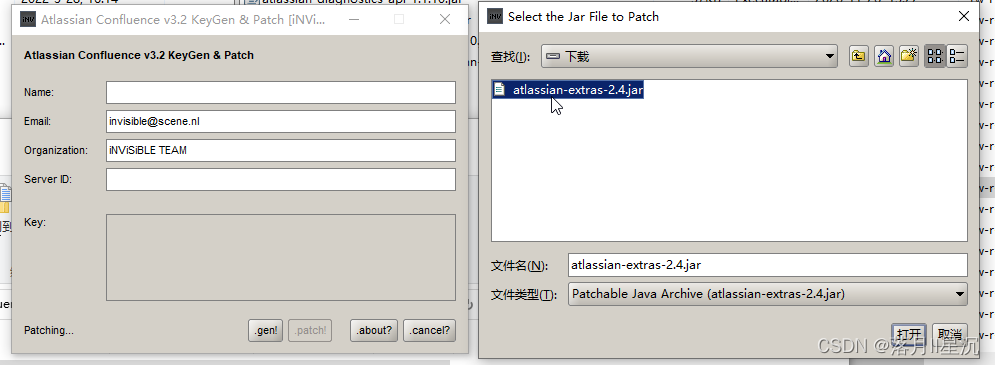
在CentOS服务器上下载/opt/atlassian/confluence/confluence/WEB-INF/lib/atlassian-extras-decoder-v2-3.4.1.jar文件到本地重命名为atlassian-extras-2.4.jar;通过java运行confluence_keygen.jar(文中最开始的那个破解包,在windows上运行,需要在windows上安装好java)选择.patch!找到刚才重命名的那个文件打开
目录:/opt/atlassian/confluence/confluence/WEB-INF/lib
文件:atlassian-extras-decoder-v2-3.4.1.jar
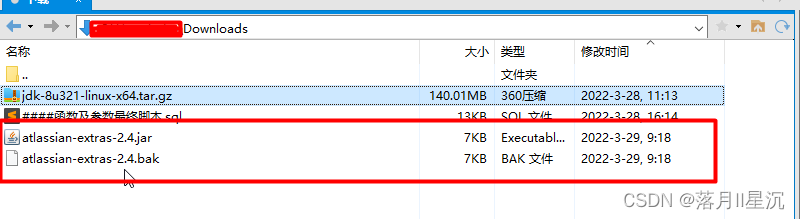
打开后在当前目录下可以看到atlassian-extras-2.4.jar和atlassian-extras-2.4.bak两个文件,这里atlassian-extras-2.4.jar已经是破解好的了,将atlassian-extras-2.4.jar名字改回atlassian-extras-decoder-v2-3.4.1.jar
然后上传回CentOS服务器/opt/atlassian/confluence/confluence/WEB-INF/lib/目录,覆盖掉原来的atlassian-extras-decoder-v2-3.4.1.jar文件
此时要重启confluence服务:
# 关闭服务
sudo service confluence stop
# 启动服务
sudo service confluence start
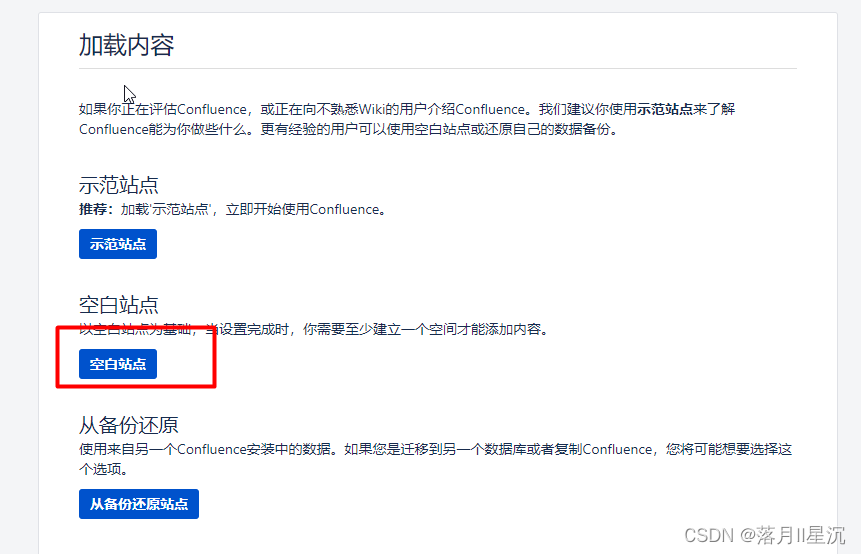
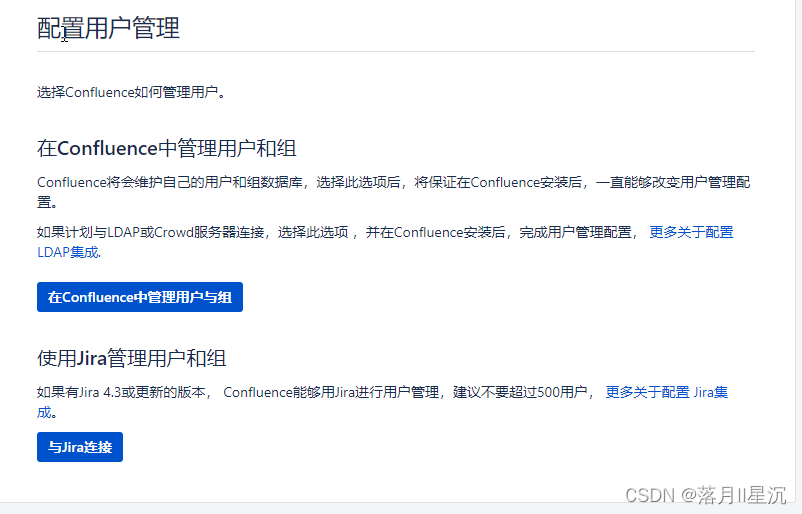
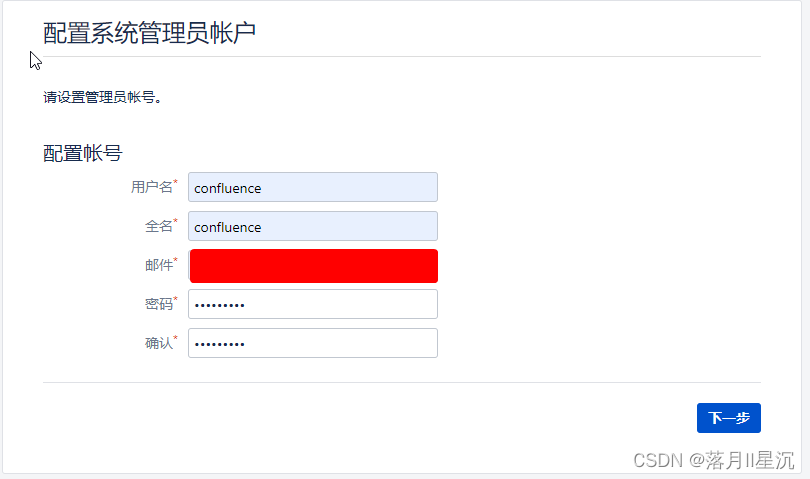
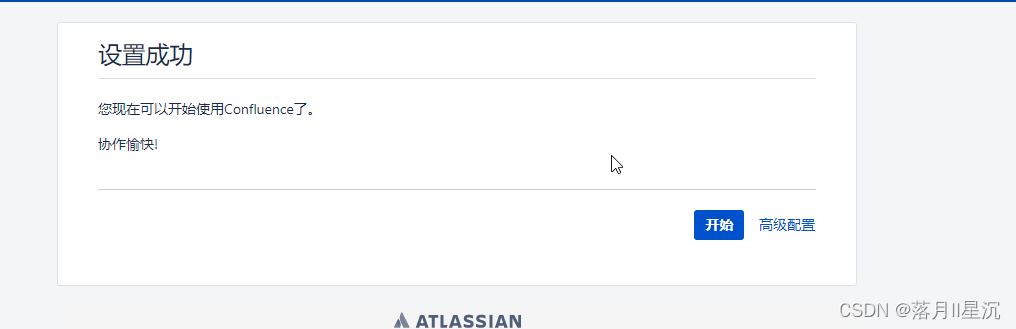
初始化设置
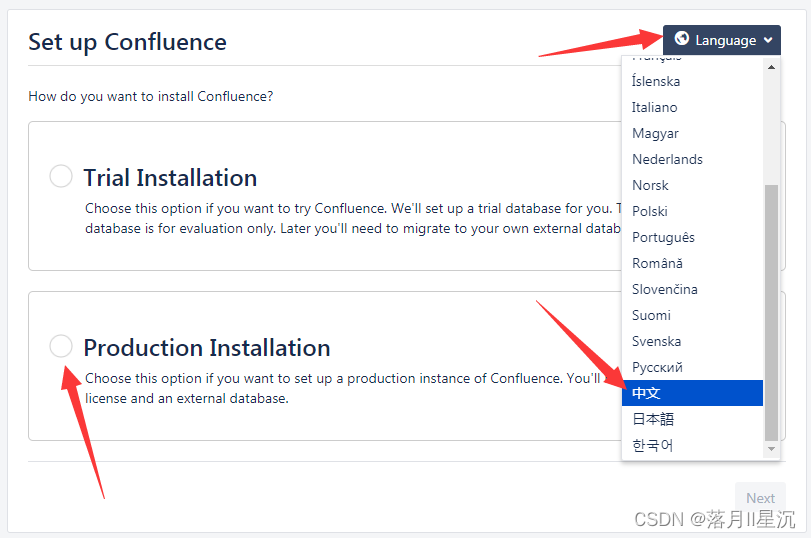
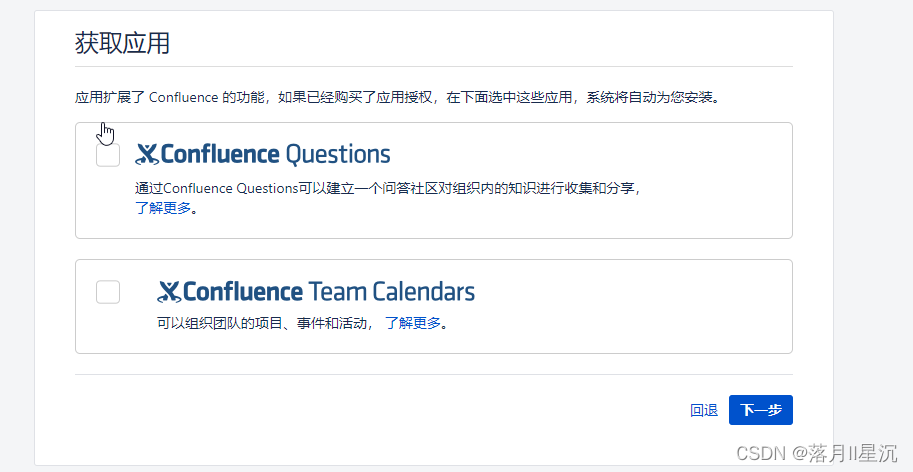
复制网页中的服务器ID,运行破解工具confluence_keygen.jar,破解复制Key到Confluence里,获得授权码,进行下一步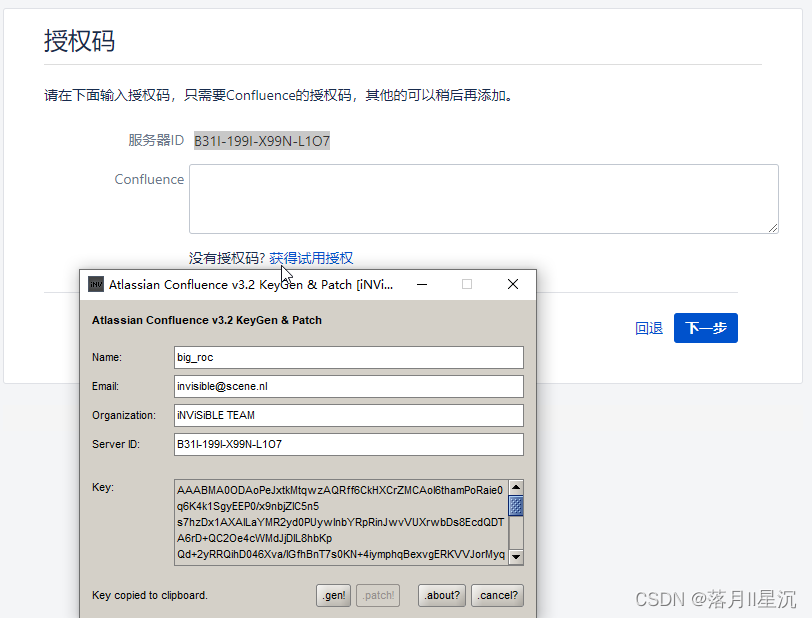
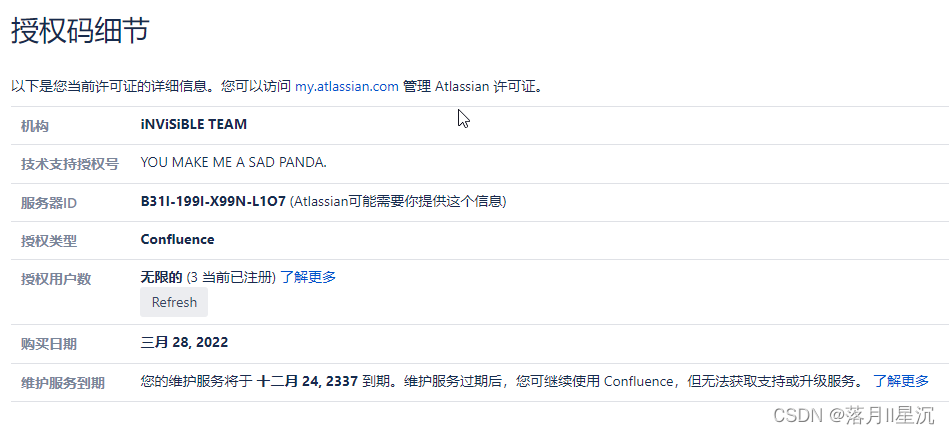
验证授权码
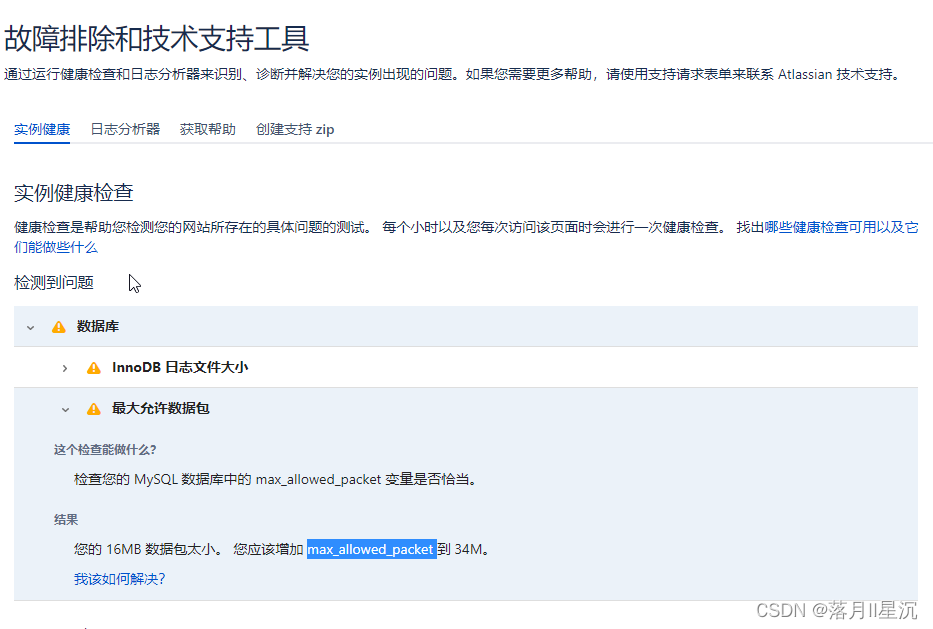
六、问题记录
七、安全问题
程序安全运行三天后发现,服务器内存、CPU全部占满,经检测感染挖矿病毒。附上处理方案:
挖矿木马自助清理手册
Linux被kdevtmpfsi 挖矿病毒入侵
处理处理kdevtmpfsi挖矿病毒以及他的守护进程kinsing
最关键还是停止服务修改端口号
总结
虽然Confluence是收费的,但是Atlassian公司将其使用门槛降低了,最低设置了10人版每年10$的授权费,企业可以根据具体的使用人数进行购买授权。
个人学习使用,这里根据网上的资源整理归档一下安装过程,仅用于个人技术储备,不做商业应用。


 2万+
2万+

 被折叠的 条评论
为什么被折叠?
被折叠的 条评论
为什么被折叠?
 到【灌水乐园】发言


