最近开始做WebService的一些项目,整理了一些自己用到的,跟大家分享下~~
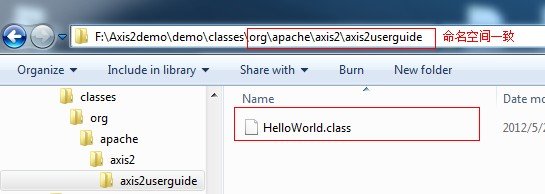
1. 新建一个项目WebService,包的命名空间为org.apache.axis2.axis2userguide,包里面有HelloWorld.java
HelloWorld.java
package org.apache.axis2.axis2userguide;
public class HelloWorld {
public String sayHello(String user) {
return user;
}
}
2. 生成WSDL文件
新建一个批处理文档,里面的内容如下:
@echo off
set JAVA_HOME=D:\Weblogic\myjavahome\jdk1.6.0_22
set AXIS2_HOME=F:\DevelopLibs\axis2-1.6.2
set CLASSPATH=F:\Axis2demo\demo\classes;%CLASSPATH%
其中,JAVA_HOME为JDK的路径,AXIS2_HOME为AXIS2的路径,CLASSPATH为HelloWorld.class的路径。请确保JDK和AXIS2配置正确。
运行%AXIS2_HOME%\bin\java2wsdl -cp . -cn org.apache.axis2.axis2userguide.HelloWorld -of axis2userguide.wsdl
运行后会生成 axis2userguide.wsdl,路径在(本例是在 F:\Axis2demo\wsdl)
3. 生成服务器端程序,运行 %AXIS2_HOME%\bin\wsdl2java.bat -uri axis2userguide.wsdl -p org.apache.axis2.axis2userguide -o build -d adb -s -wv 1.6.2 -ss -sd
运行后会生成build文件夹,路径在 F:\Axis2demo\wsdl
依次打开build\src\org\apache\axis2\axis2userguide,找到HelloWorldSkeleton.java,加入服务器端响应的逻辑代码:(浅蓝色部分为增加的逻辑代码)
HelloWorldSkeleton.java
package org.apache.axis2.call;
public class HelloWorldSkeleton {
public org.apache.axis2.call.SayHelloResponse sayHello(
org.apache.axis2.call.SayHello sayHello) {
SayHelloResponse res = new SayHelloResponse();
res.set_return(sayHello.getUser().toString() + " say hello to WebService");
return res;
}
}
在控制台,路径转到F:\Axis2demo\wsdl\build下,运行ant jar.server,运行成功后,会在build\lib下生成HelloWorld.aar
4. 部署我们的服务器端程序,拷贝HelloWorld.aar到(你的电脑Tomcat容器的安装路径)...\Apache Software Foundation\Tomcat 6.0\webapps\axis2\WEB-INF\services下,在services.list中,添加HelloWorld.aar
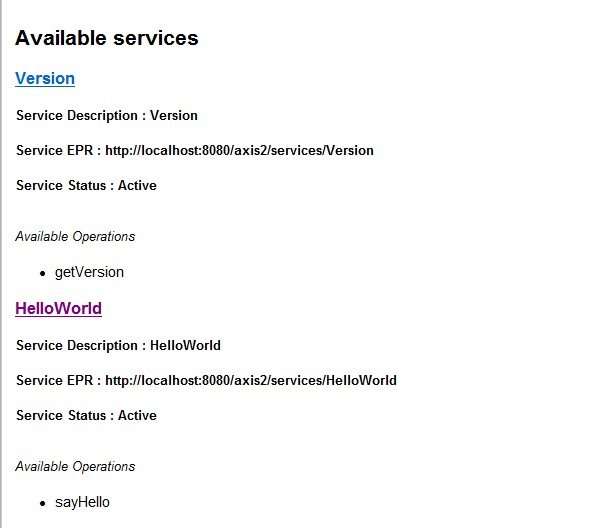
运行tomcat,在http://localhost:8080/axis2/services/listServices中会看到发布的WebService
5. 最后一步:创建客户端程序
控制台转到F:\Axis2demo\wsdl路径下,运行
%AXIS2_HOME%\bin\WSDL2Java -uri axis2userguide.wsdl -p org.apache.axis2.axis2userguide -o build -d adb -s

运行结果,会在F:\Axis2demo\wsdl\build\src\org\apache\axis2\axis2userguide下生成HelloWorldStub.java
6. 调试WebService,在F:\Axis2demo\wsdl\build\src\org\apache\axis2\axis2userguide下新建一个Client.java来call我们发布的WebService
Client.java
package org.apache.axis2.call;
public class Client {
public static void main(String[] args) {
try {
HelloWorldStub stub = new HelloWorldStub(
"http://localhost:8080/axis2/services/HelloWorld");
sayHello(stub);
} catch (Exception e) {
e.printStackTrace();
}
}
public static void sayHello(HelloWorldStub stub){
try{
SayHello req = new SayHello();
req.setUser("ZW");
SayHelloResponse res = stub.sayHello(req);
System.out.println(res.get_return().toString());
} catch(Exception e){
e.printStackTrace();
}
}
}
运行Client.java,会得到如下结果。
到此,发布WebService和Call WebService都成功!
希望对你有所帮助


 本文详细介绍了如何从零开始搭建一个WebService项目,包括项目的创建、WSDL文件的生成、服务器端程序的编写与部署以及客户端调用的过程。


 2万+
2万+

 被折叠的 条评论
为什么被折叠?


