


 本文详细介绍了如何利用Kubespray在VSphere环境下部署生产级别的Kubernetes集群,包括前置条件、CentOS系统模板准备、虚拟机配置、Kubespray安装步骤、K8s集群连接、存储类配置以及Helm的安装和配置。
基于Kubespray的生产级Kubernetes部署
0.源码地址
https://github.com/wiselyman/k8s-installation
1. 前置条件
安装EXSI(VMware vSphere Hypervisor,本例地址为:192.168.1.50):http://dl1.technet24.ir/Downlads/Software/VMware/vCenter/67u3/VMware-VMvisor-Installer-6.7.0.update03-14320388.x86_64.iso
安装VCenter(VMware vCenter Server Appliance,本例地址为:192.168.1.51):http://dl1.technet24.ir/Downloads/Software/VMware/vCenter/67u3/VMware-VCSA-all-6.7.0-14367737.iso
使用U盘将VMware-VMvisor-Installer-6.7.0.update03-14320388.x86_64.iso刻盘安装EXSI系统到一台物理机,然后打开VMware-VCSA-all-6.7.0-14367737.iso。在vcsa-ui-installer目录下按照不同的系统使用对应的界面安装VCenter。
当然如果你有直接的机器或者虚拟机也是可以的,我们只需要忽略和VMware相关的步骤即可,这次规划9台虚拟机(物理机),分别为3台master(ip:192.168.1.54-56),6台node(ip:192.168.1.57-62)。
2. 准备CentOS系统模板
-
Vsphere client下创建虚拟机目录,名称为
k8s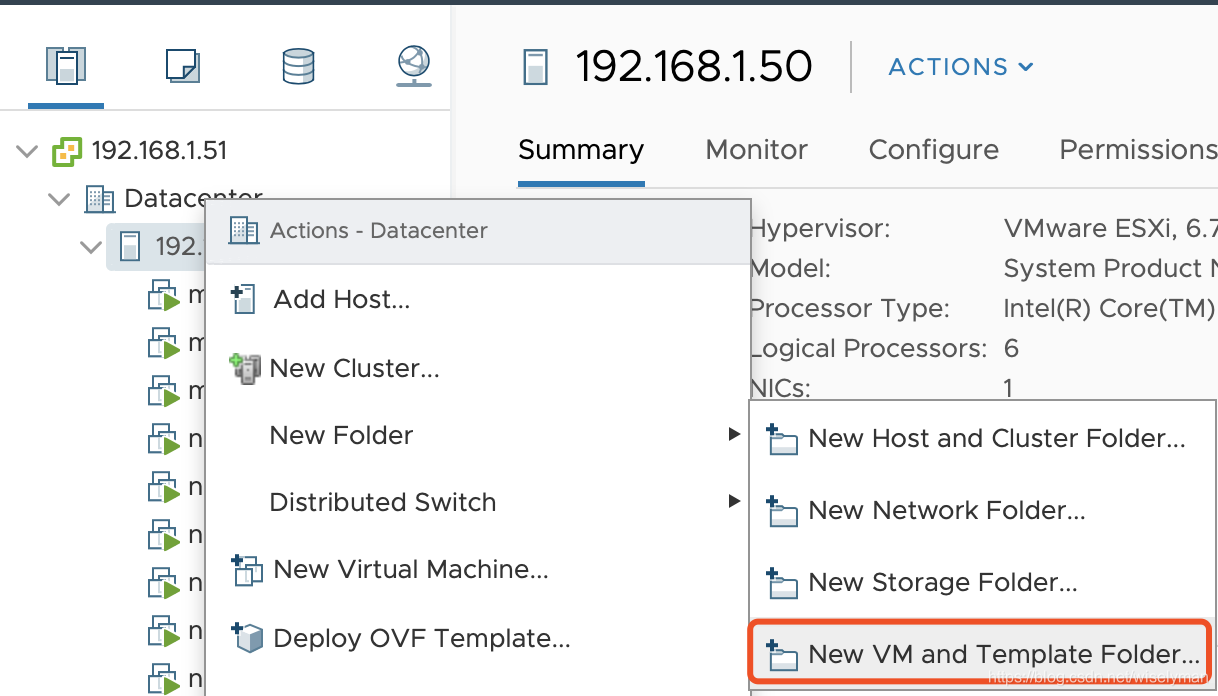
外链图片转存失败,源站可能有防盗链机制,建议将图片保存下来直接上传(img-4fH7Bcjo-1570673764176)(images/vcenter-new-folder.png)]
-
VCenter下创建CentOS虚拟机:虚拟机名称为
centos7 -
安装CentOS 7.6虚拟机
-
安装VMware Tools
yum install -y open-vm-tools -
安装govc:https://github.com/vmware/govmomi/releases
yum install wget wget https://github.com/vmware/govmomi/releases/download/prerelease-v0.21.0-58-g8d28646/govc_linux_amd64.gz gzip -d govc_linux_amd64.gz chmod +x govc_linux_amd64 mv govc_linux_amd64 /usr/local/bin/govc -
配置govc
vi .bash_profile export GOVC_URL='192.168.1.51' export GOVC_USERNAME='administrator@vsphere.local' export GOVC_PASSWORD='Wyf.38476' export GOVC_INSECURE=1 source .bash_profile -
激活虚拟机UUID,后面为虚拟机名称
govc vm.change -e="disk.enableUUID=1" -vm='centos7' -
安装perl和nettools,ansible定制虚拟机ip需使用
yum install perl net-tools -
关闭防火墙
systemctl stop firewalld && systemctl disable firewalld -
时间同步
yum -y install ntp && ntpdate ntp1.aliyun.com && systemctl start ntpd && systemctl enable ntpd -
操作机免密登陆虚拟机
产生公钥与私钥对:
ssh-keygen将本机的公钥复制到远程机器的authorized_keys文件中:
ssh-copy-id root@192.168.1.5* -
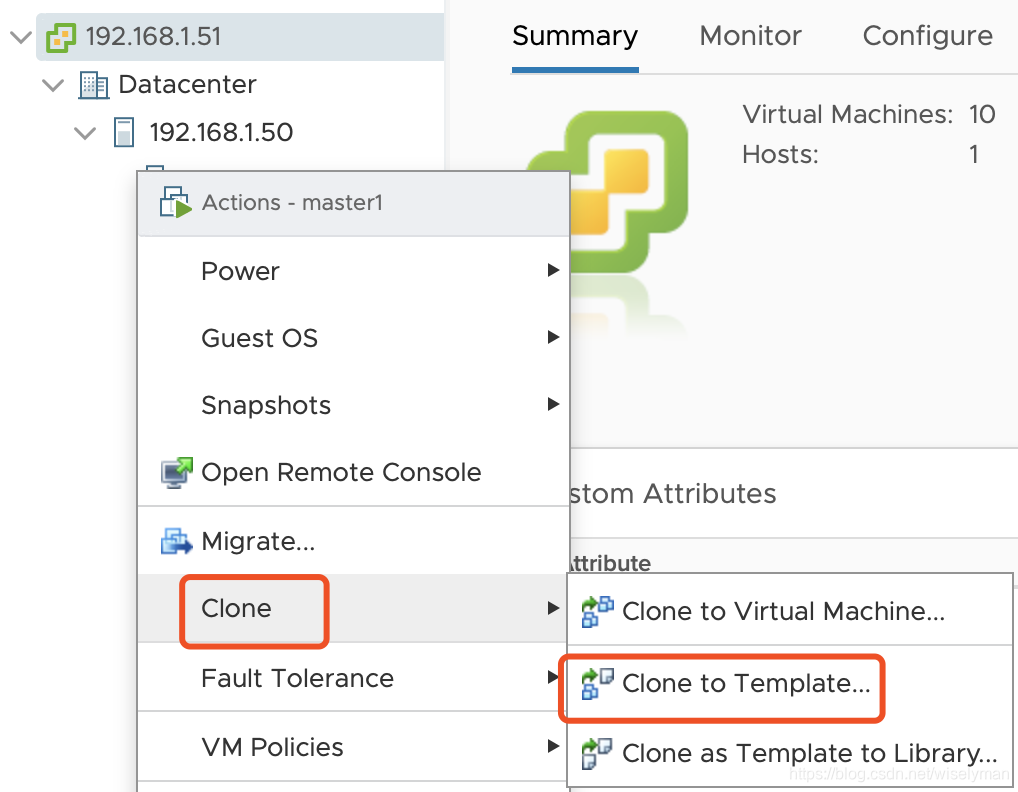
将虚拟机制成模板
3. 准备虚拟机
-
安装ansible
pip3 install PyVmomi pip3 install ansible -
编写ansible playbook:
vm.yml- hosts: 127.0.0.1 connection: local become: root gather_facts: false serial: 1 tasks: - name: Create Master Nodes vmware_guest: hostname: "{ { vcenter_hostname }}" username: "{ { vcenter_username }}" password: "{ { vcenter_password }}" validate_certs: no datacenter: "{ { datacenter }}" state: present folder: "{ { folder }}" template: "{ { template }}" name: "{ { item.key }}" cluster: "{ { cluster }}" disk: - size_gb: 30 type: thin datastore: datastore1 hardware: memory_mb: 2048 num_cpus: 2 scsi: paravirtual networks: -
 最低0.47元/天 解锁文章


 1159
1159

 被折叠的 条评论
为什么被折叠?
被折叠的 条评论
为什么被折叠?
 到【灌水乐园】发言


