


 这篇博客详细介绍了如何在Java中实现递归复制文件,包括文件复制的基本步骤、获取目录下所有子目录的逻辑以及整合代码实现。此外,还深入探讨了多线程的基本概念,如进程、线程、单核与多核CPU的区别,以及线程的创建、使用和调度。最后,列举了线程的一些常用方法。
1.递归复制文件
思路:
1.1.文件复制
本质就是文件的输入和输出
1.1完成文件输入,读取文件
1.2完成文件输出
1.3整合输入和输出完成复制
代码实现:
        try (
				FileInputStream fis = new FileInputStream("D:/a.txt");
				FileOutputStream fos = new FileOutputStream("D:/a.txt",true);
				BufferedInputStream bis = new BufferedInputStream(fis);
				BufferedOutputStream bos = new BufferedOutputStream(fos);
				){

			byte[] bytes = new byte[102400];
			int count = 0;
			while ((count=bis.read(bytes)) != -1) {
				bos.write(bytes, 0, count);
				bos.flush();
			}
		} catch (Exception e) {
			e.printStackTrace();
		}
1.2.获取目录下所有的子目录
2.1获取目录对象
2.2获取该目录下的所有直接子目录
2.3递归获取子目录下面的子目录
代码实现:
    public static void main(String[] args) {
		File file = new File("D:\\20期\\课件");
		test(file);
	}
	public static void test(File file){
		// 判断是否是文件
		if (file.isFile()) {
			System.out.println(file.getAbsolutePath());
		}else{
			// 这里说明是文件夹
			// 获取所有的子文件
			File[] files = file.listFiles();
			// 遍历每个子文件,判断是不是文件
			for (File subFile : files) {
				test(subFile);
			}
		}
	}
1.3.整合代码
3.1获取所有后代目录后,得到每一个文件对象
3,2通过文件对象就可以获取该文件的全路径
3.3有了全路径,就可以创建流对象
3.4然后就可以完成复制
代码实现:
    public static void main(String[] args) {
		File file = new File("D:\\20期\\课件");
		test(file);
		System.out.println("复制完成");
	}
	public static void test(File file){
		// 判断是否是文件
		if (file.isFile()) {
			// 获取全路径
			String filePath = file.getAbsolutePath();
			/**
			 * 注意 : 文件复制的时候,目标路径和原路径 不能一样
			 */
			// 目标目录,复制到E盘,进行拼接字符串
			String newFilePath = "E"+filePath.substring(1);

			// 判断目标目录是否存在
			// 获取目标文件对象
			File newFile = new File(newFilePath);
			// 获取父文件对象
			File parentFile = newFile.getParentFile();
			// 不存在就创建
			if (!parentFile.exists()) {
				parentFile.mkdirs();
			}
			try (
					FileInputStream fis = new FileInputStream(filePath);
					FileOutputStream fos = new FileOutputStream(newFilePath);
					BufferedInputStream bis = new BufferedInputStream(fis);
					BufferedOutputStream bos = new BufferedOutputStream(fos);
					){

				byte[] bytes = new byte[102400];
				int count = 0;
				while ((count=bis.read(bytes)) != -1) {
					bos.write(bytes, 0, count);
					bos.flush();
				}
			} catch (Exception e) {
				e.printStackTrace();
			}

		}else{
			// 这里说明是文件夹
			// 获取所有的子文件
			File[] files = file.listFiles();
			// 遍历每个子文件,判断是不是文件
			for (File subFile : files) {
				test(subFile);
			}
		}
	}
2.多线程
2.1 基本概念:程序、进程、线程
- 程序(program)是为完成特定任务、用某种语言编写的一组指令的集合。即指一 段静态的代码,静态对象。
- 进程(process)是程序的一次执行过程,或是正在运行的一个程序。是一个动态
的过程:有它自身的产生、存在和消亡的过程。——生命周期
-
- 如:运行中的QQ,运行中的MP3播放器
- 进程是静态的,进程是动态的
- 进程作为资源分配的单位,系统在运行时会为每个进程分配不同的内存区域
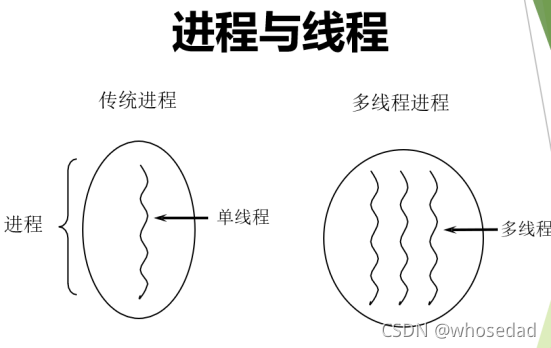
- 线程(thread),进程可进一步细化为线程,是一个程序内部的一条执行路径。
- 若一个进程同一时间并行执行多个线程,就是支持多线程的
- 线程作为调度和执行的单位,每个线程拥有独立的运行栈和程序计数器(pc),线程切换的开销小
- 一个进程中的多个线程共享相同的内存单元/内存地址空间à它们从同一堆中分配对象,可以 访问相同的变量和对象。这就使得线程间通信更简便、高效。但多个线程操作共享的系统资 源可能就会带来安全的隐患。
2.2 单核CPU和多核CPU概念
1 单核CPU和多核CPU的理解
-
- 单核CPU,其实是一种假的多线程,因为在一个时间单元内,也只能执行一个线程 的任务。例如:虽然有多车道,但是收费站只有一个工作人员在收费,只有收了费 才能通过,那么CPU就好比收费人员。如果有某个人不想交钱,那么收费人员可以 把他“挂起”(晾着他,等他想通了,准备好了钱,再去收费)。但是因为CPU时 间单元特别短,因此感觉不出来。
- 如果是多核的话,才能更好的发挥多线程的效率。(现在的服务器都是多核的)
- 一个Java应用程序java.exe,其实至少有三个线程:main()主线程,gc() 垃圾回收线程,异常处理线程。当然如果发生异常,会影响主线程。
2 并行与并发
并行:多个CPU同时执行多个任务。比如:多个人同时做不同的事。
并发:一个CPU(采用时间片)同时执行多个任务。比如:秒杀、多个人做同一件事1
3 使用多线程优点
背景:以单核CPU为例,只使用单个线程先后完成多个任务(调用多个方 法),肯定比用多个线程来完成用的时间更短,为何仍需多线程呢?
多线程程序的优点:
- 提高应用程序的响应。对图形化界面更有意义,可增强用户体验。
- 提高计算机系统CPU的利用率
- 改善程序结构。将既长又复杂的进程分为多个线程,独立运行,利于理解和
修改
4 何时需要多线程
- 程序需要同时执行两个或多个任务。
- 程序需要实现一些需要等待的任务时,如用户输入、文件读写操作、网络操作、搜索等。
- 有后台程序运行时
2.3 线程的创建和使用
Java语言的JVM允许程序运行多个线程,它通过类Java.lang.Thread来体现
Thread类的特点:
每个线程都是通过某个特定Thread对象的run()方法来完成操作的,经常 把run()方法的主体为线程体
通过该Thread对象的start()方法来启动这个线程,而非直接调用run()
创建方式:
1.继承Tread类
2.实现Runnable接口
public static void main(String[] args) {
		// 创建线程类对象 继承方式
		Thread t1 = new Processor();
		// 创建线程类对象 实现方式
		Thread t2 = new Thread(new Processor_01());
		// 启动 该线程 会自动调用run方法
		t1.start();
		t2.start();
		// 但是如果我们手动调用run方法,只是方法调用而已,并不是开启新线程
		// t1.run();
		System.out.println("=============");
		System.out.println("=============");
		System.out.println("=============");
	}
}

class Processor extends Thread {
	@Override
	public void run() {
		for (int i = 5; i >= 0; i--) {
			System.out.println("t1 : " + i);
		}
	}
}

class Processor_01 implements Runnable {
	@Override
	public void run() {
		for (int i = 5; i >= 0; i--) {
			System.out.println("t2 : " + i);
		}
	}
}
2.4 线程调用
CPU通过时间片分配
抢占式:高优先级的线程抢占CPU
同优先级的进程采用先到先得,抢占式
高优先级优先调度
2.5 常用方法
* getName() : 获取当前线程的名字
*
* setName() : 设置线程的名字,默认是Thread-0 , Thread-1 依次递增
*
* setPriority() : 设置优先级,java有10个优先级 , 1-10
* 在 Thread 类中 用三个常量表示
* public final static int MIN_PRIORITY = 1;
* public final static int NORM_PRIORITY = 5;
* public final static int MAX_PRIORITY = 10;
* 默认子类继承父类优先级,而Thread的优先级是 5
* static currentThread() : 获取当前线程对象,写在哪个类中,获取哪个线程类对象
*
* static sleep() : 让当前线程进入睡眠状态,参数是睡眠的毫秒数,写在哪个类中,就睡眠哪个线程类
使用方式:
public static void main(String[] args) {
		Thread t1 = new Thread(new Processer());
		// 设置优先级
		t1.setPriority(10);
		// 设置名字
		t1.setName("t1");
		t1.start();
		for (int i = 0; i < 10; i++) {
				try {
					t1.sleep(500);
				} catch (InterruptedException e) {
					e.printStackTrace();
				}
			// currentThread 获取当前线程对象
			// getName : 获取当前线程对象名字
			System.out.println(Thread.currentThread().getName()+" : "+i);
		}
	}
}
class Processer implements Runnable{

	@Override
	public void run() {
		for (int i = 0; i < 10; i++) {
			try {
				Thread.sleep(500);
			} catch (InterruptedException e) {
				e.printStackTrace();
			}
			// currentThread 获取当前线程对象
			// getName : 获取当前线程对象名字
			System.out.println(Thread.currentThread().getName()+" : "+i);
		}
	}
* interrupt() : 强制唤醒某个睡眠的线程,会抛出异常
public static void main(String[] args) {
		Thread t1 = new Processer_02();
		t1.start();
		System.out.println("开始执行....");
		try {
			Thread.sleep(5000);
			// 唤醒t1线程
			t1.interrupt();
		} catch (InterruptedException e) {
			e.printStackTrace();
		}
	}
}
class Processer_02 extends Thread {
	@Override
	public void run() {
		try {
			Thread.sleep(999999999L);
			System.out.println("睡醒了");
		} catch (InterruptedException e) {
			e.printStackTrace();
			System.out.println("被吵醒了");
		}
	}
* stop() ; 终止线程的方法,已过时,因为容易造成死锁,我们一般用下面这种方式终止线程
public static void main(String[] args) {
		// 创建实现类对象
		Processor_03 p = new Processor_03();
		Thread t1 = new Thread(p);
		t1.start();
		System.out.println("main结束");
		try {
			Thread.sleep(3000);
			// 3秒之后 强制结束t1线程
			// 不推荐使用,已经过时,容易导致死锁
			// t1.stop();

			p.isStop=true;
		} catch (InterruptedException e) {
			e.printStackTrace();
		}
	}
}

class Processor_03 implements Runnable {
	// 标识符 : 是否停止线程
	boolean isStop= false;
	@Override
	public void run() {
		// 格式化对象
		SimpleDateFormat sdf = new SimpleDateFormat("yyyy-MM-dd HH:mm:ss SSS");
		// 死循环
		for (int i = 0; true; i++) {
			// 判断是否终止线程
			if (isStop) {
				return;
			}
			try {
				Thread.sleep(1000);
				// // 获取当前系统时间
				Date date = new Date();
				System.out.println(sdf.format(date));
			} catch (InterruptedException e) {
				e.printStackTrace();
			}
		}
	}


 2893
2893

 被折叠的 条评论
为什么被折叠?
被折叠的 条评论
为什么被折叠?
 到【灌水乐园】发言


