


 本文介绍如何在Android应用中实现标签类菜单,包括布局设计与Java代码实现,展示具体实例。
不管是通信类的app还是新闻类的app,画面的底端都会出现一个标签类的导航框(如:QQ的信息、好友、动态的导航框),下面就对这种标签菜单的简单实现做一下介绍。
实现这种标签有两种常用的方法。第一种是直接继承tabactivity类,不过这种方法在Android4.0后便被取代,而且实现起来较麻烦。所以这里就直接介绍第二种实现方法,通过tabhost组件来实现。
首先是布局页面,在添加TabHost组件后需要在里面添加两个组件:TabWidget和FrameLayout,并且将TabWidget的id设为@android:id/tabs,将FrameLayout的id设为@android:id/tabcontent。TabWidget组件就是标签的列表组件,FrameLayout里面放置的是每个标签的具体内容。
<RelativeLayout xmlns:android="http://schemas.android.com/apk/res/android"
    xmlns:tools="http://schemas.android.com/tools"
    android:layout_width="fill_parent"
    android:layout_height="fill_parent"
    tools:context=".ListActivity" >

    <TabHost
        android:id="@+id/tabhost"
        android:layout_height="match_parent"
        android:layout_width="match_parent"
        android:layout_alignParentBottom="true"
        android:layout_alignParentLeft="true"
        >

        <LinearLayout
            android:orientation="vertical"
            android:layout_width="fill_parent"
            android:layout_height="wrap_content"
            android:layout_marginBottom="0dp"
            >

            <TabWidget
		        android:id="@android:id/tabs"
		        android:layout_width="wrap_content"
		        android:layout_height="wrap_content"
    	    >
		</TabWidget>
            <FrameLayout
                android:id="@android:id/tabcontent"
                android:layout_width="fill_parent"
                android:layout_height="wrap_content" >

                <LinearLayout
                    android:id="@+id/tab1"
                    android:layout_width="fill_parent"
                    android:layout_height="wrap_content"
                    android:orientation="vertical">

                    <AnalogClock
					android:layout_width="fill_parent"
					android:layout_height="wrap_content"
                        />
                </LinearLayout>

                <LinearLayout
                    android:id="@+id/tab2"
                    android:layout_width="fill_parent"
                    android:layout_height="wrap_content"
                    android:orientation="vertical">

                    <RatingBar
                        android:layout_width="fill_parent"
                        android:layout_height="wrap_content"/>

               </LinearLayout>


              <LinearLayout
                    android:id="@+id/tab3"
                    android:layout_width="fill_parent"
                    android:layout_height="wrap_content"
                    android:orientation="vertical">

                      <EditText
                          android:layout_width="match_parent"
                          android:layout_height="wrap_content"
                          android:text="asdf"/>

                </LinearLayout>
			</FrameLayout>


        </LinearLayout>
    </TabHost>


</RelativeLayout>
接下来是java代码
package com.sqm.myqq;

import android.os.Bundle;
import android.app.Activity;
import android.view.Menu;
import android.widget.TabHost;

public class ListActivity extends Activity {

    @Override
    protected void onCreate(Bundle savedInstanceState) {
        super.onCreate(savedInstanceState);
        setContentView(R.layout.activity_list);

        TabHost tabHost = (TabHost)this.findViewById(R.id.tabhost);//获取TabHost组件
        tabHost.setup();//建立TabHost组件

        tabHost.addTab(tabHost.newTabSpec("tab1").setContent(R.id.tab1).setIndicator("First tab"));//向tabHost对象中添加TabSpec组件,tabSpec组件获取的方法为TabHost的newTabSpec()方法
        tabHost.addTab(tabHost.newTabSpec("tab2").setContent(R.id.tab2).setIndicator("Second tab"));
        tabHost.addTab(tabHost.newTabSpec("tab3").setContent(R.id.tab3).setIndicator("Third tab"));
    }


    @Override
    public boolean onCreateOptionsMenu(Menu menu) {
        // Inflate the menu; this adds items to the action bar if it is present.
        getMenuInflater().inflate(R.menu.list, menu);
        return true;
    }

}
这样,界面中就会出现标签类的菜单组件了。
效果如下图: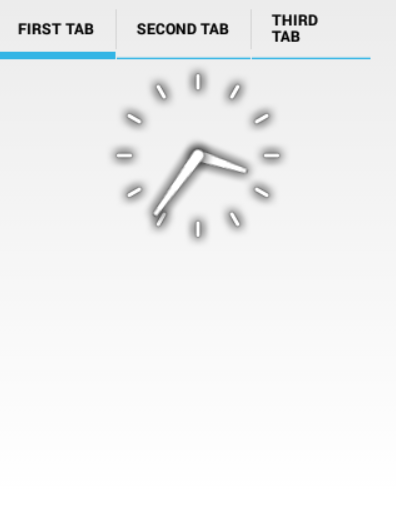


 860
860

 被折叠的 条评论
为什么被折叠?
被折叠的 条评论
为什么被折叠?
 到【灌水乐园】发言


