


 本文详细介绍了在SPA项目中实现CRUD操作及表单验证的方法,重点讲解了Element UI框架下Form组件的使用,包括如何设定验证规则、区分多个表单以及清空表单验证信息。
SPA项目开发之CRUD+表单验证
- 表单验证
Form组件提供了表单验证的功能,只需要通过 rules 属性传入约定的验证规则,
并将Form-Item的prop属性设置为需校验的字段名即可
  <el-form-item label="活动名称" prop="name">
   <el-form :model="ruleForm" :rules="rules" ref="ruleForm"
注1:有多个表单,怎么在提交进行区分?
我们在rules这里写了对表单的验证规则,但是我们如何在methods里进行指定的表单进行认证,
所以我们一开始就在el-form里写了 ref=“ruleForm”,我们在methods里就可以用
注2:清空表单验证信息
this.$refs[formName].resetFields();
话不多说,上代码
Articles.vue
<template>
<div>
<!-- 搜索筛选 -->
<el-form :inline="true" :model="formInline" class="user-search">
<el-form-item label="搜索:">
<el-input size="small" v-model="formInline.title" placeholder="请输入文章标题"></el-input>
</el-form-item>
<el-form-item>
<el-button size="small" type="primary" icon="el-icon-search" @click="search">搜索</el-button>
<el-button type="primary" icon="el-icon-plus" @click="add">添加</el-button>
</el-form-item>
</el-form>
<!--列表-->
<el-table size="small" :data="listData" border element-loading-text="拼命加载中" style="width: 100%;">
<el-table-column sortable prop="id" label="ID" width="300">
</el-table-column>
<el-table-column sortable prop="title" label="文章标题" width="300">
</el-table-column>
<el-table-column sortable prop="body" label="文章内容" width="300">
</el-table-column>
<el-table-column align="center" label="操作" min-width="300">
<template slot-scope="scope">
<el-button size="mini" @click="edit(scope.$index, scope.row)">编辑</el-button>
<el-button size="mini" type="danger" @click="del(scope.$index, scope.row)">删除</el-button>
</template>
</el-table-column>
</el-table>
<!-- 分页条 -->
<el-pagination style="margin-top: 20px;" @size-change="handleSizeChange" @current-change="handleCurrentChange"
:current-page="formInline.page" :page-sizes="[10, 20, 30, 50]" :page-size="formInline.rows" layout="total, sizes, prev, pager, next, jumper"
:total="total">
</el-pagination>
<!-- 编辑界面 -->
<el-dialog :title="title" :visible.sync="editFormVisible" width="30%" :before-close="closeDialog">
<!-- ref="editForm" 代表id 提交的页面 -->
<el-form label-width="120px" :model="editForm" :rules="rules" ref="editForm">
<el-form-item label="文章标题" prop="title">
<el-input size="small" v-model="editForm.title" auto-complete="off" placeholder="请输入文章标题"></el-input>
</el-form-item>
<el-form-item label="文章内容" prop="body">
<el-input size="small" v-model="editForm.body" auto-complete="off" placeholder="请输入文章内容"></el-input>
</el-form-item>
</el-form>
<div slot="footer" class="dialog-footer">
<el-button size="small" @click="closeDialog">取消</el-button>
<!-- 提交那個表單的數據 与上面的ref 表单相对应-->
<el-button size="small" type="primary" class="title" @click="submitForm">保存</el-button>
</div>
</el-dialog>
</div>
</template>
<script>
export default {
data() {
return {
listData: [],
total: 0,
formInline: {
title: '',
/* 携带分页的参数 */
page: 1,
rows: 10
},
editFormVisible: false,
title: '',
editForm: {
/* 提交数据来后台以键值对的形式存在 */
body: '',
title: '',
id: 0
},
rules: {
title: [{
required: true,
message: '请输入文章的标题',
trigger: 'blur'
}],
body: [{
required: true,
message: '请输入文章的内容',
trigger: 'blur'
},
{
min: 3,
max: 5,
message: '长度在 3 到 5 个字符',
trigger: 'blur'
}
]
}
};
},
methods: {
search() {
this.doSearch(this.formInline);
},
doSearch(params) {
let url = this.axios.urls.SYSTEM_ARTICLE_LIST;
this.axios.post(url, params).then((response) => {
console.log(response + "iiii");
this.listData = response.data.result;
this.total = response.data.pageBean.total;
}).catch((response) => {
console.log(response);
});
},
handleSizeChange(rows) {
console.log('页码发生改变的时候触发' + rows);
this.formInline.page = 1;
this.formInline.rows = rows;
this.search();
},
handleCurrentChange(page) {
console.log('当前页页码发生改变的时候触发!!!' + page);
this.formInline.page = page;
this.search();
},
closeDialog() {
this.editFormVisible = false;
this.clearForm();
},
submitForm() {
// 用来提交新增,修改表单书籍的,提交需要通过vue实列中定义的表单填写规则
/* ‘’不加是给字符串 加了是给对象 */
this.$refs['editForm'].validate((valid) => {
if (valid) {
let url;
if (this.editForm.id == 0) {
url = this.axios.urls.SYSTEM_ARTICLE_ADD;
} else {
url = this.axios.urls.SYSTEM_ARTICLE_EDIT;
}
this.axios.post(url, this.editForm).then((response) => {
console.log(response);
this.clearForm();
/* 刷新 */
this.doSearch(this.formInline);
}).catch((response) => {
console.log(response);
});
} else {
console.log('error submit!!');
return false;
}
});
},
clearForm() {
/* 清空表单数据 */
this.editForm.id = 0;
this.editForm.title = '';
this.editForm.body = '';
this.formInline.page = 1;
this.formInline.rows = 10;
this.editFormVisible = false;
},
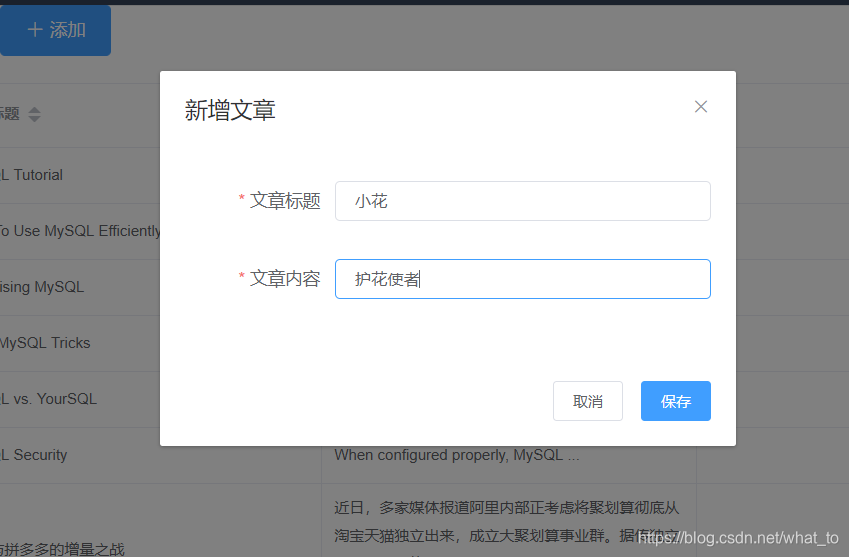
add() {
this.title = '新增文章';
this.editFormVisible = true;
},
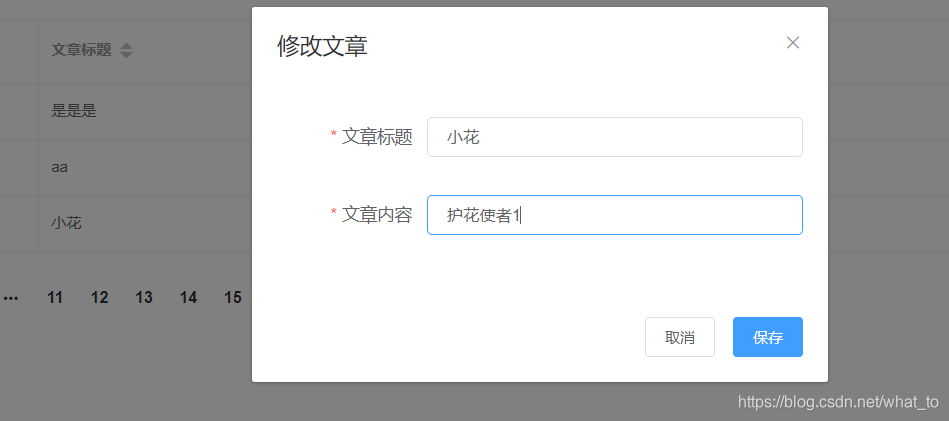
edit(index, row) {
// index代表的是操作数据在当前页面的行号
// row代表操作的当前数据,那就意味着可以从row中获取到所以数据库列段名
//var row=$("#dd").dategrid("getSelected");
// $("#ff").from(“load”,row);完成了数据回显
this.title = '修改文章';
this.editForm.id = row.id;
this.editForm.title = row.title;
this.editForm.body = row.body;
this.editFormVisible = true;
},
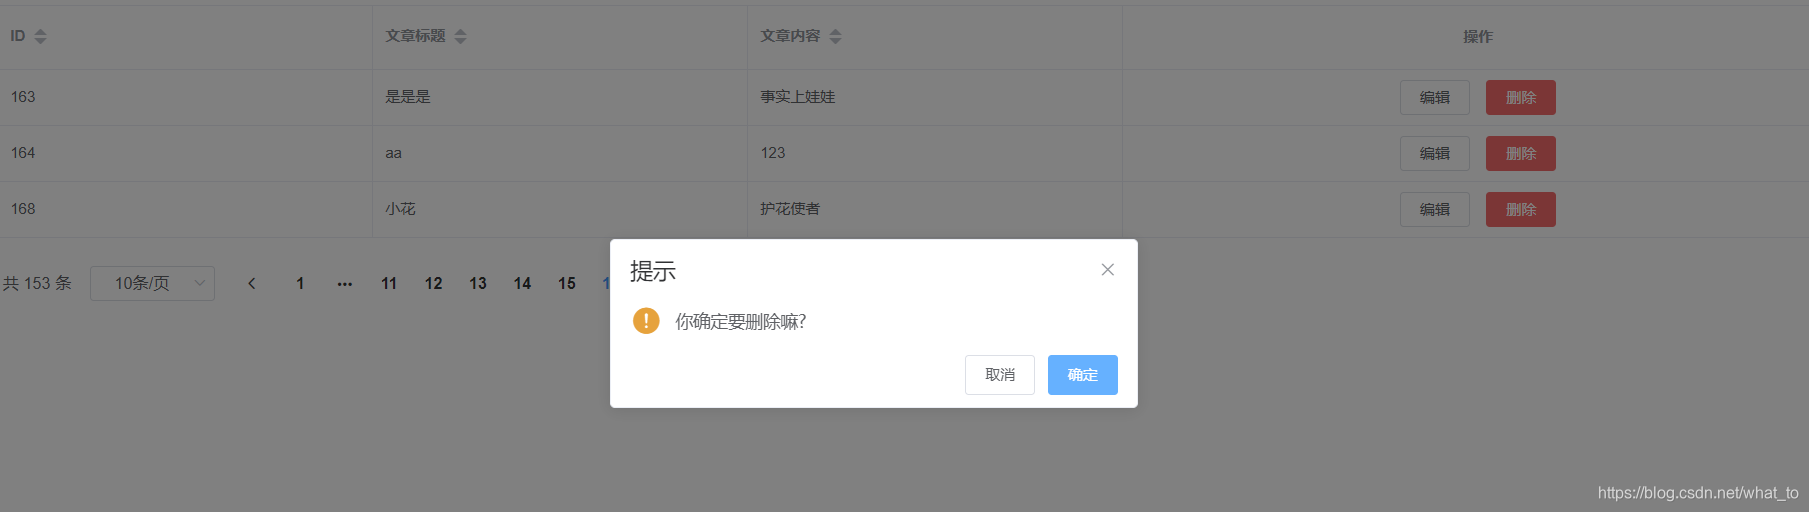
del(index, row) {
this.$confirm('你确定要删除嘛?', '提示', { //提示框
confirmButtonText: '确定',
cancelButtonText: '取消',
type: 'warning'
}).then(() => { //点击确定
this.$message({
type: 'success',
message: '删除成功!'
});
let url = this.axios.urls.SYSTEM_ARTICLE_DEL;
this.axios.post(url, {
id: row.id
}).then((response) => {
console.log(response);
this.clearForm();
/* 刷新 */
this.doSearch({});
}).catch((response) => {
console.log(response);
});
}).catch(() => { //取消
this.$message({
type: 'info',
message: '已取消删除'
});
});
}
},
created() {
this.doSearch({});
}
}
</script>
<style>
</style>


 450
450

 被折叠的 条评论
为什么被折叠?
被折叠的 条评论
为什么被折叠?
 到【灌水乐园】发言


