


提示:文章写完后,目录可以自动生成,如何生成可参考右边的帮助文档
前言
提示:这里可以添加本文要记录的大概内容:
例如:随着人工智能的不断发展,机器学习这门技术也越来越重要,很多人都开启了学习机器学习,本文就介绍了机器学习的基础内容。
提示:以下是本篇文章正文内容,下面案例可供参考
一、ai的好处
可以回答你的问题,话不多说上代码。
二、使用步骤
1.引入依赖
代码如下(示例):
<dependency>
<groupId>com.alibaba</groupId>
<artifactId>dashscope-sdk-java</artifactId>
<version>2.16.3</version>
</dependency>
2.配置ai-key跟实现代码
在application.yml中添加这个 ai:
api-key: ENC(5N/Lwvw2ez/AA9cZdVHUEPR2ov0eStDCGRRz10T8mtJu5ChIQj7LYMGJO8xiYSgc)
我这里加密了一下这个key
import com.alibaba.dashscope.aigc.generation.Generation;
import com.alibaba.dashscope.aigc.generation.GenerationParam;
import com.alibaba.dashscope.aigc.generation.GenerationResult;
import com.alibaba.dashscope.exception.ApiException;
import com.alibaba.dashscope.utils.Constants;
import io.reactivex.Flowable;
import org.springframework.http.MediaType;
import org.springframework.http.codec.ServerSentEvent;
import org.springframework.beans.factory.annotation.Value;
import com.alibaba.dashscope.common.Message;
import com.alibaba.dashscope.common.Role;
import com.alibaba.dashscope.exception.InputRequiredException;
import com.alibaba.dashscope.exception.NoApiKeyException;
import lombok.extern.slf4j.Slf4j;
import reactor.core.publisher.Flux;
import org.springframework.web.bind.annotation.RequestMapping;
import org.springframework.web.bind.annotation.RequestParam;
import org.springframework.web.bind.annotation.RestController;
import java.util.Collections;
@Slf4j
@RestController
@RequestMapping("/ask")
public class AskController {
@Value("${ai.api-key}")
private String apiKey;
// @PostMapping
// public Result ask(@RequestBody String message) throws NoApiKeyException, InputRequiredException {
// Generation gen = new Generation();
// List<Message> messages = new ArrayList<>();
// Message systemMsg =
// Message.builder().role(Role.SYSTEM.getValue()).content("You are a helpful assistant.").build();
// Message userMsg = Message.builder().role(Role.USER.getValue()).content(message).build();
// messages.add(systemMsg);
// messages.add(userMsg);
// GenerationParam param =
// GenerationParam.builder().model("qwen-turbo").messages(messages)
// .resultFormat(GenerationParam.ResultFormat.MESSAGE)
// .apiKey(apiKey)
// .enableSearch(true)
// .build();
// GenerationResult result = gen.call(param);
// String content= result.getOutput().getChoices().getFirst().getMessage().getContent();
// return Result.success(content);
//
// }
@RequestMapping(value = "/call/Stream", produces = MediaType.TEXT_EVENT_STREAM_VALUE)
public Flux<ServerSentEvent<String>> callMany(@RequestParam(value = "message", required = false, defaultValue = "如何做西红柿炖牛腩?") String message) {
try {
// 设置API密钥
Constants.apiKey = apiKey;
Generation gen = new Generation();
Message userMsg = Message.builder().role(Role.USER.getValue()).content(message).build();
return streamCallWithMessage(gen, userMsg);
} catch (ApiException | NoApiKeyException | InputRequiredException e) {
log.error("发生异常: {}", e.getMessage());
}
return Flux.empty();
}
/**
* 使用流式调用并 带回调的方式进行 消息生成
*
*/
public Flux<ServerSentEvent<String>> streamCallWithMessage(Generation gen, Message userMsg)
throws NoApiKeyException, ApiException, InputRequiredException {
// 根据用户消息构建生成参数
GenerationParam param = buildGenerationParam(userMsg);
// 使用构建的参数启动生成调用,并返回生成结果的Flowable对象
Flowable<GenerationResult> result = gen.streamCall(param);
// 从结果创建一个Flux流
// 在每个事件之间添加延迟
// .delayElements(Duration.ofMillis(1000))
// 处理每个消息事件
// 提取消息内容
// 打印输出内容
// System.out.println("output = " + output);
// 构建并返回ServerSentEvent对象
// 添加事件("error") 用来触发结束处理的事件
// 错误处理
// 根据不同类型的异常进行相应处理
// 处理NoApiKeyException
// 处理InputRequiredException
// 处理其他ApiException
// 处理其他异常
// 从结果创建一个Flux流
return Flux.from(result)
// 在每个事件之间添加延迟
// .delayElements(Duration.ofMillis(1000))
// 处理每个消息事件
.map(message -> {
// 提取消息内容
String output = message.getOutput().getChoices().getFirst().getMessage().getContent();
// 打印输出内容
// System.out.println("output = " + output);
// 构建并返回ServerSentEvent对象
return ServerSentEvent.<String>builder()
.data(output)
.build();
})
// 添加事件("error") 用来触发结束处理的事件
.concatWith(Flux.just(ServerSentEvent.<String>builder().event("error").build()))
// 错误处理
.doOnError(e -> {
// 根据不同类型的异常进行相应处理
switch (e) {
case NoApiKeyException _ ->
// 处理NoApiKeyException
log.error("NoApiKeyException: {}", e.getMessage());
case InputRequiredException _ ->
// 处理InputRequiredException
log.error("InputRequiredException: {}", e.getMessage());
case ApiException _ ->
// 处理其他ApiException
log.error("ApiException: {}", e.getMessage());
case null, default ->
// 处理其他异常
{
if (e != null) {
log.error("Other Exception: {}", e.getMessage());
}
}
}
});
}
private GenerationParam buildGenerationParam(Message userMsg) {
return GenerationParam.builder()
.model("qwen-turbo")
.messages(Collections.singletonList(userMsg))
.resultFormat(GenerationParam.ResultFormat.MESSAGE)
.topP(0.8)
.incrementalOutput(true)
.build();
}
}
的一个方法是一次性等组装好返回,下面那个是流式返回根据个人喜号使用
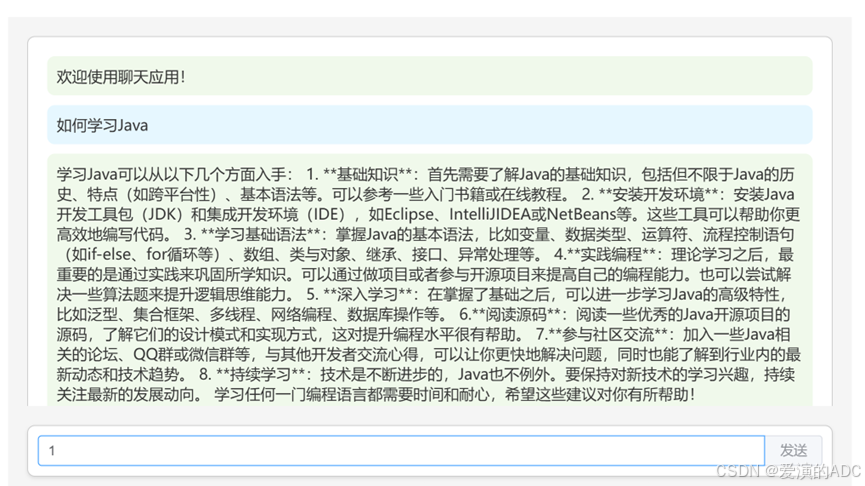
话不多说看效果
总结
非常简单大家快去试试吧,过几天更新生成照片跟视频的方法


 1655
1655

 被折叠的 条评论
为什么被折叠?
被折叠的 条评论
为什么被折叠?
 到【灌水乐园】发言


