


目录
一,JAVAFX简单介绍
图形化的用户界面(Graphical UserInterface,简称GUI)java支持可视化开发的库也不少其中包括 AWT SWT SwingX JavaFx
本此采用的是 JavaFxJavaFX 是一个强大的图形和多媒体处理工具包集合,人万人申多它允许开发者来设计、创建、调试和部署富客户端程序,并日和 Java 一样跨平台。 官网
JavaFXhttps://openjfx.io/![]() https://openjfx.io/
https://openjfx.io/
从jdk8版本之后,jdk中就不再包含JavaFX的类包,如果你的版本是jdk8以上的版本,需要下载JavaFX安装包,才能使用JavaFX进行编译。
1.1 下载jdk与javafx-sdk
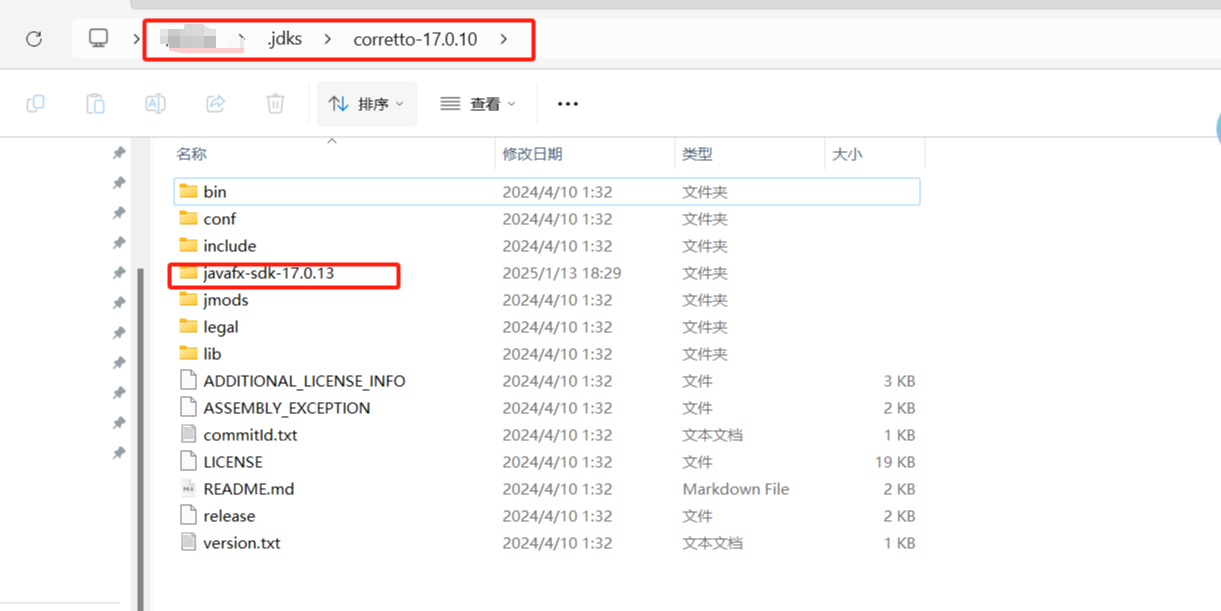
jdk版本是jdk17 javafx的版本javafx-sdk-17.0.7
将下载的文件放到jdk17的目录下
1.2 用Maven构建项目
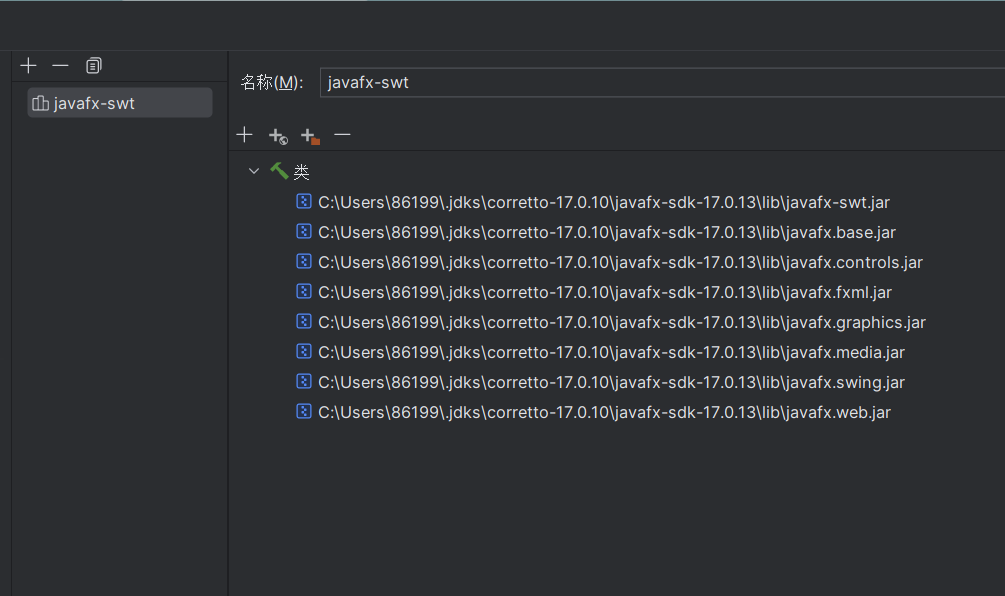
用maven创建项目,创建时选择对应的jdk,将javafx文件的ib目录下的包导入到项目的模块中
1.3 主函数部分代码
package com.exp;

import javafx.application.Application;
import javafx.stage.Stage;

public class JavaFxMain extends Application {
    @Override
    public void start(Stage stage) throws Exception {
        stage.show();
    }

    public static void main(String[] args) {
        launch();
    }
}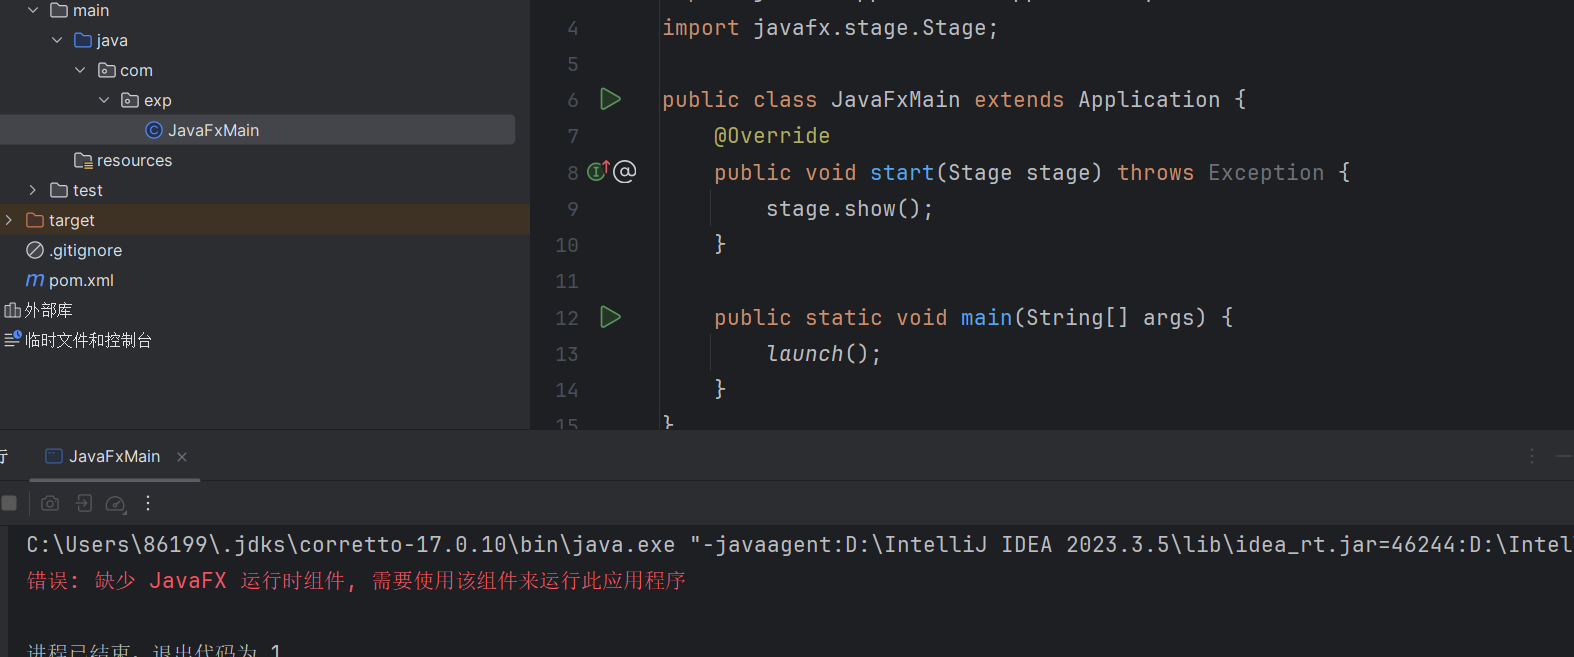
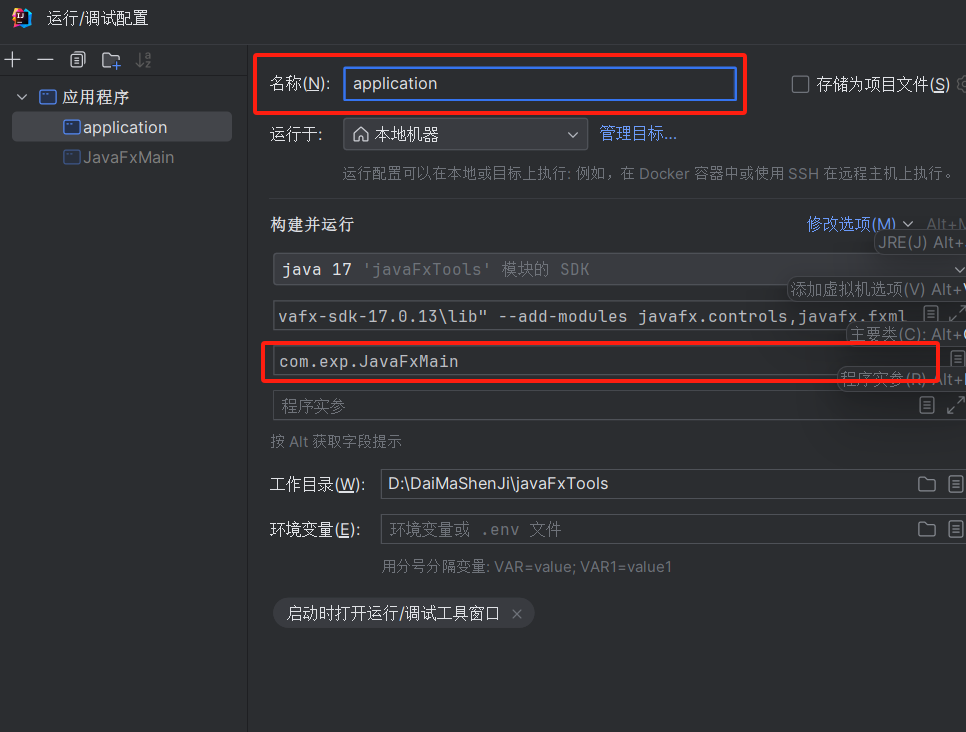
1.4 添加虚拟机选项
然后执行下面的操作
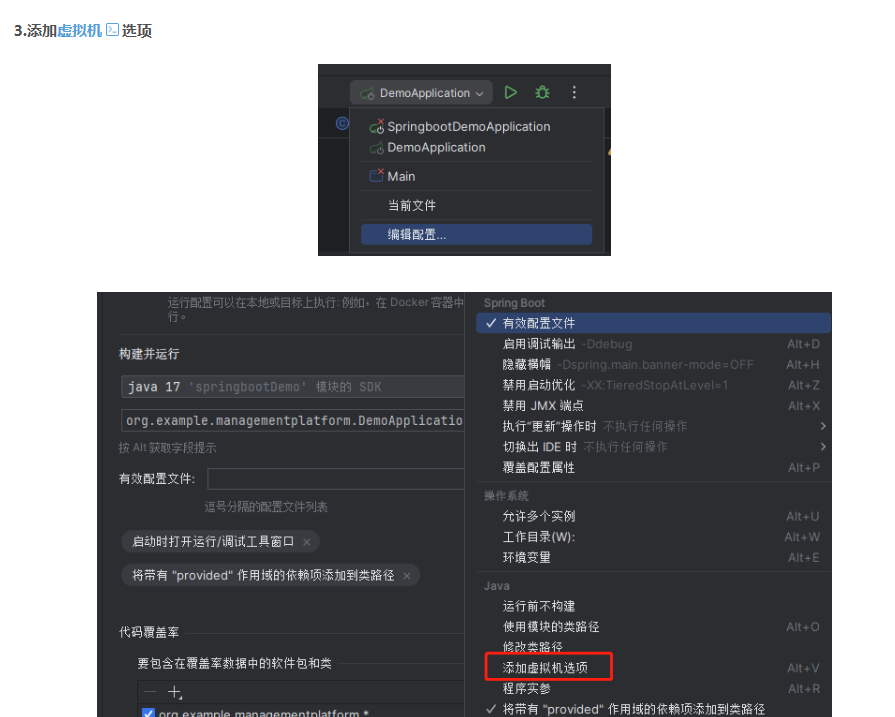
在编辑配置处会自动有这个
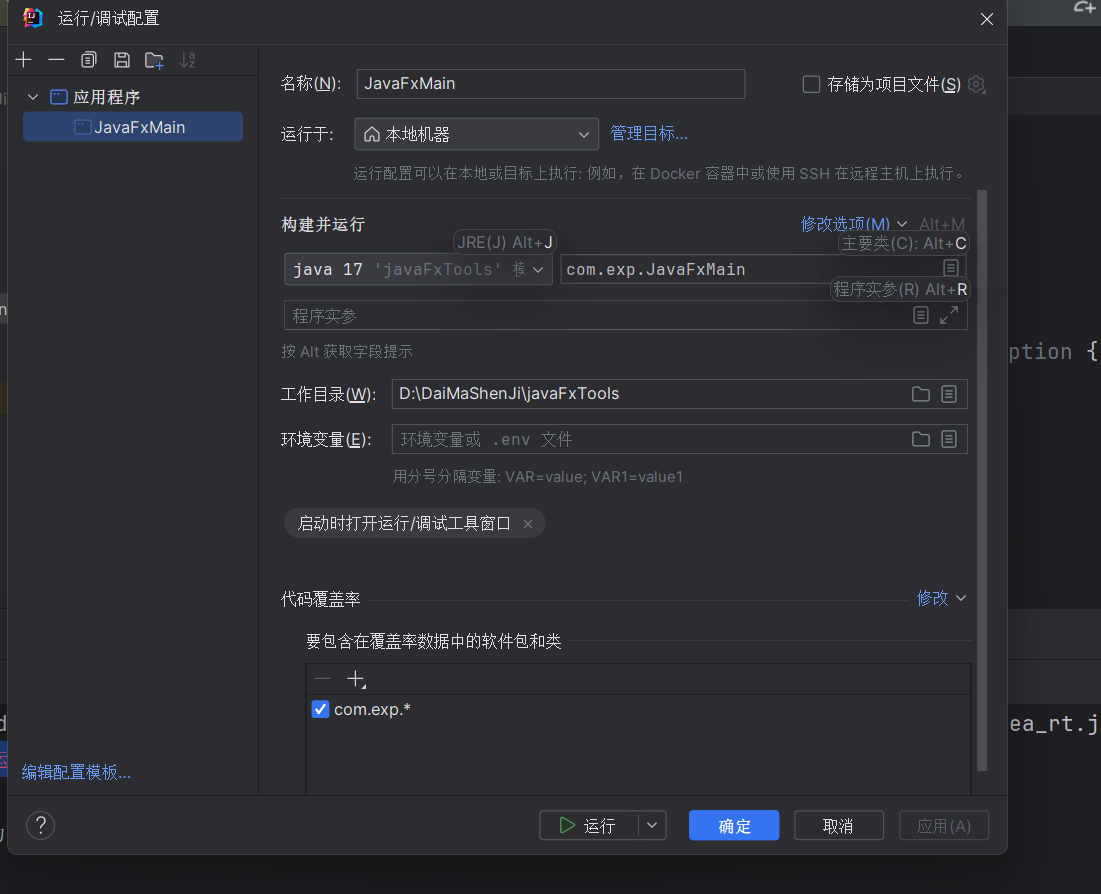
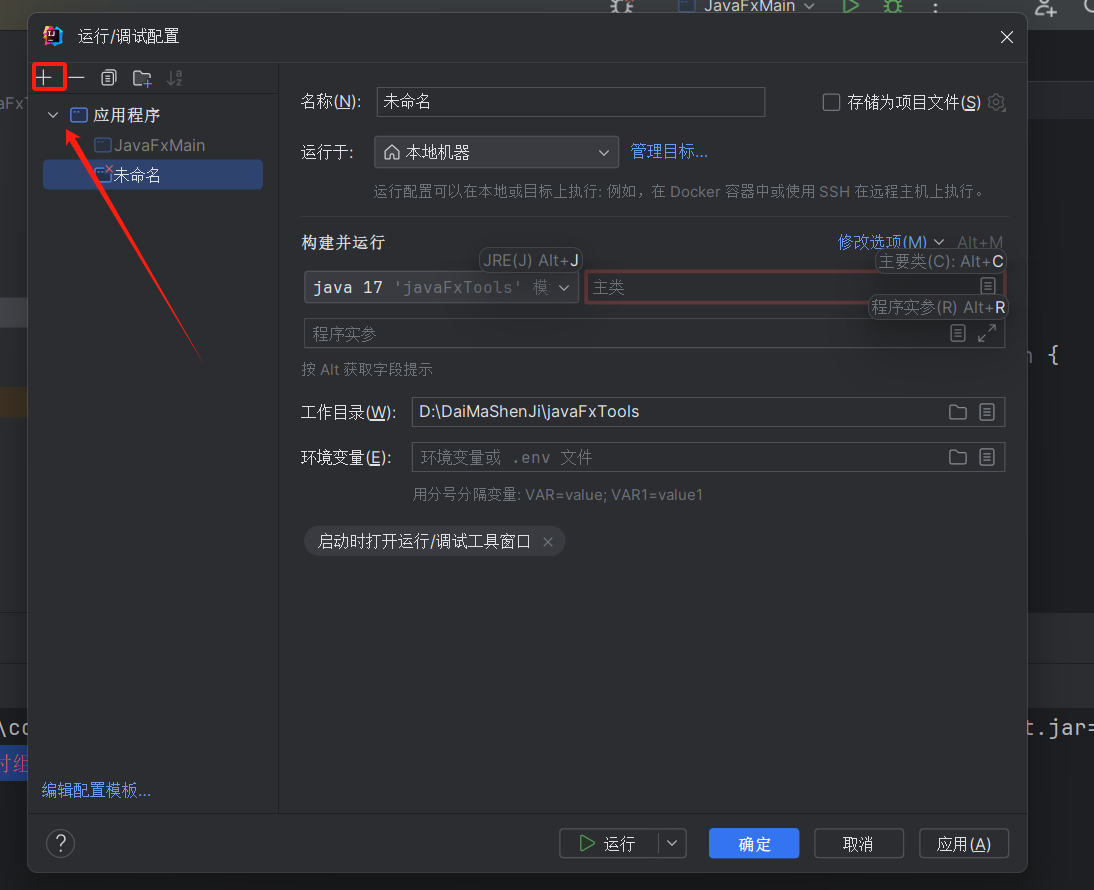
选择其中的应用程序,然后有个修改选项,选择其中的添加虚拟机选项
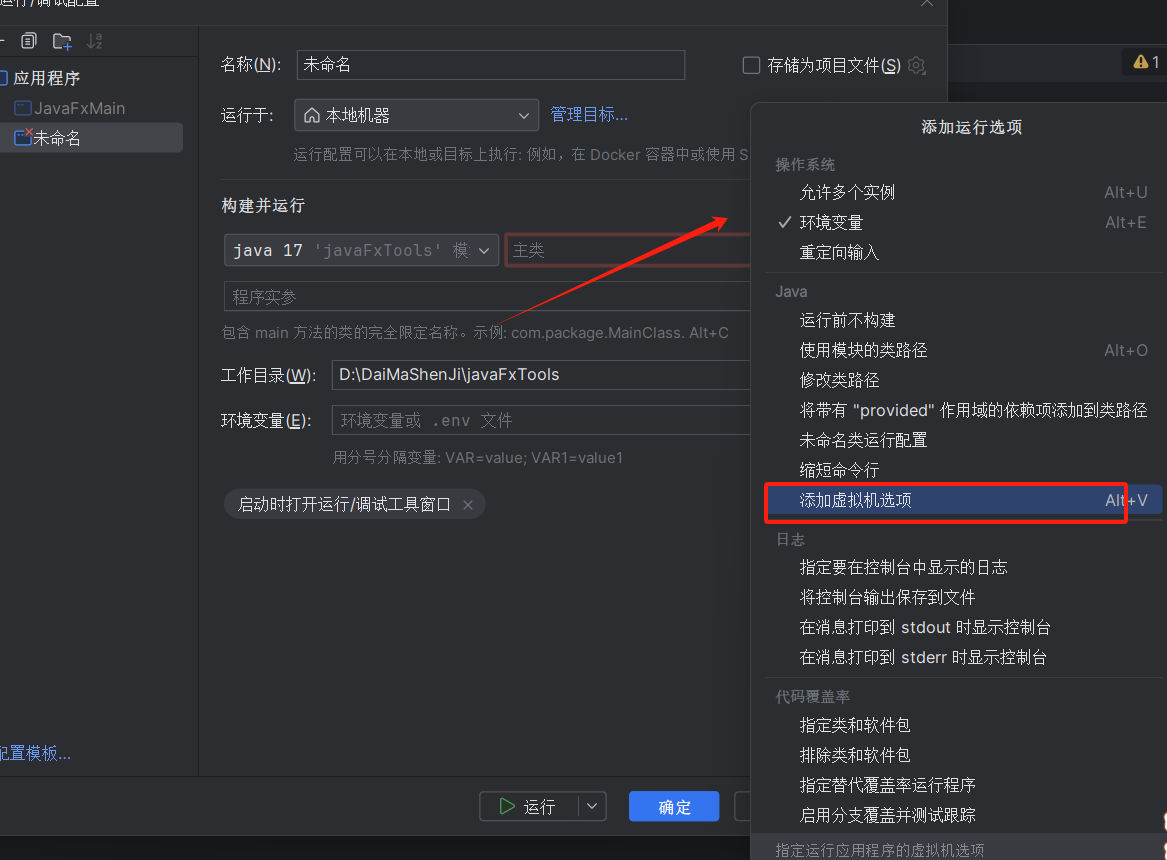
# 中间的module-path需替换为自己的javafx-sdk的目录
--module-path "C:\Users\86199\.jdks\corretto-17.0.10\javafx-sdk-17.0.13\lib" --add-modules javafx.controls,javafx.fxml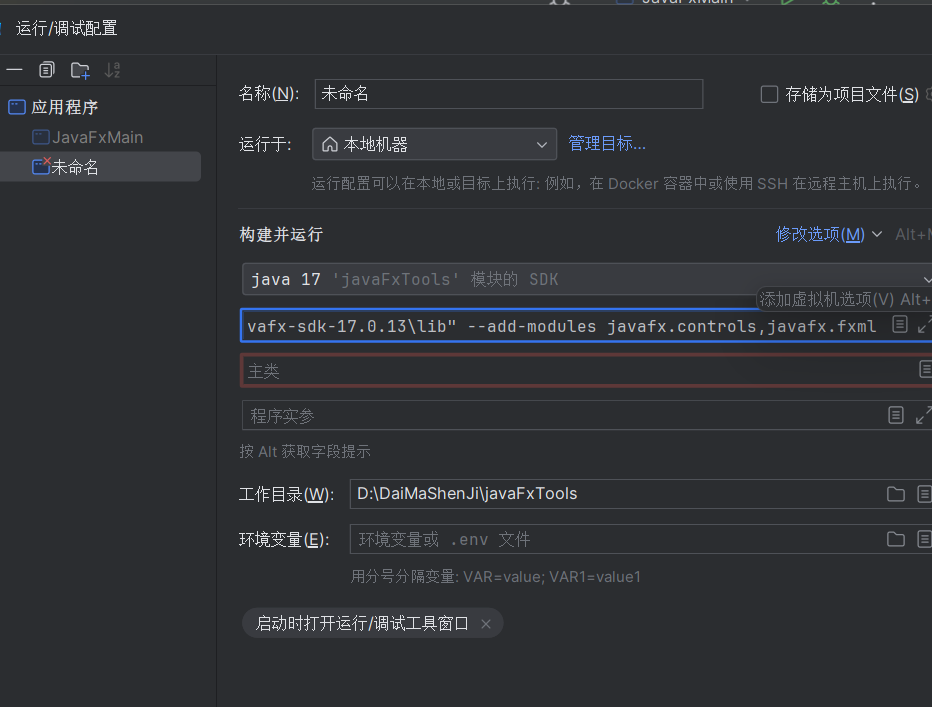
然后添加名字,增加主类
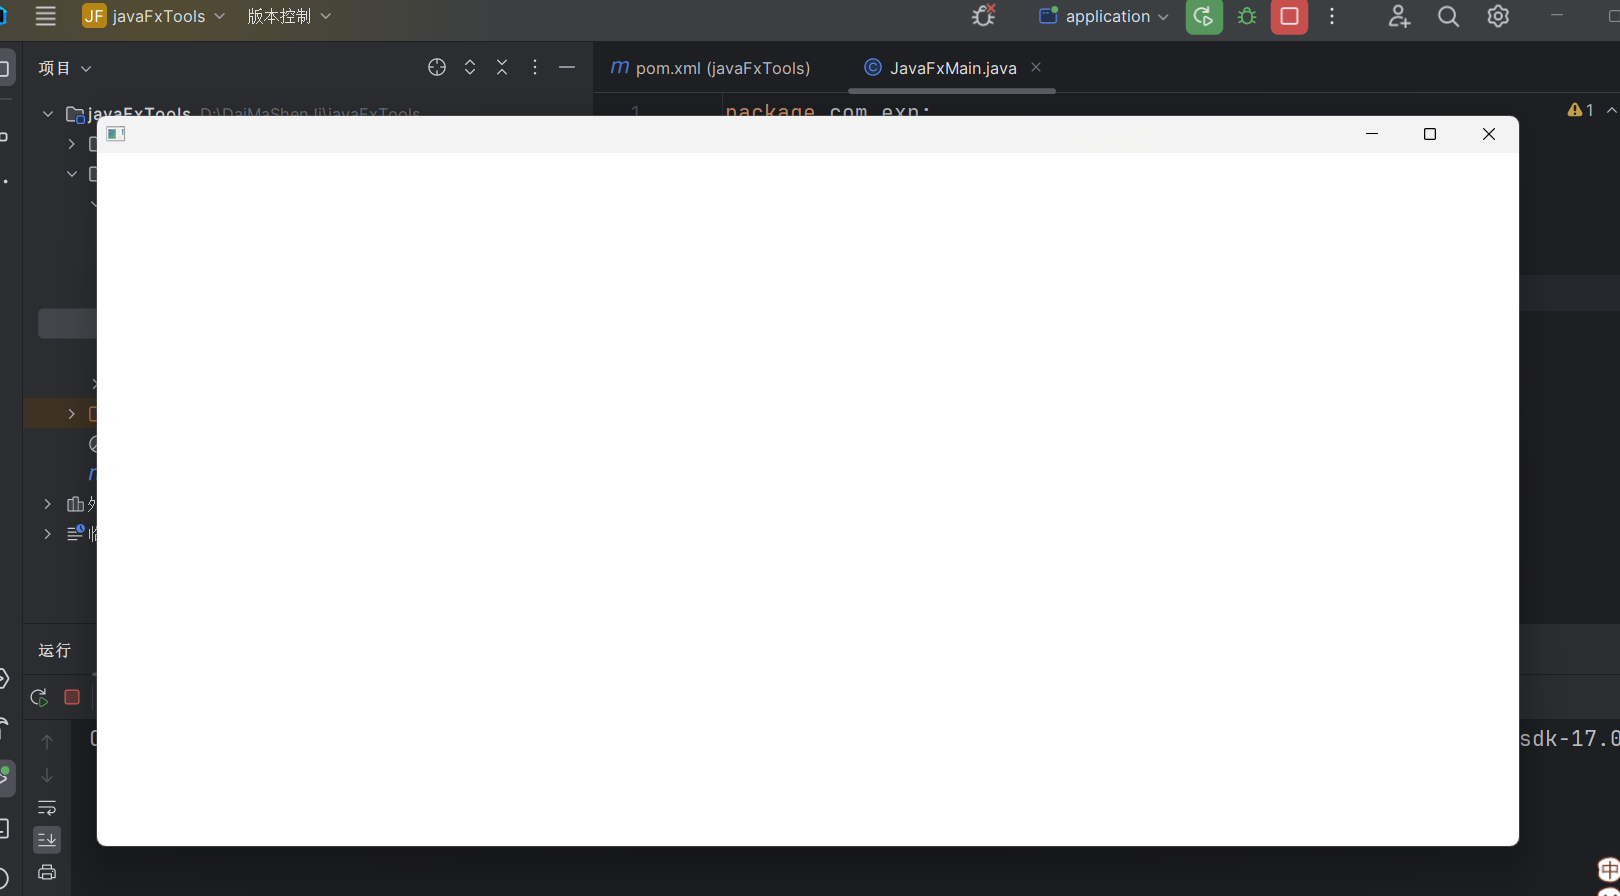
1.5 尝试运行
运行成功后会有下面的一个空白框出现
二,JAVAFX-GUI控件和界面的编写
2.1 初始化界面编写
package com.exp;

import javafx.application.Application;
import javafx.collections.FXCollections;
import javafx.scene.Scene;
import javafx.scene.control.*;
import javafx.scene.layout.AnchorPane;
import javafx.stage.Stage;

public class JavaFxMain extends Application {

    public static void main(String[] args) {
        //默认有的方法
        launch();
    }
    @Override
    public void start(Stage stage) throws Exception {
    //显示界面
    stage.show();
  }
}
2.2 设置场景的一些基本配置
package com.exp;

import javafx.application.Application;
import javafx.collections.FXCollections;
import javafx.scene.Scene;
import javafx.scene.control.*;
import javafx.scene.layout.AnchorPane;
import javafx.stage.Stage;

public class JavaFxMain extends Application {

    public static void main(String[] args) {
        //默认有的方法
        launch();
    }
    @Override
    public void start(Stage stage) throws Exception {
    //设置GUI的标题
    stage.setTitle("漏洞检测工具");
    //禁止放大,无法点击最大化按钮
    stage.setResizable(false);
    //布局控件
    AnchorPane anchorPane = new AnchorPane();

    //设置场景 以及场景的大小
    Scene scene = new Scene(anchorPane, 700, 400);
    stage.setScene(scene);
    //显示界面
    stage.show();
  }
}
2.3 创建一些控件
2.3.1 控件的创建
// 创建标签
new Label("网址:");

//文本框(输入框)
new TextField();

//设置下拉框
  //设置下拉框
  String []pocs = {"Thinkphp5_Rce","Thinkphp2x_Rce",};
  ChoiceBox choiceBox = new ChoiceBox(FXCollections.observableArrayList(pocs));
2.3.2 控件的用到的属性
//设置默认值或者提示信息
setText("文本框设置默认值")
setValue("下拉框设置默认值")
setPromptText("设置提示信息")

//设置控件的宽度(长度),高度
setPrefWidth("设置宽度") //用数字
setPrefHeight("设置高度") //用数字

//按钮
new Button("单个检测");

//文本域
TextArea textArea = new TextArea();
//需要配合设置下拉属性
textArea.setWrapText(true);
2.3.3 控件设置位置用到的属性
由于GUI的位置是以左上角作为基准的,因此,设置X的正值就是里左边栏的距离是多少,同理Y也是类似的,设置正值就离顶部的边界有多远,位置是慢慢调出来的,并且可以基于其他的控件的位置来调控.
setLayoutX()
setLayoutY()
2.3.4 控件的创建的不同类型
        //设置控件
        Label UrlLabel = new Label("网址:");
        Label MsgLabel = new Label("信息:");
        //文本框
        TextField textField = new TextField();
        //设置文本框的默认值setText 设置提示setPromptText
        textField.setPromptText("请输入网址:");
       //设置文本框的宽度
        textField.setPrefWidth(260);
        //设置下拉框
        String []pocs = {"Thinkphp5_Rce","Thinkphp2x_Rce",};
        ChoiceBox choiceBox = new ChoiceBox(FXCollections.observableArrayList(pocs));
        //设置默认值
        choiceBox.setValue("Thinkphp5_Rce");
        //设置按钮
        Button BtnCheck = new Button("单个检测");
        Button BtnBatch = new Button("批量检测");
        //设置文本域
        TextArea textArea = new TextArea();
        textArea.setPromptText("返回结果信息........");
        //设置下拉属性
        textArea.setWrapText(true);
        textArea.setPrefHeight(300);
2.3.5 控件位置设置
        //设置控件的位置
        //设置网址标签的位置
        UrlLabel.setLayoutX(20);
        UrlLabel.setLayoutY(13);

        //设置信息标签的位置
        MsgLabel.setLayoutX(20);
        MsgLabel.setLayoutY(50);


        //设置文本框位置
        textField.setLayoutX(70);
        textField.setLayoutY(10);


        //选择框
        choiceBox.setLayoutX(340);
        choiceBox.setLayoutY(10);

        //设置button1的位置
        BtnCheck.setLayoutX(480);
        BtnCheck.setLayoutY(10);
        //设置button2的位置
        BtnBatch.setLayoutX(550);
        BtnBatch.setLayoutY(10);

        //设置文本域的位置
        textArea.setLayoutX(70);
        textArea.setLayoutY(50);
2.3.6 将添加组件添加到界面中
//add 是单个控件  addAll 是多个控件
        anchorPane.getChildren().addAll(UrlLabel,MsgLabel,textField,choiceBox,BtnCheck,BtnBatch,textArea);
三,完整漏洞检测GUI代码
3.1 代码部分
package com.exp;

import javafx.application.Application;
import javafx.collections.FXCollections;
import javafx.scene.Scene;
import javafx.scene.control.*;
import javafx.scene.layout.AnchorPane;
import javafx.stage.Stage;

public class JavaFxMain extends Application {

    public static void main(String[] args) {
        //默认有的方法
        launch();
    }
    @Override
    public void start(Stage stage) throws Exception {
        //设置GUI的标题
        stage.setTitle("漏洞检测工具");
        //禁止放大,无法点击最大化按钮
        stage.setResizable(false);
        //布局控件
        AnchorPane anchorPane = new AnchorPane();

        //设置控件
        Label UrlLabel = new Label("网址:");
        Label MsgLabel = new Label("信息:");
        //文本框
        TextField textField = new TextField();
        //设置文本框的宽度
        textField.setPrefWidth(260);
        //设置文本框的默认值setText 设置提示setPromptText
        textField.setPromptText("请输入网址:");
        //设置下拉框
        String []pocs = {"Thinkphp5_Rce","Thinkphp2x_Rce",};
        ChoiceBox choiceBox = new ChoiceBox(FXCollections.observableArrayList(pocs));
        //设置默认值
        choiceBox.setValue("Thinkphp5_Rce");
        //设置按钮
        Button BtnCheck = new Button("单个检测");
        Button BtnBatch = new Button("批量检测");
        //设置文本域
        TextArea textArea = new TextArea();
        textArea.setPromptText("返回结果信息........");
        //设置下拉属性
        textArea.setWrapText(true);
        textArea.setPrefHeight(300);


        //设置控件的位置
        //设置网址标签的位置
        UrlLabel.setLayoutX(20);
        UrlLabel.setLayoutY(13);

        //设置信息标签的位置
        MsgLabel.setLayoutX(20);
        MsgLabel.setLayoutY(50);


        //设置文本框位置
        textField.setLayoutX(70);
        textField.setLayoutY(10);


        //选择框
        choiceBox.setLayoutX(340);
        choiceBox.setLayoutY(10);

        //设置button1的位置
        BtnCheck.setLayoutX(480);
        BtnCheck.setLayoutY(10);
        //设置button2的位置
        BtnBatch.setLayoutX(550);
        BtnBatch.setLayoutY(10);

        //设置文本域的位置
        textArea.setLayoutX(70);
        textArea.setLayoutY(50);

        //add 是单个控件  addAll 是多个控件
        anchorPane.getChildren().addAll(UrlLabel,MsgLabel,textField,choiceBox,BtnCheck,BtnBatch,textArea);


        //设置场景 以及场景的大小
        Scene scene = new Scene(anchorPane, 700, 400);
        stage.setScene(scene);
        //显示界面
        stage.show();
    }

}
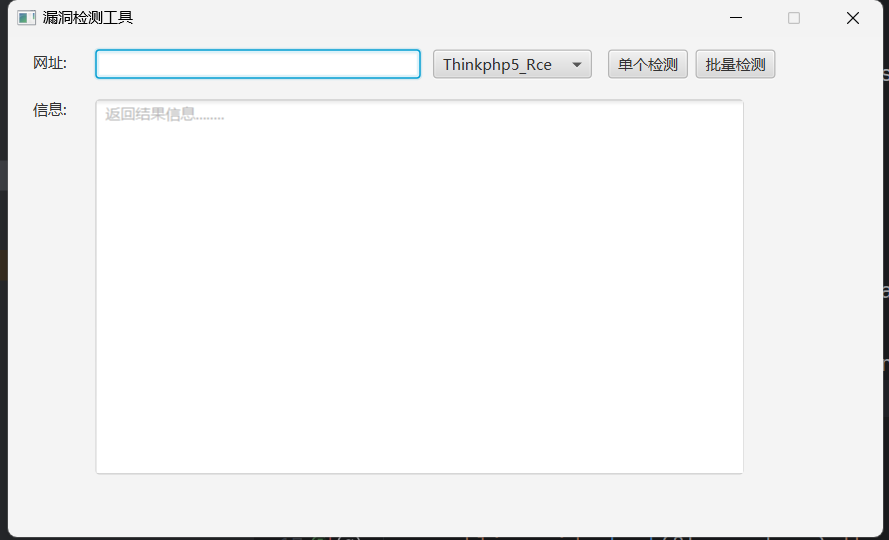
3.2 GUI界面展示


 被折叠的 条评论
为什么被折叠?
被折叠的 条评论
为什么被折叠?
 到【灌水乐园】发言


