


将QLabel控件以小圆灯形式显示,显示不同颜色代表不同状态
1、在MyLed.h中
#ifndef MYLED_H
#define MYLED_H

#include <QObject>
#include <QLabel>

#define    GREEN    0
#define    YELLOW   1
#define    RED      2
#define    GREY     3

class MyLed : public QObject
{
    Q_OBJECT
public:
    explicit MyLed(QObject *parent = nullptr);

    static void SetLED(QLabel* label, int color, int size, int isClearText = 1);
signals:

public slots:
};

#endif // MYLED_H
2、MyLed.cpp中
#include "myled.h"

MyLed::MyLed(QObject *parent) : QObject(parent)
{

}

void MyLed::SetLED(QLabel *label, int color, int size, int isClearText)
{
    if(isClearText == 1)
        label->setText("");                                                      // 将label中的文字清空

    // 先设置矩形大小
    // 如果ui界面设置的label大小比最小宽度和高度小,矩形将被设置为最小宽度和最小高度;
    // 如果ui界面设置的label大小比最小宽度和高度大,矩形将被设置为最大宽度和最大高度;
    QString min_width = QString("min-width: %1px;").arg(size);              // 最小宽度:size
    QString min_height = QString("min-height: %1px;").arg(size);            // 最小高度:size
    QString max_width = QString("max-width: %1px;").arg(size);              // 最小宽度:size
    QString max_height = QString("max-height: %1px;").arg(size);            // 最小高度:size
    // 再设置边界形状及边框
    QString border_radius = QString("border-radius: %1px;").arg(size/2);    // 边框是圆角,半径为size/2
    QString border = QString("border:1px solid black;");                    // 边框为1px黑色
    // 最后设置背景颜色
    QString background = "background-color:";
    switch (color) {
    case GREY:      background += "rgb(190,190,190)";   break;        // 灰色
    case RED:       background += "rgb(255,0,0)";       break;        // 红色
    case GREEN:     background += "rgb(0,255,0)";       break;        // 绿色
    case YELLOW:    background += "rgb(255,255,0)";     break;        // 黄色
    default:    break;
    }

    const QString SheetStyle = min_width + min_height + max_width + max_height + border_radius + border + background;
    label->setStyleSheet(SheetStyle);
}
3、调用即可,显示如下图
MyLed::SetLED(ui->err2Led11, GREY, LED_SIZE);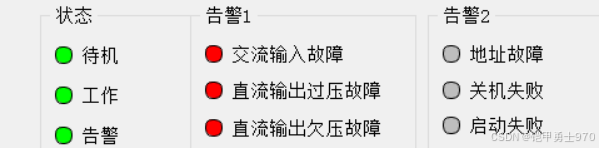


 被折叠的 条评论
为什么被折叠?
被折叠的 条评论
为什么被折叠?
 到【灌水乐园】发言


