


一、关于Swagger
Swagger 是一个规范和完整的框架,用于生成、描述、调用和可视化
RESTful
风格的
Web
服务。使用 Swagger,就是把相关的信息存储在它定义的描述文件里面(
yml
或
json
格式),再通过维护这个描述 文件可以去更新接口文档,以及生成各端代码。而Springfox-swagger,
则可以通过扫描代码去生成这个 描述文件,连描述文件都不需要再去维护了。所有的信息,都在代码里面了。代码即接口文档,接口文 档即代码。总体目标是使客户端和文件系统作为服务器以同样的速度来更新。文件的方法,参数和模型 紧密集成到服务器端的代码,允许API
来始终保持同步。
作用:
- 接口的文档在线自动生成
- 功能测试
二、SpringBoot集成Swagger
1、初始实现步骤
步骤1:添加maven坐标
<dependency>
    <groupId>io.springfox</groupId>
    <artifactId>springfox-swagger2</artifactId>
    <version>2.9.2</version>
</dependency>
<dependency>
    <groupId>io.springfox</groupId>
    <artifactId>springfox-swagger-ui</artifactId>
    <version>2.9.2</version>
</dependency>步骤2:编写一个配置类-SwaggerConfig来配置 Swagger
@Configuration //配置类
@EnableSwagger2// 开启Swagger2的自动配置
public class SwaggerConfig {
}步骤3:访问测试 :http://localhost:8080/swagger-ui.html ,可以看到swagger的界面

注意:
如果启动报错空指针是因为springboot2.6.0
中将
SpringMVC
默认路径匹配策略从
AntPathMatcher
更 改为PathPatternParser
,导致出错 可以在启动类上加上@EnableWebMvc
注解或者在配置中切换为原先的
AntPathMatcher
spring.mvc.pathmatch.matching-strategy=ant_path_matcher
2、配置Swagger
1.Swagger实例Bean是Docket,所以通过配置Docket实例来配置Swagger
@Bean //配置docket以配置Swagger具体参数
public Docket docket() {
return new Docket(DocumentationType.SWAGGER_2);
}
2.
可以通过
apiInfo()
属性配置文档信息
// 配置文档信息
private ApiInfo apiInfo() {
Contact contact = new Contact(
"联系人名字",
"http://xxx.xxx.com/联系人访问链接",
"联系人邮箱"
);
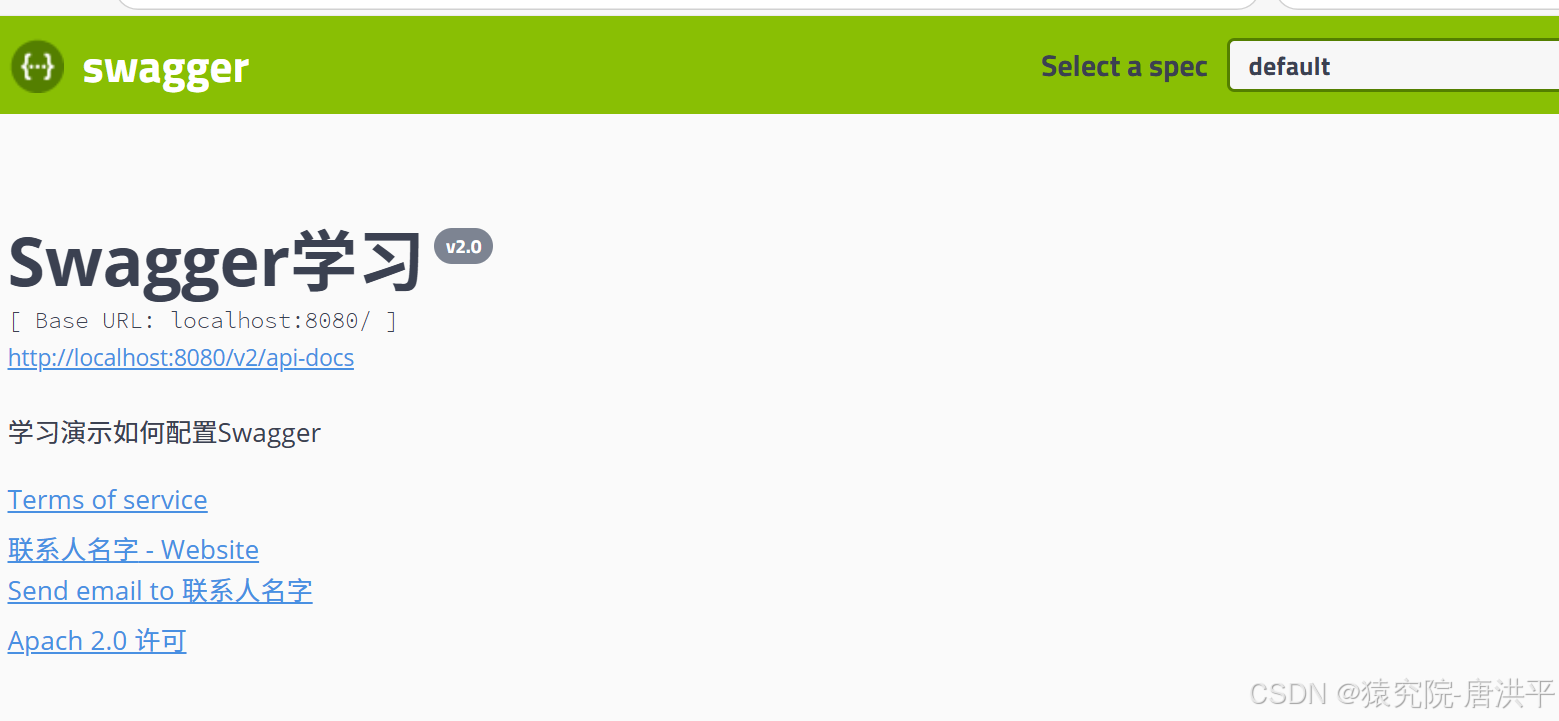
return new ApiInfo(
"Swagger学习", // 标题
"学习演示如何配置Swagger", // 描述
"v1.0", // 版本
"http://apesource.com", // 组织链接
contact, // 联系人信息
"Apache 2.0 许可", // 许可(注意修正了拼写错误:Apach -> Apache)
"许可链接", // 许可连接
new ArrayList<>() // 扩展
);
}
3.Docket
实例关联上
apiInfo()
@Bean
public Docket docket() {
    return new Docket(DocumentationType.SWAGGER_2).apiInfo(apiInfo());
}
4.重启项目,访问测试 http://localhost:8080/swagger-ui.html 再次查看效果;
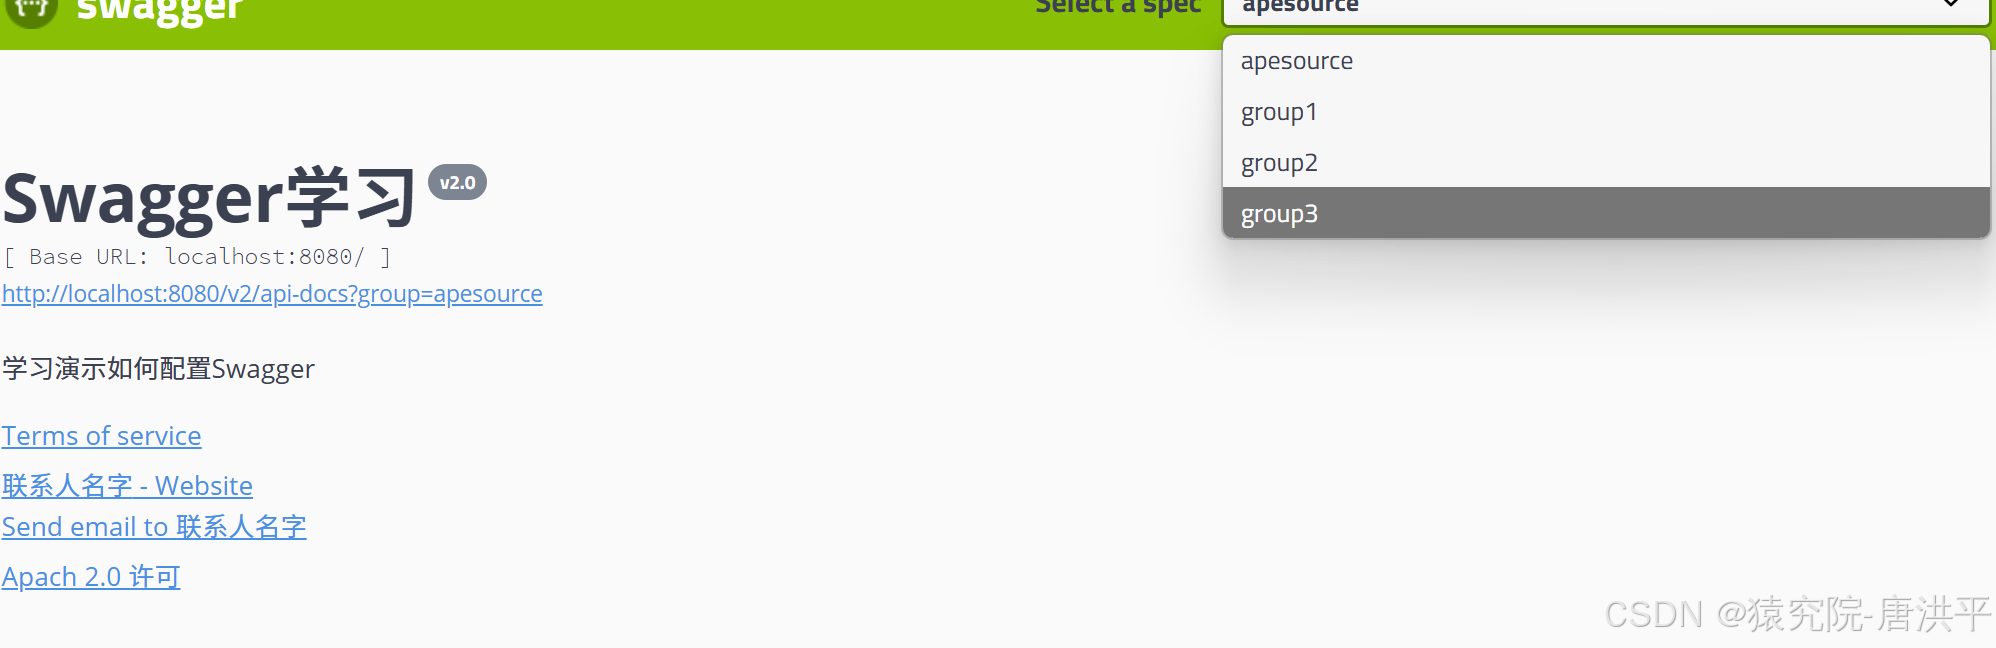
3、配置API分组
1.
如果没有配置分组,默认是
default
。通过
groupName()
方法即可配置分组
@Bean
public Docket docket(Environment environment) {
    return new Docket(DocumentationType.SWAGGER_2).apiInfo(apiInfo())
        .groupName("hello") // 配置分组
        // 省略配置....
}2.重启项目查看分组
3.
如何配置多个分组?配置多个分组只需要配置多个
docket
即可:
@Bean
public Docket docket1(){
    return new Docket(DocumentationType.SWAGGER_2).groupName("group1");
}
@Bean
public Docket docket2(){
    return new Docket(DocumentationType.SWAGGER_2).groupName("group2");
}
@Bean
public Docket docket3(){
    return new Docket(DocumentationType.SWAGGER_2).groupName("group3");
}4.重启项目,访问测试 http://localhost:8080/swagger-ui.html 查看效果;
4、拓展:其他皮肤
我们可以导入不同的包实现不同的皮肤定义
1.
默认的访问
http://localhost:8080/swagger-ui.html
<dependency>
    <groupId>io.springfox</groupId>
    <artifactId>springfox-swagger-ui</artifactId>
    <version>2.9.2</version>
</dependency>
2.bootstrap-ui
访问
http://localhost:8080/doc.html
<dependency>
    <groupId>com.github.xiaoymin</groupId>
    <artifactId>swagger-bootstrap-ui</artifactId>
    <version>1.9.1</version>
</dependency>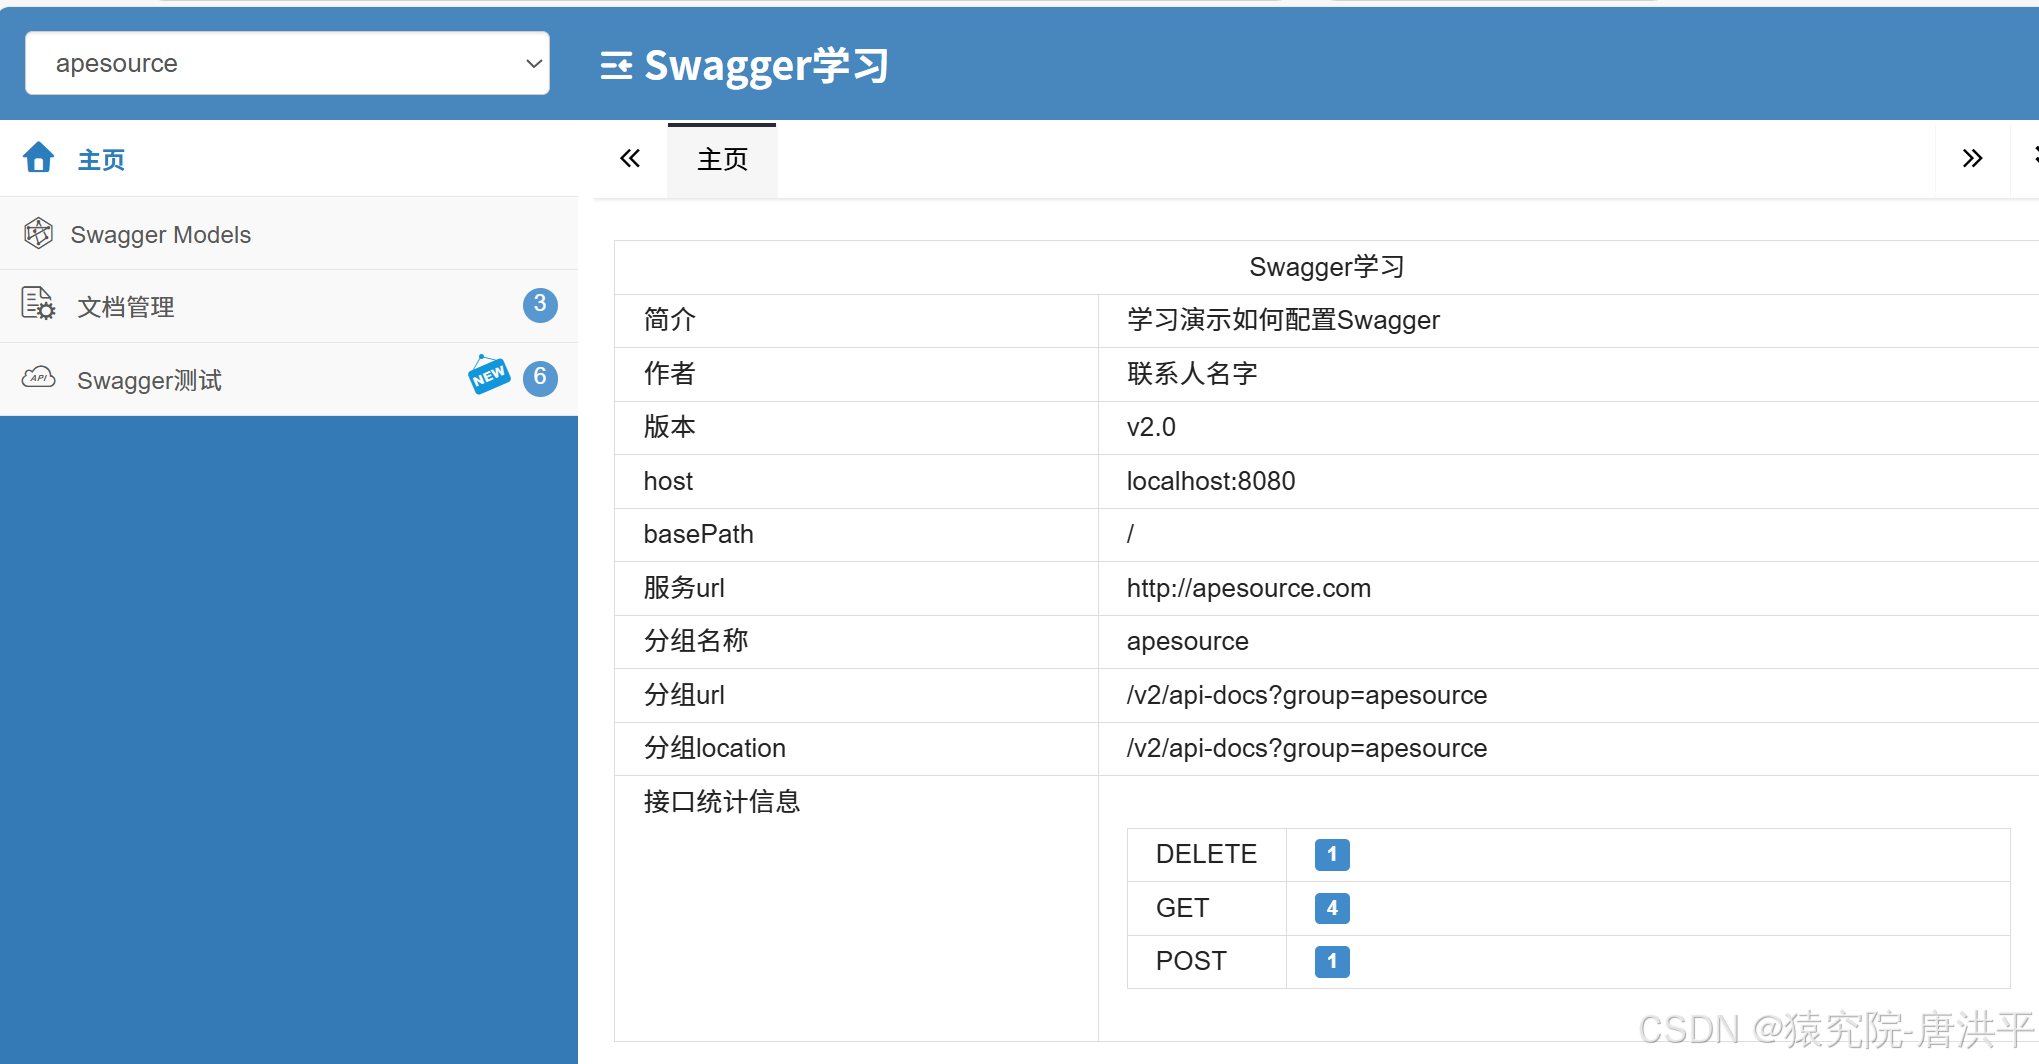


 152
152

 被折叠的 条评论
为什么被折叠?
被折叠的 条评论
为什么被折叠?
 到【灌水乐园】发言


