


 该文详细介绍了如何搭建一个基于SpringBoot的微服务架构,包括引入Nacos作为服务发现和配置中心,使用Feign进行服务间调用,以及配置Hystrix实现熔断和容错。同时,文中涉及到的配置管理、依赖注入和负载均衡策略也是关键点。
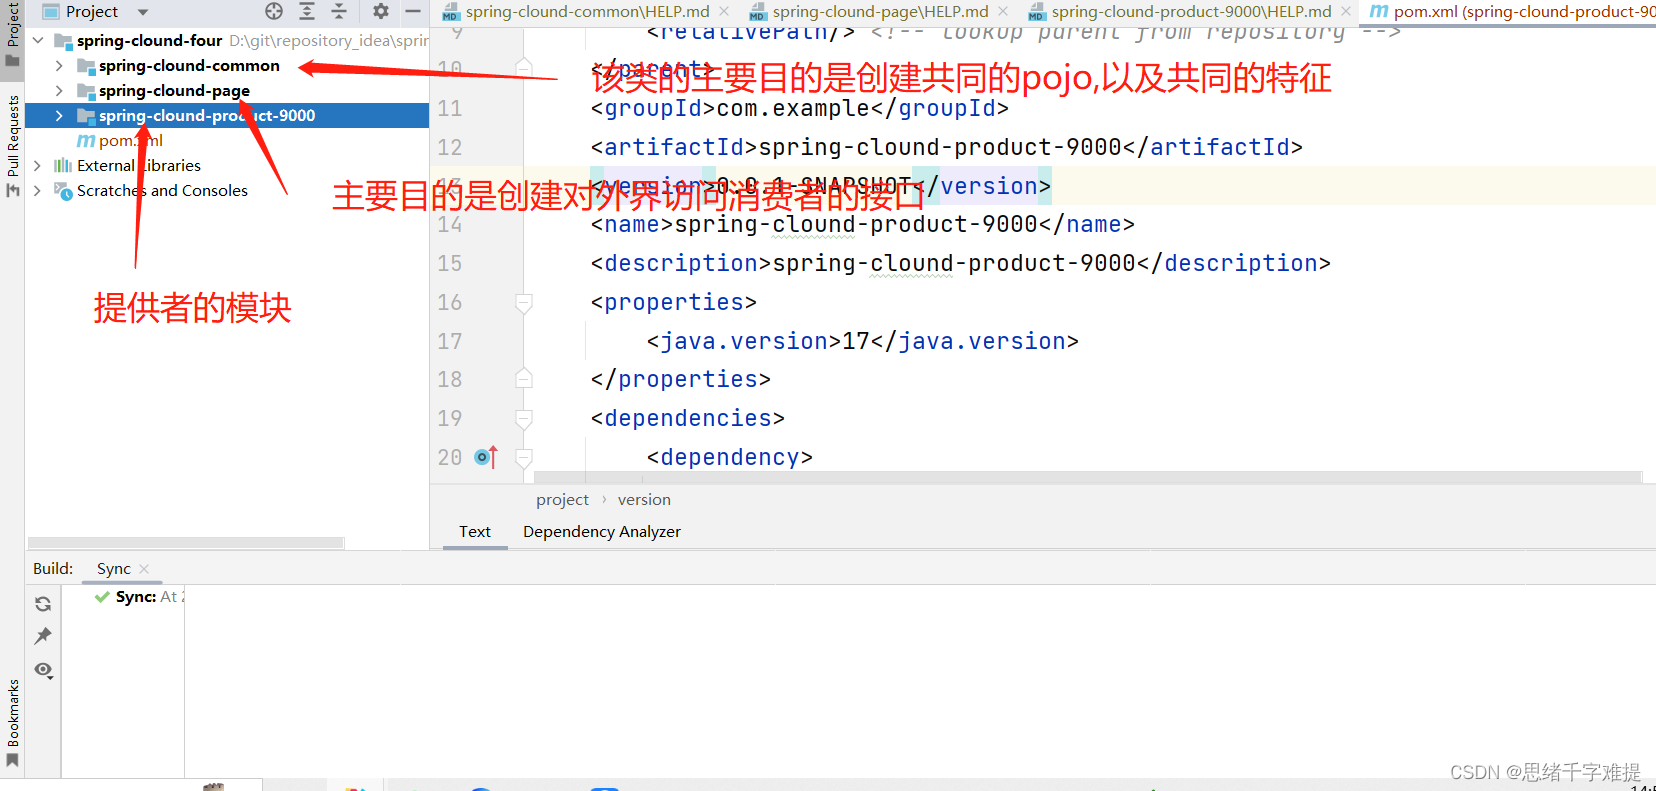
1.先创建以下项目结构
2.在父项目中导入以下依赖
    <dependencies>
        <dependency>
            <groupId>org.springframework.boot</groupId>
            <artifactId>spring-boot-starter</artifactId>
        </dependency>

        <!-- Web依赖 -->
        <dependency>
            <groupId>org.springframework.boot</groupId>
            <artifactId>spring-boot-starter-web</artifactId>
        </dependency>
        <!-- 日志依赖 -->
        <dependency>
            <groupId>org.springframework.boot</groupId>
            <artifactId>spring-boot-starter-logging</artifactId>
        </dependency>
        <!-- Lombok工具 -->
        <dependency>
            <groupId>org.projectlombok</groupId>
            <artifactId>lombok</artifactId>
            <version>1.18.4</version>
            <scope>provided</scope>
        </dependency>
        <!-- Actuator可以帮助你监控和管理Spring Boot应用 -->
        <dependency>
            <groupId>org.springframework.boot</groupId>
            <artifactId>spring-boot-starter-actuator</artifactId>
        </dependency>
        <!-- 热部署 -->
        <dependency>
            <groupId>org.springframework.boot</groupId>
            <artifactId>spring-boot-devtools</artifactId>
            <optional>true</optional>
        </dependency>

        <dependency>
            <groupId>org.springframework.boot</groupId>
            <artifactId>spring-boot-starter-test</artifactId>
            <scope>test</scope>
        </dependency>
    </dependencies>
    <dependencyManagement>
        <dependencies>
            <dependency>
                <groupId>com.alibaba.cloud</groupId>
                <artifactId>spring-cloud-alibaba-dependencies</artifactId>
                <version>2.1.0.RELEASE</version>
                <type>pom</type>
                <scope>import</scope>
            </dependency>
            <!-- SCN -->
            <!--            Spring Cloud Neflix公司出品的微服务组件的依赖-->
            <dependency>
                <groupId>org.springframework.cloud</groupId>
                <artifactId>spring-cloud-dependencies</artifactId>
                <version>Greenwich.RELEASE</version>
                <type>pom</type>
                <scope>import</scope>
            </dependency>
            <!-- 引入Jaxb开始 -->
            <dependency>
                <groupId>com.sun.xml.bind</groupId>
                <artifactId>jaxb-core</artifactId>
                <version>2.2.11</version>
            </dependency>
            <dependency>
                <groupId>javax.xml.bind</groupId>
                <artifactId>jaxb-api</artifactId>
            </dependency>
            <dependency>
                <groupId>com.sun.xml.bind</groupId>
                <artifactId>jaxb-impl</artifactId>
                <version>2.2.11</version>
            </dependency>
            <dependency>
                <groupId>org.glassfish.jaxb</groupId>
                <artifactId>jaxb-runtime</artifactId>
                <version>2.2.10-b140310.1920</version>
            </dependency>
            <dependency>
                <groupId>javax.activation</groupId>
                <artifactId>activation</artifactId>
                <version>1.1.1</version>
            </dependency>
            <!-- 引入Jaxb结束 -->
        </dependencies>
    </dependencyManagement>

    <build>
        <plugins>
            <plugin>
                <groupId>org.springframework.boot</groupId>
                <artifactId>spring-boot-maven-plugin</artifactId>
            </plugin>
        </plugins>
    </build>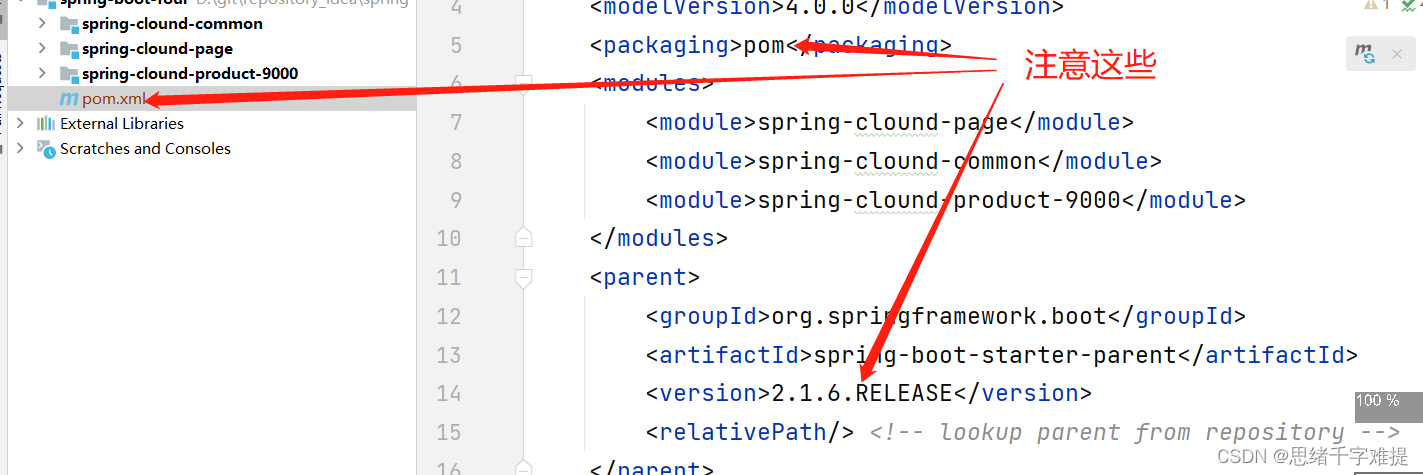
3.分别product,page项⽬的pom.xml⽂件中引⼊ Nacos客户端依赖,必须删除这三个项-client依赖。
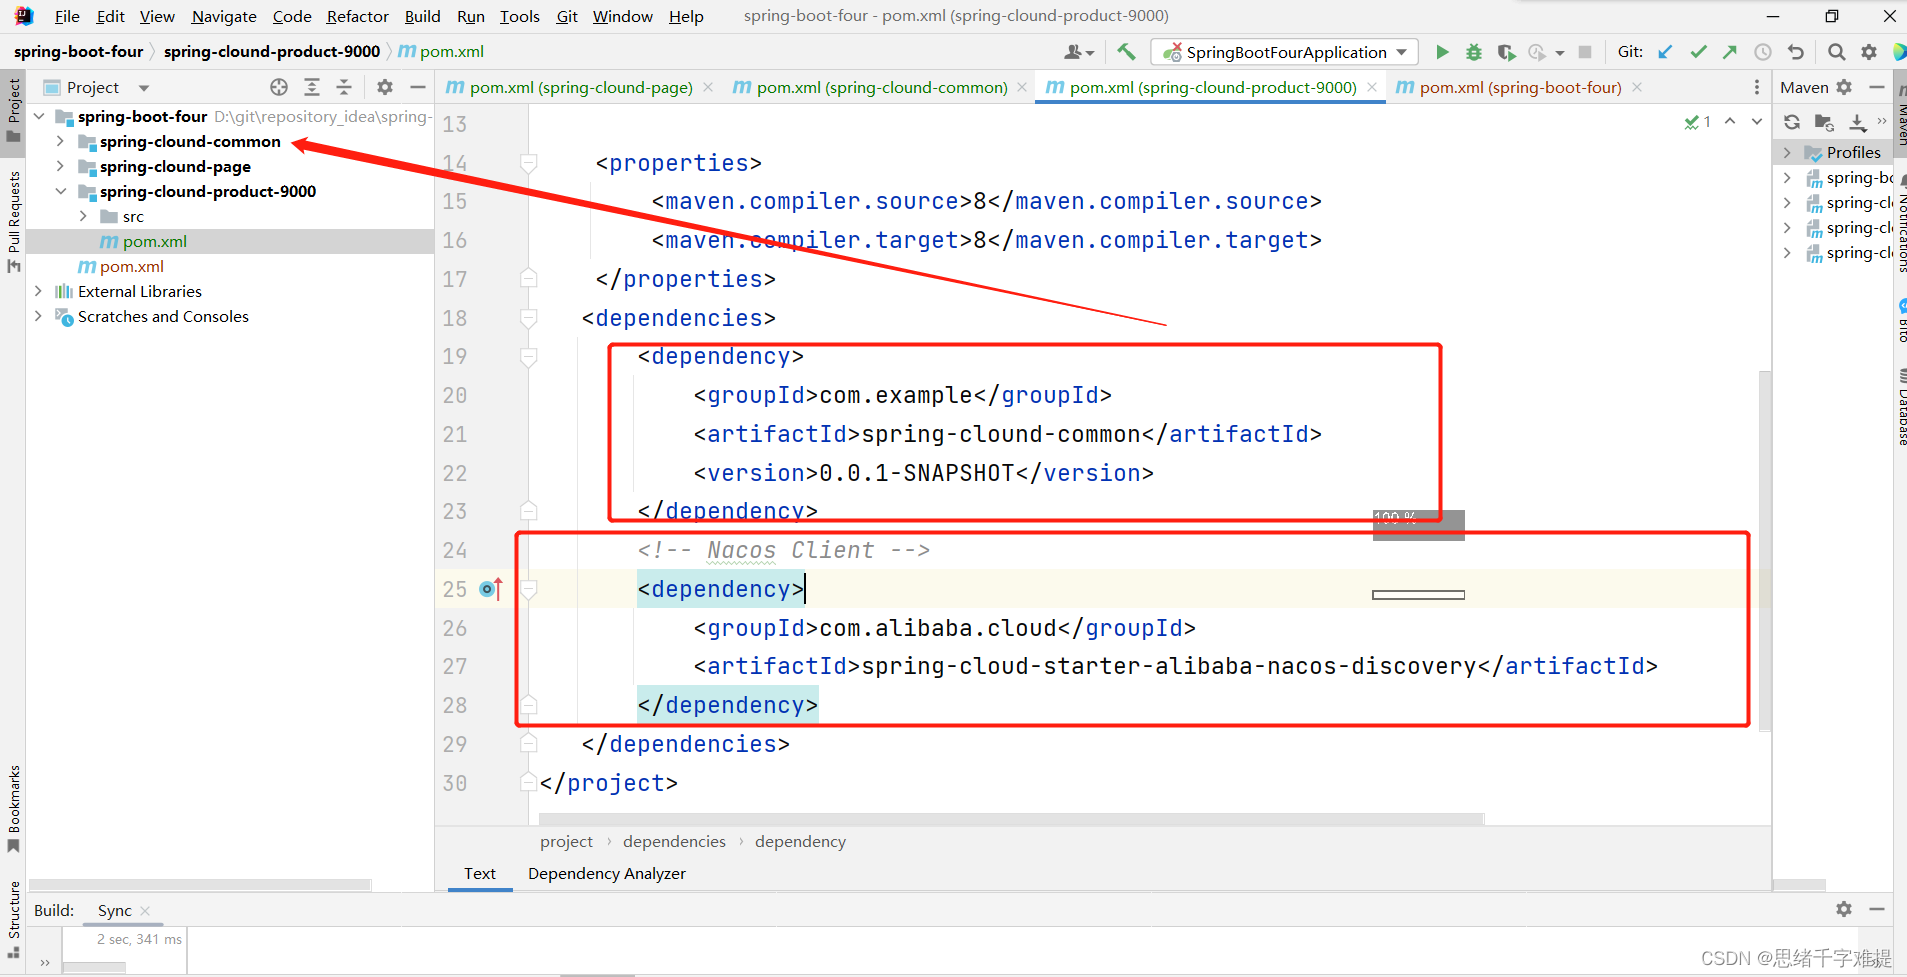
   <dependency>
        <groupId>com.example</groupId>
        <artifactId>yx-service-common</artifactId>
        <version>0.0.1-SNAPSHOT</version>
    </dependency>

    <dependency>
        <groupId>com.alibaba.cloud</groupId>
        <artifactId>spring-cloud-starter-alibaba-nacos-discovery</artifactId>
    </dependency>
4。在product编写启动类
@SpringBootApplication
@MapperScan("com.qf.product.mapper")
//@EnableDiscoveryClient  //将当前的项目标记为注册中心的客户端,然后向注册信息
public class ProductApplication9000 {
    public static void main(String[] args) {
        SpringApplication.run(ProductApplication9000.class,args);
    }
}
5.在common中pom文件中添加以下依赖
  <dependencies>
        <dependency>
            <groupId>com.baomidou</groupId>
            <artifactId>mybatis-plus-boot-starter</artifactId>
            <version>3.3.2</version>
        </dependency>
        <!-- pojo持久化使用 -->
        <dependency>
            <groupId>javax.persistence</groupId>
            <artifactId>javax.persistence-api</artifactId>
            <version>2.2</version>
        </dependency>
        <dependency>
            <groupId>mysql</groupId>
            <artifactId>mysql-connector-java</artifactId>
            <scope>runtime</scope>
        </dependency>
    </dependencies>

    <build>
        <finalName>yx-service-common</finalName>
        <pluginManagement><!-- lock down plugins versions to avoid using Maven defaults (may be moved to parent pom) -->
            <plugins>
                <plugin>
                    <artifactId>maven-clean-plugin</artifactId>
                    <version>3.1.0</version>
                </plugin>
                <!-- see http://maven.apache.org/ref/current/maven-core/default-bindings.html#Plugin_bindings_for_war_packaging -->
                <plugin>
                    <artifactId>maven-resources-plugin</artifactId>
                    <version>3.0.2</version>
                </plugin>
                <plugin>
                    <artifactId>maven-compiler-plugin</artifactId>
                    <version>3.8.0</version>
                </plugin>
                <plugin>
                    <artifactId>maven-surefire-plugin</artifactId>
                    <version>2.22.1</version>
                </plugin>
                <plugin>
                    <artifactId>maven-war-plugin</artifactId>
                    <version>3.2.2</version>
                </plugin>
                <plugin>
                    <artifactId>maven-install-plugin</artifactId>
                    <version>2.5.2</version>
                </plugin>
                <plugin>
                    <artifactId>maven-deploy-plugin</artifactId>
                    <version>2.8.2</version>
                </plugin>
            </plugins>
        </pluginManagement>
    </build>
6.在product中的application.yml中导入yml文件
server:
  port: 9000
spring:
  application:
    name: yx-service-product
  datasource:
    url: jdbc:mysql://localhost:3306/yx_sc?useSSL=false&useUnicode=true&characterEncoding=utf-8&serverTimezone=UTC
    username: root
    password: 123
  cloud:
    nacos:
      discovery:
        server-addr: 127.0.0.1:8848 #Nacos Server地址
7.在page的pom中,导入以下依赖
    <dependencies>

        <dependency>
            <groupId>com.example</groupId>
            <artifactId>spring-clound-common</artifactId>
            <version>0.0.1-SNAPSHOT</version>
        </dependency>


        <!-- 熔断器Hystrix -->
        <dependency>
            <groupId>org.springframework.cloud</groupId>
            <artifactId>spring-cloud-starter-netflix-hystrix</artifactId>
        </dependency>

        <dependency>
            <groupId>org.springframework.cloud</groupId>
            <artifactId>spring-cloud-starter-openfeign</artifactId>
        </dependency>
        <!-- Nacos Client -->
        <dependency>
            <groupId>com.alibaba.cloud</groupId>
            <artifactId>spring-cloud-starter-alibaba-nacos-discovery</artifactId>
        </dependency>
        <!-- 引入alibaba-nacos-config依赖,可以从Nacos配置中心获得配置信息 -->
        <dependency>
            <groupId>com.alibaba.cloud</groupId>
            <artifactId>spring-cloud-starter-alibaba-nacos-config</artifactId>
        </dependency>

        <dependency>
            <groupId>com.alibaba.cloud</groupId>
            <artifactId>spring-cloud-starter-alibaba-sentinel</artifactId>
        </dependency>
    </dependencies>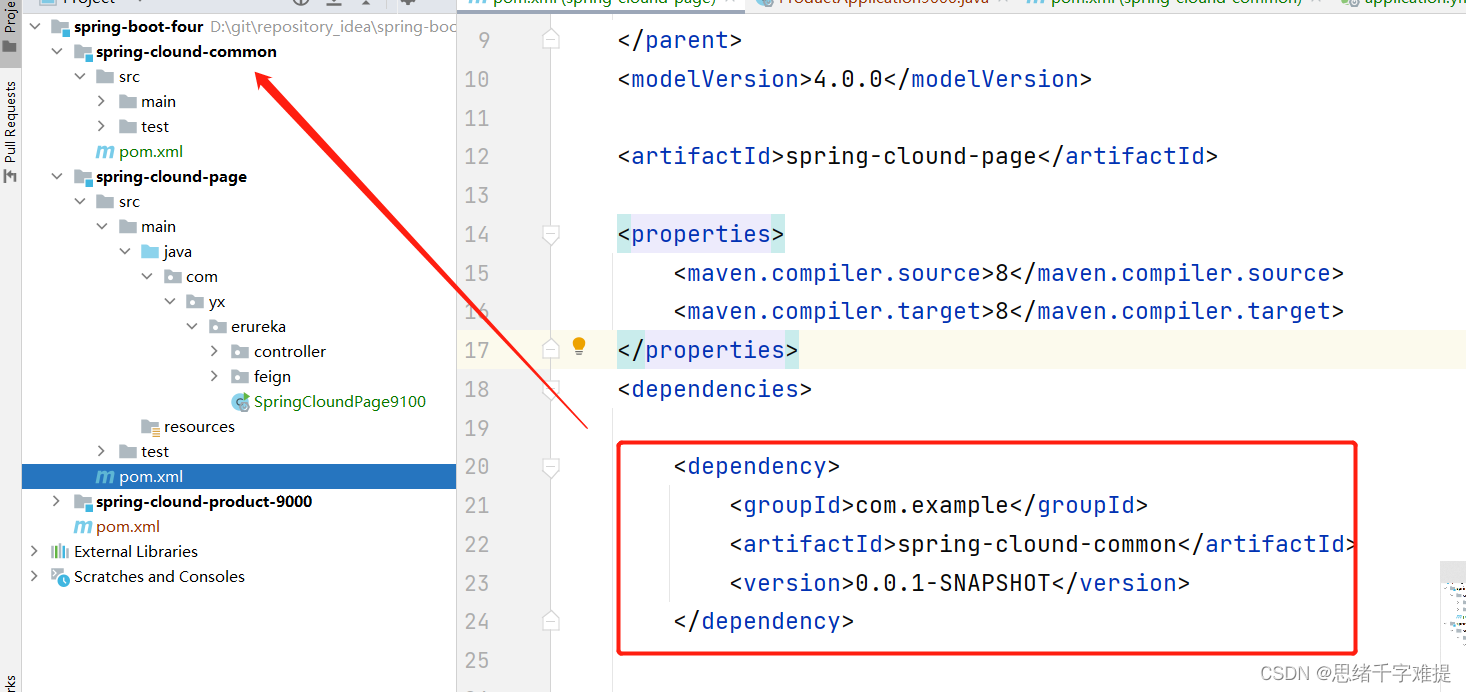
8.编写page的启动类
import org.mybatis.spring.annotation.MapperScan;
import org.springframework.boot.SpringApplication;
import org.springframework.boot.autoconfigure.SpringBootApplication;
import org.springframework.cache.annotation.EnableCaching;
import org.springframework.cloud.client.circuitbreaker.EnableCircuitBreaker;
import org.springframework.cloud.client.discovery.EnableDiscoveryClient;
import org.springframework.cloud.client.loadbalancer.LoadBalanced;
import org.springframework.cloud.openfeign.EnableFeignClients;
import org.springframework.context.annotation.Bean;
import org.springframework.web.client.RestTemplate;

@SpringBootApplication
//@EnableCircuitBreaker//开启Hystri熔断器功能
@EnableFeignClients//开启Feign远程服务调用功能
@MapperScan("com.qf.product.mapper")
//申明当前项目是Eurekaa客户端
@EnableDiscoveryClient
public class PageApplication {
    public static void main(String[] args) {
            SpringApplication.run(PageApplication.class,args);
   }
//   @LoadBalanced //调用Ribbon复杂均衡算法,实现负载均衡
//   @Bean
//    public RestTemplate restTemplate(){
//        return new RestTemplate();
//    }

}
9.编写page的yml文件
server:
  port: 9100
spring:
  cloud:
    nacos:
      discovery:
        server-addr: 127.0.0.1:8848 #Nacos Server地址
      config:
        server-addr: 127.0.0.1:8848
      #group: DEFAULT_GROUP # 如果使⽤的默认分组,可以不设置
        file-extension: yaml
        ext-config[0]:
          data-id: test1.yaml
          #group: DEFAULT_GROUP
          refresh: true # 开启扩展dataId的动态刷新
        ext-config[1]:
          data-id: test2.yaml
          #group: DEFAULT_GROUP
          refresh: true # 开启扩展dataId的动态刷新

  application:
    name: yx-service-page

  datasource:
    url: jdbc:mysql://localhost:3306/yx_sc?useSSL=false&useUnicode=true&characterEncoding=utf-8&serverTimezone=UTC
    username: root
    password: 123

hystrix:
  command:
    default:   #就算不给也不报错有默认
      circuitBreaker:
        # 强制打开熔断器,如果该属性设置为true,强制断路器进入打开状态,将会拒绝所有的请求,默认false关闭的
        forceOpen: false
        # 触发熔断错误比例阈值,默认值50%
        errorThresholdPercentage: 50
        # 熔断后休眠时长,默认值5秒
        sleepWindowInMilliseconds: 3000
        # 熔断触发最小请求次数,默认值是20
        requestVolumeThreshold: 2
      execution:
        isolation:
          thread:
            # 熔断超时设置,默认为1秒
            timeoutInMilliseconds: 2000
  threadpool: #hytix线程池配置
    default:
      coreSize: 10 # 并发执⾏的最⼤线程数,默认10
      maxQueueSize: 1000 # BlockingQueue的最⼤队列数,默认值-1
      # 即使maxQueueSize没有达到,达到queueSizeRejectionThreshold该值后,请求也会被拒绝,默认值5
      queueSizeRejectionThreshold: 800

  # 暴露健康接口的细节
  endpoint:
    health:
      show-details: always
# 针对的被调⽤⽅微服务名称,不加就是全局⽣效
yx-service-product:
  ribbon:
  # 请求连接超时时间
    ConnectTimeout: 2000
  # 请求处理超时时间
    ReadTimeout: 10000
  # 对所有操作都进⾏重试
    OkToRetryOnAllOperations: true
  # 根据如上配置,当访问到故障请求的时候,它会再尝试访问⼀次当前实例(次数由MaxAutoRetries配置),如果不⾏,
  # 就换⼀个实例进⾏访问;如果还不⾏,再换⼀次实例访问(更换次数由MaxAutoRetriesNextServer配置);如果依然不⾏,返回失败信息。
    MaxAutoRetries: 0 # 对当前选中实例重试次数,不包括第⼀次调⽤
    MaxAutoRetriesNextServer: 0 # 切换实例的重试次数
    NFLoadBalancerRuleClassName: com.netflix.loadbalancer.RandomRule # 负载策略调整
# 开启Feign的熔断功能
feign:
  hystrix:
    enabled: true  # 开启Feign的熔断功能
  compression:
    request:
      enabled: true # 默认不开启
      mime-types: text/html,application/xml,application/json # 设置压缩的数据类型,设置为默认值
      min-request-size: 2048 # 设置触发压缩的大小下限,2048为默认值
    response:
      enabled: true # 默认不开启
      # ⽅式1:暴露指定refresh端⼝
        # ⽅式1:暴露指定refresh端⼝
management:
  endpoints:
    web:
      exposure:
        include: bus-refresh
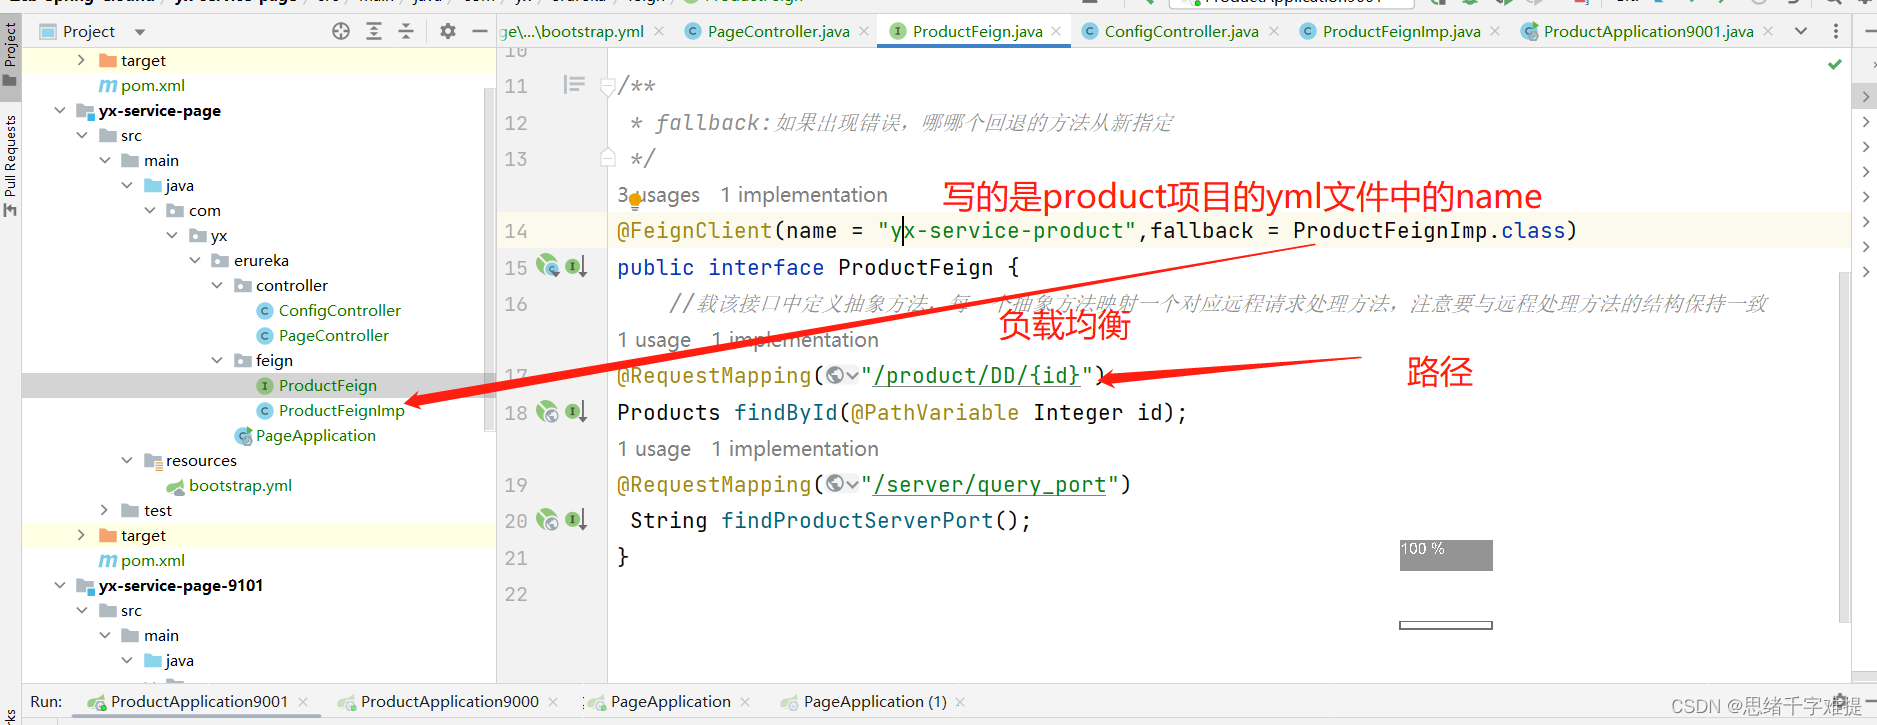
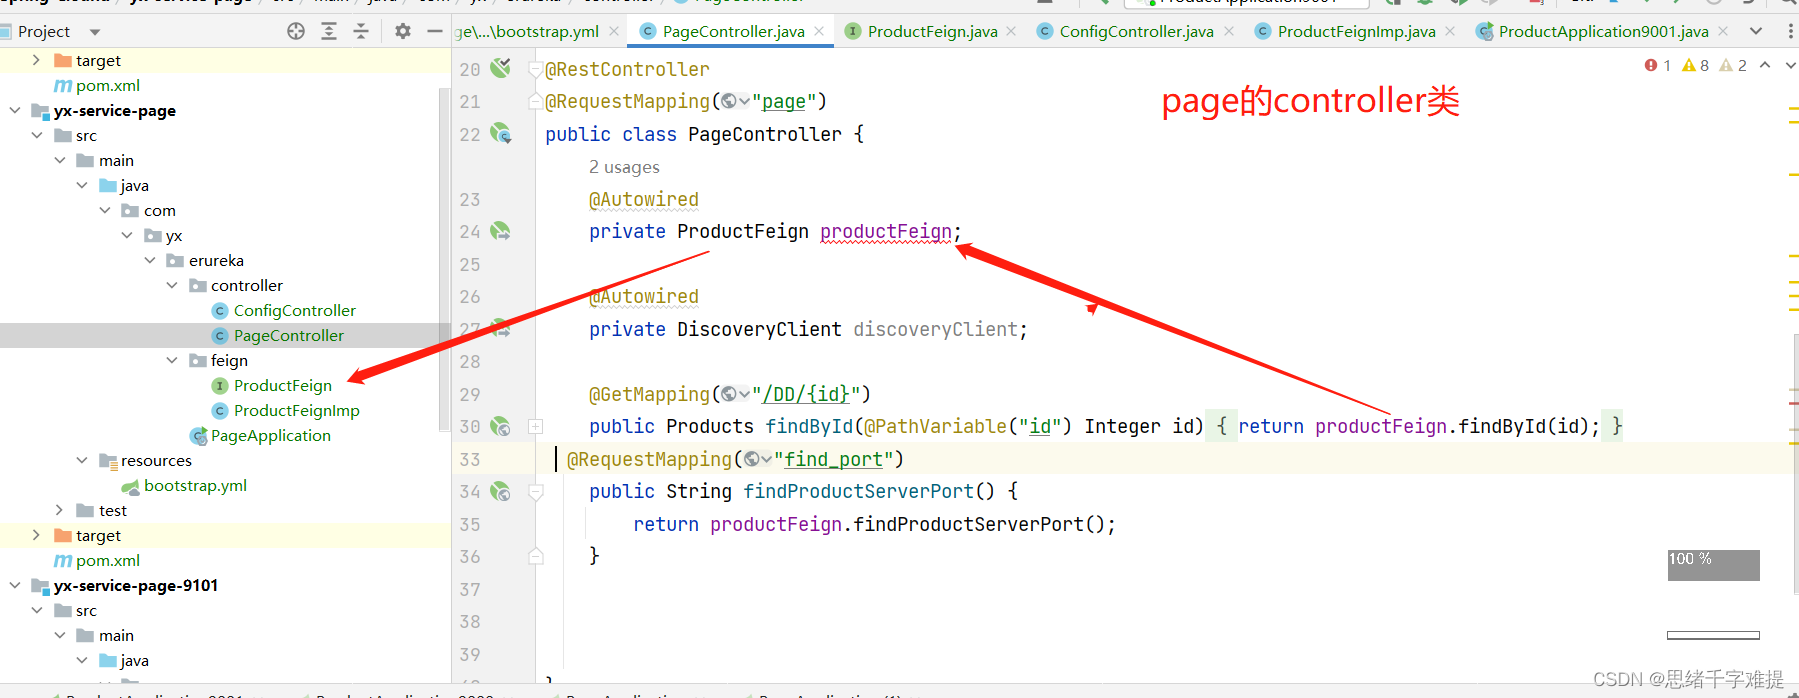
10.编写page的feign接口
package com.yx.erureka.feign;

import com.qf.common.pojo.Products;
import org.springframework.cloud.openfeign.FeignClient;
import org.springframework.web.bind.annotation.PathVariable;
import org.springframework.web.bind.annotation.RequestMapping;

// 注解表示Feign的远程调用
//-name:表示feign远程调用对应的服务提供者的名称\

/**
 * fallback:如果出现错误,哪哪个回退的方法从新指定
 */
@FeignClient(name = "yx-service-product",fallback = ProductFeignImp.class)
public interface ProductFeign {
    //载该接口中定义抽象方法,每一个抽象方法映射一个对应远程请求处理方法,注意要与远程处理方法的结构保持一致
@RequestMapping("/product/DD/{id}")
Products findById(@PathVariable Integer id);
@RequestMapping("/server/query_port")
 String findProductServerPort();
}
编写错误返回内容
package com.yx.erureka.feign;

import com.qf.common.pojo.Products;
import org.springframework.stereotype.Component;

@Component
public class ProductFeignImp implements ProductFeign{
    @Override
    public Products findById(Integer id) {
        return null;
    }

    @Override
    public String findProductServerPort() {
        return "-2";
    }
}


 1万+
1万+

 被折叠的 条评论
为什么被折叠?
被折叠的 条评论
为什么被折叠?
 到【灌水乐园】发言


