


 这篇博客深入介绍了JavaScript中的Web APIs和DOM的相关知识,包括如何根据ID和标签名获取元素,使用HTML5新方法及特殊元素获取,事件处理的三要素和执行过程,以及元素和样式的修改。通过实例展示了如何实现图片切换、密码显示隐藏、元素显示隐藏、循环精灵图以及文本框焦点行为。此外,还提供了详细的代码示例帮助读者巩固理解。
争取卷起来啊喂,之前真的好躺qwq
目录
I.Web APls
① Web APIs 和 JS 基础的关联性

 ② API 和 Web API


地址戳这 → MDN

II.DOM
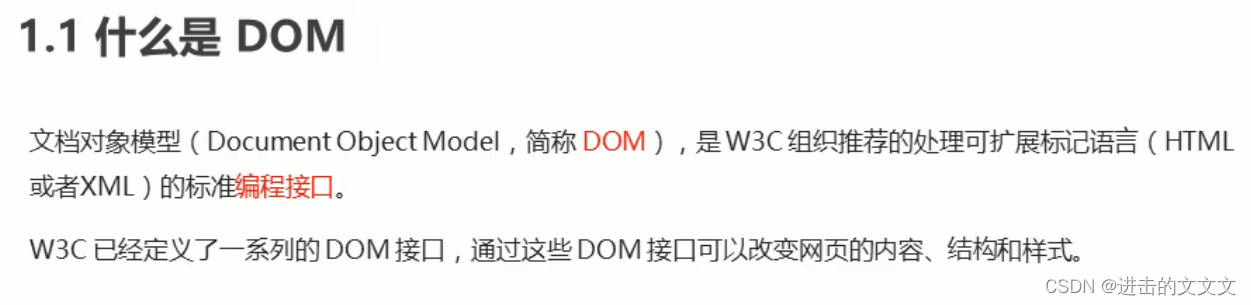
① 简介

② 获取元素
※※ 根据ID 获取
用 getElementByld() 方法可以获取 带有ID 的 元素对象


 ※※ 根据标签名获取
用 getElementsByTagName() 方法可以返回 带有指定标签名 的 对象的集合


※※ 通过HTML5新增的方法获取(i9以上版本支持)


※※ 特殊元素获取

③ 事件基础
※※ 三要素


btn.onclick = function() {
    alert('点秋香');
}
※※ 执行过程


④ 操作元素
※※ 修改普通元素


※※※※ 普通案例


图可以自己随便找,这里就不放了
<img src="w.jpg" alt="早上好!">
<div>早上好</div>
<script>
    var img = document.querySelector(' img ');
    var div = document.querySelector('div ');
    var time = new Date();
    var h = time.getHours();
    if (h < 12) {
        img.src = "z.jpg";
        img.alt = "早上";
        div.innerHTML = '早安 ';
    } else if (h < 18) {
        img.src = "x.jpg";
        img.alt = "下午";
        div.innerHTML = '下午好 ';
    } else {
        img.src = "w.jpg";
        img.alt = "晚";
        div.innerHTML = '晚好 ';
    }
</script>
※※ 修改表单属性

※※※※ 表单案例


html和css复习戳这里 → html汇总 、css边框 、css定位
我的:
<!DOCTYPE html>
<html lang="en">

<head>
    <meta charset="UTF-8">
    <meta http-equiv="X-UA-Compatible" content="IE=edge">
    <meta name="viewport" content="width=device-width, initial-scale=1.0">
    <title>Document</title>
    <style>
        .box {
            position: relative;
            width: 600px;
            height: 50px;
            margin: 50px auto;
            border: 10px inset dodgerblue;
        }

        input {
            width: 470px;
            height: 45px;
            outline: 0;
        }

        input::-ms-reveal {
            display: none;
        }
        /* 从网上学的去掉小眼睛的方法 */

        img {
            position: absolute;
            top: 0;
            right: 0;
        }
    </style>

    <body>
        <div class="box">
            <img src="2.jpg">
            <input type="password">
        </div>
        <script>
            var img = document.querySelector('img');
            var pw = document.querySelector('input');
            var flag = 0;
            img.onclick = function() {
                if (flag == 0) {
                    img.src = "1.jpg";
                    pw.type = 'text';
                } else {
                    img.src = "2.jpg";
                    pw.type = 'password';
                }
                flag = !flag;
            }
        </script>
    </body>

</html>
PS. 例图是用ps拼起来的

pink的:
<!DOCTYPE html>
<html lang="en">

<head>
    <meta charset="UTF-8">
    <meta http-equiv="X-UA-Compatible" content="IE=edge">
    <meta name="viewport" content="width=device-width, initial-scale=1.0">
    <title>Document</title>
    <style>
        .box {
            width: 400px;
            border-bottom: 1px solid#ccc;
            margin: 100px auto;
        }

        .box input {
            width: 370px;
            height: 30px;
            border: 0;
            outline: none;
        }
    </style>
</head>

<body>
    <div class="box">
        <label for="">
            <img src="images/close.png" alt="" id="eye">
        </label>
        <input type="password" name="" id="pwd"></div>
    <script>
        //1.获取元素
        var eye = document.getElementById('eye');
        var pwd = document.getElementById('pwd');
        //2.注册事件处理程序
        var flag = 0;
        eye.onclick = function() { //点击一次之后,flag一定要变化
            if (flag == 0) {
                pwd.type = 'text';
                eye.src = 'images/open.png';
                flag = 1;
            } else {
                pwd.type = 'password';
                eye.src = 'images/close.png';
                flag = 0;
            }
        }
    </script>

</body>

</html>
※※ 修改样式属性

 ※※※※ 样式案例


我的:
<!DOCTYPE html>
<html lang="en">

<head>
    <meta charset="UTF-8">
    <meta http-equiv="X-UA-Compatible" content="IE=edge">
    <meta name="viewport" content="width=device-width, initial-scale=1.0">
    <title>Document</title>
    <style>
        .box {
            position: relative;
            width: 445px;
            height: 440px;
            margin: 50px auto;
            border: 10px inset dodgerblue;
        }

        .btn {
            position: absolute;
            top: 13%;
            left: 20px;
            width: 30px;
            height: 30px;
            border: 3px solid slateblue;
            border-radius: 10px;
            text-align: center;
        }

        .img {
            position: absolute;
            top: 50%;
            margin-top: -190px;
            padding: 5px;
            right: 20px;
            width: 350px;
            height: 377px;
            border: 3px solid slateblue;
            border-radius: 10px;
        }

        p {
            margin: 3px;
            text-align: center;
            font-size: 15px;
        }

        img {
            width: 350px;
            height: 350px;
            border-radius: 20px;
        }
    </style>

    <body>
        <div class="box">
            <button class="btn">X</button>
            <div class="img">
                <p>图来自百度~!</p>
                <img src="1.jpg">
            </div>
        </div>
        <script>
            var btn = document.querySelector('.btn');
            var box = document.querySelector('.box');

            btn.onclick = function() {
                box.style.display = 'none';
            }
        </script>
    </body>

</html>
PS.点了按钮好几次都没反应。。然后发现是把 document.querySelector('.btn'); 写成了 getElementsByClassName ,如果你也忘了的话赶快去看本篇的获取元素哦!
pink的:
<!DOCTYPE html>
<html lang="en">

<head>
    <meta charset="UTF-8">
    <meta http-equiv="X-UA-Compatible" content="IE=edge">
    <meta name="viewport" content="width=device-width, initial-scale=1.0">
    <title>Document</title>
    <style>
        .box {
            position: relative;
            width: 74px;
            height: 88px;
            border: 1px solid#ccc;
            margin: 100px auto;
            font-size: 12px;
            text-align: center;
            color: #f40;
            /* display: block; */
        }

        .box img {
            width: 60px;
            margin-top: 5px;
        }

        .close-btn {
            position: absolute;
            top: -1px;
            left: -16px;
            width: 14px;
            height: 14px;
            border: 1px solid#ccC;
            line-height: 14px;
            font-family: Arial, Helvetica, sans-serif;
            cursor: pointer;
        }
    </style>
</head>

<body>
    <div class="box">淘宝二维码
        <img src="images/tao.png" alt="">
        <i class="close-btn">x</i>
    </div>
    <script>
        //1.获取元素
        var btn = document.querySelector('.close-btn');
        var box = document.querySelector('.box');
        //2.注册事件程序处理
        btn.onclick = function() {
            box.style.display = 'none;'
        }
    </script>

</body>

</html>
※※※※ 循环精灵图


这个是直接抄的pink的
<!DOCTYPE html>
<html lang="en">

<head>
    <meta charset="UTF-8">
    <meta http-equiv="X-UA-Compatible" content="IE=edge">
    <meta name="viewport" content="width=device-width, initial-scale=1.0">
    <title>Document</title>

</head>

<body>
    <div class="box">
        <ul>
            <li></li>
            <li></li>
            <li></li>
            <li></li>
            <li></li>
            <li></li>
            <li></li>
            <li></li>
            <li></li>
            <li></li>
            <li></li>
            <li></li>
        </ul>
    </div>
    <script>
        //1.获取元素所有的小li
        var lis = document.querySelectorAll('li');
        for (var i = 0; i < lis.length; i++) {
            //让索引号乘以44就是每个li的背景y坐标
            var index = i * 44;
            //index就是我们的y坐标
            lis[i].style.backgroundPosition = '0 -' + index + 'px';
        }
    </script>

</body>

</html>
※※ 文本框案例

我的:
<!DOCTYPE html>
<html lang="en">

<head>
    <meta charset="UTF-8">
    <meta http-equiv="X-UA-Compatible" content="IE=edge">
    <meta name="viewport" content="width=device-width, initial-scale=1.0">
    <title>Document</title>
    <style>
        .box {
            position: relative;
            margin: 50px auto;
            width: 270px;
            border: 10px groove dodgerblue;
            padding: 10px;
            border-radius: 10px;
        }

        input {
            color: #999;
            width: 260px;
            font-size: 16px;
            font-family: '楷体';
            font-weight: 700;
            height: 24px;
            border: 3px solid #999;
            border-radius: 6px;
        }

        button {
            position: absolute;
            height: 32px;
            width: 50px;
            margin-right: -4px;
            top: 20%;
            right: 5%;
            border: 3px solid #999;
            background-color: lightskyblue;
            border-radius: 6px;
            color: rgb(123, 122, 122);
            font-size: 16px;
            font-weight: 700;
            font-family: '楷体';
        }
    </style>
</head>

<body>
    <div class="box">
        <input type="text" value="手机">
        <button>搜索</button>

    </div>
    <script>
        var text = document.querySelector('input');
        text.onfocus = function() {
            if (text.value == '手机') text.value = '';
        }
        text.onblur = function() {
            if (text.value == '') text.value = '手机';
        }
    </script>

</html>
只放了显示的图,可以直接复制代码试一下ww

pink的:
<!DOCTYPE html>
<html lang="en">

<head>
    <meta charset="UTF-8">
    <meta http-equiv="X-UA-Compatible" content="IE=edge">
    <meta name="viewport" content="width=device-width, initial-scale=1.0">
    <title>Document</title>

</head>

<body>
    <input type="text" value="手机">
    <script>
        //1.获取元素
        var text = document.querySelector('input');
        // 2.注册事件获得焦点事件 onfocus
        text.onfocus = function() {
                //console.log('得到了焦点');
                if (this.value === '手机') this.value = '';
                //获得焦点需要把文本框里面的文字颜色变黑
                this.style.color = '#333';
            }
            //3.注册事件失去焦点事件 onblur
        text.onblur = function() {
            //console.log('失去了焦点');
            if (this.value == '') this.value = '手机';
            //失去焦点需要把文本框里面的文字颜色变浅色
            this.style.color = '#999';
        }
    </script>

</body>

</html>
恭喜看到这的小伙伴,你已经完成JavaScript APIs第一天的学习了~!!
下面进入第一天剩余部分的学习吧 (。・∀・)ノ゙ → 样式属性部分案例
有用的话可以点赞评论收藏哦!!


 被折叠的 条评论
为什么被折叠?
被折叠的 条评论
为什么被折叠?
 到【灌水乐园】发言


