


 本文主要介绍Spring整合MyBatis与JUnit的相关内容。先对Spring整合MyBatis进行分析,包括MyBatis程序核心对象和配置文件;接着阐述Spring整合MyBatis的步骤,如导坐标、写配置类和运行代码;最后说明Spring整合JUnit的步骤,如导坐标和编写测试类。
目录
Spring整合MyBatis分析
MyBatis程序核心对象分析
// 1. 创建SqLSessionFactoryBuilder对象 SqlSessionFactoryBuilder sqlSessionFactoryBuilder = new SqlSessionFactoryBuilder(); // 2. 加载配置文件 InputStream inputStream = Resources.getResourceAsStream("SqlMapConfig.xml"); // 3.创建SqlSessionFactory对象 SqlSessionFactory sqlSessionFactory = sqlSessionFactoryBuilder.build(inputStream); // 4.获取SqLSession SqlSession sqlSession =sqlSessionFactory.openSession(); // 5.执行SqLSession对象执行sql BrandDao brandDao =sqlSession.getMapper(BrandDao.class); // 6. 获取数据 Brand brand = brandDao.findById(1); System.out.println(brand); // 7.释放资源 sqlSession.close();上段代码可以分解成四部分:
①初始化SqlSessionFactory(1,2,3)
②获取连接,获取实现(4,5)
③获取数据层接口(6)
④关闭连接(7)
代码中有SqlSessionFactory SqlSession BrandDao三个核心对象,
最核心对象:SqlSessionFactory,作为Spring的bean管理。
配置文件分析
<configuration>
    <properties resource="jdbc.properties"/>
    <typeAliases>
        <package name="test.domain"/>
    </typeAliases>

    <environments default="mysql">
        <environment id="mysql">
            <transactionManager type="JDBC"/>
            <dataSource type="POOLED">
                <property name="driver" value="${jdbc.driver}"/>
                <property name="url" value="${jdbc.url}"/>
                <property name="username" value="${jdbc.username}"/>
                <property name="password" value="${jdbc.password}"/>
            </dataSource>
        </environment>
    </environments>
    <mappers>
        <!--扫描mapper-->
        <package name="test.dao"/>
    </mappers>
</configuration>
mappers以上的标签都是为核心对象SqlSessionFactory初始化的。mappers是根据业务变化的。之后的配置类中将这个分为两部分写。
<properties resource="jdbc.properties"/>这个在SpringConfig的注解中用@PropertySource("classpath:jdbc.properties")代替。
<dataSource type="POOLED">
    <property name="driver" value="${jdbc.driver}"/>
    <property name="url" value="${jdbc.url}"/>
    <property name="username" value="${jdbc.username}"/>
    <property name="password" value="${jdbc.password}"/>
</dataSource>
这个就转化为JdbcConfig对应的部分。
<typeAliases>
    <package name="test.domain"/>
</typeAliases>
<environments default="mysql">
    <environment id="mysql">
        <transactionManager type="JDBC"/>
    </environment>
</environments>
<mappers>
    <package name="test.dao"/>
</mappers>
剩下的转化在MybatisConfig中。
Spring整合MyBatis
第一步:导坐标
<dependencies>

    <dependency>
        <groupId>org.mybatis</groupId>
        <artifactId>mybatis</artifactId>
        <version>3.5.6</version>
    </dependency>

    <dependency>
        <groupId>mysql</groupId>
        <artifactId>mysql-connector-java</artifactId>
        <version>8.0.28</version>
    </dependency>

    <dependency>
        <groupId>org.springframework</groupId>
        <artifactId>spring-context</artifactId>
        <version>5.3.20</version>
    </dependency>

    <dependency>
        <groupId>com.alibaba</groupId>
        <artifactId>druid</artifactId>
        <version>1.1.16</version>
    </dependency>
    <!--引入新坐标-->
    <dependency>
        <groupId>org.springframework</groupId>
        <artifactId>spring-jdbc</artifactId>
        <version>5.3.20</version>
    </dependency>

    <dependency>
        <groupId>org.mybatis</groupId>
        <artifactId>mybatis-spring</artifactId>
        <version>1.3.0</version>
    </dependency>
</dependencies>
第二步:注解开发写配置类
SpringConfig
@Configuration
@ComponentScan("test")
@PropertySource("classpath:jdbc.properties")
@Import({MybatisConfig.class,JdbcConfig.class})
public class SpringConfig {
}
JdbcConfig
public class JdbcConfig {

    @Value("${jdbc.driver}")
    private String driver;
    @Value("${jdbc.url}")
    private String url;
    @Value("${jdbc.username}")
    private String userName;
    @Value("${jdbc.password}")
    private String password;

    @Bean
    //dataSource标签对应的转化
    public DataSource dataSource(){
        DruidDataSource druidDataSource = new DruidDataSource();
        druidDataSource.setDriverClassName(driver);
        druidDataSource.setUrl(url);
        druidDataSource.setUsername(userName);
        druidDataSource.setPassword(password);
        return  druidDataSource;
    }
}
MybatisConfig
public class MybatisConfig {
    @Bean
    //代替配置文件里面的SqlSessionFactory初始化,DataSource引用JdbcConfig的bean
    public SqlSessionFactoryBean sqlSessionFactory(DataSource dataSource) {
        SqlSessionFactoryBean ssfb = new SqlSessionFactoryBean();
        ssfb.setTypeAliasesPackage("test.domain");    //<typeAliases><package>标签转化为setTypeAliasesPackage方法
        ssfb.setDataSource(dataSource);    //<environments>标签转化为setDataSource方法
        return ssfb;
    }

    @Bean
    //代替配置文件里面的扫描mapper
    public MapperScannerConfigurer mapperScannerConfigurer(){
        MapperScannerConfigurer msc =new MapperScannerConfigurer();
        msc.setBasePackage("test.dao");     //<mappers><package>标签转化为setBasePackage方法
        return msc;
    }
}
第三步:写运行代码
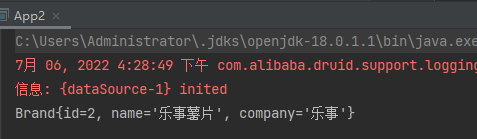
public class App2 {
    public static void main(String[] args) throws IOException {
        ApplicationContext context = new AnnotationConfigApplicationContext(SpringConfig.class);
        BrandService brandService = context.getBean(BrandService.class);
        Brand brand = brandService.findById(2);
        System.out.println(brand);
    }
}
运行结果:
Spring整合JUnit
第一步:导坐标
<dependency>
    <groupId>junit</groupId>
    <artifactId>junit</artifactId>
    <version>4.12</version>
    <scope>test</scope>
</dependency>

<dependency>
    <groupId>org.springframework</groupId>
    <artifactId>spring-test</artifactId>
    <version>5.3.20</version>
</dependency>
第二步:编写测试类
使用Spring整合JUnit专用的类加载器。
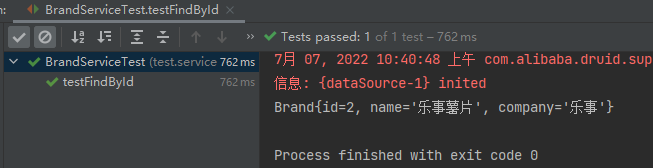
@RunWith(SpringJUnit4ClassRunner.class)
@ContextConfiguration(classes = SpringConfig.class)
//两个固定格式的注解
public class BrandServiceTest {
    //要测谁就用@Autowired配置成一个属性
    @Autowired
    private BrandService brandService;
    //用@Test指定测试方法,右键运行
    @Test
    public void testFindById(){
        Brand brand = brandService.findById(2);
        System.out.println(brand);
    }
}
运行结果:


 被折叠的 条评论
为什么被折叠?
被折叠的 条评论
为什么被折叠?
 到【灌水乐园】发言


