


Elasticsearch
Elasticsearch 是一个分布式搜索和分析引擎,具有以下特点:
分布式架构:Elasticsearch 设计为可以扩展到数百台服务器,可以轻松地处理大量的数据。
实时搜索:Elasticsearch 使用了倒排索引技术,可以实现低延迟、实时搜索以及快速聚合和过滤。
多种数据类型:Elasticsearch 可以存储不同类型的数据,包括结构化和非结构化数据、文本、数字、日期等数据类型。
复杂查询:Elasticsearch 提供了一套灵活且强大的查询语言,可用于执行全文搜索、模糊搜索、复杂聚合和过滤等操作。
高可靠性:在一个 Elasticsearch 集群中,每个索引通常都会被划分为多个分片,这些分片可以存储在不同的节点上,从而提高系统的可用性和容错性。
开源免费:Elasticsearch 是一款完全开放源代码的软件,且免费使用。
1、安装elasticsearch、kibana、分词器
- elasticsearch
1、拉取镜像:
docker pull elasticsearch:7.12.1 # 版本不能上8.xx有问题
2、启动容器
挂载的数据卷目录需要提前创建好
/usr/local/elasticsearch/data:数据持久化
/usr/local/elasticsearch/config/elasticsearch.yml:配置文件
/usr/local/elasticsearch/plugins:es插件
需要注意可能会出现文件权限不足启动失败的原因:
开发挂载数据卷的权限
chmod -R 777 /usr/local/elasticsearch
docker run --name elasticsearch -d -p 9200:9200 -p 9300:9300 -e "discovery.type=single-node" -e "ES_JAVA_OPTS=-Xms256m -Xmx256m" --restart=always -v /usr/local/elasticsearch/config/elasticsearch.yml:/usr/share/elasticsearch/config/elasticsearch.yml -v /usr/local/elasticsearch/data/:/usr/share/elasticsearch/data -v /usr/local/elasticsearch/plugins:/usr/share/elasticsearch/plugins elasticsearch:7.12.1

稍加等待,一直处于up状态基本OK,访问ip+9200如下则OK

- kibana
1、拉取镜像
docker pull kibana:7.12.1
2、run起来
要用ip不能使用localhost和127.0.0.1,测试过了,在kibana容器里面curl访问不到,通过ip就可以访问
docker run --name kibana -d -p 5601:5601 -e "ELASTICSEARCH_HOSTS=http://192.168.19.129:9200" kibana:7.12.1
成功照:

基本使用:
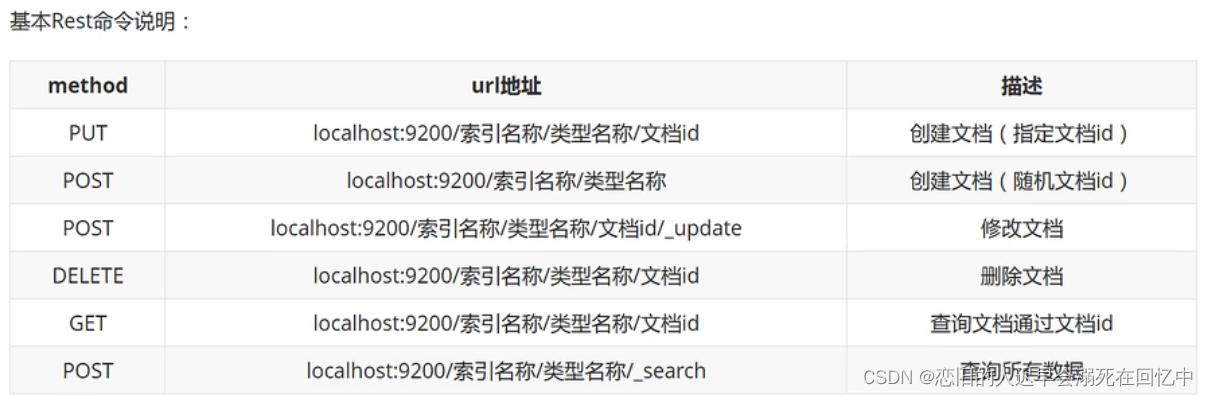
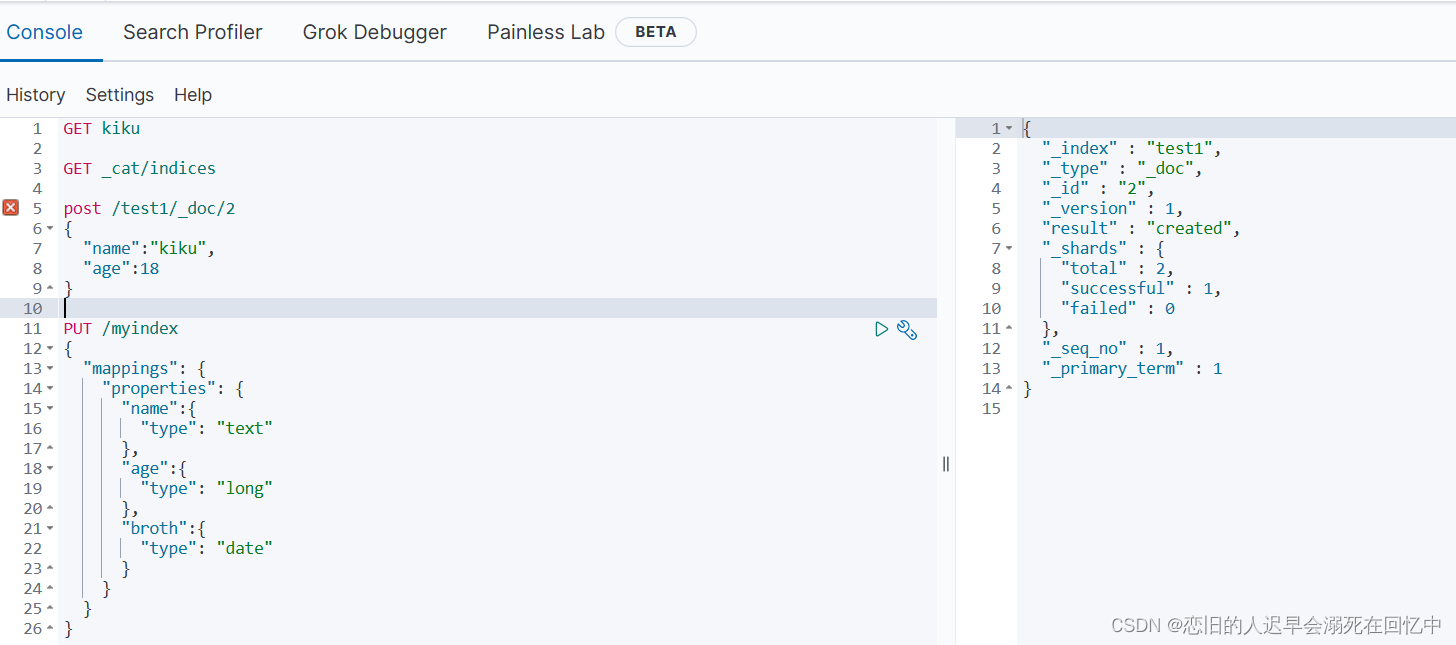
# 创建文档
PUT/test1/_doc/2
{
"name":"kiku",
"age":18
}
# 创建索引
PUT /myindex
{
"mappings": {
  "properties": {
    "name":{
      "type": "text"
    },
    "age":{
      "type": "long"
    },
    "broth":{
      "type": "date"
    }
  }
}
}
#获取索引或文档信息get后面跟上索引或文档
GET myindex
#查看信息
GET _cat/indices
#修改文档
POST /test1/_doc/2/_update
{
"doc":{
  "name":"啊啊啊啊"
}
}
#删除索引或文档
DELETE test1
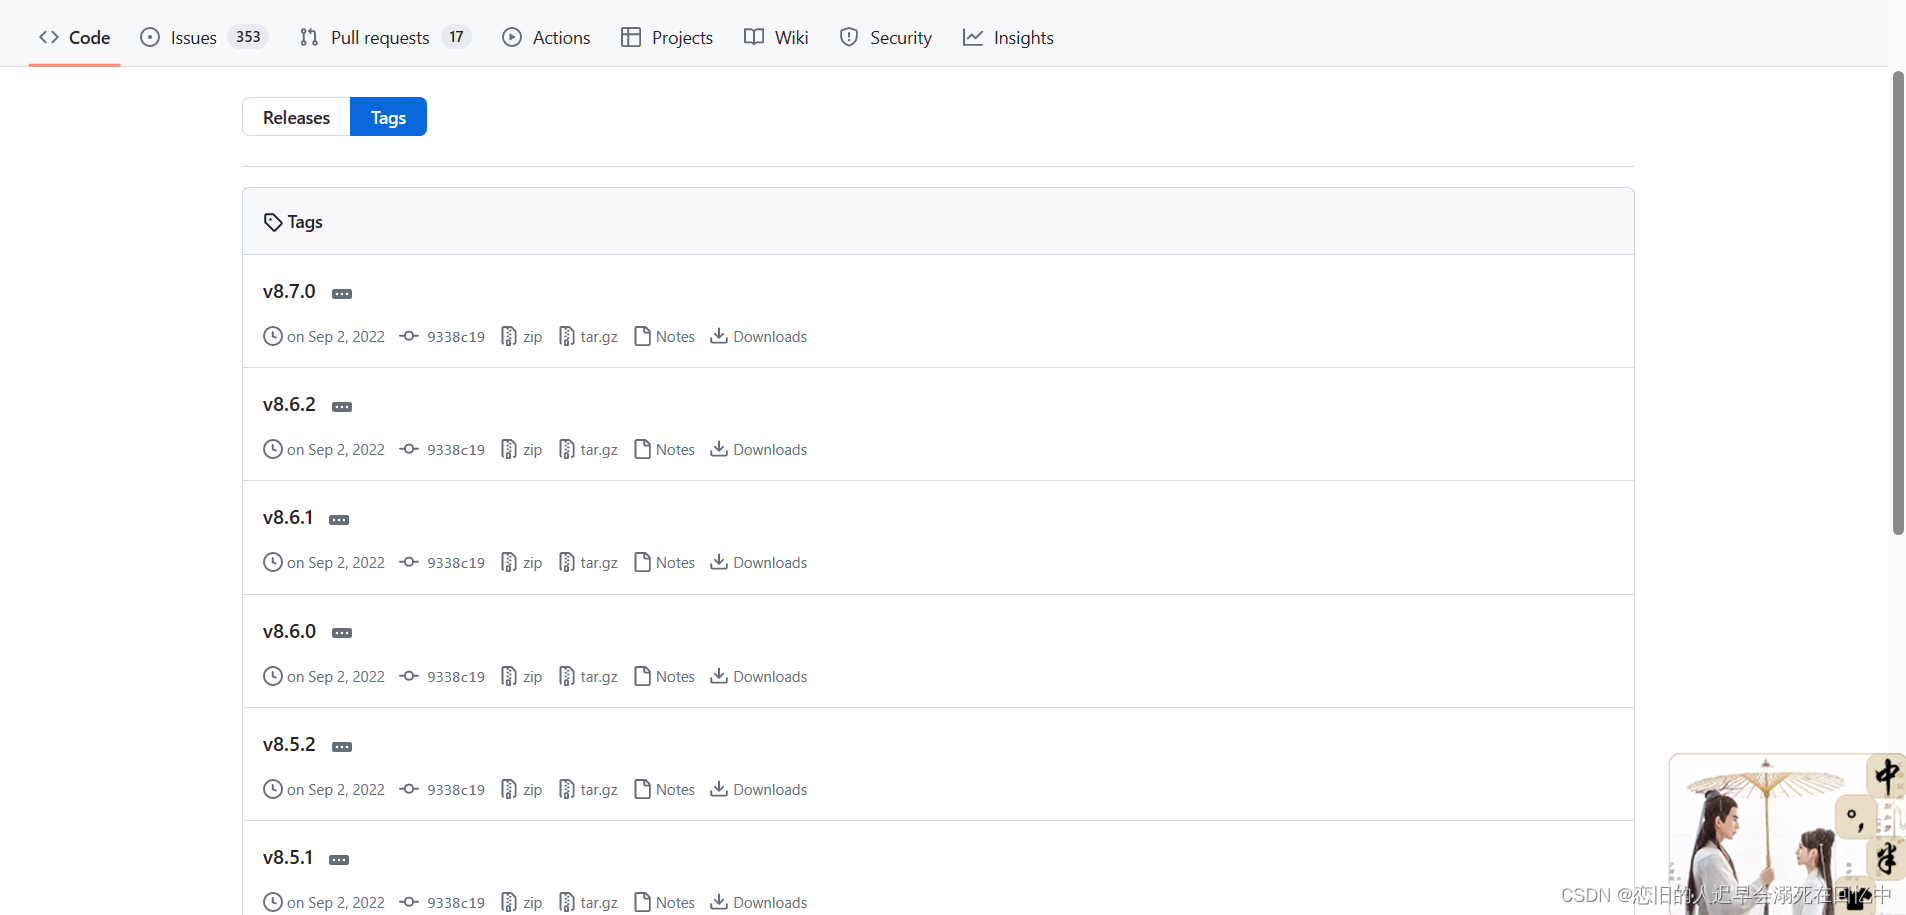
- 分词器 elasticsearch-analysis-ik
1、下载
下载地址(下载对应适配的版本)
2、解压到数据卷中
在运行容器的时候,挂载了3个数据卷,其中的plugins就是插件所在。所以我们将分词器解压到该数据卷再重启容器即可
3、测试是否安装成功
 curl 'localhost:9200/_analyze?pretty' -H 'Content-Type: application/json' -d '{
 "analyzer": "ik_max_word",
 "text": "我爱中国"
}'
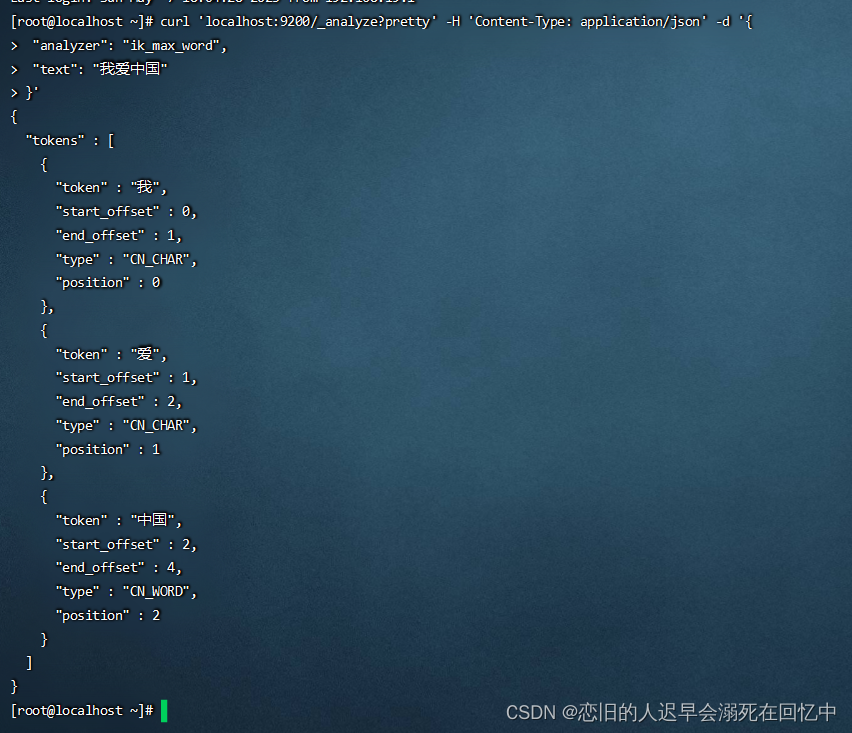
出现如上内容就说明正确了
2、理论知识
Elasticsearch是一个基于Lucene的分布式搜索和分析引擎。它将文本内容存储在可搜索和可分析的结构化JSON文档中,提供了强大的搜索、聚合、过滤、地理空间查询等能力,并能够容易地实现实时数据的索引、搜索和分析
0、名词
- 索引
索引是一类具有相似特征的文档集合,它通过给文档添加字段来描述文档的属性。就相当于MySQL的database。 - 文档
文档是 Elasticsearch 中最小的数据单元,其中包含一个或多个字段及其值。文档一般用JSON格式表示。就相当于MySQL数据库的单行数据
1、倒排索引
基本思想是将所有文档中的每个词作为键(key),把包含该词的文档ID作为值(value)并建立完整的索引结构。
举例来说,假设一个书本包含四段话:
“Spring is a great framework for Java development.”
“Java developers should know Spring.”
“To learn Java development with Spring, you need to read Spring in Action.”
那么倒排索引就是:
Spring:1, 2, 3
Java:1, 2, 3
development: 1, 2, 3
等等…
这样的索引方式可以快速找到匹配特定词语的文档,并从索引中进行相关度排序和过滤。
2、分片复制
为了处理大型数据集和高并发请求,Elasticsearch 所有的索引还被分成多个碎片(Shards)。每个分片是一个完整的Lucene索引,可以存储和处理数据,并且可以跨多个节点进行复制和负载均衡。
3、配置文件
Elasticsearch有三个配置文件:
-
elasticsearch.yml 用于配置 Elasticsearch
-
jvm.options 用于配置 Elasticsearch JVM 设置
-
log4j2.properties 用于配置 Elasticsearch 日志记录
cluster.name:Elasticsearch 集群名称,不同的 Elasticsearch 集群需要保持不同的名称。
node.name: 每个节点都需要一个唯一的名称来识别节点。
path.data: 数据文件路径,多个路径使用逗号(,)隔开。
path.logs: 日志文件路径。
network.host: 节点绑定的 IP 地址。可以指定为单个 IP 地址、多个地址或者通配符(0.0.0.0)。如果要允许远程访问,可以将该配置项设置为 0.0.0.0。
http.port: 节点使用的 HTTP 端口,默认为 9200。
transport.tcp.port: 节点间通信使用的 TCP 端口,默认为 9300。
discovery.zen.ping.unicast.hosts: 在集群中添加新节点时自动发现其他节点。该配置项设置为其他节点所在机器的 IP 地址和端口号,集群成员的 IP 地址列表。
discovery.zen.minimum_master_nodes: 对于一个有 N 个数据节点和 M 个主节点的集群,要求 N/2+1 个节点认为当前的主节点才能更换主节点。
bootstrap.memory_lock: Linux 节点需要启用该配置项以锁定内存,避免 Elasticsearch 内存交换到磁盘而影响性能。
3、spring boot整合使用Elasticsearch
1、maven依赖
        <dependency>
            <groupId>org.springframework.boot</groupId>
            <artifactId>spring-boot-starter-data-elasticsearch</artifactId>
        </dependency>
        <!-- json字符串需要使用的fastjson-->
        <dependency>
            <groupId>com.alibaba</groupId>
            <artifactId>fastjson</artifactId>
            <version>2.0.22</version>
        </dependency>
2、配置RestHighLevelClient
import org.apache.http.HttpHost;
import org.elasticsearch.client.RestClient;
import org.elasticsearch.client.RestHighLevelClient;
import org.springframework.context.annotation.Bean;
import org.springframework.context.annotation.Configuration;

/**
 * @Classname ElasticSearchRestConfig
 * @Description TODO
 * @Version 1.0.0
 * @Date 2023/5/10 9:44
 * @Created by wlh12
 */
@Configuration
public class ElasticSearchRestConfig {

    @Bean
    public RestHighLevelClient restHighLevelClient(){
        return new RestHighLevelClient(RestClient.builder(new HttpHost("192.168.19.129",9200,"http")));
    }
}
或者
spring:
  elasticsearch:
    rest:
      uris: 192.168.19.129:9200 # 配置为es的地址
3、api测试
package com.example;

import com.alibaba.fastjson.JSON;
import org.elasticsearch.action.admin.indices.delete.DeleteIndexRequest;
import org.elasticsearch.action.bulk.BulkItemResponse;
import org.elasticsearch.action.bulk.BulkRequest;
import org.elasticsearch.action.bulk.BulkResponse;
import org.elasticsearch.action.delete.DeleteRequest;
import org.elasticsearch.action.delete.DeleteResponse;
import org.elasticsearch.action.get.GetRequest;
import org.elasticsearch.action.get.GetResponse;
import org.elasticsearch.action.index.IndexRequest;
import org.elasticsearch.action.index.IndexResponse;
import org.elasticsearch.action.search.SearchRequest;
import org.elasticsearch.action.search.SearchResponse;
import org.elasticsearch.action.support.master.AcknowledgedResponse;
import org.elasticsearch.action.update.UpdateRequest;
import org.elasticsearch.action.update.UpdateResponse;
import org.elasticsearch.client.RequestOptions;
import org.elasticsearch.client.RestHighLevelClient;
import org.elasticsearch.client.indices.CreateIndexRequest;
import org.elasticsearch.client.indices.CreateIndexResponse;
import org.elasticsearch.client.indices.GetIndexRequest;
import org.elasticsearch.client.indices.GetIndexResponse;
import org.elasticsearch.common.text.Text;
import org.elasticsearch.common.unit.Fuzziness;
import org.elasticsearch.common.unit.TimeValue;
import org.elasticsearch.common.xcontent.XContentType;
import org.elasticsearch.index.query.BoolQueryBuilder;
import org.elasticsearch.index.query.QueryBuilders;
import org.elasticsearch.index.query.TermQueryBuilder;
import org.elasticsearch.search.SearchHit;
import org.elasticsearch.search.SearchHits;
import org.elasticsearch.search.builder.SearchSourceBuilder;
import org.elasticsearch.search.fetch.subphase.highlight.HighlightBuilder;
import org.elasticsearch.search.fetch.subphase.highlight.HighlightField;
import org.junit.jupiter.api.Test;
import org.springframework.beans.factory.annotation.Autowired;
import org.springframework.boot.test.context.SpringBootTest;
import org.yaml.snakeyaml.events.Event;

import java.io.IOException;
import java.util.ArrayList;
import java.util.HashMap;
import java.util.Map;

@SpringBootTest
class ElasticsearchApplicationTests {

    @Autowired
    private RestHighLevelClient restHighLevelClient;
    @Test
    void contextLoads() throws IOException {
        // 1、创建索引
        CreateIndexRequest kiku = new CreateIndexRequest("kiku");
        CreateIndexResponse indexResponse = restHighLevelClient.indices().create(kiku, RequestOptions.DEFAULT);
        System.out.println(indexResponse.isAcknowledged());
        // 2、获取索引
        GetIndexRequest getIndexRequest = new GetIndexRequest("kiku");
        if (restHighLevelClient.indices().exists(getIndexRequest,RequestOptions.DEFAULT)){
            GetIndexResponse getIndexResponse = restHighLevelClient.indices().get(getIndexRequest, RequestOptions.DEFAULT);
            System.out.println(getIndexResponse.getAliases());
        } else {
            System.out.println("不存在");
        }
        // 3、删除索引
        DeleteIndexRequest deleteIndexRequest = new DeleteIndexRequest("kiku");
        AcknowledgedResponse delete = restHighLevelClient.indices().delete(deleteIndexRequest, RequestOptions.DEFAULT);
        System.out.println(delete.isAcknowledged());
    }

    @Test
    void documents() throws IOException {
        // 操作索引为kiku的索引库
        // 1、创建文档
        HashMap<String, Object> map = new HashMap<>();
        map.put("name","kiku王");
        map.put("age",18);
        map.put("broth","1994-06-18");
        IndexRequest indexRequest = new IndexRequest("kiku");
        indexRequest.source(JSON.toJSONString(map), XContentType.JSON);
        indexRequest.id("2");
        indexRequest.timeout(TimeValue.timeValueSeconds(1));
        IndexResponse indexResponse = restHighLevelClient.index(indexRequest, RequestOptions.DEFAULT);
        System.out.println(indexResponse.toString());
        // 2、获取文档信息
        GetRequest getRequest = new GetRequest("kiku", "2");
        GetResponse getResponse = restHighLevelClient.get(getRequest, RequestOptions.DEFAULT);
        Map<String, Object> source = getResponse.getSource();
        System.out.println(source);
        System.out.println(getResponse);
        // 3、修改文档
        UpdateRequest updateRequest = new UpdateRequest("kiku", "2");
        source.put("name","newName");
        updateRequest.doc(JSON.toJSONString(source),XContentType.JSON);
        UpdateResponse updateResponse = restHighLevelClient.update(updateRequest, RequestOptions.DEFAULT);
        System.out.println(updateResponse);
        // 4、删除文档
        DeleteRequest deleteRequest = new DeleteRequest("kiku", "2");
        deleteRequest.timeout("1s");
        DeleteResponse deleteResponse = restHighLevelClient.delete(deleteRequest, RequestOptions.DEFAULT);
        System.out.println(deleteResponse);
    }

    @Test
    void batch() throws IOException {
        // 1、批量添加数据(模拟初始数据的入es库)
        BulkRequest bulkRequest = new BulkRequest();
        ArrayList<Map> maps = new ArrayList<>();
        HashMap<String, Object> map1 = new HashMap<>();
        map1.put("name","我是这条数据的1号的数据");
        map1.put("age",10);
        maps.add(map1);

        HashMap<String, Object> map2 = new HashMap<>();
        map2.put("name","我是这条数据的2号");
        map2.put("age",12);
        maps.add(map2);

        HashMap<String, Object> map3 = new HashMap<>();
        map3.put("name","我是这条数据的3号");
        map3.put("age",13);
        maps.add(map3);

        HashMap<String, Object> map4 = new HashMap<>();
        map4.put("name","我是这条数据的4号");
        map4.put("age",14);
        maps.add(map4);

        for (int i = 0; i < maps.size(); i++) {
            bulkRequest.add(new IndexRequest("kiku").id(""+i).source(JSON.toJSONString(maps.get(i)),XContentType.JSON));
        }
        BulkResponse bulkResponse = restHighLevelClient.bulk(bulkRequest, RequestOptions.DEFAULT);
        System.out.println(bulkResponse.status());
        if (bulkResponse.hasFailures()) {
            // 请求中至少有一个文档没有成功处理
            for (BulkItemResponse bulkItemResponse : bulkResponse) {
                if (bulkItemResponse.isFailed()) {
                    BulkItemResponse.Failure failure = bulkItemResponse.getFailure();
                    System.out.println("Error: id=" + bulkItemResponse.getId() + " error message:" +failure.getMessage());
                }
            }
        } else {
            // 所有文档均已成功处理
            System.out.println("All documents are indexed.");
        }

        System.out.println("====================================================");
        // 2、批量搜索(es本就用于搜索,这个才是重头戏)

        // 验证是否全部插入数据了
        SearchResponse searchResponse = restHighLevelClient.search(new SearchRequest("kiku"), RequestOptions.DEFAULT);
        SearchHit[] searchHits = searchResponse.getHits().getHits();
        for (SearchHit hit : searchHits) {
            String sourceAsString = hit.getSourceAsString();
            System.out.println(sourceAsString);
        }
        SearchRequest searchRequest = new SearchRequest("kiku");
        // 复合调教构造器
        BoolQueryBuilder boolQueryBuilder = QueryBuilders.boolQuery();
        // termQuery精确匹配、matchQuery模糊匹配、rangeQuery区间
        boolQueryBuilder
                .filter(QueryBuilders.matchQuery("name","数据").fuzziness(Fuzziness.AUTO))
                .filter(QueryBuilders.rangeQuery("age").gte(10).lte(50))
        ;

        HighlightBuilder highlightBuilder = new HighlightBuilder();
        highlightBuilder.field("name")
                .requireFieldMatch(false)
                .preTags("<span style='color:red'>")
                .postTags("</span>");
        // 分页器数据
        int current = 1;
        int pageSize = 2;
        // 把条件放进去
        searchRequest.source()
                .query(boolQueryBuilder)
                .from((current - 1) * pageSize)
                .size(pageSize)
                .highlighter(highlightBuilder);
        // 发起查询
        SearchResponse search = restHighLevelClient.search(searchRequest, RequestOptions.DEFAULT);
        SearchHits hits = search.getHits();
        ArrayList<Map<String, Object>> list = new ArrayList<>();
        for (SearchHit hit : hits.getHits()) {
            // 打印查询结果集
            Map<String, HighlightField> highlightFields = hit.getHighlightFields();
            HighlightField name = highlightFields.get("name");
            Map<String, Object> sourceAsMap = hit.getSourceAsMap();
            if (name!=null){
                String newStr = "";
                Text[] texts = name.fragments();//
                for (Text text : texts) {
                    newStr += text;
                }
                sourceAsMap.put("name",newStr);
            }
            // 转换为出参dto
            list.add(sourceAsMap);
        }
        System.out.println(list);
    }
}


 2112
2112

 被折叠的 条评论
为什么被折叠?
被折叠的 条评论
为什么被折叠?
 到【灌水乐园】发言


