


引言
使用多模块项目结构在Spring Boot中具有显著的优势,特别是在大型项目中,能够显著提高开发效率和代码管理的灵活性。通过模块化开发、统一依赖管理、代码复用、构建优化以及独立部署和版本控制,多模块结构为项目的开发和维护提供了强有力的支持(主要是想在之前的兔子系统里面加一个即时通讯的功能,然后发现很多模块加在一起会很乱,就想着这样改造了)。
一、项目搭建(后端)
1、创建项目
New Project。
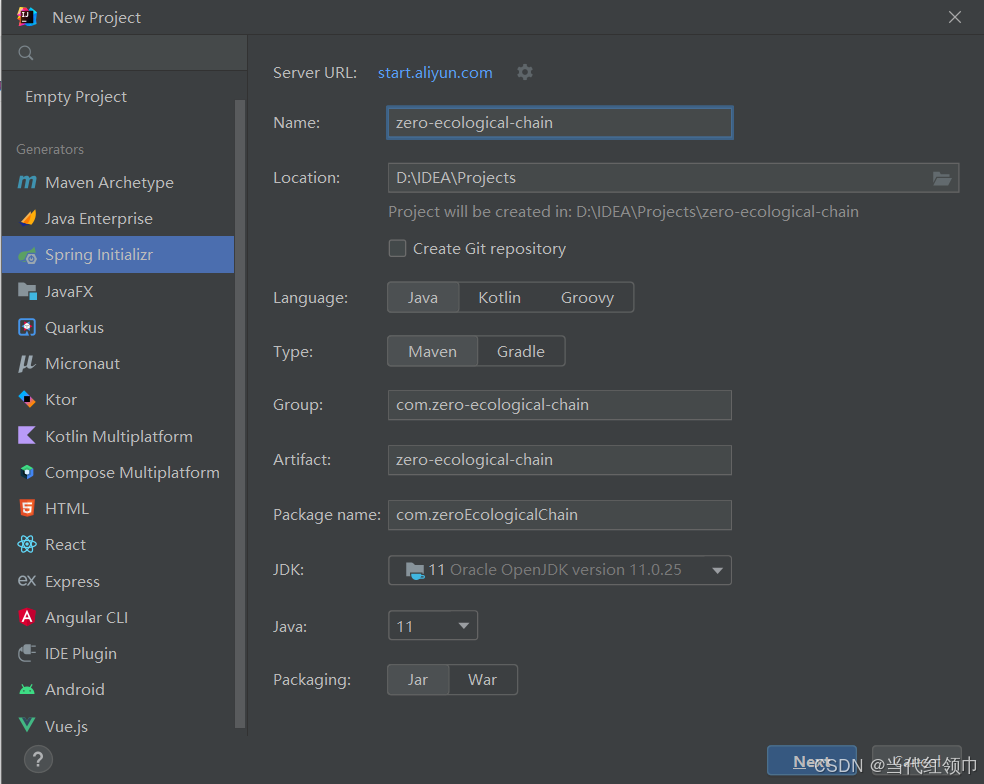
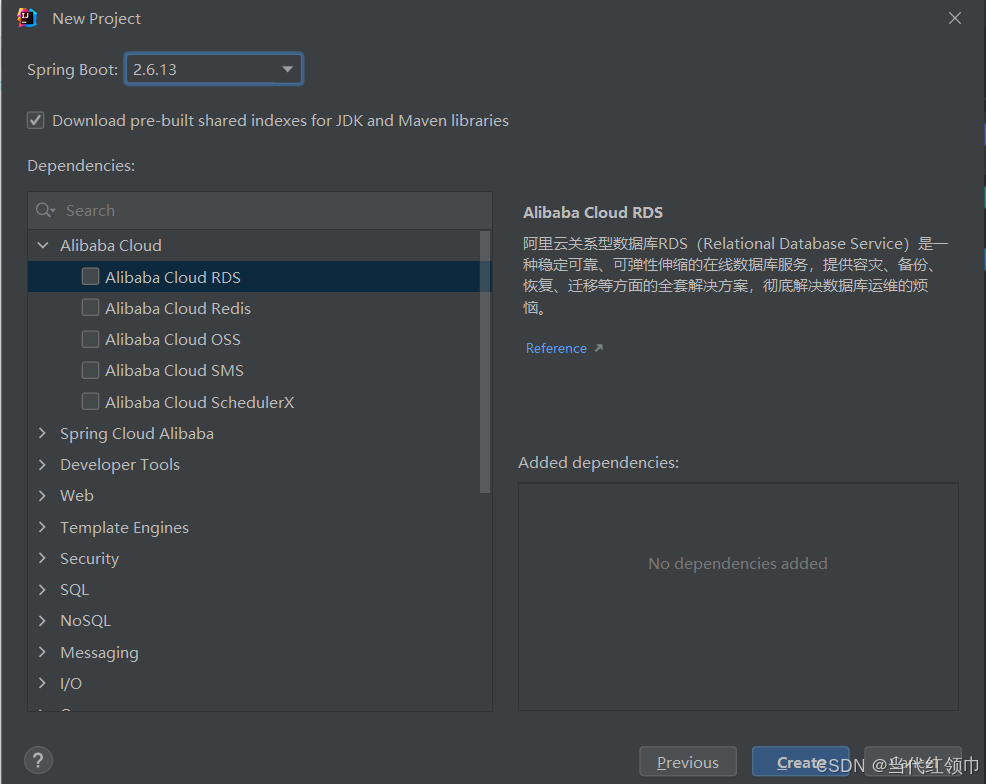
直接下一步,具体需要的依赖可以之后在 pom 文件中添加。
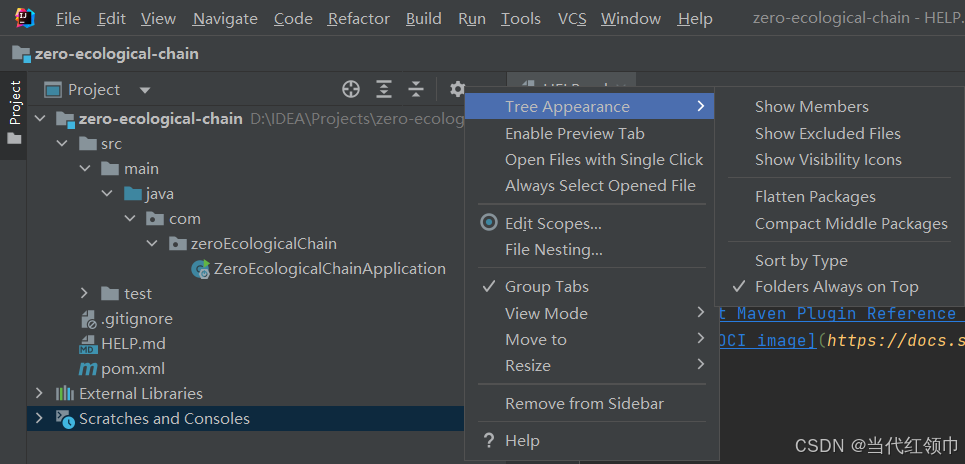
这就是刚建好的项目结构,可能有人会问为什么我这里这么这么简洁,可以给大家看一下怎么设置的(右键设置,然后选择想要显示哪些,怎么显示,这里仅供参考):
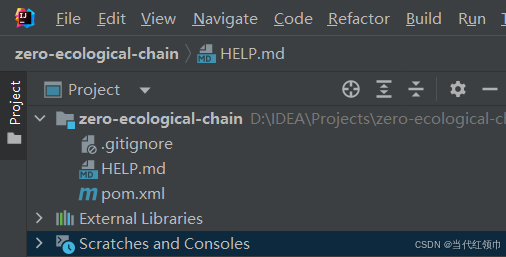
删除父工程下面的 src 文件。
2、修改父 pom.xml 文件
这里提供我的作为参考(注释加的很详细了,如果你们在这一步有点小问题,可以暂时忽略,因为我在下面提供了完整能跑的 pom,但是应该是没问题的):
<?xml version="1.0" encoding="UTF-8"?>
<project xmlns="http://maven.apache.org/POM/4.0.0" xmlns:xsi="http://www.w3.org/2001/XMLSchema-instance"
         xsi:schemaLocation="http://maven.apache.org/POM/4.0.0 https://maven.apache.org/xsd/maven-4.0.0.xsd">
    <!--在 spring-boot-starter-parent 中已经定义了 Spring Framework、Spring Boot 等相关依赖的版本。当子模块需要使用这些依赖时,不需要显式地指定版本号-->
    <parent>
        <groupId>org.springframework.boot</groupId>
        <artifactId>spring-boot-starter-parent</artifactId>
        <version>2.6.13</version>
        <relativePath/>
    </parent>

    <modelVersion>4.0.0</modelVersion> <!-- 定义当前 POM 文件遵循的 Maven 模型版本 -->
    <groupId>com.zero-ecological-chain</groupId> <!-- 定义项目所属的组织或项目组的唯一标识符 -->
    <artifactId>zero-ecological-chain</artifactId> <!-- 定义项目的唯一标识符,用于在所属的组织或项目组内唯一标识该项目 -->
    <version>1.0.0</version> <!-- 定义项目的版本号,版本号用于区分项目的不同迭代和发布 -->
    <name>零式生态链</name> <!-- 定义项目的显示名称 -->
    <description>一个简易的生态链系统</description> <!-- 对项目进行简要的描述,提供关于项目的功能、用途或目标的信息 -->
    <packaging>pom</packaging> <!-- packaging 标签用于指定项目的打包方式,这里将 packaging 设置为 "pom",表示该项目是一个聚合项目或者父项目 -->

    <properties>
        <java.version>11</java.version> <!--声明 java 版本号-->
        <project.build.sourceEncoding>UTF-8</project.build.sourceEncoding> <!--定义了项目源代码文件的编码格式-->
        <project.reporting.outputEncoding>UTF-8</project.reporting.outputEncoding> <!-- Maven 生成各种报告文件使用的编码格式-->
    </properties>

    <repositories> <!-- 设置 Maven 仓库 -->
        <repository>
            <id>aliyunmaven</id>
            <name>阿里云公共仓库</name>
            <url>https://maven.aliyun.com/repository/public</url>
        </repository>
    </repositories>

    <dependencies>
        <dependency> <!--引入 Spring Boot 的核心功能,为项目搭建一个基础的 Spring Boot 开发环境-->
            <groupId>org.springframework.boot</groupId>
            <artifactId>spring-boot-starter</artifactId>
            <!--因为上面 spring-boot-starter-parent 提供了一系列的依赖管理,这样在项目里引入依赖时可以不用显式指定版本-->
        </dependency>
        <dependency><!-- 引入 Spring Boot 对 JDBC(Java Database Connectivity)的支持 -->
            <groupId>org.springframework.boot</groupId>
            <artifactId>spring-boot-starter-jdbc</artifactId>
        </dependency>
        <dependency><!-- 在 Spring Boot 项目中集成 MyBatis 框架,MyBatis 是一个优秀的持久层框架,它简化了 Java 应用与数据库之间的交互操作 -->
            <groupId>org.mybatis.spring.boot</groupId>
            <artifactId>mybatis-spring-boot-starter</artifactId>
            <version>2.2.2</version>
        </dependency>
        <dependency> <!-- 引入 Oracle 数据库的 JDBC 驱动程序,提供了 Java 程序与 Oracle 数据库建立连接的能力-->
            <groupId>com.oracle.database.jdbc</groupId>
            <artifactId>ojdbc11</artifactId>
            <version>23.3.0.23.09</version>
        </dependency>
        <dependency> <!-- 引入 Lombok 库,通过注解的方式来减少 Java 代码中样板代码的编写,如 @Data 注解-->
            <groupId>org.projectlombok</groupId>
            <artifactId>lombok</artifactId>
            <optional>true</optional>
        </dependency>
        <dependency> <!-- 引入 Apache Commons Lang3 库,提供了丰富的工具类如 StringUtils-->
            <groupId>org.apache.commons</groupId>
            <artifactId>commons-lang3</artifactId>
            <version>3.12.0</version>
        </dependency>
        <dependency> <!-- 引入 Log4j 日志框架,可以灵活地控制日志信息的输出目的地、输出格式以及日志级别等-->
            <groupId>log4j</groupId>
            <artifactId>log4j</artifactId>
            <version>1.2.16</version>
        </dependency>
    </dependencies>
</project>
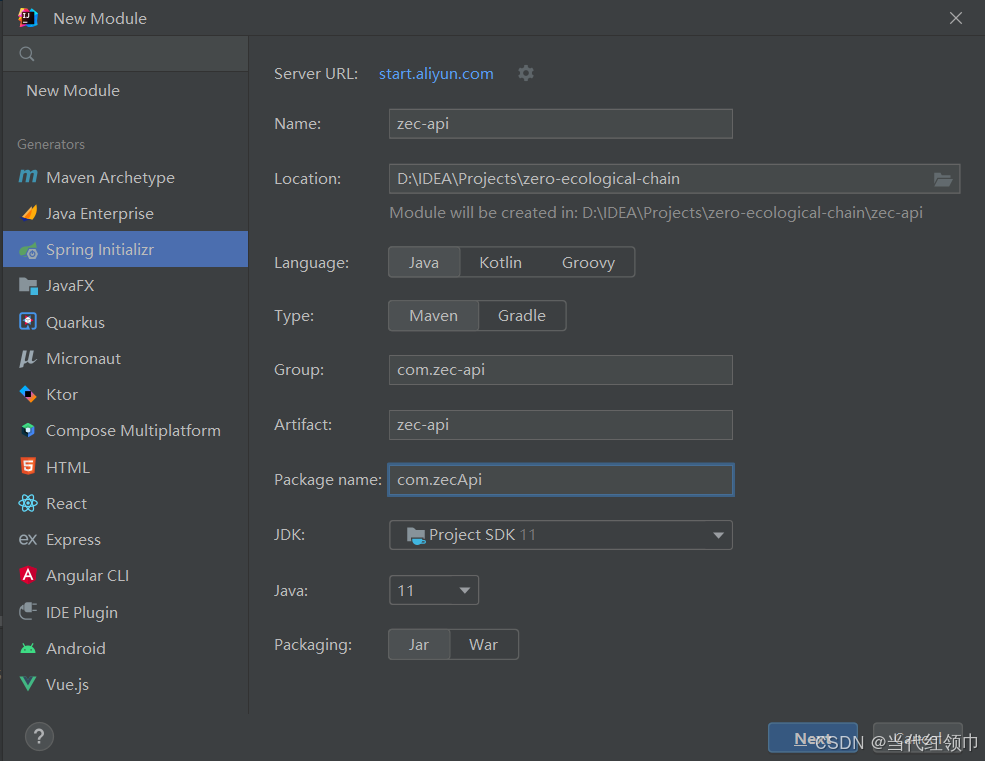
3、创建子工程 zec-api
这个子工程是用来对外提供接口的模块,进行前后端交互或其他服务的请求。
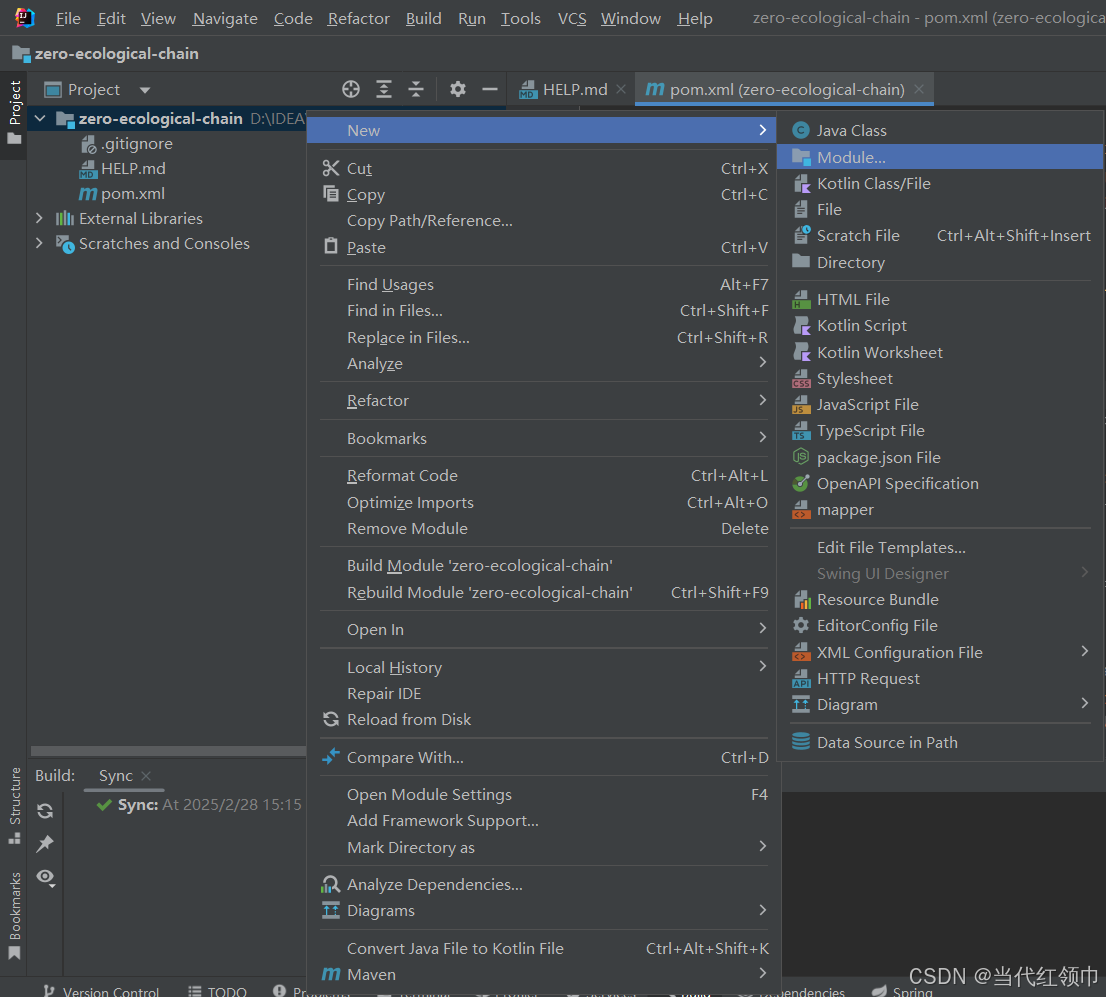
右击项目,选择 New --> Module。
填写子工程信息,点击 Next。
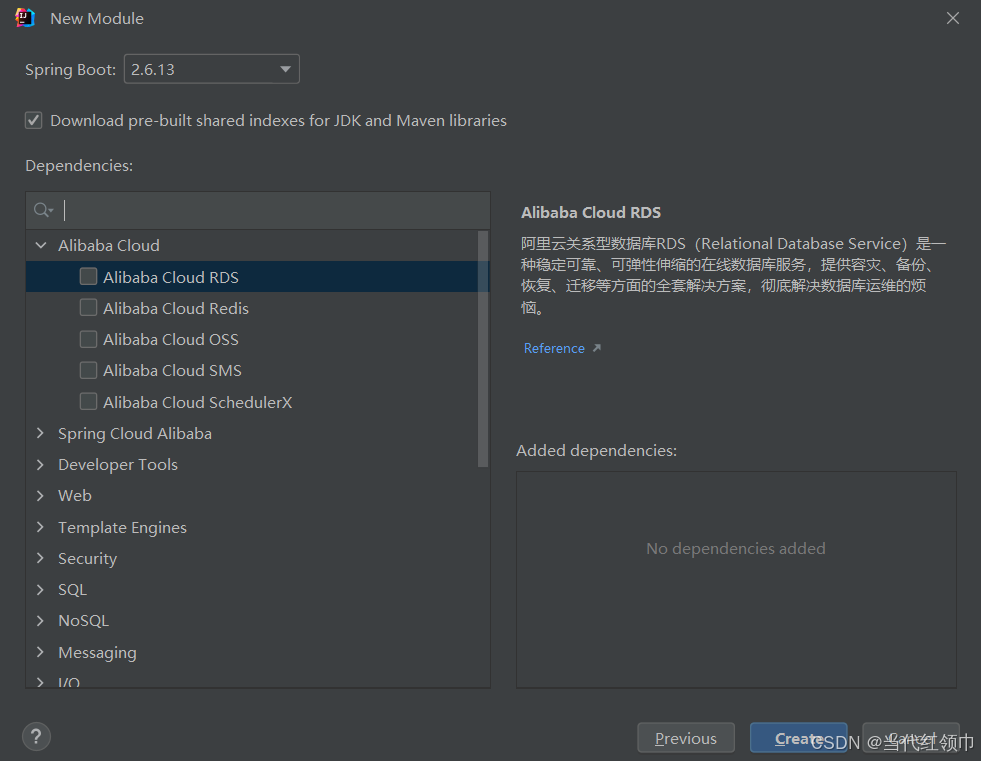
直接点 Create。
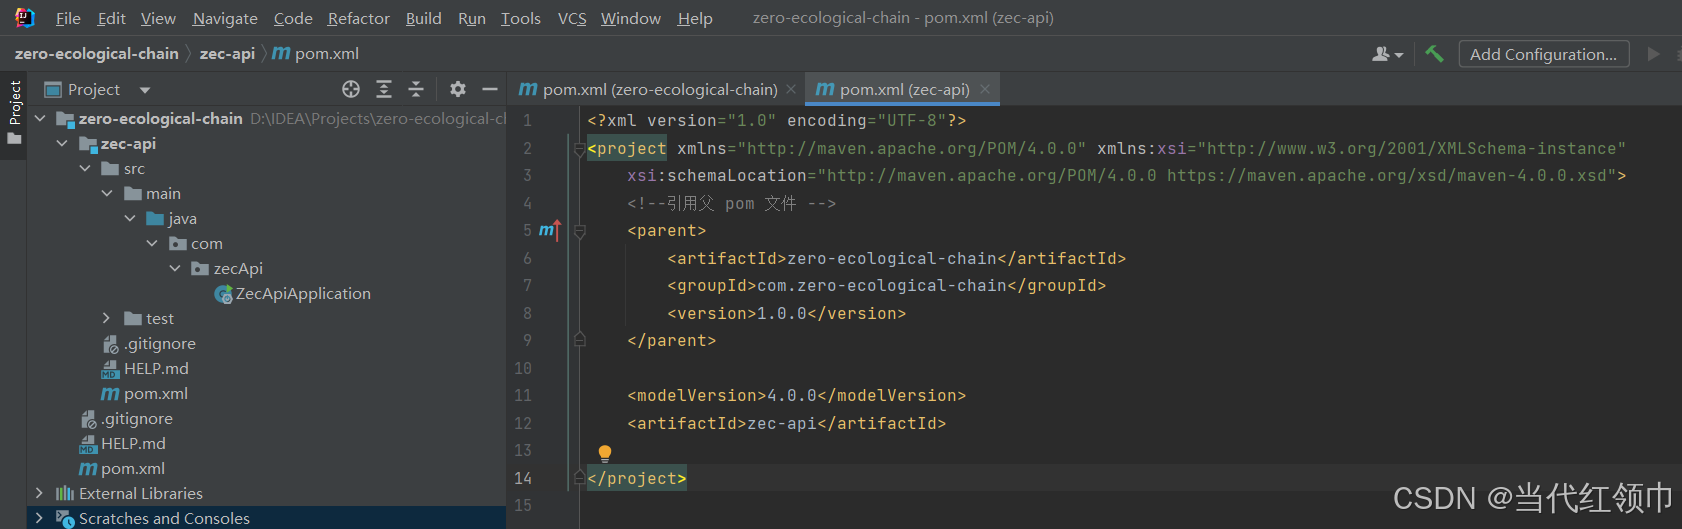
创建成功之后,修改子父工程的 pom 文件,把他们关联起来。
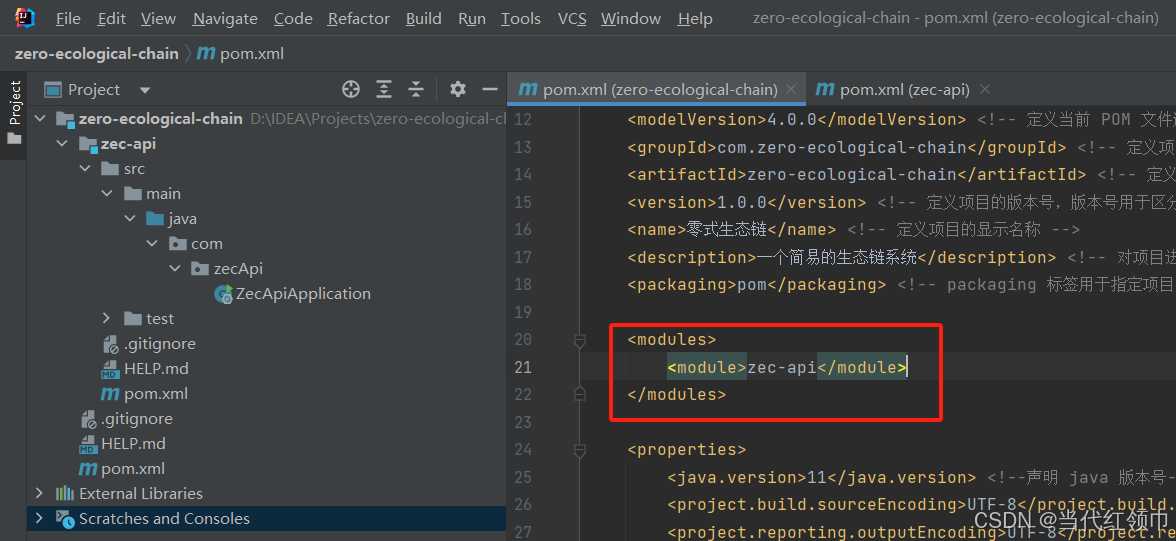
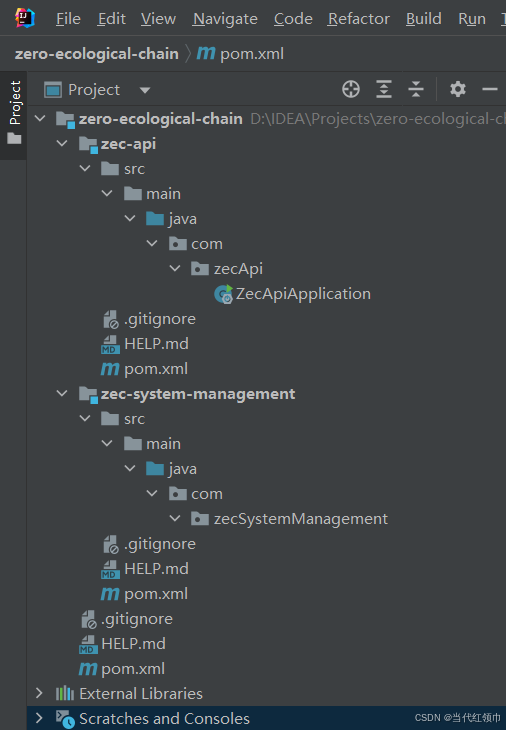
4、创建子工程 zec-system-management
这个子工程是系统管理模块,这个这一步就跟上面的一样,就不重复展示了。
test 文件没用,可以删掉,再把子工程 zec-system-management 的启动类删除,目前的项目结构就是这样了。
5、创建项目基本结构
创建每个子工程模块对应的功能包。
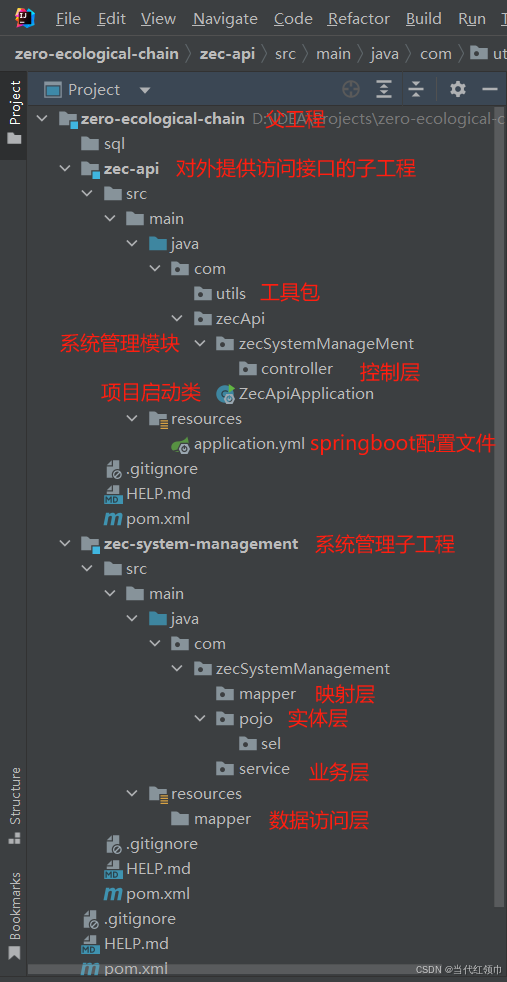
这里面的 yml 配置文件我放在下面给大家参考一下:
## 指定web容器访问端口号
rabbit:
  name: 零式生态链
  version: v-1.0.0
## web容器端口号
server:
  port: 8088
## 配置数据库连接
spring:
  servlet:
    multipart:
      max-file-size: 40MB
      max-request-size: 40MB
      ## 设置单个文件上传的最大内存
  datasource:
    driver-class-name: oracle.jdbc.OracleDriver
    url: jdbc:oracle:thin:@//localhost:1521/ORCL
    username: 用户名
    password: 密码
## 配置mybatis中mapper.xml文件扫描
mybatis:
  type-aliases-package: com.*.pojo.sel.*
  mapper-locations: classpath:mapper/*.xml   # mapper.xml文件映射
6、连接数据库
使用最右边的 Database 连接 Oracle 数据库。
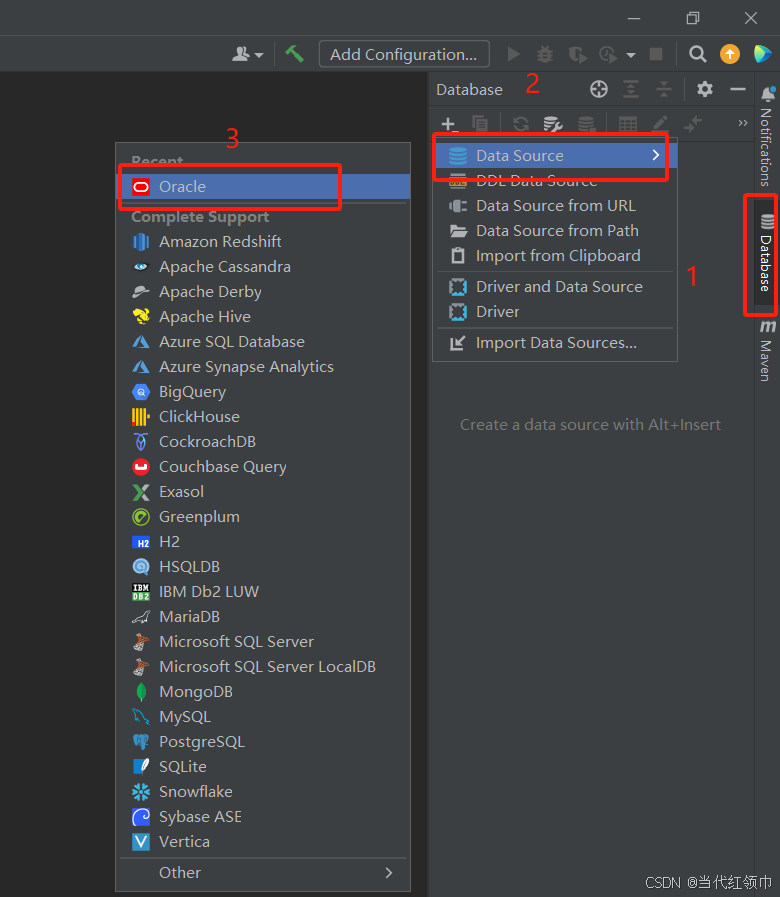
输入连接信息。
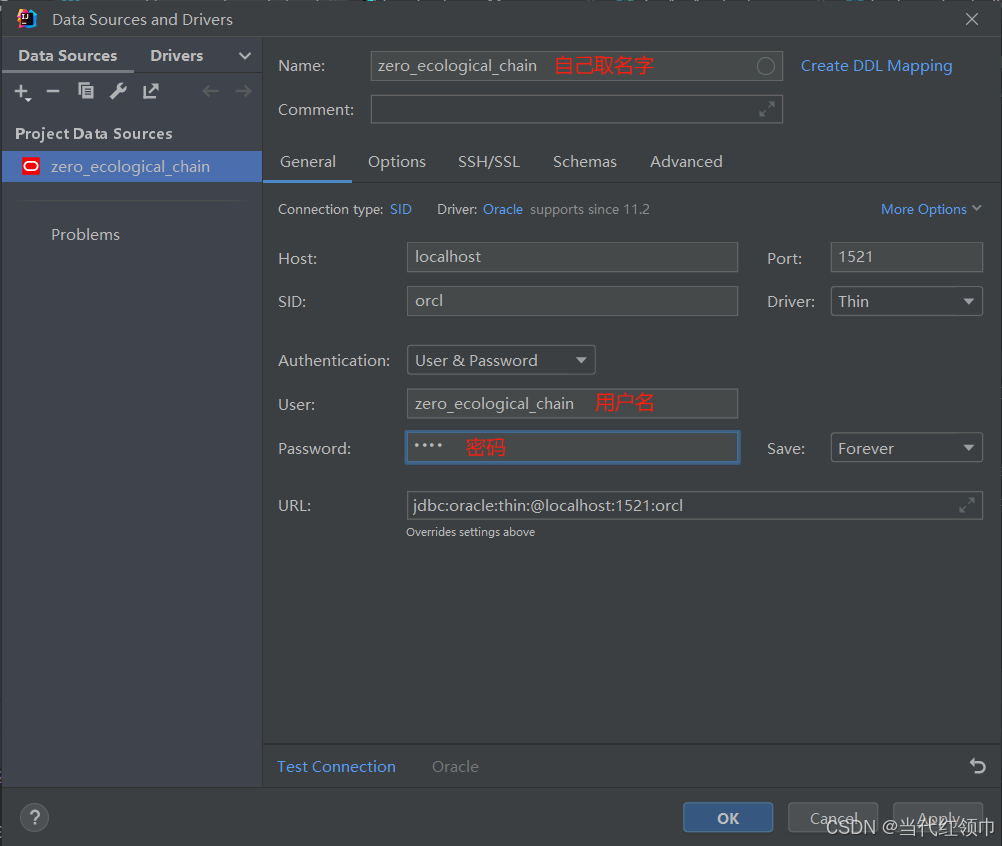
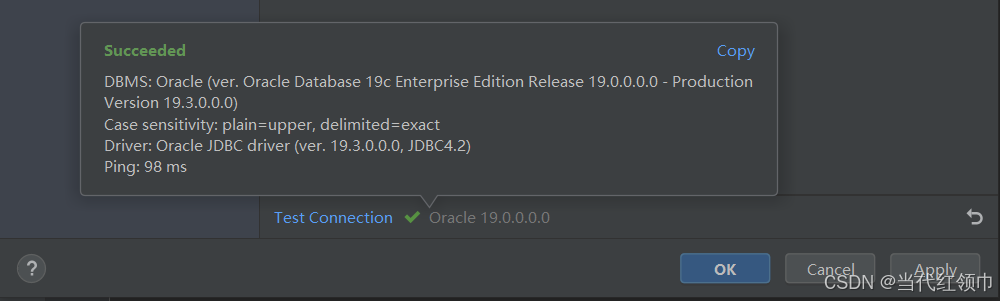
输入完成后,点击下面的 TestConnection,测试是是否正常连接,如果出现这样的就表示成功了,点击 Apply。
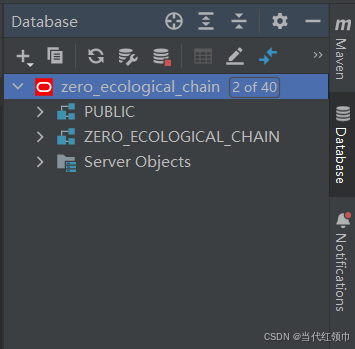
然后在 IDEA 右侧就能看到数据库信息了。
7、数据库创建表
建一个测试用的用户表,测试数据可以自己加上。
-- 用户表
CREATE TABLE zero_ecological_chain.CUSTOMER (
  ID VARCHAR2(32) NOT NULL,
  ACCOUNT VARCHAR2(9) NOT NULL,
  NICK_NAME VARCHAR2(32) NOT NULL,
  BIRTHDAY Date,
  SEX VARCHAR(1),
  CREATE_TIME Date DEFAULT SYSDATE NOT NULL,
  UPDATE_TIME Date DEFAULT SYSDATE NOT NULL,
  IS_DELETE varchar(1) DEFAULT 'N' NOT NULL
);
建好之后,在 idea 右侧点一下刷新,就能看到刚才建好的表。

8、生成实体类
利用 idea 自带的功能,可以自动生成实体类。
右击刚才看到的表。
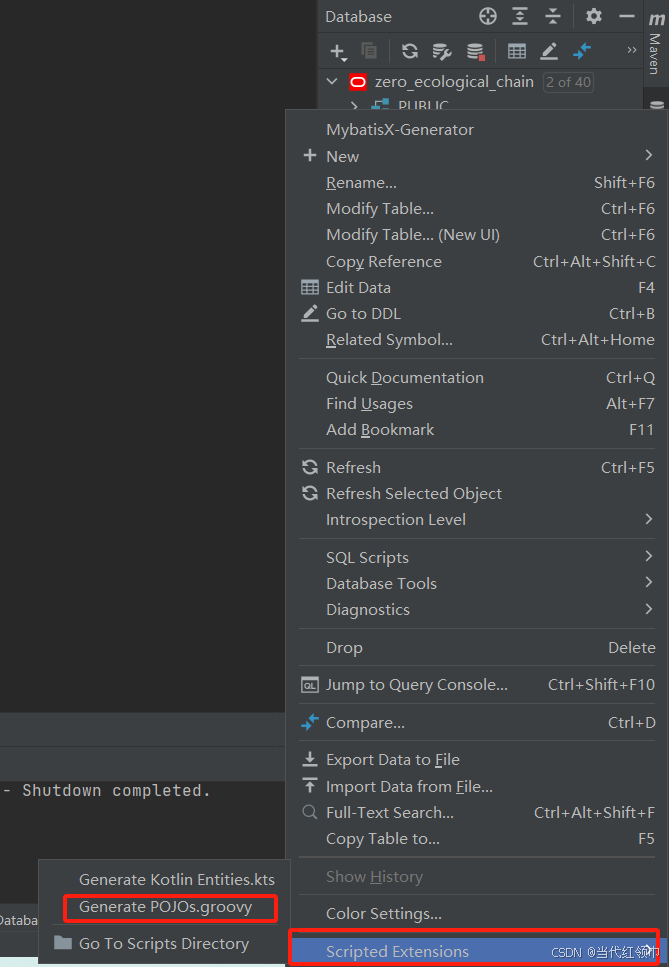
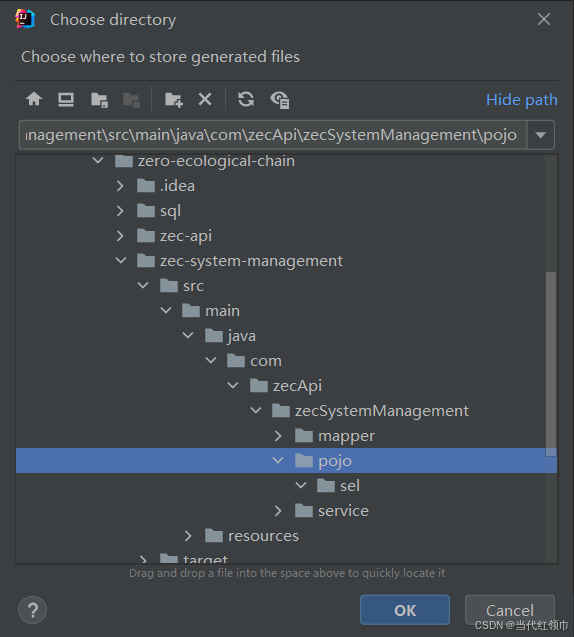
选择实体类生成的位置,点击 OK。
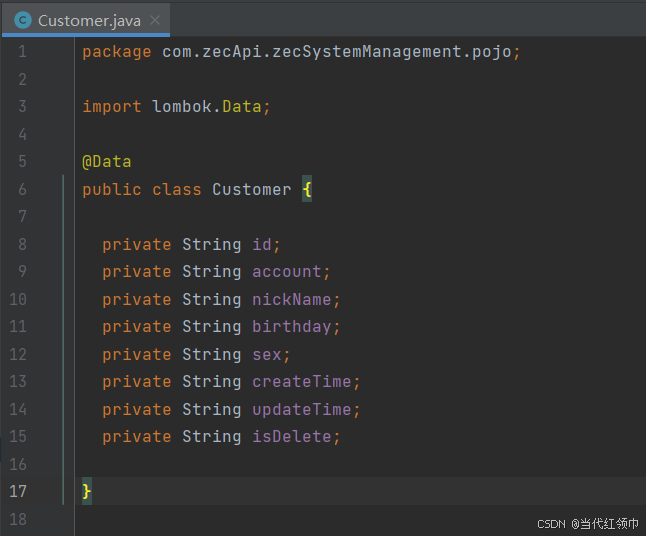
生成好之后对实体类做一些改造,使用 @Data 注解替换原本的 getter、setter 方法。
9、开始写代码
我这里是都写好了,给大家看一下完整的能跑的项目结构。

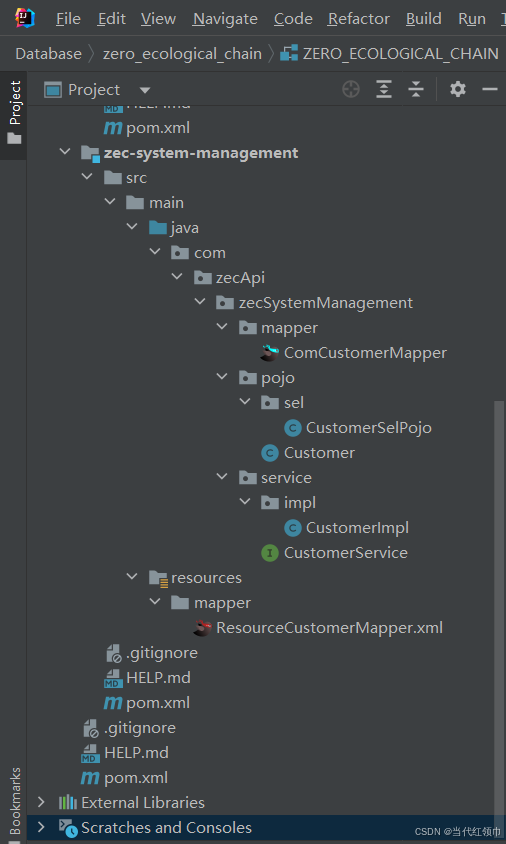
代码我从上到下依次展示:
子工程 zec-api
AjaxResult
工具类,用于向前端发送 RESTful API 风格的数据。
package com.zecApi.utils;

import java.util.HashMap;

/**
 * 操作消息提醒
 */
public class AjaxResult extends HashMap<String, Object> {
    private static final long serialVersionUID = 1L;

    /**
     * 状态码
     */
    public static final String CODE_TAG = "code";

    /**
     * 返回内容
     */
    public static final String MSG_TAG = "msg";

    /**
     * 数据对象
     */
    public static final String DATA_TAG = "data";

    /**
     * 数据总数量
     */
    public static final String DATA_COUNT = "count";

    /**
     * 状态类型
     */
    public enum Type {
        /**
         * 成功
         */
        SUCCESS(200),
        /**
         * 警告
         */
        WARN(301),
        /**
         * 校验失败
         */
        FAILED(-1),
        /**
         * 错误
         */
        ERROR(500);
        private final int value;

        Type(int value) {
            this.value = value;
        }

        public int value() {
            return this.value;
        }
    }

    /**
     * 初始化一个新创建的 AjaxResult 对象,使其表示一个空消息。
     */
    public AjaxResult() {
    }

    /**
     * 初始化一个新创建的 AjaxResult 对象
     *
     * @param type 状态类型
     * @param msg  返回内容
     */
    public AjaxResult(Type type, String msg) {
        super.put(CODE_TAG, type.value);
        super.put(MSG_TAG, msg);
    }

    /**
     * 初始化一个新创建的 AjaxResult 对象
     *
     * @param type 状态类型
     * @param msg  返回内容
     * @param data 数据对象
     */
    public AjaxResult(Type type, String msg, Object data) {
        super.put(CODE_TAG, type.value);
        super.put(MSG_TAG, msg);
        if (StringUtils.isNotNull(data)) {
            super.put(DATA_TAG, data);
        }
    }

    /**
     * 初始化一个新创建的 AjaxResult 对象
     *
     * @param data 数据对象
     */
    public AjaxResult(Object data) {
        if (StringUtils.isNotNull(data)) {
            super.put(DATA_TAG, data);
        }
    }

    /**
     * 初始化一个新创建的 AjaxResult 对象
     * @param type  状态类型
     * @param msg   返回内容
     * @param data  数据对象
     * @param count 数据总数量
     */
    public AjaxResult(Type type, String msg, Object data,Integer count) {
        super.put(CODE_TAG, type.value);
        super.put(MSG_TAG, msg);
        if (StringUtils.isNotNull(data)) {
            super.put(DATA_TAG, data);
        }
        if(count!=null){
            super.put(DATA_COUNT,count);
        }
    }

    /**
     * 方便链式调用
     *
     * @param key   键
     * @param value 值
     * @return 数据对象
     */
    @Override
    public AjaxResult put(String key, Object value) {
        super.put(key, value);
        return this;
    }

    /**
     * 返回成功消息
     *
     * @return 成功消息
     */
    public static AjaxResult success() {
        return AjaxResult.success("操作成功");
    }

    /**
     * 返回成功数据
     *
     * @return 成功消息
     */
    public static AjaxResult success(Object data) {
        return AjaxResult.success("操作成功", data);
    }

    /**
     * 返回成功消息
     *
     * @param msg 返回内容
     * @return 成功消息
     */
    public static AjaxResult success(String msg) {
        return AjaxResult.success(msg, null);
    }

    /**
     * 返回成功消息
     *
     * @param msg  返回内容
     * @param data 数据对象
     * @return 成功消息
     */
    public static AjaxResult success(String msg, Object data) {
        return new AjaxResult(Type.SUCCESS, msg, data);
    }

    /**
     * 返回警告消息
     *
     * @param msg 返回内容
     * @return 警告消息
     */
    public static AjaxResult warn(String msg) {
        return AjaxResult.warn(msg, null);
    }

    /**
     * 返回警告消息
     *
     * @param msg  返回内容
     * @param data 数据对象
     * @return 警告消息
     */
    public static AjaxResult warn(String msg, Object data) {
        return new AjaxResult(Type.WARN, msg, data);
    }

    /**
     * 返回错误消息
     *
     * @return
     */
    public static AjaxResult error() {
        return AjaxResult.error("操作失败");
    }

    /**
     * 返回错误消息
     *
     * @param msg 返回内容
     * @return 警告消息
     */
    public static AjaxResult error(String msg) {
        return AjaxResult.error(msg, null);
    }

    /**
     * 返回错误消息
     *
     * @param msg  返回内容
     * @param data 数据对象
     * @return 警告消息
     */
    public static AjaxResult error(String msg, Object data) {
        return new AjaxResult(Type.ERROR, msg, data);
    }
}
StringUtils
字符串工具类。
package com.zecApi.utils;


import java.util.Collection;
import java.util.Map;

/**
 * 字符串工具类
 */
public class StringUtils extends org.apache.commons.lang3.StringUtils {
    /**
     * 空字符串
     */
    private static final String NULLSTR = "";

    /**
     * 下划线
     */
    private static final char SEPARATOR = '_';

    /**
     * 获取参数不为空值
     *
     * @param value defaultValue 要判断的value
     * @return value 返回值
     */
    public static <T> T nvl(T value, T defaultValue) {
        return value != null ? value : defaultValue;
    }

    /**
     * * 判断一个Collection是否为空, 包含List,Set,Queue
     *
     * @param coll 要判断的Collection
     * @return true:为空 false:非空
     */
    public static boolean isEmpty(Collection<?> coll) {
        return isNull(coll) || coll.isEmpty();
    }

    /**
     * * 判断一个Collection是否非空,包含List,Set,Queue
     *
     * @param coll 要判断的Collection
     * @return true:非空 false:空
     */
    public static boolean isNotEmpty(Collection<?> coll) {
        return !isEmpty(coll);
    }

    /**
     * * 判断一个对象数组是否为空
     *
     * @param objects 要判断的对象数组
     *                * @return true:为空 false:非空
     */
    public static boolean isEmpty(Object[] objects) {
        return isNull(objects) || (objects.length == 0);
    }

    /**
     * * 判断一个对象数组是否非空
     *
     * @param objects 要判断的对象数组
     * @return true:非空 false:空
     */
    public static boolean isNotEmpty(Object[] objects) {
        return !isEmpty(objects);
    }

    /**
     * * 判断一个Map是否为空
     *
     * @param map 要判断的Map
     * @return true:为空 false:非空
     */
    public static boolean isEmpty(Map<?, ?> map) {
        return isNull(map) || map.isEmpty();
    }

    /**
     * * 判断一个Map是否为空
     *
     * @param map 要判断的Map
     * @return true:非空 false:空
     */
    public static boolean isNotEmpty(Map<?, ?> map) {
        return !isEmpty(map);
    }

    /**
     * * 判断一个字符串是否为空串
     *
     * @param str String
     * @return true:为空 false:非空
     */
    public static boolean isEmpty(String str) {
        return isNull(str) || NULLSTR.equals(str.trim());
    }

    /**
     * * 判断一个字符串是否为非空串
     *
     * @param str String
     * @return true:非空串 false:空串
     */
    public static boolean isNotEmpty(String str) {
        return !isEmpty(str);
    }

    /**
     * * 判断一个对象是否为空
     *
     * @param object Object
     * @return true:为空 false:非空
     */
    public static boolean isNull(Object object) {
        return object == null;
    }

    /**
     * * 判断一个对象是否非空
     *
     * @param object Object
     * @return true:非空 false:空
     */
    public static boolean isNotNull(Object object) {
        return !isNull(object);
    }

    /**
     * * 判断一个对象是否是数组类型(Java基本型别的数组)
     *
     * @param object 对象
     * @return true:是数组 false:不是数组
     */
    public static boolean isArray(Object object) {
        return isNotNull(object) && object.getClass().isArray();
    }

    /**
     * 去空格
     */
    public static String trim(String str) {
        return (str == null ? "" : str.trim());
    }

    /**
     * 截取字符串
     *
     * @param str   字符串
     * @param start 开始
     * @return 结果
     */
    public static String substring(final String str, int start) {
        if (str == null) {
            return NULLSTR;
        }

        if (start < 0) {
            start = str.length() + start;
        }

        if (start < 0) {
            start = 0;
        }
        if (start > str.length()) {
            return NULLSTR;
        }

        return str.substring(start);
    }

    /**
     * 截取字符串
     *
     * @param str   字符串
     * @param start 开始
     * @param end   结束
     * @return 结果
     */
    public static String substring(final String str, int start, int end) {
        if (str == null) {
            return NULLSTR;
        }

        if (end < 0) {
            end = str.length() + end;
        }
        if (start < 0) {
            start = str.length() + start;
        }

        if (end > str.length()) {
            end = str.length();
        }

        if (start > end) {
            return NULLSTR;
        }

        if (start < 0) {
            start = 0;
        }
        if (end < 0) {
            end = 0;
        }

        return str.substring(start, end);
    }

    /**
     * 格式化文本, {} 表示占位符<br>
     * 此方法只是简单将占位符 {} 按照顺序替换为参数<br>
     * 如果想输出 {} 使用 \\转义 { 即可,如果想输出 {} 之前的 \ 使用双转义符 \\\\ 即可<br>
     * 例:<br>
     * 通常使用:format("this is {} for {}", "a", "b") -> this is a for b<br>
     * 转义{}: format("this is \\{} for {}", "a", "b") -> this is \{} for a<br>
     * 转义\: format("this is \\\\{} for {}", "a", "b") -> this is \a for b<br>
     *
     * @param template 文本模板,被替换的部分用 {} 表示
     * @param params   参数值
     * @return 格式化后的文本
     */
   /* public static String format(String template, Object... params) {
        if (isEmpty(params) || isEmpty(template)) {
            return template;
        }
        return StrFormatter.format(template, params);
    }*/

    /**
     * 下划线转驼峰命名
     */
    public static String toUnderScoreCase(String str) {
        if (str == null) {
            return null;
        }
        StringBuilder sb = new StringBuilder();
        // 前置字符是否大写
        boolean preCharIsUpperCase = true;
        // 当前字符是否大写
        boolean curreCharIsUpperCase = true;
        // 下一字符是否大写
        boolean nexteCharIsUpperCase = true;
        for (int i = 0; i < str.length(); i++) {
            char c = str.charAt(i);
            if (i > 0) {
                preCharIsUpperCase = Character.isUpperCase(str.charAt(i - 1));
            } else {
                preCharIsUpperCase = false;
            }

            curreCharIsUpperCase = Character.isUpperCase(c);

            if (i < (str.length() - 1)) {
                nexteCharIsUpperCase = Character.isUpperCase(str.charAt(i + 1));
            }

            if (preCharIsUpperCase && curreCharIsUpperCase && !nexteCharIsUpperCase) {
                sb.append(SEPARATOR);
            } else if ((i != 0 && !preCharIsUpperCase) && curreCharIsUpperCase) {
                sb.append(SEPARATOR);
            }
            sb.append(Character.toLowerCase(c));
        }
        return sb.toString();
    }

    /**
     * 是否包含字符串
     *
     * @param str  验证字符串
     * @param strs 字符串组
     * @return 包含返回true
     */
    public static boolean inStringIgnoreCase(String str, String... strs) {
        if (str != null && strs != null) {
            for (String s : strs) {
                if (str.equalsIgnoreCase(trim(s))) {
                    return true;
                }
            }
        }
        return false;
    }

    /**
     * 将下划线大写方式命名的字符串转换为驼峰式。如果转换前的下划线大写方式命名的字符串为空,则返回空字符串。 例如:HELLO_WORLD->HelloWorld
     *
     * @param name 转换前的下划线大写方式命名的字符串
     * @return 转换后的驼峰式命名的字符串
     */
    public static String convertToCamelCase(String name) {
        StringBuilder result = new StringBuilder();
        // 快速检查
        if (name == null || name.isEmpty()) {
            // 没必要转换
            return "";
        } else if (!name.contains("_")) {
            // 不含下划线,仅将首字母大写
            return name.substring(0, 1).toUpperCase() + name.substring(1);
        }
        // 用下划线将原始字符串分割
        String[] camels = name.split("_");
        for (String camel : camels) {
            // 跳过原始字符串中开头、结尾的下换线或双重下划线
            if (camel.isEmpty()) {
                continue;
            }
            // 首字母大写
            result.append(camel.substring(0, 1).toUpperCase());
            result.append(camel.substring(1).toLowerCase());
        }
        return result.toString();
    }

    /**
     * 驼峰式命名法
     * 例如:user_name->userName
     */
    public static String toCamelCase(String s) {
        if (s == null) {
            return null;
        }
        if (s.indexOf(SEPARATOR) == -1) {
            return s;
        }
        s = s.toLowerCase();
        StringBuilder sb = new StringBuilder(s.length());
        boolean upperCase = false;
        for (int i = 0; i < s.length(); i++) {
            char c = s.charAt(i);

            if (c == SEPARATOR) {
                upperCase = true;
            } else if (upperCase) {
                sb.append(Character.toUpperCase(c));
                upperCase = false;
            } else {
                sb.append(c);
            }
        }
        return sb.toString();
    }

    @SuppressWarnings("unchecked")
    public static <T> T cast(Object obj) {
        return (T) obj;
    }
}
CustomerController
用户控制类,跟前端交互用的。
package com.zecApi.zecSystemManagement.controller;

import com.zecApi.utils.AjaxResult;
import com.zecApi.zecSystemManagement.pojo.sel.CustomerSelPojo;
import com.zecApi.zecSystemManagement.service.CustomerService;
import org.springframework.web.bind.annotation.*;


import javax.annotation.Resource;
import java.util.List;

@RestController
@RequestMapping("ZecSystemManagement/CustomerController")
/**
 * 用户的控制层
 */
public class CustomerController {

    /**
     * 调用业务访问层对象
     */
    @Resource
    private CustomerService customerService;

    /**
     * PostMapping:处理 POST 请求
     * 查询所有用户信息的方法
     */
    @PostMapping("/selCustomers")
    public AjaxResult selCustomers() {
        List<CustomerSelPojo> customerSelPojoList = customerService.selCustomers();
        String msg = customerSelPojoList!= null? "查询成功!" : "查询失败!";
        return new AjaxResult(customerSelPojoList!= null? AjaxResult.Type.SUCCESS : AjaxResult.Type.ERROR, msg, customerSelPojoList);
    }

}
ZecApiApplication
项目启动类。
package com.zecApi;

import org.springframework.boot.SpringApplication;
import org.springframework.boot.autoconfigure.SpringBootApplication;

@SpringBootApplication
public class ZecApiApplication {

    public static void main(String[] args) {
        SpringApplication.run(ZecApiApplication.class, args);
    }

}
application.yml
项目的配置文件。
## 指定web容器访问端口号
zero-ecological-chain:
  name: 零式生态链
  version: v-1.0.0
## web容器端口号
server:
  port: 8088
## 配置数据库连接
spring:
  datasource:
    driver-class-name: oracle.jdbc.OracleDriver
    url: jdbc:oracle:thin:@//localhost:1521/ORCL
    username: ZERO_ECOLOGICAL_CHAIN
    password: 1231
## 配置mybatis中mapper.xml文件扫描
mybatis:
  type-aliases-package: com.zecApi.*.pojo.sel.*
  mapper-locations: classpath:mapper/*.xml   # mapper.xml文件映射
banner.txt
项目启动的时候,控制台打印的信息(个人爱好,可有可无)。
Application Name: ${zero-ecological-chain.name}
Application Version: ${zero-ecological-chain.version}
Spring Boot Version:${spring-boot.version}
${AnsiColor.BRIGHT_CYAN}
         ,--.    ,----..
       ,--.'|   /   /   \              ,---,.                ,----..
   ,--,:  : |  /   .     :           ,'  .'  \         ,--, /   /   \
,`--.'`|  ' : .   /   ;.  \        ,---.' .' |       ,'_ /||   :     :
|   :  :  | |.   ;   /  ` ;        |   |  |: |  .--. |  | :.   |  ;. /
:   |   \ | :;   |  ; \ ; |        :   :  :  /,'_ /| :  . |.   ; /--`
|   : '  '; ||   :  | ; | '        :   |    ; |  ' | |  . .;   | ;  __
'   ' ;.    ;.   |  ' ' ' :        |   :     \|  | ' |  | ||   : |.' .'
|   | | \   |'   ;  \; /  |        |   |   . |:  | | :  ' ;.   | '_.' :
'   : |  ; .' \   \  ',  /         '   :  '; ||  ; ' |  | ''   ; : \  |
|   | '`--'    ;   :    /          |   |  | ; :  | : ;  ; |'   | '/  .'
'   : |         \   \ .'           |   :   /  '  :  `--'   \   :    /
;   |.'          `---`             |   | ,'   :  ,      .-./\   \ .'
'---'                              `----'      `--`----'     `---`
pom.xml
zec-api 下的 pom 文件
<?xml version="1.0" encoding="UTF-8"?>
<project xmlns="http://maven.apache.org/POM/4.0.0" xmlns:xsi="http://www.w3.org/2001/XMLSchema-instance"
    xsi:schemaLocation="http://maven.apache.org/POM/4.0.0 https://maven.apache.org/xsd/maven-4.0.0.xsd">
    <!--引用父 pom 文件 -->
    <parent>
        <artifactId>zero-ecological-chain</artifactId>
        <groupId>com.zero-ecological-chain</groupId>
        <version>1.0.0</version>
    </parent>

    <modelVersion>4.0.0</modelVersion>
    <artifactId>zec-api</artifactId>

    <dependencies>
        <dependency> <!-- 引入其他子工程,用于控制层调用服务层用的 -->
            <artifactId>zec-system-management</artifactId>
            <groupId>com.zec-system-management</groupId>
            <version>1.0.0</version>
        </dependency>
    </dependencies>

</project>
子工程 zec-system-management
ComCustomerMapper
用户映射层。
package com.zecApi.zecSystemManagement.mapper;

import com.zecApi.zecSystemManagement.pojo.sel.CustomerSelPojo;
import org.apache.ibatis.annotations.Mapper;

import java.util.List;

@Mapper
public interface ComCustomerMapper {
    List<CustomerSelPojo> selCustomers();
}
CustomerSelPojo
这个跟它下面的 CustomerPojo 是一样的,至于为什么多加一个这个,我在 springboot+vue 项目创建中说过了,这边就不多说了。
package com.zecApi.zecSystemManagement.pojo.sel;

import lombok.Data;

@Data
public class CustomerSelPojo {

  private String id;
  private String account;
  private String nickName;
  private String birthday;
  private String sex;
  private String createTime;
  private String updateTime;
  private String isDelete;

}
CustomerImpl
用户服务层的实现类。
package com.zecApi.zecSystemManagement.service.impl;

import com.zecApi.zecSystemManagement.mapper.ComCustomerMapper;
import com.zecApi.zecSystemManagement.pojo.sel.CustomerSelPojo;
import com.zecApi.zecSystemManagement.service.CustomerService;
import org.springframework.stereotype.Service;

import javax.annotation.Resource;
import java.util.List;

@Service
public class CustomerImpl implements CustomerService {

    //创建数据访问层对象
    @Resource
    private ComCustomerMapper comCustomerMapper;

    @Override
    public List<CustomerSelPojo> selCustomers() {
        return comCustomerMapper.selCustomers();
    }
}
CustomerService
用户的服务层
package com.zecApi.zecSystemManagement.service;

import com.zecApi.zecSystemManagement.pojo.sel.CustomerSelPojo;

import java.util.List;

public interface CustomerService {

    /**
     * 查询所有用户信息
     * @return
     */
    List<CustomerSelPojo> selCustomers();

}
ResourceCustomerMapper.xml
用户的数据访问层。
<?xml version="1.0" encoding="UTF-8"?>
<!DOCTYPE mapper
        PUBLIC "-//mybatis.org//DTD Mapper 3.0//EN"
        "http://mybatis.org/dtd/mybatis-3-mapper.dtd">
<mapper namespace="com.zecApi.zecSystemManagement.mapper.ComCustomerMapper">

    <resultMap id="customerResultMap" type="com.zecApi.zecSystemManagement.pojo.sel.CustomerSelPojo">
        <result property="id" column="ID"/>
        <result property="account" column="ACCOUNT"/>
        <result property="nickName" column="NICK_NAME"/>
        <result property="birthday" column="BIRTHDAY"/>
        <result property="sex" column="SEX"/>
        <result property="createTime" column="CREATE_TIME"/>
        <result property="updateTime" column="UPDATE_TIME"/>
        <result property="isDelete" column="IS_DELETE"/>
    </resultMap>

    <select id="selCustomers" resultMap="customerResultMap">
        SELECT T.ID, T.ACCOUNT, T.NICK_NAME,
               TO_CHAR(T.BIRTHDAY, 'YYYY-MM-DD') AS BIRTHDAY,T.SEX,
               T.CREATE_TIME, T.UPDATE_TIME, T.IS_DELETE
        FROM zero_ecological_chain.CUSTOMER T
    </select>

</mapper>
pom.xml
<?xml version="1.0" encoding="UTF-8"?>
<project xmlns="http://maven.apache.org/POM/4.0.0" xmlns:xsi="http://www.w3.org/2001/XMLSchema-instance"
    xsi:schemaLocation="http://maven.apache.org/POM/4.0.0 https://maven.apache.org/xsd/maven-4.0.0.xsd">
    <!--引用父 pom 文件 -->
    <parent>
        <artifactId>zero-ecological-chain</artifactId>
        <groupId>com.zero-ecological-chain</groupId>
        <version>1.0.0</version>
    </parent>

    <modelVersion>4.0.0</modelVersion>
    <artifactId>zec-system-management</artifactId>
    <groupId>com.zec-system-management</groupId>

</project>
父工程 zero-ecological-chain
pom.xml
<?xml version="1.0" encoding="UTF-8"?>
<project xmlns="http://maven.apache.org/POM/4.0.0" xmlns:xsi="http://www.w3.org/2001/XMLSchema-instance"
         xsi:schemaLocation="http://maven.apache.org/POM/4.0.0 https://maven.apache.org/xsd/maven-4.0.0.xsd">
    <!--在 spring-boot-starter-parent 中已经定义了 Spring Framework、Spring Boot 等相关依赖的版本。当子模块需要使用这些依赖时,不需要显式地指定版本号-->
    <parent>
        <groupId>org.springframework.boot</groupId>
        <artifactId>spring-boot-starter-parent</artifactId>
        <version>2.6.13</version>
        <relativePath/>
    </parent>

    <modelVersion>4.0.0</modelVersion> <!-- 定义当前 POM 文件遵循的 Maven 模型版本 -->
    <groupId>com.zero-ecological-chain</groupId> <!-- 定义项目所属的组织或项目组的唯一标识符 -->
    <artifactId>zero-ecological-chain</artifactId> <!-- 定义项目的唯一标识符,用于在所属的组织或项目组内唯一标识该项目 -->
    <version>1.0.0</version> <!-- 定义项目的版本号,版本号用于区分项目的不同迭代和发布 -->
    <name>零式生态链</name> <!-- 定义项目的显示名称 -->
    <description>一个简易的生态链系统</description> <!-- 对项目进行简要的描述,提供关于项目的功能、用途或目标的信息 -->
    <packaging>pom</packaging> <!-- packaging 标签用于指定项目的打包方式,这里将 packaging 设置为 "pom",表示该项目是一个聚合项目或者父项目 -->

    <modules>
        <module>zec-api</module>
        <module>zec-system-management</module>
    </modules>

    <properties>
        <java.version>11</java.version> <!--声明 java 版本号-->
        <project.build.sourceEncoding>UTF-8</project.build.sourceEncoding> <!--定义了项目源代码文件的编码格式-->
        <project.reporting.outputEncoding>UTF-8</project.reporting.outputEncoding> <!-- Maven 生成各种报告文件使用的编码格式-->
    </properties>

    <repositories> <!-- 设置 Maven 仓库 -->
        <repository>
            <id>aliyunmaven</id>
            <name>阿里云公共仓库</name>
            <url>https://maven.aliyun.com/repository/public</url>
        </repository>
    </repositories>

    <dependencies>
        <dependency> <!--引入 Spring Boot 的核心功能,为项目搭建一个基础的 Spring Boot 开发环境-->
            <groupId>org.springframework.boot</groupId>
            <artifactId>spring-boot-starter</artifactId>
            <!--因为上面 spring-boot-starter-parent 提供了一系列的依赖管理,这样在项目里引入依赖时可以不用显式指定版本-->
        </dependency>
        <dependency><!-- 引入 Spring Boot 对 JDBC(Java Database Connectivity)的支持 -->
            <groupId>org.springframework.boot</groupId>
            <artifactId>spring-boot-starter-jdbc</artifactId>
        </dependency>
        <dependency><!-- 在 Spring Boot 项目中集成 MyBatis 框架,MyBatis 是一个优秀的持久层框架,它简化了 Java 应用与数据库之间的交互操作 -->
            <groupId>org.mybatis.spring.boot</groupId>
            <artifactId>mybatis-spring-boot-starter</artifactId>
            <version>2.2.0</version>
        </dependency>
        <dependency> <!-- 此依赖会自动引入一系列开发 Web 应用所需的库和框架,它会帮助开发者快速搭建起一个 Web 应用的基础环境-->
            <groupId>org.springframework.boot</groupId>
            <artifactId>spring-boot-starter-web</artifactId>
        </dependency>
        <dependency> <!-- 引入 Oracle 数据库的 JDBC 驱动程序,提供了 Java 程序与 Oracle 数据库建立连接的能力-->
            <groupId>com.oracle.database.jdbc</groupId>
            <artifactId>ojdbc11</artifactId>
            <version>23.3.0.23.09</version>
        </dependency>
        <dependency> <!-- 引入 Lombok 库,通过注解的方式来减少 Java 代码中样板代码的编写,如 @Data 注解-->
            <groupId>org.projectlombok</groupId>
            <artifactId>lombok</artifactId>
            <optional>true</optional>
        </dependency>
        <dependency> <!-- 引入 Apache Commons Lang3 库,提供了丰富的工具类如 StringUtils-->
            <groupId>org.apache.commons</groupId>
            <artifactId>commons-lang3</artifactId>
            <version>3.12.0</version>
        </dependency>
        <dependency> <!-- 引入 Log4j 日志框架,可以灵活地控制日志信息的输出目的地、输出格式以及日志级别等-->
            <groupId>log4j</groupId>
            <artifactId>log4j</artifactId>
            <version>1.2.16</version>
        </dependency>
    </dependencies>
</project>
这里就是肉眼可见的所有项目代码了,建议的写代码顺序就是:
控制层 --> 服务层 --> 服务层实现类 --> 映射层 --> 数据访问层。实体类就是缺什么就在那个 pojo 里面加上就行了。
10、项目启动
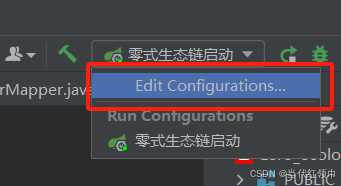
编辑一下这个启动项目。
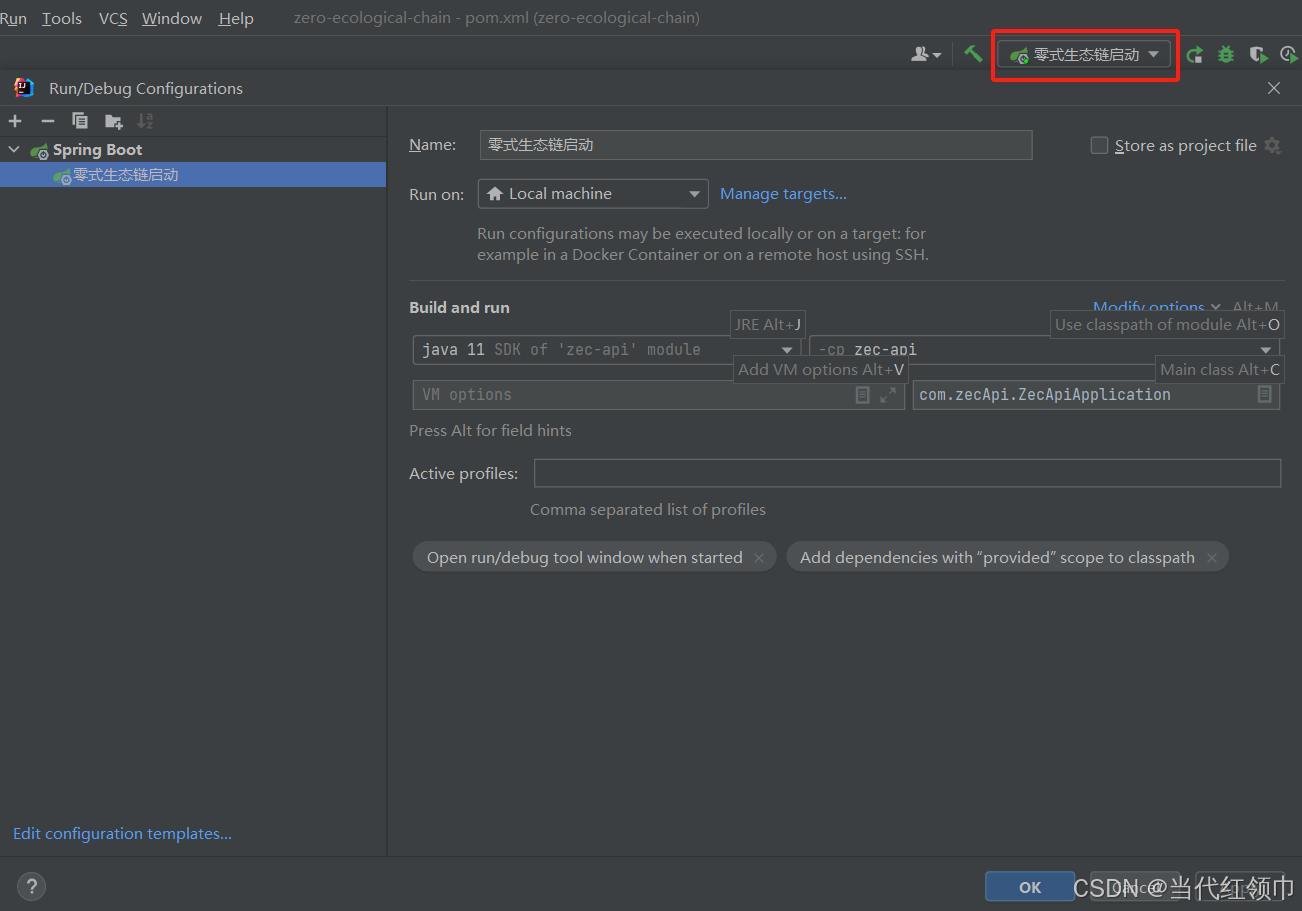
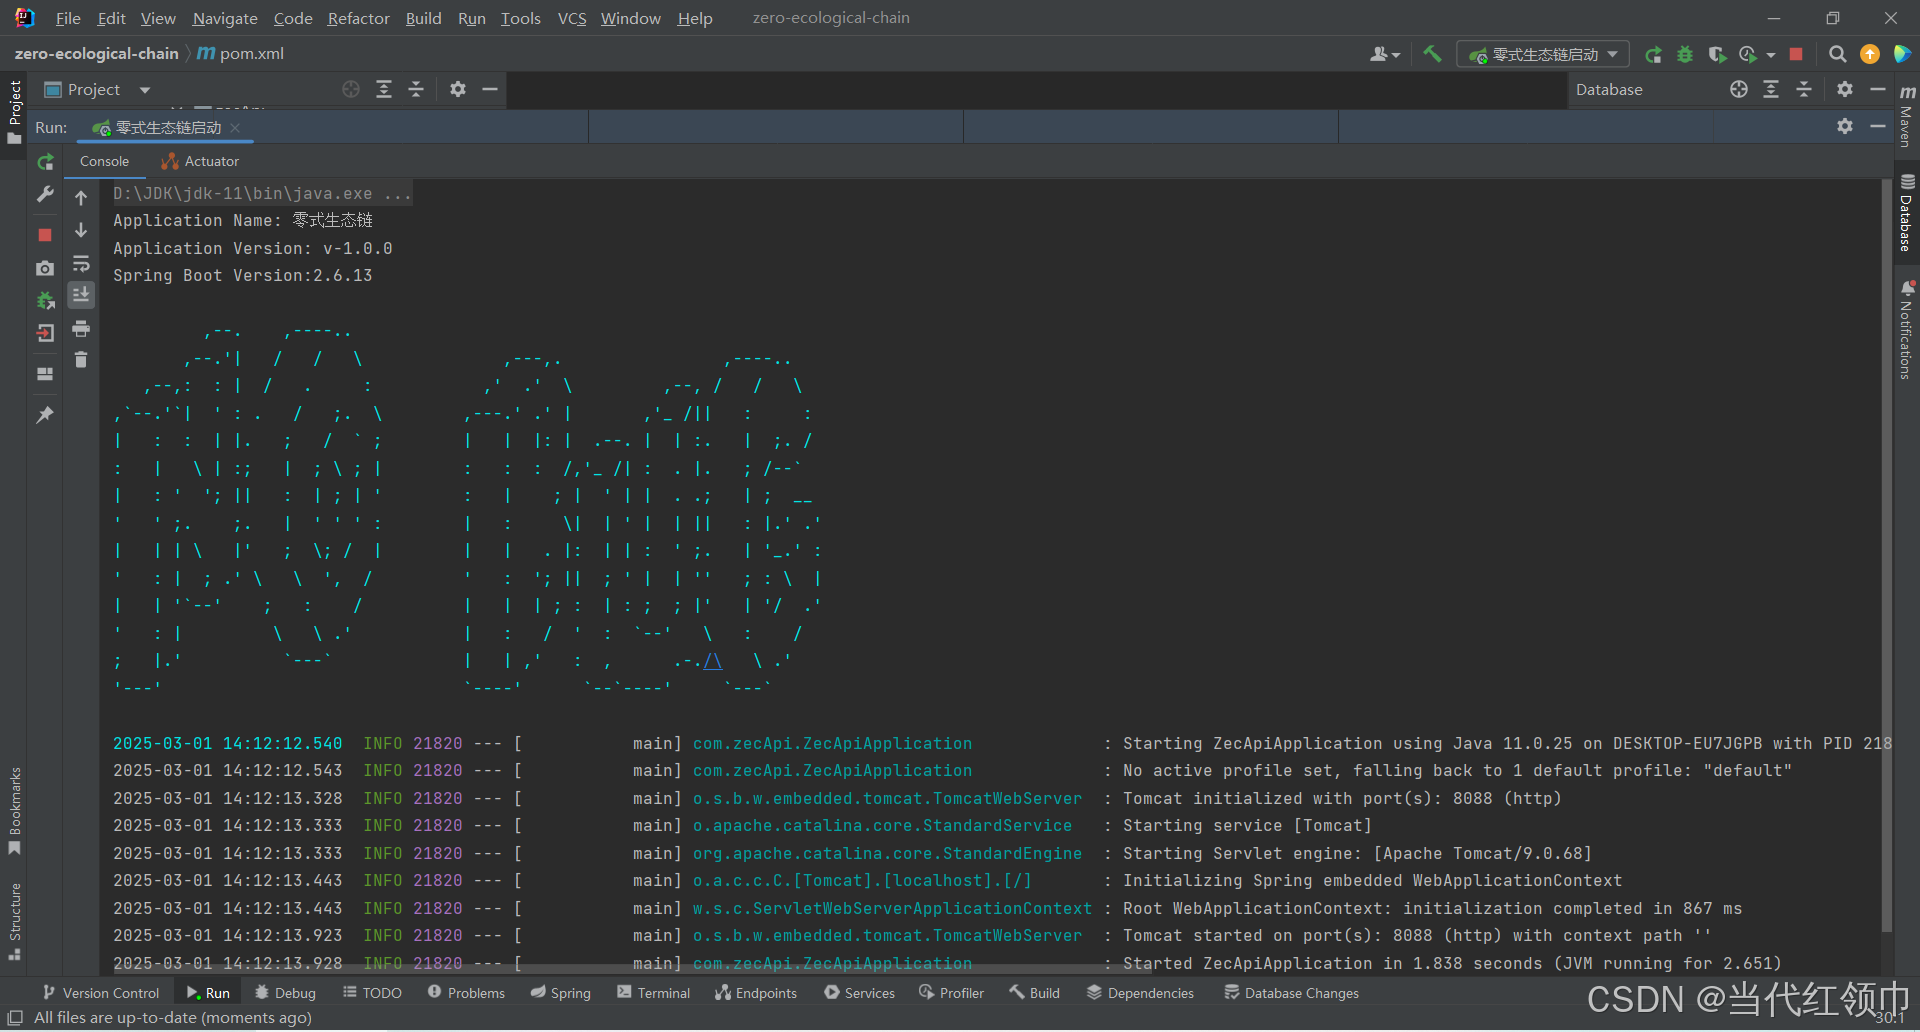
点击启动。

启动后,控制台出现这样的信息,就没问题了。
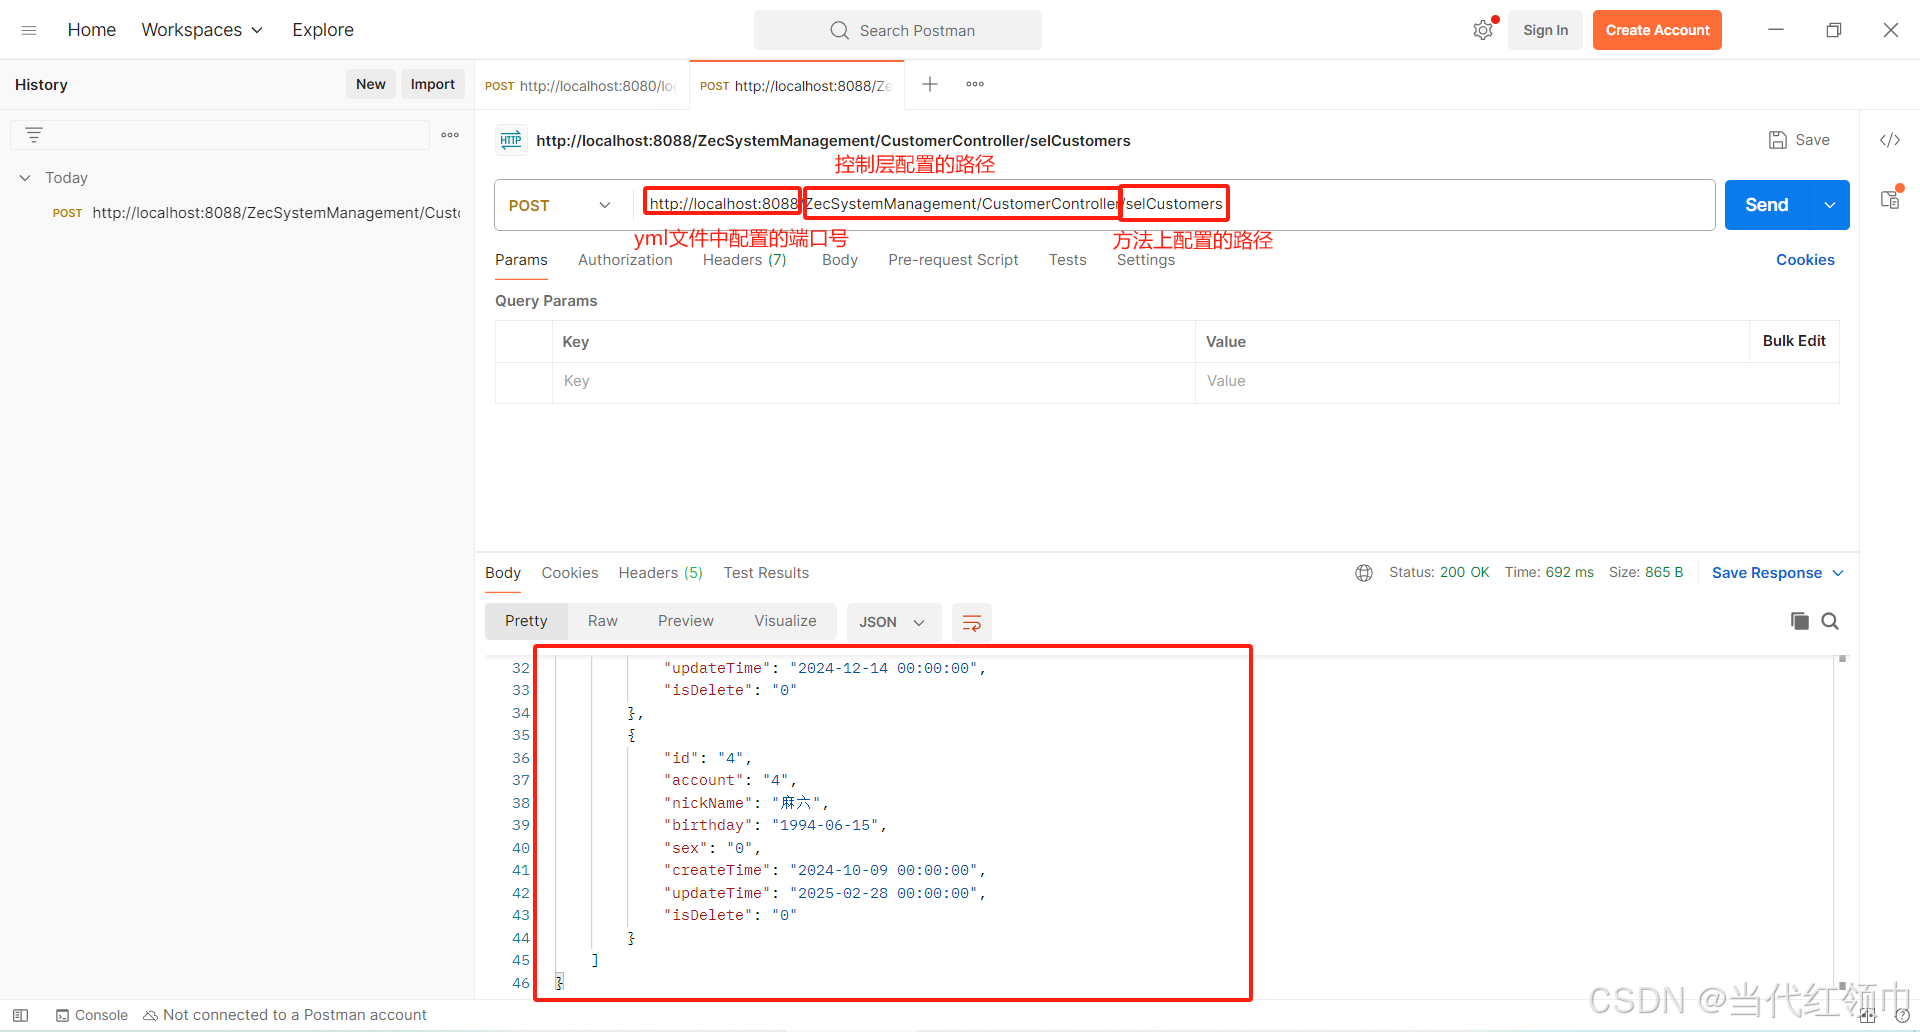
11、接口测试
我这里使用的是 postman,如果能正常查到数据,就没问题了。
如果要再加别的子工程的话,就跟子工程 zec-system-management 一样,然后控制层在 zec-api里面写就行了。
二、Vue 的构建
后端的数据能够正常查询并返回就没问题了。
前端就是把数据渲染上去,可以参考我之前写的 SpringBoot + Vue 项目创建详细步骤。
如果有问题的话,可以在评论区问,也可以私聊,我看到了会回的。


 2723
2723

 被折叠的 条评论
为什么被折叠?
被折叠的 条评论
为什么被折叠?
 到【灌水乐园】发言


