


傻妞安装全过程
1. 创建目录并拉取源程序
s=sillyGirl;a=arm64;if [[ $(uname -a | grep "x86_64") != "" ]];then a=amd64;fi ;if [ ! -d $s ];then mkdir $s;fi ;cd $s;wget https://mirror.ghproxy.com/https://github.com/cdle/${s}/releases/download/main/${s}_linux_$a -O $s && chmod 777 $s;pkill -9 $s;$(pwd)/$s
这里的https://mirror.ghproxy.com/用的人比较多可用换成别的镜像站,比如https://ghps.cc/
2.运行sillyGirl并调试
./sillyGril -t
使用IP:8080的地址访问傻妞后台,这里建议有域名的在域名@记录那里做个解析,不用一直复制粘贴IP地址
2.1登入后台并配置
在基础参数处配置对应端口号及账号密码,这里记得填入一个字段刷新一次,不然不同步。
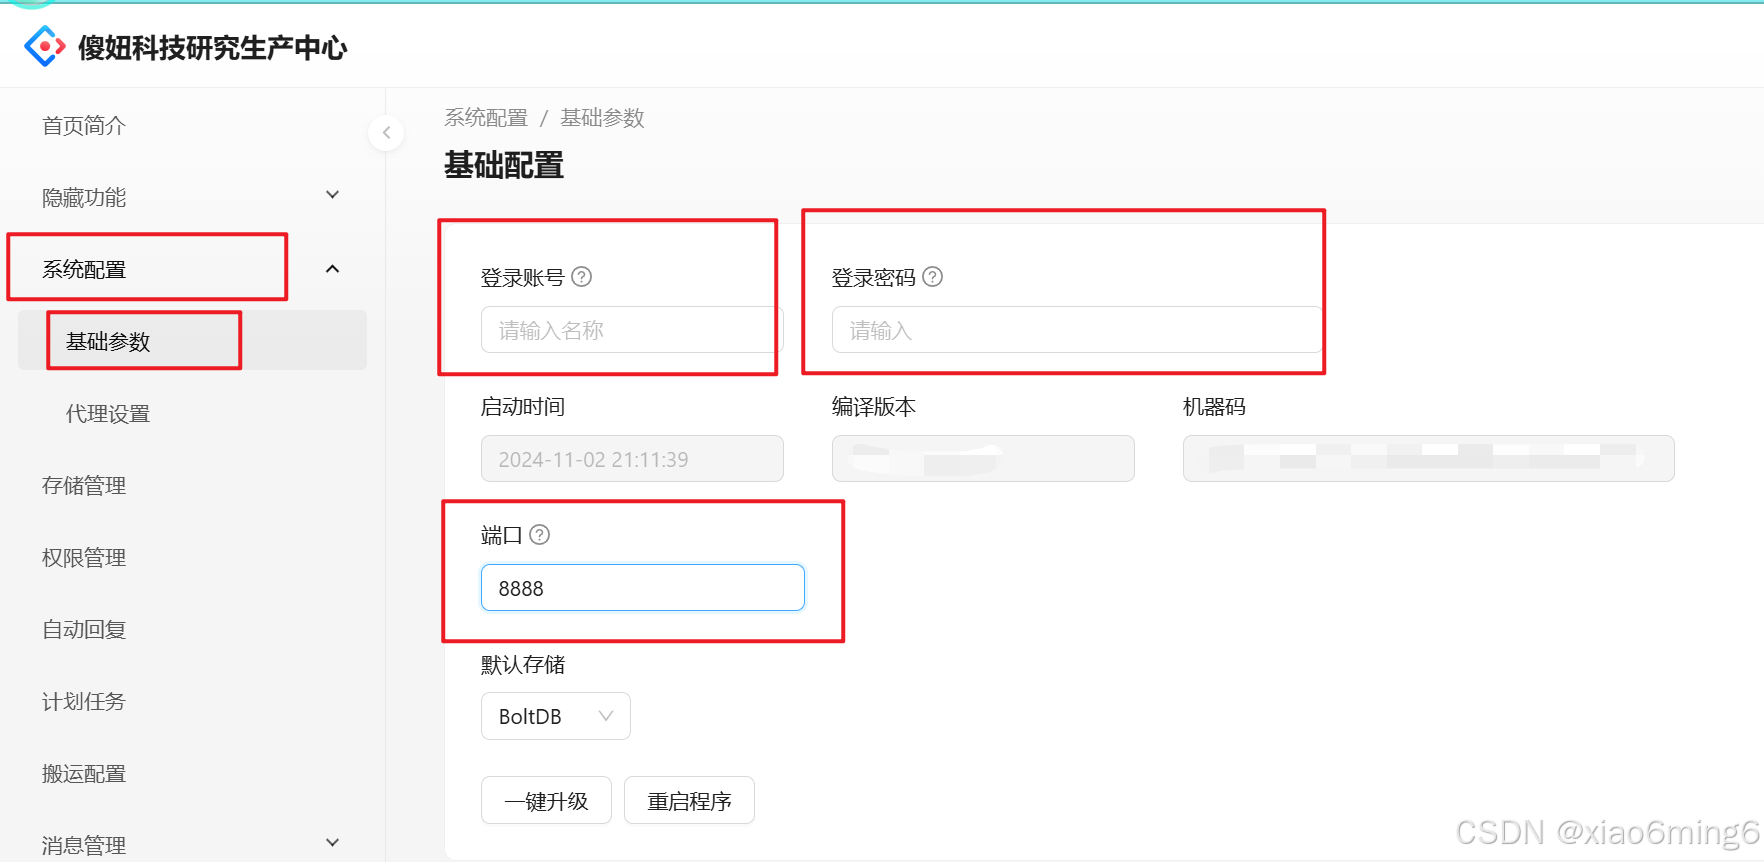
PS:关键一点,服务器一定要在防火墙放行端口,开启防火墙的记得关闭或者放行。
2.2安装所需环境
安装插件后提示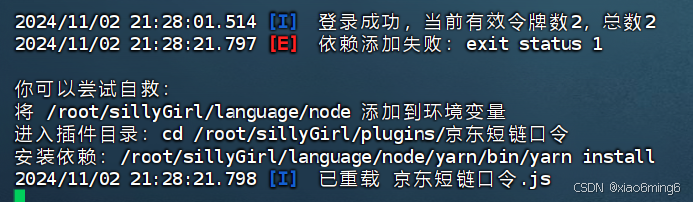
按要求添加变量
vi /etc/profile
在最后追加环境变量export PATH=/root/sillyGirl/language/node:$PATH
生效配置
source /etc/profile
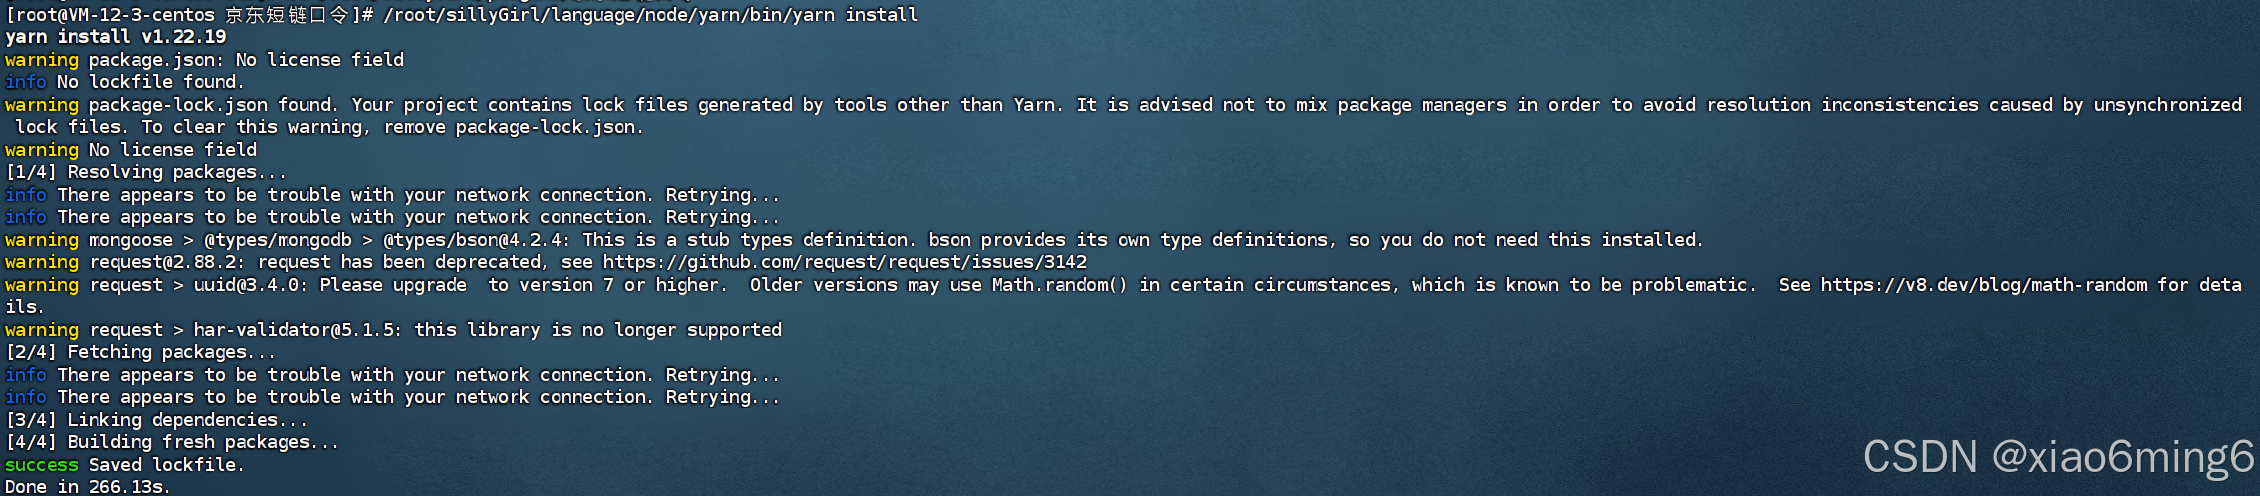
执行/root/sillyGirl/language/node/yarn/bin/yarn install
发现报错

不慌,看提示是GLIBC缺失或需要升级,执行以下代码对glibc进行升级
cd
wget http://ftp.gnu.org/gnu/glibc/glibc-2.28.tar.gz
tar xf glibc-2.28.tar.gz
cd glibc-2.28/ && mkdir build  && cd build
2.2.1 升级gcc、make
# 升级GCC(默认为4 升级为8)
yum install -y centos-release-scl
#下载软件包
wget https://mirrors.aliyun.com/gnu/gcc/gcc-9.3.0/gcc-9.3.0.tar.gz
#解压依赖包
tar -zxf gcc-9.3.0.tar.gz
cd gcc-9.3.0/
#下载4个依赖包
./contrib/download_prerequisites
#预编译
mkdir build
cd build
./configure --enable-checking=release --enable-language=c,c++ --disable-multilib --prefix=/usr # 运行不了就在前面加个小数点再回车
#查看cpu核数
cat /proc/cpuinfo| grep “processor”| wc -l
#-j2中的数字为cpu核数,及并发工作任务数量,可以提高编译效率
make -j2
#编译安装
make install
#检查gcc版本
gcc -v

# 升级 make(默认为3 升级为4)
wget http://ftp.gnu.org/gnu/make/make-4.3.tar.gz # 网卡可用用wget https://mirrors.aliyun.com/gnu/make/make-4.3.tar.gz
tar -xzvf make-4.3.tar.gz && cd make-4.3/
mkdir build && cd build
../configure --prefix=/usr
make && make install
make -v
2.2.2 继续安装glibc2.28
# 预编译glibc2.28
cd ~/glibc-2.28/build/ # 没有build就mkdir build
../configure --prefix=/usr --disable-profile --enable-add-ons --with-headers=/usr/include --with-binutils=/usr/bin --disable-sanity-checks --disable-werror
make -j2 #编译glibc2.28
make install # 安装glibc
ldd --version # 查看glibc版本
# 安装locale
make localedata/install-locales
值得一提的是如果在安装glibc2.28make install时提示
/usr/bin/ld: cannot find -lnss_test2
collect2: error: ld returned 1 exit status
Execution of gcc -B/usr/bin/ failed!
The script has found some problems with your installation!
Please read the FAQ and the README file and check the following:
- Did you change the gcc specs file (necessary after upgrading from
Linux libc5)?- Are there any symbolic links of the form libXXX.so to old libraries?
Links like libm.so -> libm.so.5 (where libm.so.5 is an old library) are wrong,
libm.so should point to the newly installed glibc file - and there should be
only one such link (check e.g. /lib and /usr/lib)
You should restart this script from your build directory after you’ve
fixed all problems!
Btw. the script doesn’t work if you’re installing GNU libc not as your
primary library!
make[1]: *** [Makefile:111: install] Error 1
make[1]: Leaving directory ‘/root/glibc-2.28’
make: *** [Makefile:12: install] Error 2
需要添加代码补丁,在glibc-2.28/scripts/test-installation.pl的第125行进行如下修改:(“-”代表删除,“+”代表新增)
@@ -125,7 +125,7 @@ while (<SOVERSIONS>) {
     next if ($build_mathvec == 0 && $name eq "mvec");
     if ($name ne "nss_ldap" && $name ne "db1"
 	&& $name ne "thread_db"
-	&& $name ne "nss_test1" && $name ne "libgcc_s") {
+	&& $name ne "nss_test1" && $name ne "nss_test2" && $name ne "nss_nis" && $name ne "nss_nisplus" && $name ne "libgcc_s") {
       $link_libs .= " -l$name";
       $versions{$name} = $version;
     }
在glibc-2.28/Changelog 的第8044行修改如下:
@@ -8044,6 +8044,11 @@
 	(__log1pf): Disable -Wmaybe-uninitialized for -Os around
 	computation using c.

+2017-08-06  Hiroshi Takekawa  <sian@big.or.jp>
+
+	* scripts/test-installation.pl: Filter out libnss_test2. Additionally, as of 2017-11-17, filter
+	out nss_nis, nss_nisplus, and libgcc_s.
+
 2018-02-01  Dmitry V. Levin  <ldv@altlinux.org>
添加补丁后,重新在buildmake install即可
[root@VM-12-3-centos build]# ldd --version # 输入命令查看glibc版本
ldd (GNU libc) 2.28 # 可以看见已经更新到2.28了
Copyright (C) 2018 Free Software Foundation, Inc.
This is free software; see the source for copying conditions.  There is NO
warranty; not even for MERCHANTABILITY or FITNESS FOR A PARTICULAR PURPOSE.
Written by Roland McGrath and Ulrich Drepper.
[root@VM-12-3-centos build]# strings /lib64/libc.so.6 |grep GLIBC_
# ...
GLIBC_2.17
GLIBC_2.18
GLIBC_2.22
GLIBC_2.23
GLIBC_2.24
GLIBC_2.25
GLIBC_2.26
GLIBC_2.27
GLIBC_2.28
# ...
2.2.3 测试结果
按sillyGIrl提示执行如下脚本修复插件:
cd /root/sillyGirl/plugins/京东短链口令
/root/sillyGirl/language/node/yarn/bin/yarn install
如图所示,修复成功,可以愉快的玩耍了。
3. 展望未来
未完待续…
参考文献:
[1] Centos7 升级gcc8.2.0
[2] Centos7 升级glibc
[3] 解决glibc make install失败问题


 3万+
3万+

 被折叠的 条评论
为什么被折叠?
被折叠的 条评论
为什么被折叠?
 到【灌水乐园】发言


