


 本文讲述了如何使用Selenium和BeautifulSoup解决在爬取淘宝商品标题时遇到的JavaScript问题,以获取高质量数据集来提升Nanogpt模型的性能,包括参数设置和训练过程中的优化策略。

nanogpt应该不陌生,很多时候,要达到理想的效果,要提高参数量,还要良好的数据集,但是优秀的数据集从哪来,怎么去寻找,而数据集和参数量不足都会影响到实际的使用。
数据集最好数量多,效果也要比较好,而且训练时间也要短,提示词效果也要比较好。
所以这就有了爬虫爬取淘宝商品标题:
- 商品标题是人为添加的,相当于人工标注
- 比较固定的长度,处理数据的时候不用过多处理
- 爬取难度较低
随意点击一个淘宝网页:
&keyword= 物品名字
&pnum=1 页码
用from bs4 import BeautifulSoup 爬取不了
soup = BeautifulSoup(response.text, 'html.parser')爬取出来的是js
所以要用到selenium
它有防selenium的,所以要用cmd启动,然后再自动
但是一直爬取,就会被弹窗阻碍,这时候关闭第一层的弹窗,里面的内容就会显示出来
代码如下:
from selenium import webdriver
from selenium.webdriver.common.by import By
from selenium.webdriver.support.ui import WebDriverWait
from selenium.webdriver.support import expected_conditions as EC
from selenium.webdriver.chrome.options import Options
from bs4 import BeautifulSoup
from selenium.common.exceptions import NoSuchElementException
import subprocess
import time

# 设置 Chrome 命令行参数
chrome_path = r'chrome.exe'#你的路径
remote_debugging_port = '9222'
cmd = [chrome_path,
       '--remote-debugging-port=' + remote_debugging_port,]
# 使用 subprocess 启动 Chrome 浏览器
subprocess.Popen(cmd)

# 等待浏览器启动并监听端口
time.sleep(2)  # 根据实际情况调整等待时间

# 设置 Selenium Chrome 选项来连接到现有的远程调试端口
chrome_options = Options()
chrome_options.add_experimental_option("debuggerAddress", "127.0.0.1:{}".format(remote_debugging_port))

# 创建 webdriver 实例并连接到现有的浏览器
driver_path = 'chromedriver.exe'#你的路径,对应版本才行
browser = webdriver.Chrome(executable_path=driver_path,options=chrome_options)


# 现在你可以使用 driver 对象来控制从命令行启动的 Chrome 实例了

Loop = 10
number = 0

list1 = ["鸡肉","新鲜猪肉","新鲜水果","猕猴桃"]
for f in list1:
    find = f
    for i in range(1, Loop + 1):
        page = i
        url = #将url的字符串对接上去,'....keyword='后面+ find +'...&pnum=' + str(page)
        browser.get(url)
        time.sleep(5)
        try:#找到关闭
            element = browser.find_element_by_xpath('//a[text()="关闭"]')
            # print("找到了元素")
            element.click()
        except NoSuchElementException:
            # print("没有找到元素")
            pass
        time.sleep(10)
        # 获取页面源代码(此时已经包含了由JavaScript动态生成的内容)
        soup = BeautifulSoup(browser.page_source, 'html.parser')
        # 查找所有class为'title-text'的元素,并打印它们的文本内容
        title_texts = soup.find_all(class_='title-text')
        for title_text in title_texts:
            number += 1
            print(title_text.get_text(strip=True))
            with open('写入文本.txt', 'a+', encoding='utf-8') as f:
                f.write(title_text.get_text(strip=True) + "\n")
    print("爬出:", number, "条")


# 自动化完成后,确保关闭所有相关的窗口和标签页
browser.close()
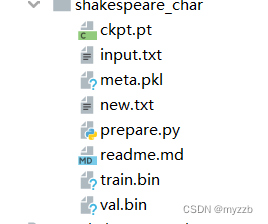
写入了文本之后,就是将文本里面的转到nanogpt的文本数据里面
我用的是nanogpt里的莎士比亚文集的,稍微修改了一些
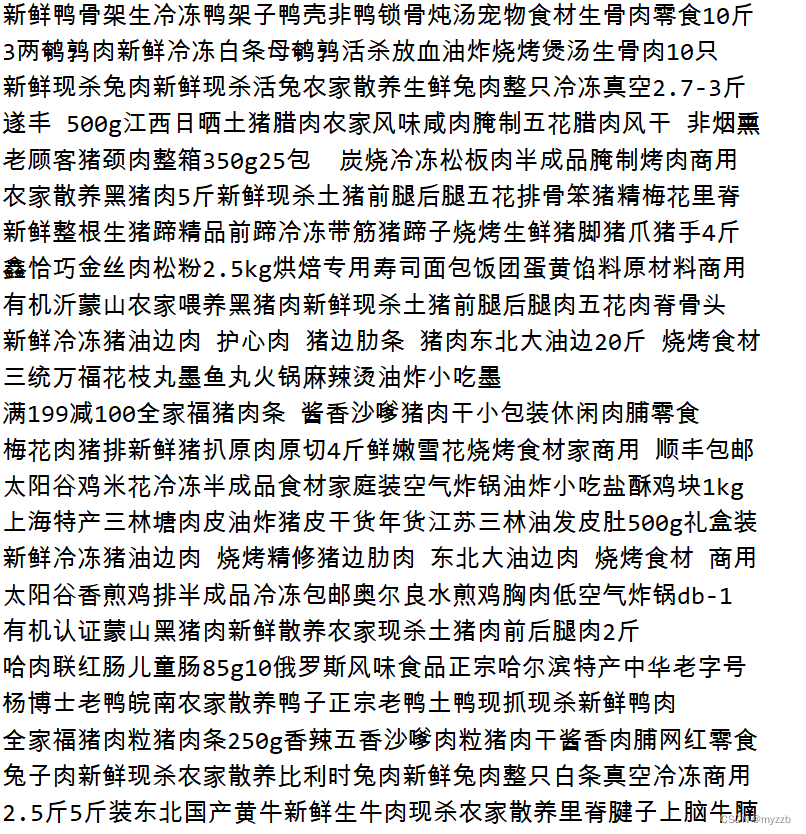
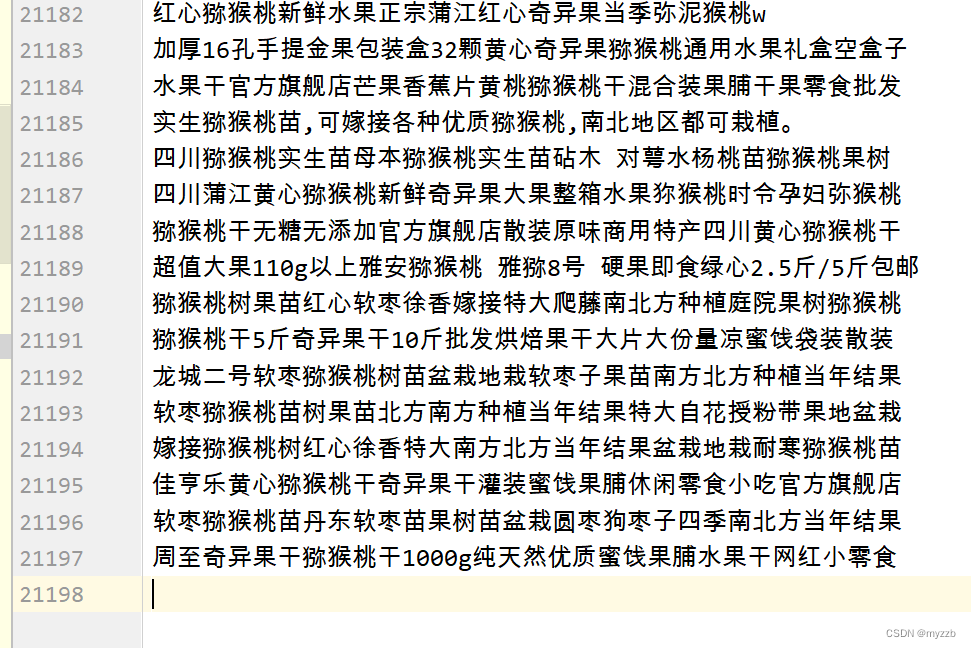
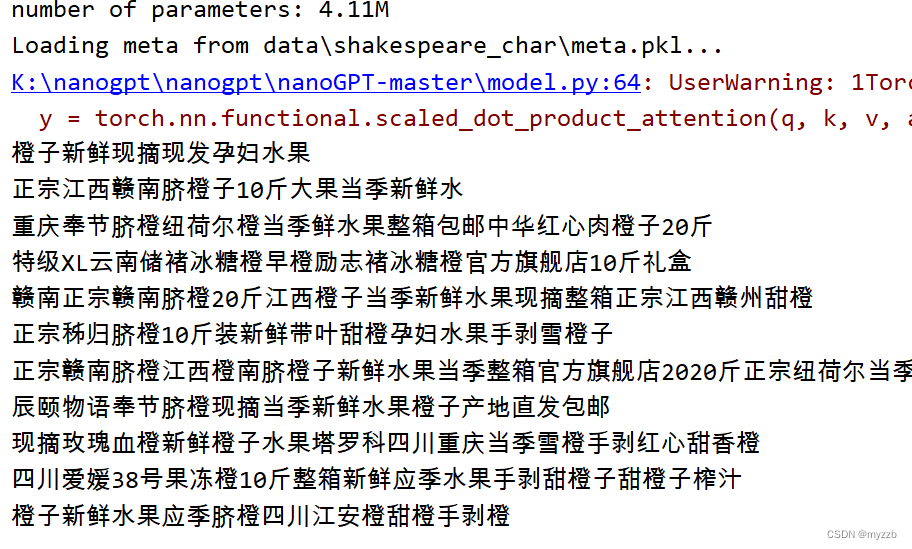
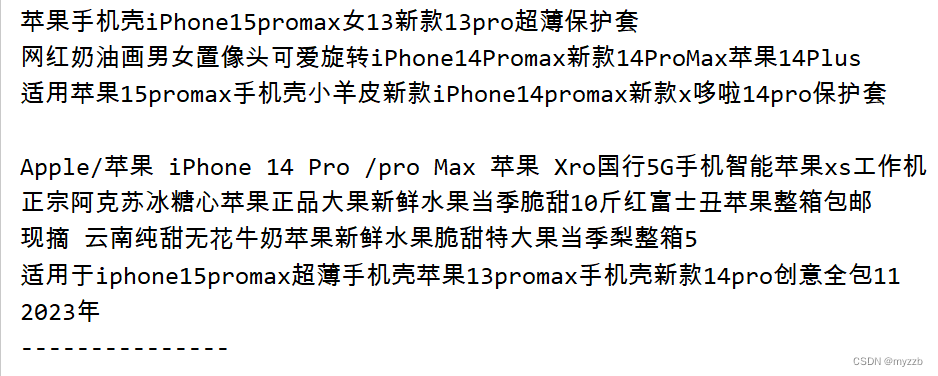
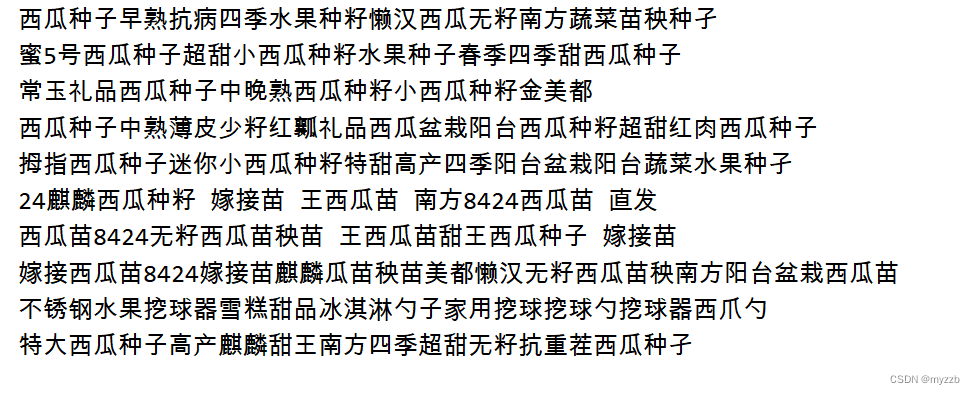
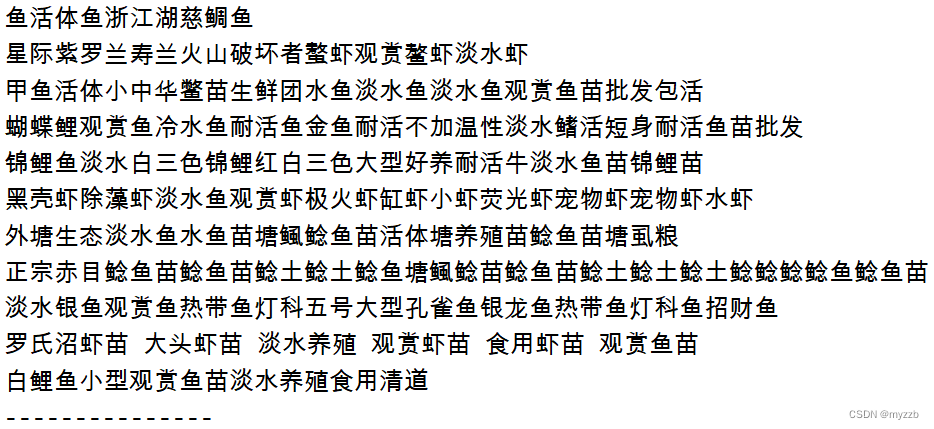
标题提取出来是这样的
很多都是在30个或以下,那么为了生成之后上下文关联性比较强,block_size最好大一些,但是上下文太多也会影响性能。
生成文本上我设置是300个token,所以我在设置上下文时候设置了256
大致参数如下
batch_size = 30
block_size = 256 # context of up to 256 previous characters
# baby GPT model :)
n_layer = 8
n_head = 8
n_embd = 192
dropout = 0.2
learning_rate = 6e-4 # with baby networks can afford to go a bit higher
max_iters = 8000
lr_decay_iters = 8000 # make equal to max_iters usually
min_lr = 1e-5 # learning_rate / 10 usually
beta2 = 0.99 # make a bit bigger because number of tokens per iter is small
warmup_iters = 100 # not super necessary potentially
# on macbook also add
# device = 'cpu' # run on cpu only
compile = False # do not torch compile the model
dtype = 'float32'
我的数据集大小
训练8000次loss能达到1.0左右,根据不同情况,要适当调整
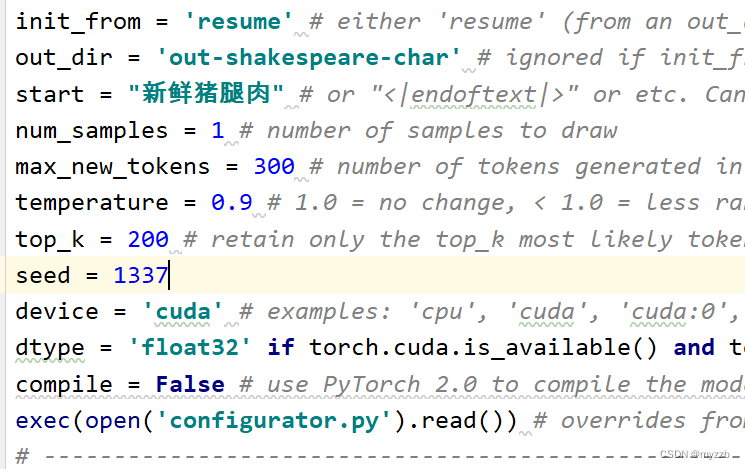
Sample里稍微修改一些就好了
运行效果


 被折叠的 条评论
为什么被折叠?
被折叠的 条评论
为什么被折叠?
 到【灌水乐园】发言


