


 本文介绍HAProxy的特性及其在高负载Web站点的应用,并详细讲解了如何配置HAProxy服务器以实现负载均衡,包括安装依赖、编译安装及配置过程。
一、Haproxy简介
1、常见的web集群调度器
- 软件
LVS、Haproxy、Nginx - 硬件
F5、梭子鱼、绿盟
2、Haproxy应用分析
Haproxy是一款可提供高可用性、负载均衡、基于TCP和HTTP应用的代理的软件适用于负载大的web站点,运行在硬件上可支持数以万计的并发连接的连接请求
3、优点
- Haoroxy在负载均衡的速度和并发处理上优于Nginx
- 支持虚拟主机、可以工作在四、七层
- 能够补充Nginx的一些缺点,如session的保持、cookie的引导
- 支持url检测后端的服务器的状态
- 对MySQL进行,对后端的DB节点进行检测和负载均衡
- 支持很多负载均衡算法:轮询,加权轮询,原地址保持,RI,rdp-cookie
二、部署Haproxy服务器
环境
haproxy    192.168.30.7
web1       192.168.30.8
web2       192.168.30.9
client     192.168.30.254
1.配置Web服务器
两台Web服务器除IP主机名和页面内容不一致,其他是一样的,下面只演示一台的配置
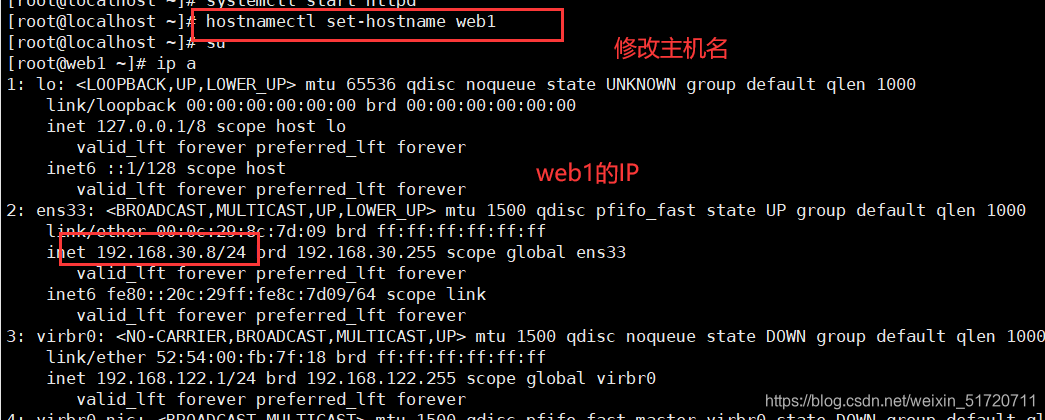
1.1 修改主机名与IP
1.2 yum安装Httpd服务
[root@web1 ~]# yum -y install httpd  //yum安装会将依赖包自动安装
已加载插件:fastestmirror, langpacks
Loading mirror speeds from cached hostfile
 * base: mirrors.aliyun.com
 * extras: mirrors.aliyun.com
 * updates: mirrors.aliyun.com
软件包 httpd-2.4.6-97.el7.centos.x86_64 已安装并且是最新版本
无须任何处理
[root@web1 ~]#
1.3 修改httpd页面文件
[root@web1 ~]# cat /var/www/html/test.html
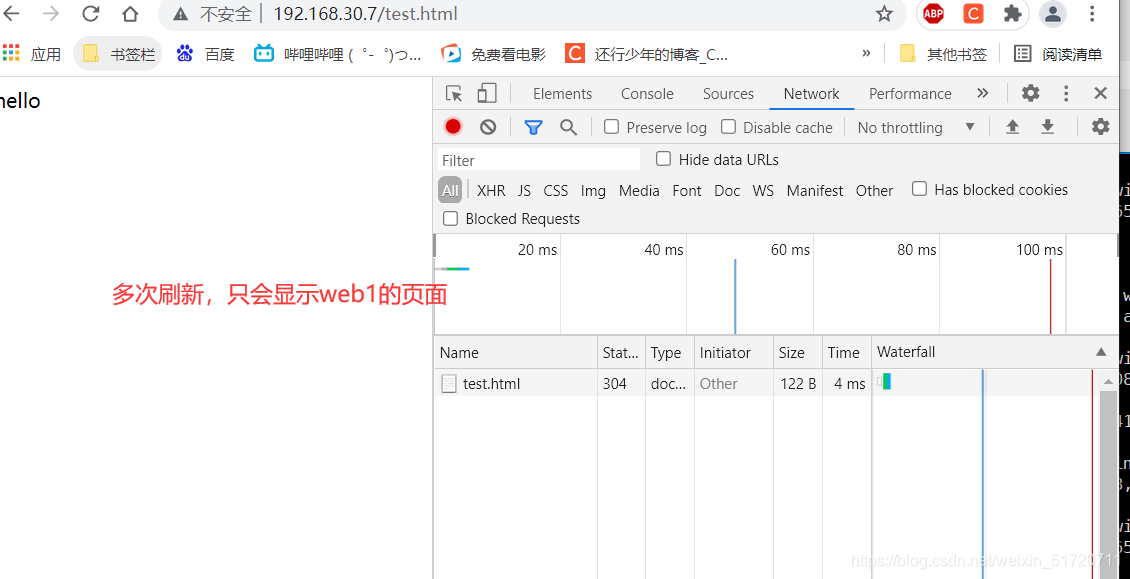
hello //web1的页面为hello
[root@web2 ~]# cat /var/www/html/test.html
world //web2的页面为world
1.4 启动httpd
[root@web1 ~]# systemctl restart httpd
[root@web1 ~]# netstat -antp | grep httpd
tcp6       0      0 :::80                   :::*                    LISTEN      75904/httpd
[root@web1 ~]#
2、配置Haproxy服务器
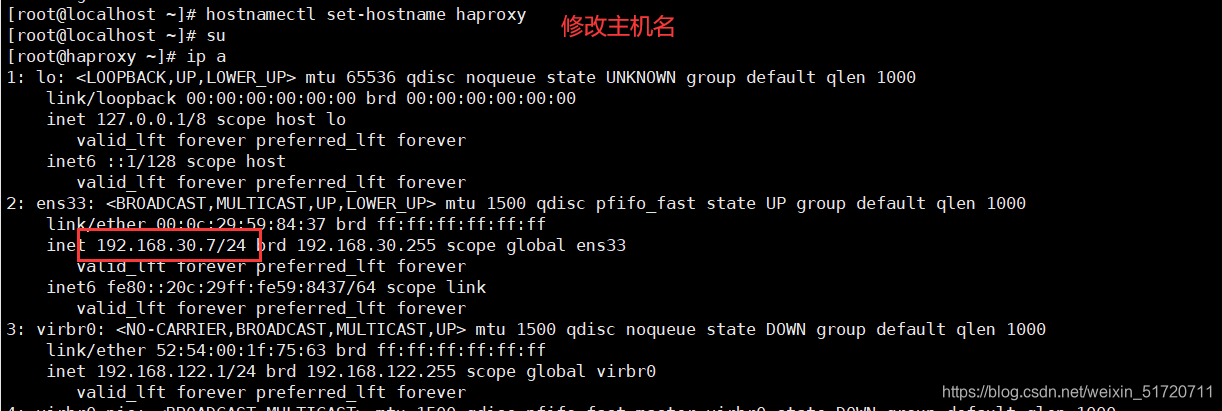
2.1 修改主机名与IP
2.2 安装haproxy依赖环境
[root@haproxy ~]# yum install -y pcre-devel bzip2-devel gcc gcc-c++ make
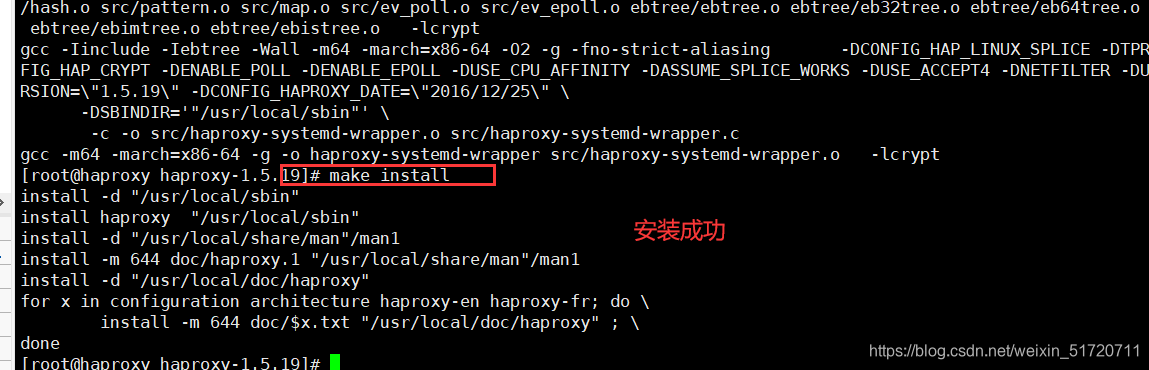
2.3 安装haproxy
[root@haproxy opt]# tar xf haproxy-1.5.19.tar.gz  //还原
[root@haproxy opt]# ll
总用量 1332
drwxrwxr-x  9 root root     261 12月 25 2016 haproxy-1.5.19
-rw-r--r--  1 root root 1362834 7月  27 16:50 haproxy-1.5.19.tar.gz
drwxr-xr-x. 2 root root       6 10月 31 2018 rh
[root@haproxy opt]# cd haproxy-1.5.19/
[root@haproxy haproxy-1.5.19]# uname -a   //查看当前内核版本
Linux haproxy 3.10.0-957.el7.x86_64 #1 SMP Thu Nov 8 23:39:32 UTC 2018 x86_64 x86_64 x86_64 GNU/Linux
[root@haproxy haproxy-1.5.19]# make TARGET=linux2628 ARCH=x86_64    //kernel大于2.6.28的用TARGET=linux2628
ARCH=x86_64		#系统位数,64位系统
2.4 创建haproxy工作目录
[root@haproxy haproxy-1.5.19]# mkdir /etc/haproxy   //放在/etc下
[root@haproxy haproxy-1.5.19]# cp examples/haproxy.cfg /etc/haproxy/   //将配置文件cp过来
[root@haproxy haproxy-1.5.19]# cd /etc/haproxy/
[root@haproxy haproxy]# ls
haproxy.cfg
2.5 更新配置文件
[root@haproxy haproxy]# cat haproxy.cfg
# this config needs haproxy-1.1.28 or haproxy-1.2.1

global
	log /dev/log	local0 info    //local0为日志设备,默认存放到系统日志
	log /dev/log	local0 notice
	#log loghost	local0 info
	maxconn 4096
	#chroot /usr/share/haproxy    //不需要更改根目录
	uid 99               //用户UID
	gid 99               //用户GID
	daemon               //守护进程模式
	#debug
	#quiet

defaults
log	     global					//定义日志为global配置中的日志定义
mode    http					//模式为http
option  httplog					//采用http日志格式记录日志
option  dontlognull				//不记录健康检查日志信息
retries 3						//检查节点服务器失败次数,连续达到三次失败,则认为节点不可用
redispatch						//当服务器负载很高时,自动结束当前队列处理比较久的连接
maxconn 2000					//最大连接数
contimeout      5000			//连接超时时间
clitimeout      50000			//客户端超时时间
srvtimeout      50000			//服务器超时时间

listen  webcluster 0.0.0.0:80
    option httpchk GET /test.html  //检查服务器的test.html文件
    balance roundrobin		//负载均衡调度算法使用轮询算法roundrobin
    server inst1 192.168.30.8:80 check inter 2000 fall 3	//定义在线节点,check inter 2000 表示haproxy服务器和节点之间的一个心跳频率,fall 3	表示连续三次检测不到心跳频率则认为该节点失效
    server inst2 192.168.30.9:80 check inter 2000 fall 3
2.6 启动haproxy服务
[root@haproxy haproxy]# cp /opt/haproxy-1.5.19/examples/haproxy.init /etc/init.d/haproxy  //将启动文件放入service的管理目录
[root@haproxy haproxy]# cd /etc/init.d/
[root@haproxy init.d]# chmod +x haproxy   //赋予执行权限
[root@haproxy init.d]# chkconfig --add /etc/init.d/haproxy   //加入系统管理
[root@haproxy init.d]# ln -s /usr/local/sbin/haproxy /usr/sbin/haproxy    //优化启动
[root@haproxy init.d]# systemctl start haproxy    //启动
[root@haproxy init.d]# netstat -antp | grep haproxy  //已启动
tcp        0      0 0.0.0.0:80              0.0.0.0:*               LISTEN      22488/haproxy
3.测试
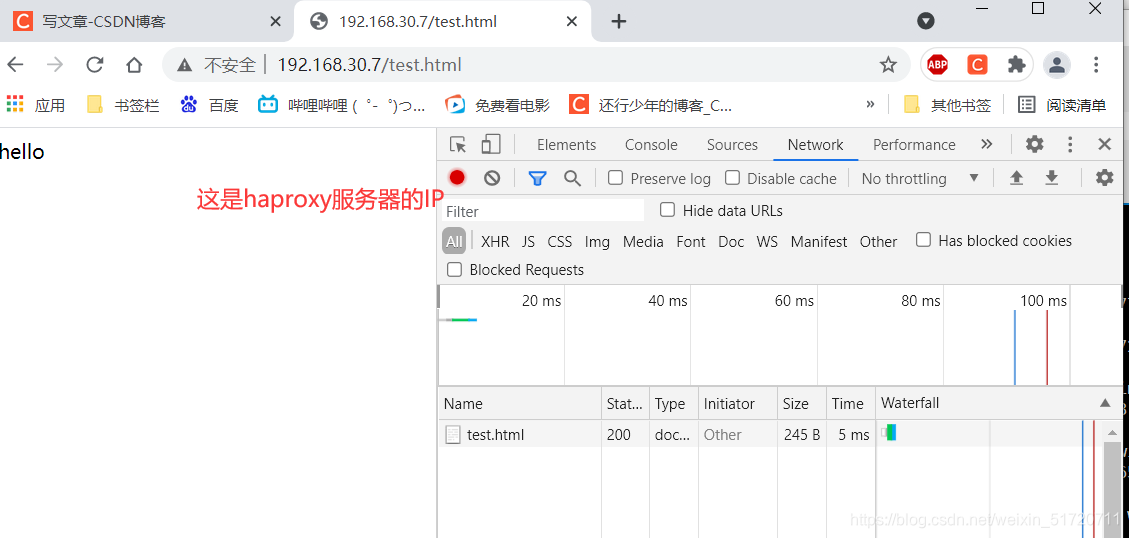
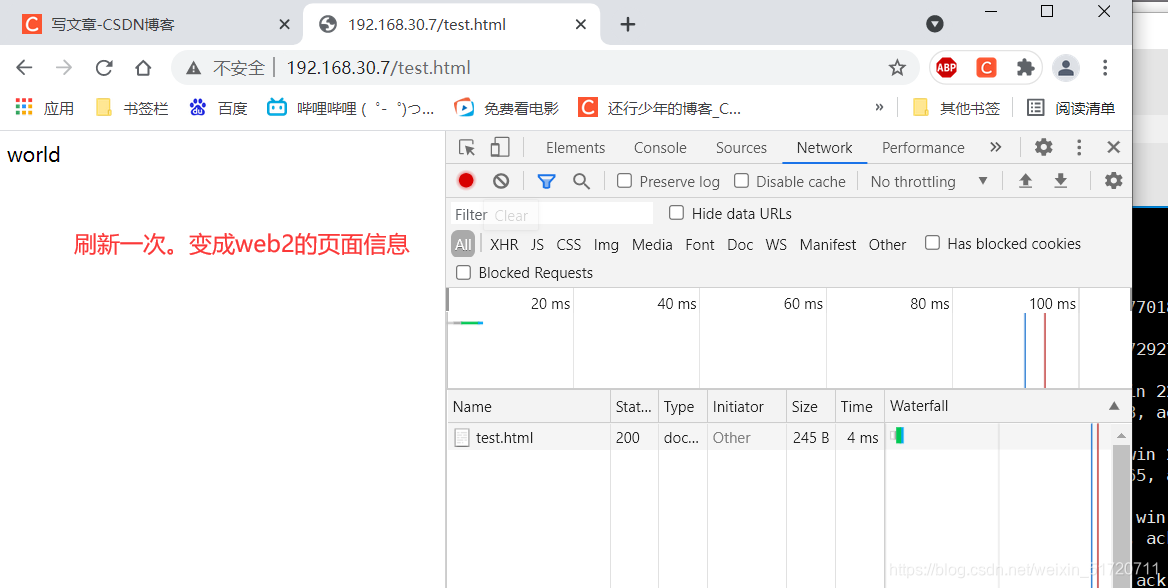
[root@web2 ~]# systemctl stop httpd //关闭web2的httpd服务
小结
- lVS,Haproxy,Nginx最常用的调度算法有三种:轮询调度、最小连接数算法、基于来源访问调度算法
- LVS性能最好,但是搭建相对复杂,Nginx的upstream模块支持群集功能,但是性能没有Haproxy好
- 可以使用keepalived软件来实现haproxy服务的高可用


 3751
3751

 被折叠的 条评论
为什么被折叠?
被折叠的 条评论
为什么被折叠?
 到【灌水乐园】发言


