


 本文介绍如何在不同设备上实现导航栏的高度适配,包括状态栏高度的动态获取及胶囊按钮位置适配的方法。
1.新建一个目录,并新建组件和同名目录

2. 一般导航栏的高度就是45px,差不多就可以
<template>
	<view>
		<view class="navbar">
			<view class="navbar-fixed">
		<view class="content-search">
			<input type="text" placeholder="请输入关键字">
		</view>
			</view>
			<!-- 做一个占位 ,因为其他做了定位有一定的影响-->
			<view style="height: 45px;"></view>
		</view>
	</view>
</template>
CSS样式
.navbar{
.navbar-fixed{
position: fixed;
top: 0;
left: 0;
right: 0;
z-index: 99;
width: 100%;
background: #f07373;
.content-search{
height: 45px;
display: flex;
justify-content: center;
align-items: center;
input{width: 70%;
background: lightgoldenrodyellow;
font-size: 14px;text-align: center;border-radius: 20px;}
}
}
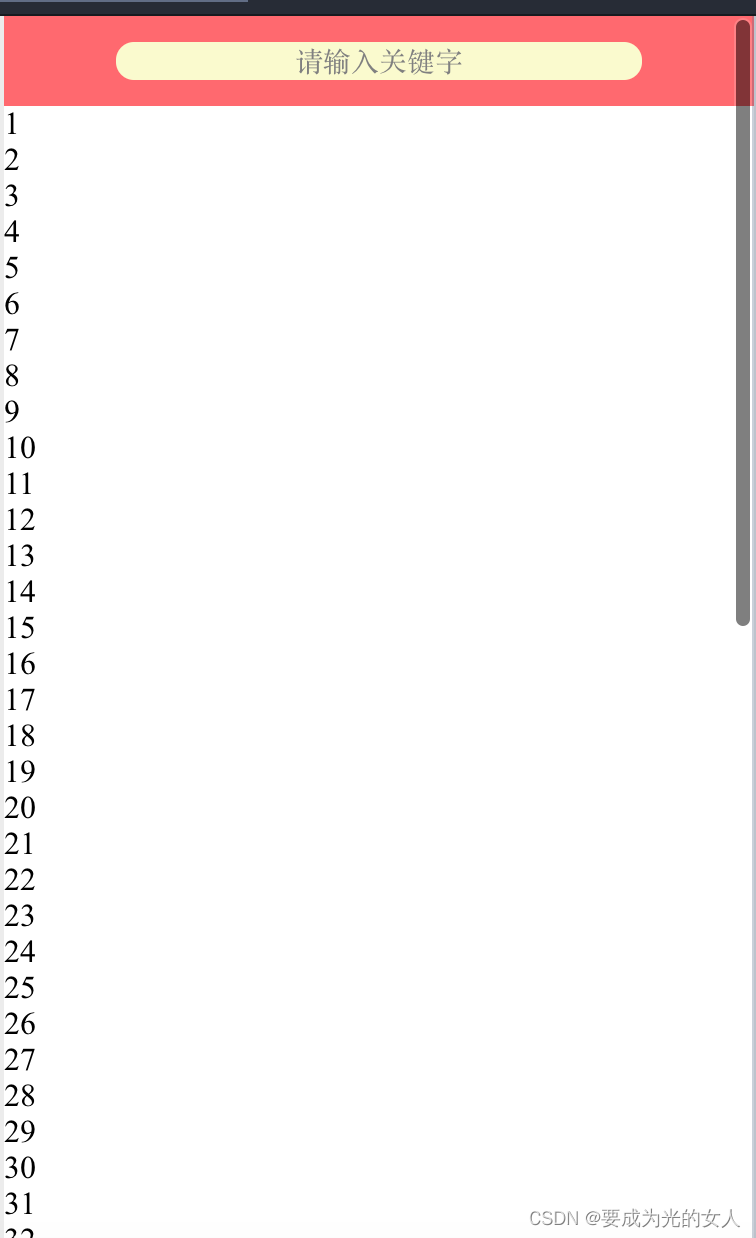
}效果如下:
二、根据设备不同,状态栏的高度也就不同
在create 函数里写上
<template>
<view class="navbar">
<view class="navbar_fixed">
<view :style="{height:statusBarHeight+'px'}"></view>
<view class="content_search">
<input type="text" placeholder="请输入关键字">
	</view>
	</view>
<!-- 做一个占位 -->
<view style="height: 45px;"></view>
</view>
</template>
<script>
	export default {
		name:"navbar",
		data() {
			return {
			statusBarHeight:20	//状态栏高度:动态的赋值给状态栏的占位
		}
		},
		created() {
			//使用同步方法:获取手机系统信息
		const info=uni.getSystemInfoSync()
		this.statusBarHeight=info.statusBarHeight
		},
	}
</script>
三、给胶囊做适配(动态导航栏高度)
<script>
	export default {
		name:"navbar",
		data() {
		return {
			statusBarHeight:20	,//状态栏高度:动态的赋值给状态栏的占位
			navBarHeight:45  //导航栏高度,默认45px
		}
		},
		created() {
			//使用同步方法:获取手机系统信息
		const info=uni.getSystemInfoSync()
        // 设置状态栏的高度
		this.statusBarHeight=info.statusBarHeight
		// 获取胶囊的位置
		const menuButtonInfo=uni.getMenuButtonBoundingClientRect()
		//(胶囊底部高度-状态栏的高度)+(胶囊顶部部高度-状态栏内的高度)=导航栏的高度
		this.navBarHeight=(menuButtonInfo.bottom - info.statusBarHeight)
		+(menuButtonInfo.top-info.statusBarHeight)
		},
	}
</script>
HTML 代码:
<template>
	<view class="navbar">
	<view class="navbar_fixed">
	<view :style="{height:statusBarHeight+'px'}"></view>
	<view class="content_search" :style="{height:navBarHeigh+'px'}">
	<input type="text" placeholder="请输入关键字">
	</view>
			</view>
			<!-- 做一个占位 -->
			<view style="height: 45px;"></view>
		</view>
</template>


 1371
1371

 被折叠的 条评论
为什么被折叠?
被折叠的 条评论
为什么被折叠?
 到【灌水乐园】发言


