


axios 使用
下载依赖
初次使用需要下载axios依赖包
npm install axios请求
get请求
-
首先是无参请求
 axios.get('后台接口api')
 .then(response=>{
     consolg.log(response)
 })
 .catch(error=> {
     console.log(error);
 });
使用.then方法来接收响应体,使用.catch方法来处理异常
-
有参请求
 axios.get('后台接口api', {
     params: {
         id: 1,
         name:'fish'
     }
 })
 .then(response=>{
     console.log(response);
 })
 .catch(error=>{
     console.log(error);
 });
post请求
post
 axios.post('后台接口api', {
     id: 1,
     name: 'fish'
 })
 .then(response=>{
     console.log(response);
 })
 .catch(error=>{
     console.log(error);
 });
整合
个人喜欢且推荐参数全部整合起来,类似报文的方式发起请求
axios({
url:'api',
method:'post|get',
headers:{键值对},
data:{
name:'fish'
}
})
.then(response=>{
console.log(res)
})
.catch(error=>{
console.log(error)
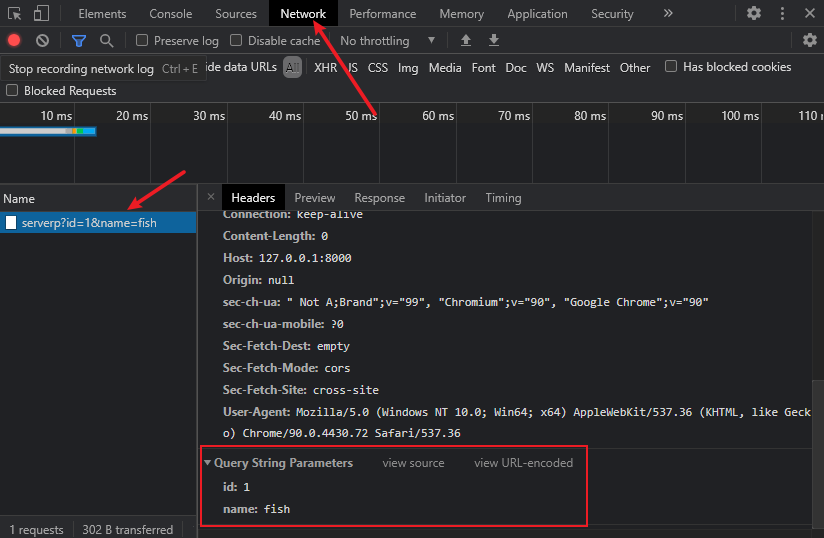
})发起请求后我们就可以在开发者调试工具上看到我们的请求参数
并发
有时候我们需要同时发起多个不同的请求,这时我们就可以使用并发
 axios.all([
     axios.post('后台api',"name:fish"),
     axios.get('后台api',{parms:{id:1}})
 ])
 .then(
     axios.spread((res1,res2)=>{
         console.log(res1)
         console.log(res2)
     })
 )
 .catch(error=>{
     console.log(error)
 })
全局配置
在开发中,会经常遇到同一个页面多个地方请求同一个url,多次使用同一个url时我们可以将那个url提取出来,做一个全局配置
//设置默认请求方式
axios.default.method = 'GET'|'POST'
//提取路径
axios.default.baseURL = '后台api'
//设置默认参数
axios.default.params={id:1,name:'fish'}
//设定超时时间(超时未响应则停止,单位为毫秒)
axios.defaults.timeout = 5000
//配置全局路径后,就就可以不输入url直接输入资源路径即可,例如我这里资源路径为 test
axios.get('test')
.then(res=>{
console.log(res)
})
.catch(error=>{
console.log(error)
})配置实例
适用于配置多个请求
const req_1 = axios.create({
baseURL:'后台api',
timeout:5000
})
req_1({
url:'test'
})
.then(res=>{
console.log(res)
})
.catch(error=>{
console.log(error)
})拦截器
适用于在请求发起前或响应时,进行相关操作,常用于强制登录,处理响应信息等等
//发起请求后被拦截器拦截,进行相应处理后放行之后,再发起请求
axios.interceptors.request.use(
config=>{
console.log('进入了拦截器')
//进行相应操作
retrun config //放行
},
err=>{
//处理异常
}
)
//请求成功响应返回时,先被拦截器拦截,对响应数据进行处理后,放行
axios.interceptors.response.use(
config=>{
console.log('进入拦截器')
//进行操作
config.data.name = '张三'
retrun config.data //放行
},
error=>{
//处理异常
}
)当定义了多个拦截器时 执行顺序是: 请求拦截器是谁在定义的最后,谁先拦截,相应拦截器则是谁先定义谁先拦截。


 898
898

 被折叠的 条评论
为什么被折叠?
被折叠的 条评论
为什么被折叠?
 到【灌水乐园】发言


