


目录
一.适配Oracle
可借鉴这两条博客:
也可拉取我的nacos进行搭建:清寒/nacos-all-oracle
主要的适配就是添加数据源,修改源码中的sql。
二.搭建Nacos集群。
修改完源码后,可使用命令对代码进行编译打包
mvn -Prelease-nacos -Dmaven.test.skip=true -Dpmd.skip=true -Drat.skip=true -Dcheckstyle.skip=true clean install -U


//解释
mvn \
-Prelease-nacos \                    # 激活 release-nacos profile
-Dmaven.test.skip=true \            # 跳过测试
-Dpmd.skip=true \                   # 跳过 PMD 代码检查
-Drat.skip=true \                   # 跳过 Apache RAT 许可证检查
-Dcheckstyle.skip=true \            # 跳过代码风格检查
clean \                             # 清理之前的构建
install \                           # 安装到本地仓库
-U # 强制更新依赖注意:如果启动时不是使用指定配置文件的方式,需要先修改application.properties文件。
如果启动时想要使用外置的配置文件,则需先将代码中的application.properties文件注释,否则jar包内部的配置文件优先级会高于外部,导致外置配置不生效。(console和distribution下的配置文件都注释)
构建完成后,在nacos-distribution模块target目录下找到nacos-server.zip。

拿到压缩包,找个目录解压,如下:
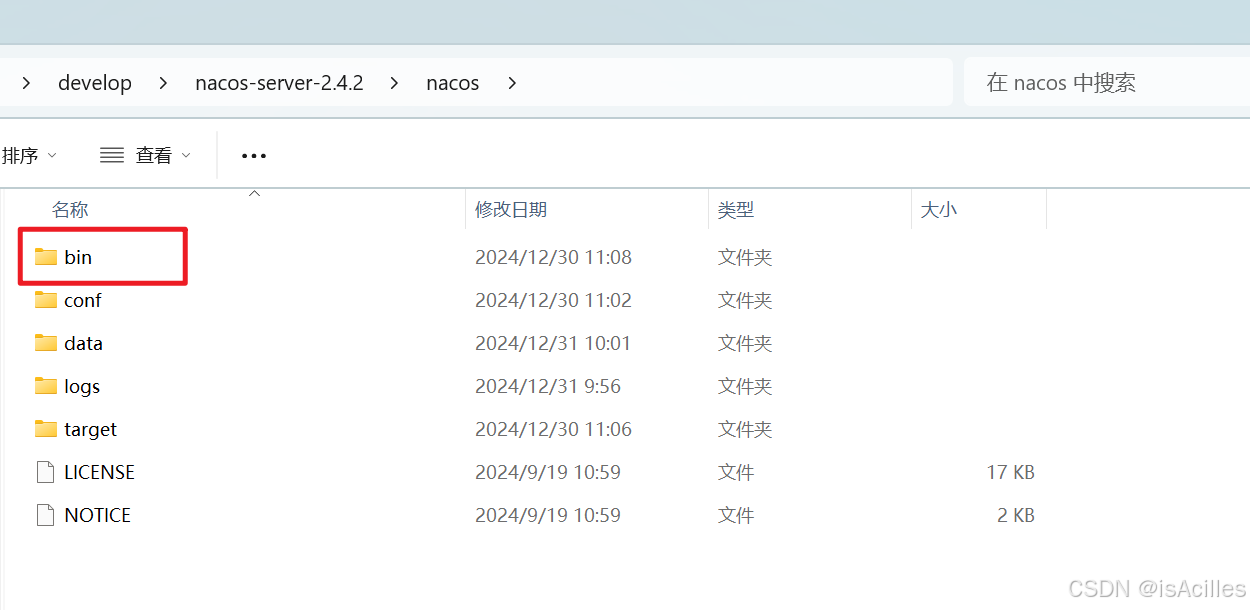
本地启动时,进入bin目录的cmd窗口,执行命令:
# 单机模式
startup.cmd -m standalone

# 集群模式
startup.cmd -m cluster
此处省略不表。
下面说一下Linux服务器中搭建nacos Dcoker集群的过程。
1.创建挂载目录
mkdir /usr/local/nacos
cd /usr/local/nacos

mkdir conf data logs
2.准备配置文件
application.properties内容,放在conf目录下
#
# Copyright 1999-2018 Alibaba Group Holding Ltd.
#
# Licensed under the Apache License, Version 2.0 (the "License");
# you may not use this file except in compliance with the License.
# You may obtain a copy of the License at
#
#      http://www.apache.org/licenses/LICENSE-2.0
#
# Unless required by applicable law or agreed to in writing, software
# distributed under the License is distributed on an "AS IS" BASIS,
# WITHOUT WARRANTIES OR CONDITIONS OF ANY KIND, either express or implied.
# See the License for the specific language governing permissions and
# limitations under the License.
#

#*************** Spring Boot Related Configurations ***************#
### Default web context path:
server.servlet.contextPath=/nacos
### Include message field
server.error.include-message=ALWAYS
### Default web server port:
server.port=31003

#*************** Network Related Configurations ***************#
### If prefer hostname over ip for Nacos server addresses in cluster.conf:
# nacos.inetutils.prefer-hostname-over-ip=false

### Specify local server's IP:
# nacos.inetutils.ip-address=

#*************** Config Module Related Configurations ***************#
### Deprecated configuration property, it is recommended to use `spring.sql.init.platform` replaced.
# spring.datasource.platform=mysql
nacos.plugin.datasource.log.enabled=true


#spring.sql.init.platform=mysql
#spring.sql.init.platform=ob4oracle
spring.sql.init.platform=oracle

### Count of DB:
db.num=1

### Connect URL of  mysql DB:
# db.url.0=jdbc:mysql://127.0.0.1:3306/nacos?characterEncoding=utf8&connectTimeout=1000&socketTimeout=3000&autoReconnect=true&useUnicode=true&useSSL=false&serverTimezone=UTC
# db.user=nacos
# db.password=nacos


### Connect URL of oracel DB:
db.url.0=jdbc:oracle:thin:@//192.168.187.130:1521/ORCLPDB
db.user.0=HGC_NACOS_CONFIG
db.password.0=123456
db.jdbcDriverName=oracle.jdbc.OracleDriver
db.testQuery=select 1 from dual

### the maximum retry times for push
nacos.config.push.maxRetryTime=50

#*************** Naming Module Related Configurations ***************#
### Data dispatch task execution period in milliseconds:

### If enable data warmup. If set to false, the server would accept request without local data preparation:
# nacos.naming.data.warmup=true

### If enable the instance auto expiration, kind like of health check of instance:
# nacos.naming.expireInstance=true

nacos.naming.empty-service.auto-clean=true
nacos.naming.empty-service.clean.initial-delay-ms=50000
nacos.naming.empty-service.clean.period-time-ms=30000


#*************** CMDB Module Related Configurations ***************#
### The interval to dump external CMDB in seconds:
# nacos.cmdb.dumpTaskInterval=3600

### The interval of polling data change event in seconds:
# nacos.cmdb.eventTaskInterval=10

### The interval of loading labels in seconds:
# nacos.cmdb.labelTaskInterval=300

### If turn on data loading task:
# nacos.cmdb.loadDataAtStart=false


#*************** Metrics Related Configurations ***************#
### Metrics for prometheus
#management.endpoints.web.exposure.include=*

### Metrics for elastic search
management.metrics.export.elastic.enabled=false
#management.metrics.export.elastic.host=http://localhost:9200

### Metrics for influx
management.metrics.export.influx.enabled=false
#management.metrics.export.influx.db=springboot
#management.metrics.export.influx.uri=http://localhost:8086
#management.metrics.export.influx.auto-create-db=true
#management.metrics.export.influx.consistency=one
#management.metrics.export.influx.compressed=true

#*************** Access Log Related Configurations ***************#
### If turn on the access log:
server.tomcat.accesslog.enabled=true

### accesslog automatic cleaning time
server.tomcat.accesslog.max-days=30

### The access log pattern:
server.tomcat.accesslog.pattern=%h %l %u %t "%r" %s %b %D %{User-Agent}i %{Request-Source}i

### The directory of access log:
server.tomcat.basedir=file:.


#*************** Access Control Related Configurations ***************#
### If enable spring security, this option is deprecated in 1.2.0:
#spring.security.enabled=false
### The ignore urls of auth, is deprecated in 1.2.0:
nacos.security.ignore.urls=/,/error,/**/*.css,/**/*.js,/**/*.html,/**/*.map,/**/*.svg,/**/*.png,/**/*.ico,/console-ui/public/**,/v1/auth/**,/v1/console/health/**,/actuator/**,/v1/console/server/**

### The auth system to use, currently only 'nacos' and 'ldap' is supported:
nacos.core.auth.system.type=nacos

### If turn on auth system:
nacos.core.auth.enabled=false
nacos.core.auth.username=nacos
nacos.core.auth.password=nacos

### Turn on/off caching of auth information. By turning on this switch, the update of auth information would have a 15 seconds delay.
nacos.core.auth.caching.enabled=true

### Since 1.4.1, Turn on/off white auth for user-agent: nacos-server, only for upgrade from old version.
nacos.core.auth.enable.userAgentAuthWhite=false

### Since 1.4.1, worked when nacos.core.auth.enabled=true and nacos.core.auth.enable.userAgentAuthWhite=false.
### The two properties is the white list for auth and used by identity the request from other server.
nacos.core.auth.server.identity.key=severIdentity
nacos.core.auth.server.identity.value=security

### worked when nacos.core.auth.system.type=nacos
### The token expiration in seconds:
nacos.core.auth.plugin.nacos.token.cache.enable=false
nacos.core.auth.plugin.nacos.token.expire.seconds=18000
### The default token (Base64 string):
#nacos.core.auth.plugin.nacos.token.secret.key=SecretKey012345678901234567890123456789012345678901234567890123456789
nacos.core.auth.plugin.nacos.token.secret.key=SecretKey012345678901234567890123456789012345678901234567890123456789

### worked when nacos.core.auth.system.type=ldapï¼{0} is Placeholder,replace login username
#nacos.core.auth.ldap.url=ldap://localhost:389
#nacos.core.auth.ldap.basedc=dc=example,dc=org
#nacos.core.auth.ldap.userDn=cn=admin,${nacos.core.auth.ldap.basedc}
#nacos.core.auth.ldap.password=admin
#nacos.core.auth.ldap.userdn=cn={0},dc=example,dc=org
#nacos.core.auth.ldap.filter.prefix=uid
#nacos.core.auth.ldap.case.sensitive=true
#nacos.core.auth.ldap.ignore.partial.result.exception=false

#*************** Control Plugin Related Configurations ***************#
# plugin type
#nacos.plugin.control.manager.type=nacos

# local control rule storage dir, default ${nacos.home}/data/connection and ${nacos.home}/data/tps
#nacos.plugin.control.rule.local.basedir=${nacos.home}

# external control rule storage type, if exist
#nacos.plugin.control.rule.external.storage=

#*************** Config Change Plugin Related Configurations ***************#
# webhook
#nacos.core.config.plugin.webhook.enabled=false
# It is recommended to use EB https://help.aliyun.com/document_detail/413974.html
#nacos.core.config.plugin.webhook.url=http://localhost:8080/webhook/send?token=***
# The content push max capacity ,byte
#nacos.core.config.plugin.webhook.contentMaxCapacity=102400

# whitelist
#nacos.core.config.plugin.whitelist.enabled=false
# The import file suffixs
#nacos.core.config.plugin.whitelist.suffixs=xml,text,properties,yaml,html
# fileformatcheck,which validate the import file of type and content
#nacos.core.config.plugin.fileformatcheck.enabled=false

#*************** Istio Related Configurations ***************#
### If turn on the MCP server:
nacos.istio.mcp.server.enabled=false

#此处指定模式为集群模式
nacos.core.cluster.mode=cluster
#节点列表为从file中获取
nacos.core.member.lookup.type=file

###*************** Add from 1.3.0 ***************###


#*************** Core Related Configurations ***************#

### set the WorkerID manually
# nacos.core.snowflake.worker-id=

### Member-MetaData
# nacos.core.member.meta.site=
# nacos.core.member.meta.adweight=
# nacos.core.member.meta.weight=

### MemberLookup
### Addressing pattern category, If set, the priority is highest
# nacos.core.member.lookup.type=[file,address-server]
## Set the cluster list with a configuration file or command-line argument
# nacos.member.list=192.168.16.101:8847?raft_port=8807,192.168.16.101?raft_port=8808,192.168.16.101:8849?raft_port=8809
## for AddressServerMemberLookup
# Maximum number of retries to query the address server upon initialization
# nacos.core.address-server.retry=5
## Server domain name address of [address-server] mode
# address.server.domain=jmenv.tbsite.net
## Server port of [address-server] mode
# address.server.port=8080
## Request address of [address-server] mode
# address.server.url=/nacos/serverlist

#*************** JRaft Related Configurations ***************#

### Sets the Raft cluster election timeout, default value is 5 second
# nacos.core.protocol.raft.data.election_timeout_ms=5000
### Sets the amount of time the Raft snapshot will execute periodically, default is 30 minute
# nacos.core.protocol.raft.data.snapshot_interval_secs=30
### raft internal worker threads
# nacos.core.protocol.raft.data.core_thread_num=8
### Number of threads required for raft business request processing
# nacos.core.protocol.raft.data.cli_service_thread_num=4
### raft linear read strategy. Safe linear reads are used by default, that is, the Leader tenure is confirmed by heartbeat
# nacos.core.protocol.raft.data.read_index_type=ReadOnlySafe
### rpc request timeout, default 5 seconds
# nacos.core.protocol.raft.data.rpc_request_timeout_ms=5000
### enable to support prometheus service discovery
#nacos.prometheus.metrics.enabled=true
在conf目录下添加cluster.conf文件
##此处是我的虚拟机IP及nacos端口,你使用需要更换
192.168.187.129:31003
192.168.187.130:31003
192.168.187.131:31003
在nacos目录下创建dockerfile文件
FROM openjdk:8-jdk
WORKDIR /usr/local/nacos
# 设置时区
ENV TZ=Asia/Shanghai
RUN ln -snf /usr/share/zoneinfo/$TZ /etc/localtime && echo $TZ > /etc/timezone
# 环境变量
ENV MODE=cluster
ENV PREFER_HOST_MODE=ip
ENV NACOS_APPLICATION_PORT=31003
# 创建目录
RUN mkdir -p /usr/local/nacos/logs \
&& mkdir -p /usr/local/nacos/conf \
&& mkdir -p /usr/local/nacos/data
# 复制 jar 包
COPY nacos-server.jar /usr/local/nacos/nacos-server.jar
# 健康检查
HEALTHCHECK --interval=5s --timeout=3s --retries=3 \
CMD curl -f http://localhost:31003/nacos/actuator/health || exit 1
EXPOSE 31003 32003 32004
ENTRYPOINT ["java", \
"-Dnacos.home=/usr/local/nacos", \
"-Dnacos.standalone=false", \
"-Dnacos.core.member.lookup.type=file", \
"-jar", \
"/usr/local/nacos/nacos-server.jar", \
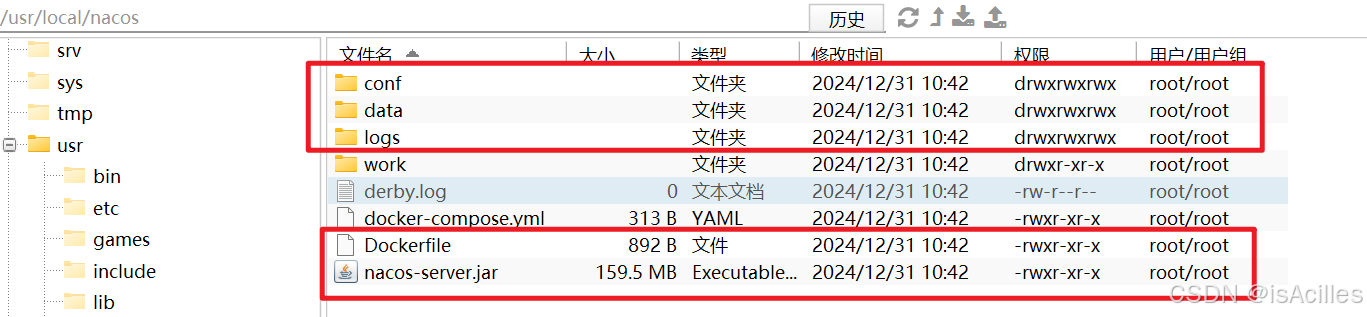
"--spring.config.location=classpath:/,file:/usr/local/nacos/conf/"]将nacos-server.jar包上传至/usr/local/nacos目录下
操作完后,大体目录:
3.执行命令构建镜像并跑容器
# 构建镜像
docker build -t nacos-server:latest .

# 节点1 (192.168.187.130)
docker run -d \
    --name nacos \
    --restart always \
    --network host \
    -v /usr/local/nacos/conf:/usr/local/nacos/conf \
    -v /usr/local/nacos/logs:/usr/local/nacos/logs \
    -e MODE=cluster \
    -e PREFER_HOST_MODE=ip \
    -e NACOS_SERVER_IP=192.168.187.130 \
    -e SPRING_DATASOURCE_PLATFORM=oracle \
    -e JVM_XMS=512m \
    -e JVM_XMX=512m \
    nacos-server:latest
等待一会通过命令docker logs -ft nacos查看日志。
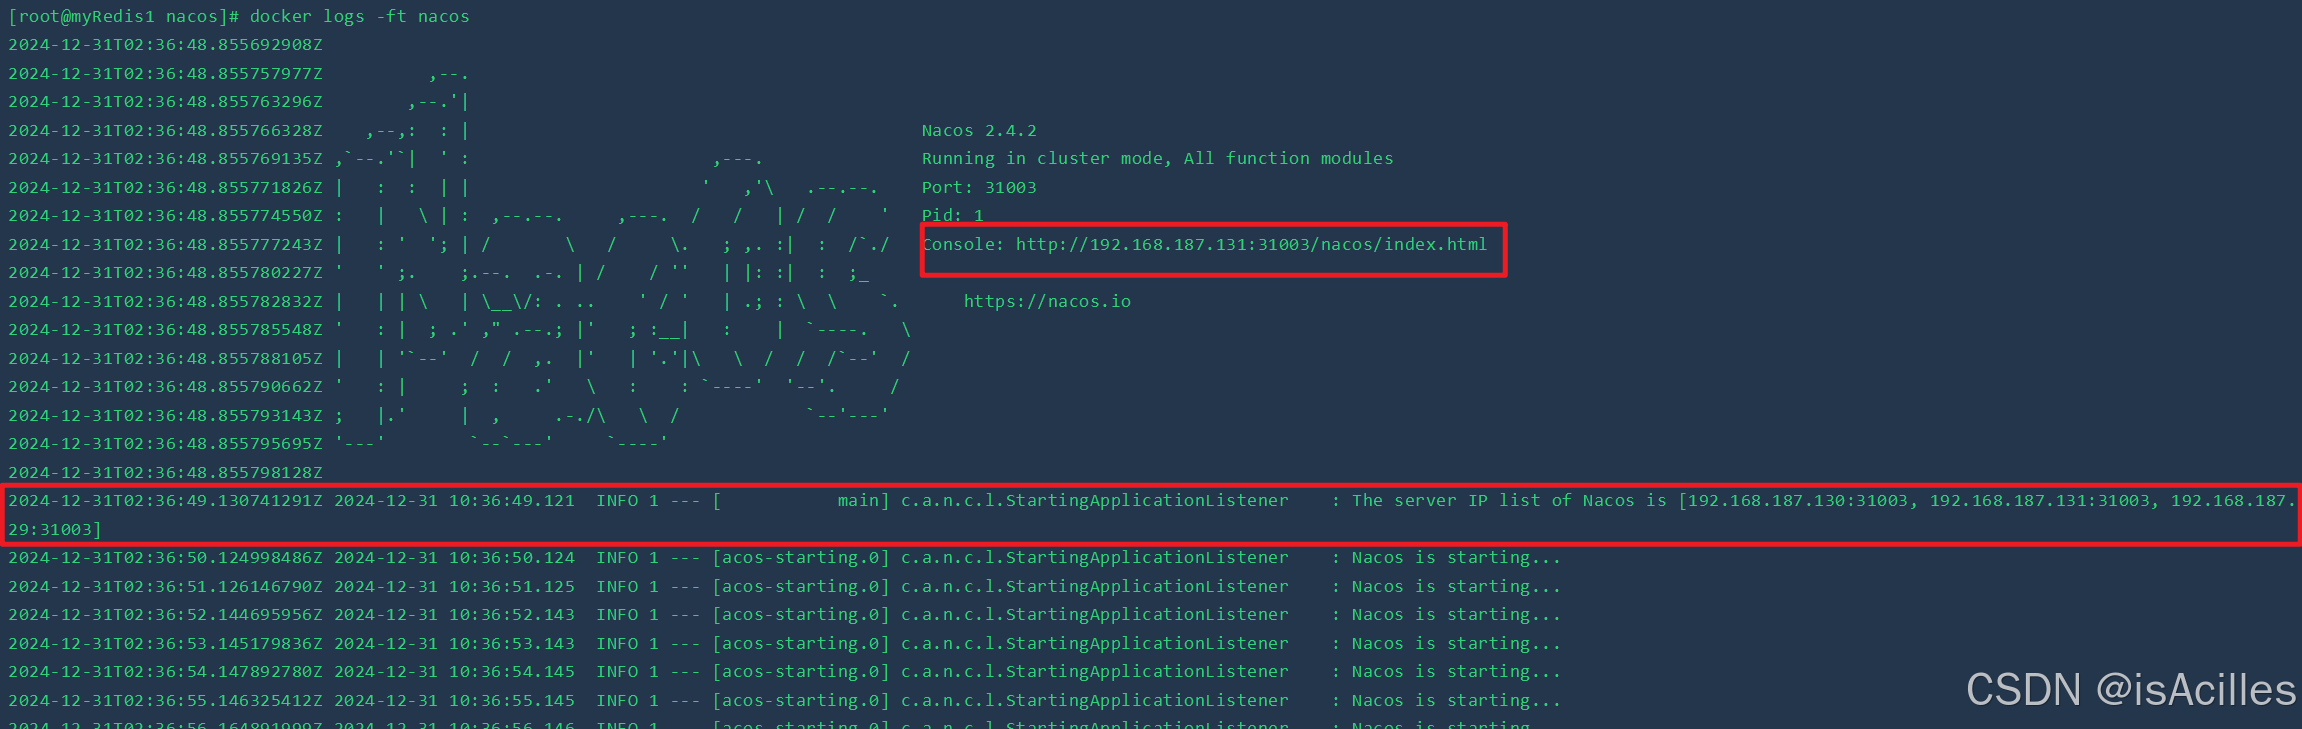
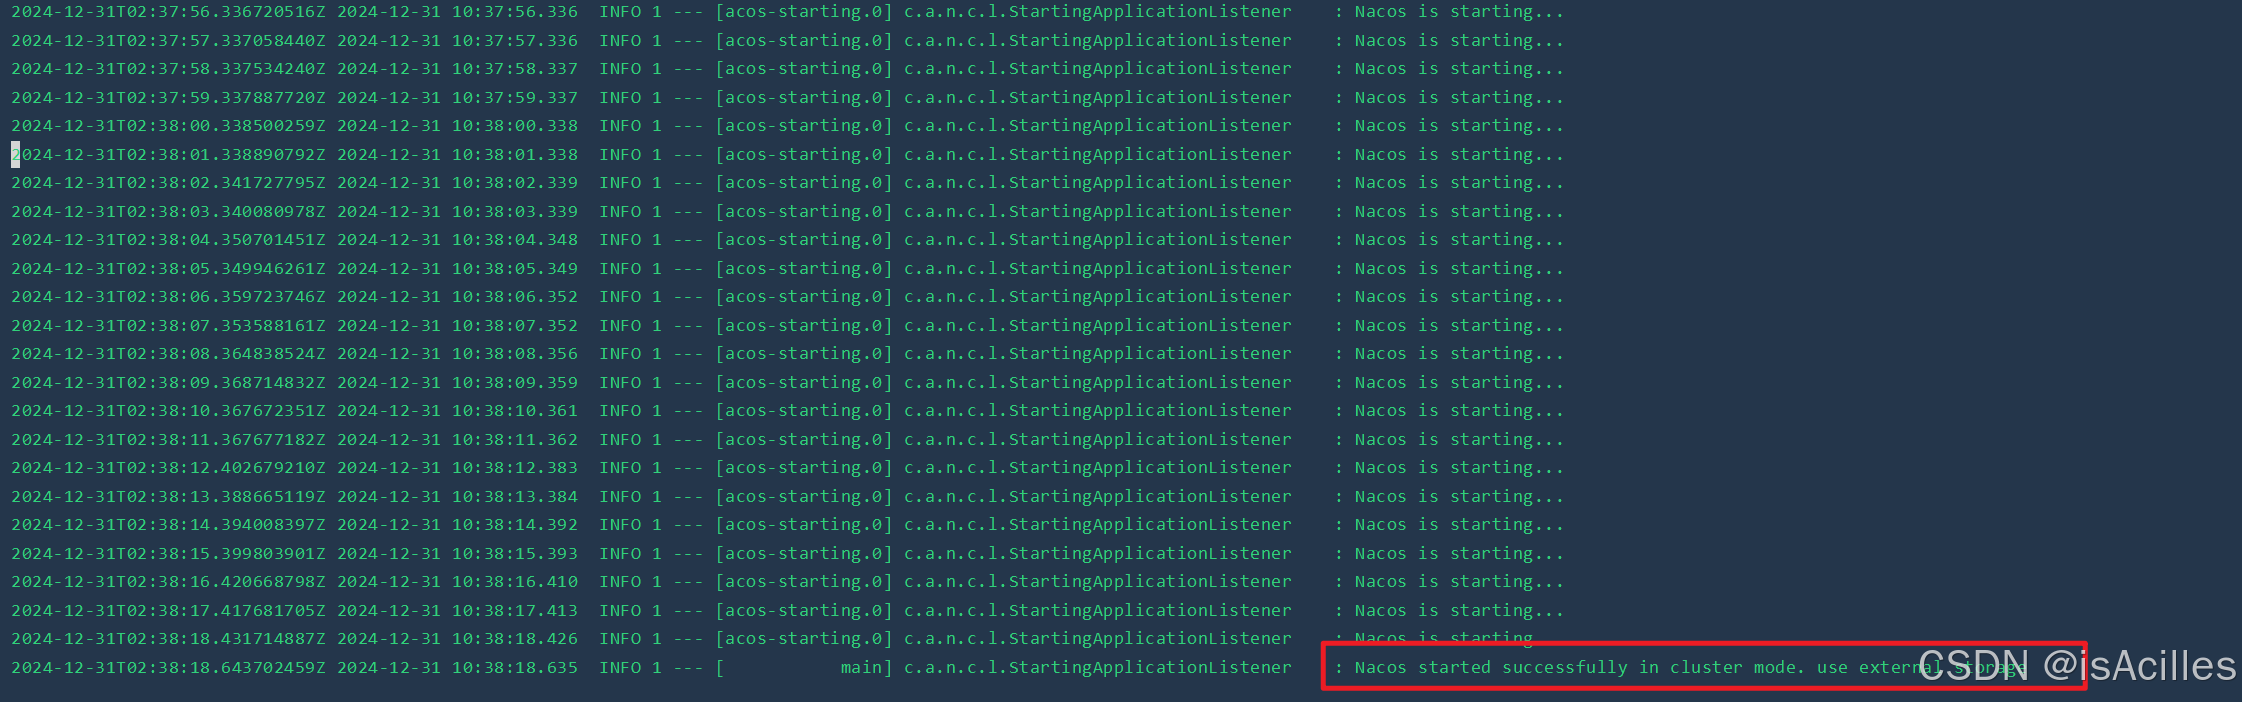
访问页面,可以看到集群搭建好,当前节点已被拉起。
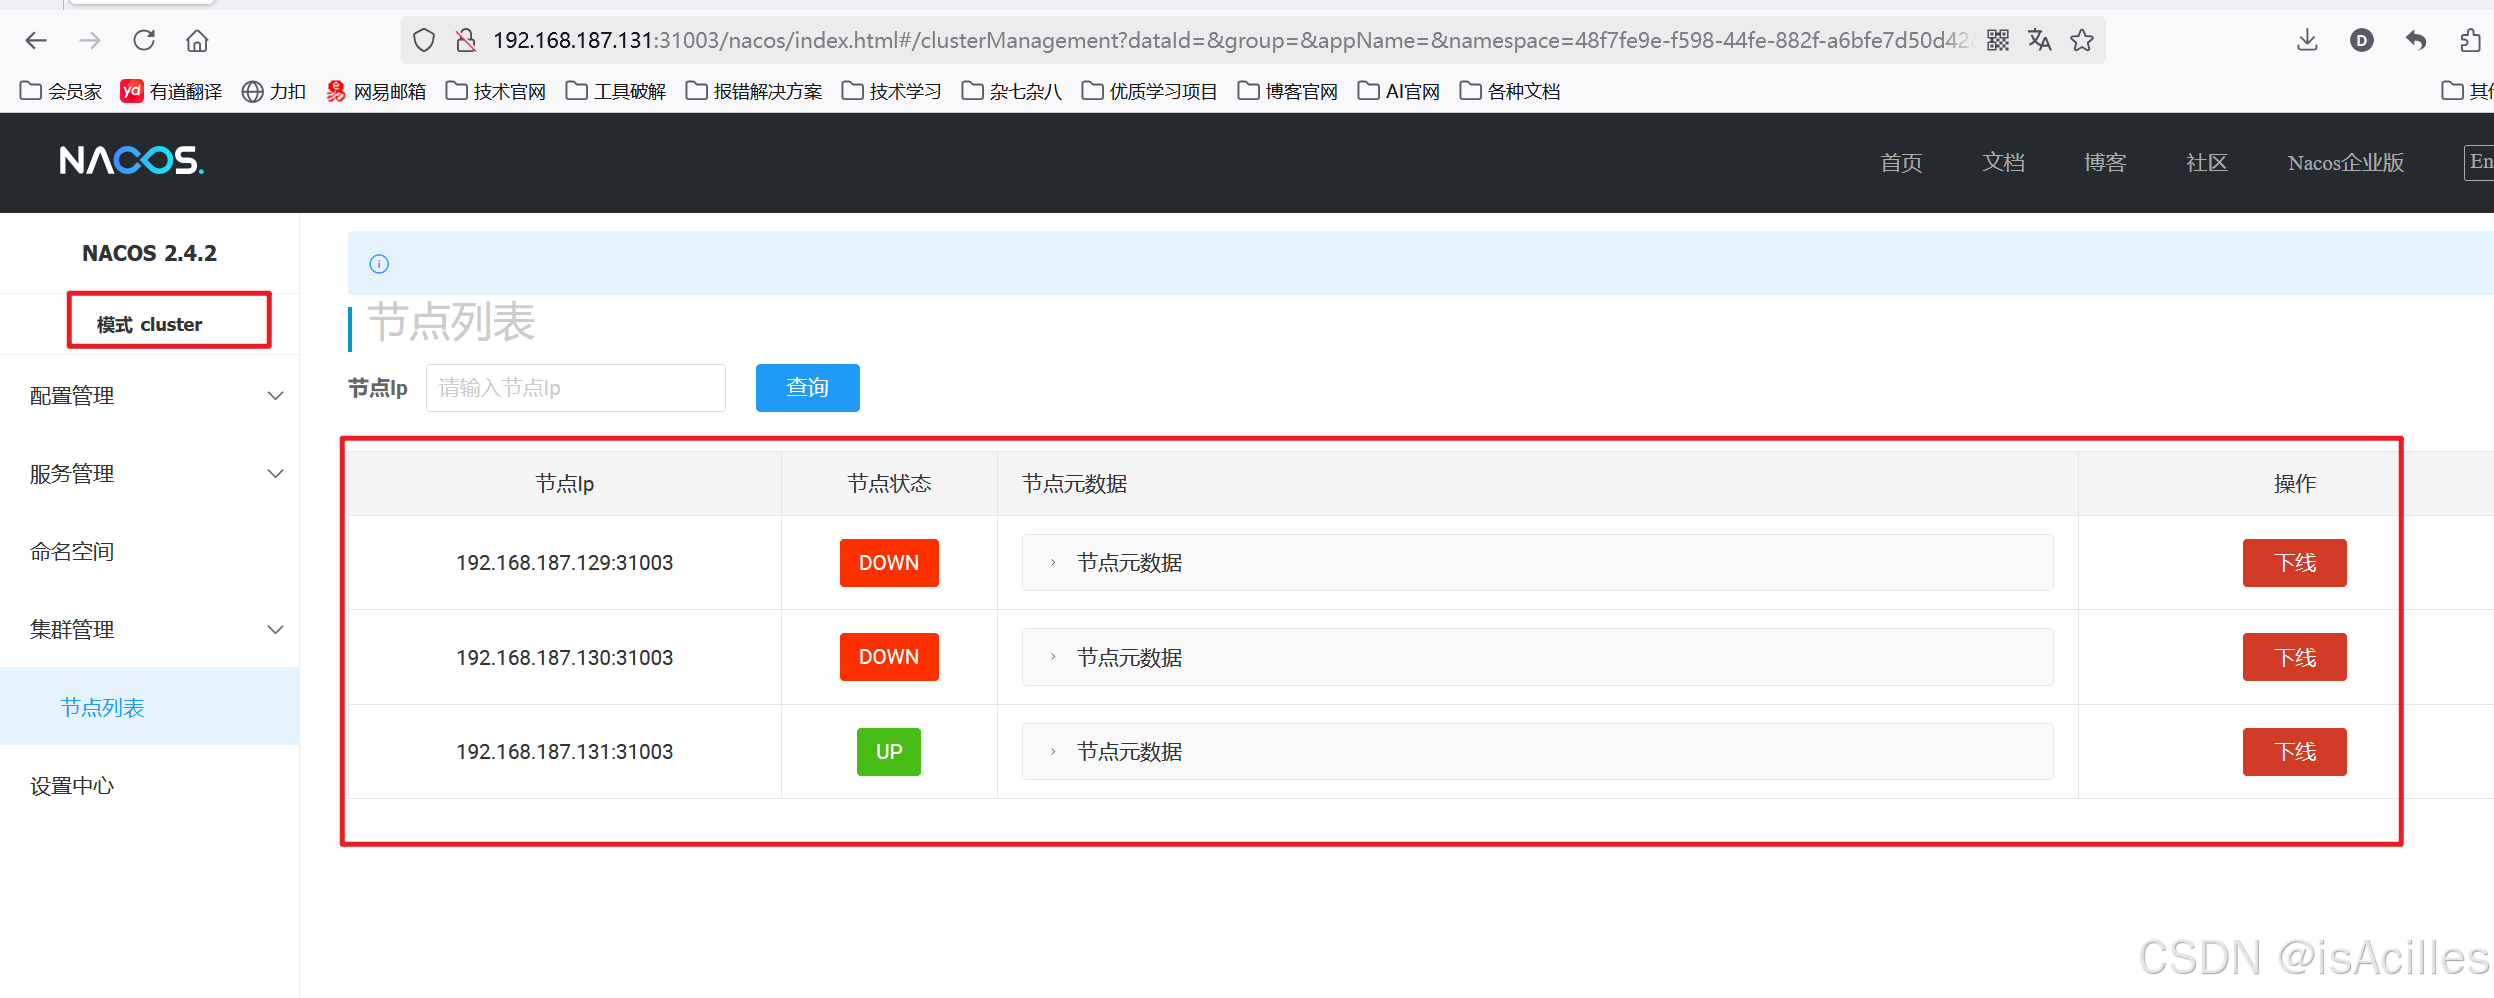
使用相同的方式拉起其他两台节点,集群就搭建好了。
# 安装 openssh-clients
yum install -y openssh-clients

# 如果需要 SSH 服务器
yum install -y openssh-server


#可以使用scp命令将文件在服务器间进行传送

# 1. 从本地复制到远程
scp 本地文件 用户名@远程主机:远程路径

# 2. 从远程复制到本地
scp 用户名@远程主机:远程文件 本地路径

# 3. 复制目录(加 -r 参数)
scp -r 本地目录 用户名@远程主机:远程路径


###示范
# 1. 复制单个文件到远程服务器
scp /path/to/local/file.txt root@192.168.1.100:/path/to/remote/

# 2. 复制远程文件到本地
scp root@192.168.1.100:/path/to/remote/file.txt /path/to/local/

# 3. 复制整个目录到远程服务器
scp -r /path/to/local/dir root@192.168.1.100:/path/to/remote/

# 4. 复制远程目录到本地
scp -r root@192.168.1.100:/path/to/remote/dir /path/to/local/

# 5. 指定端口号(如果不是默认22端口)
scp -P 2222 file.txt root@192.168.1.100:/path/to/remote/

# 6. 保持文件属性
scp -p file.txt root@192.168.1.100:/path/to/remote/

# 7. 显示详细传输信息
scp -v file.txt root@192.168.1.100:/path/to/remote/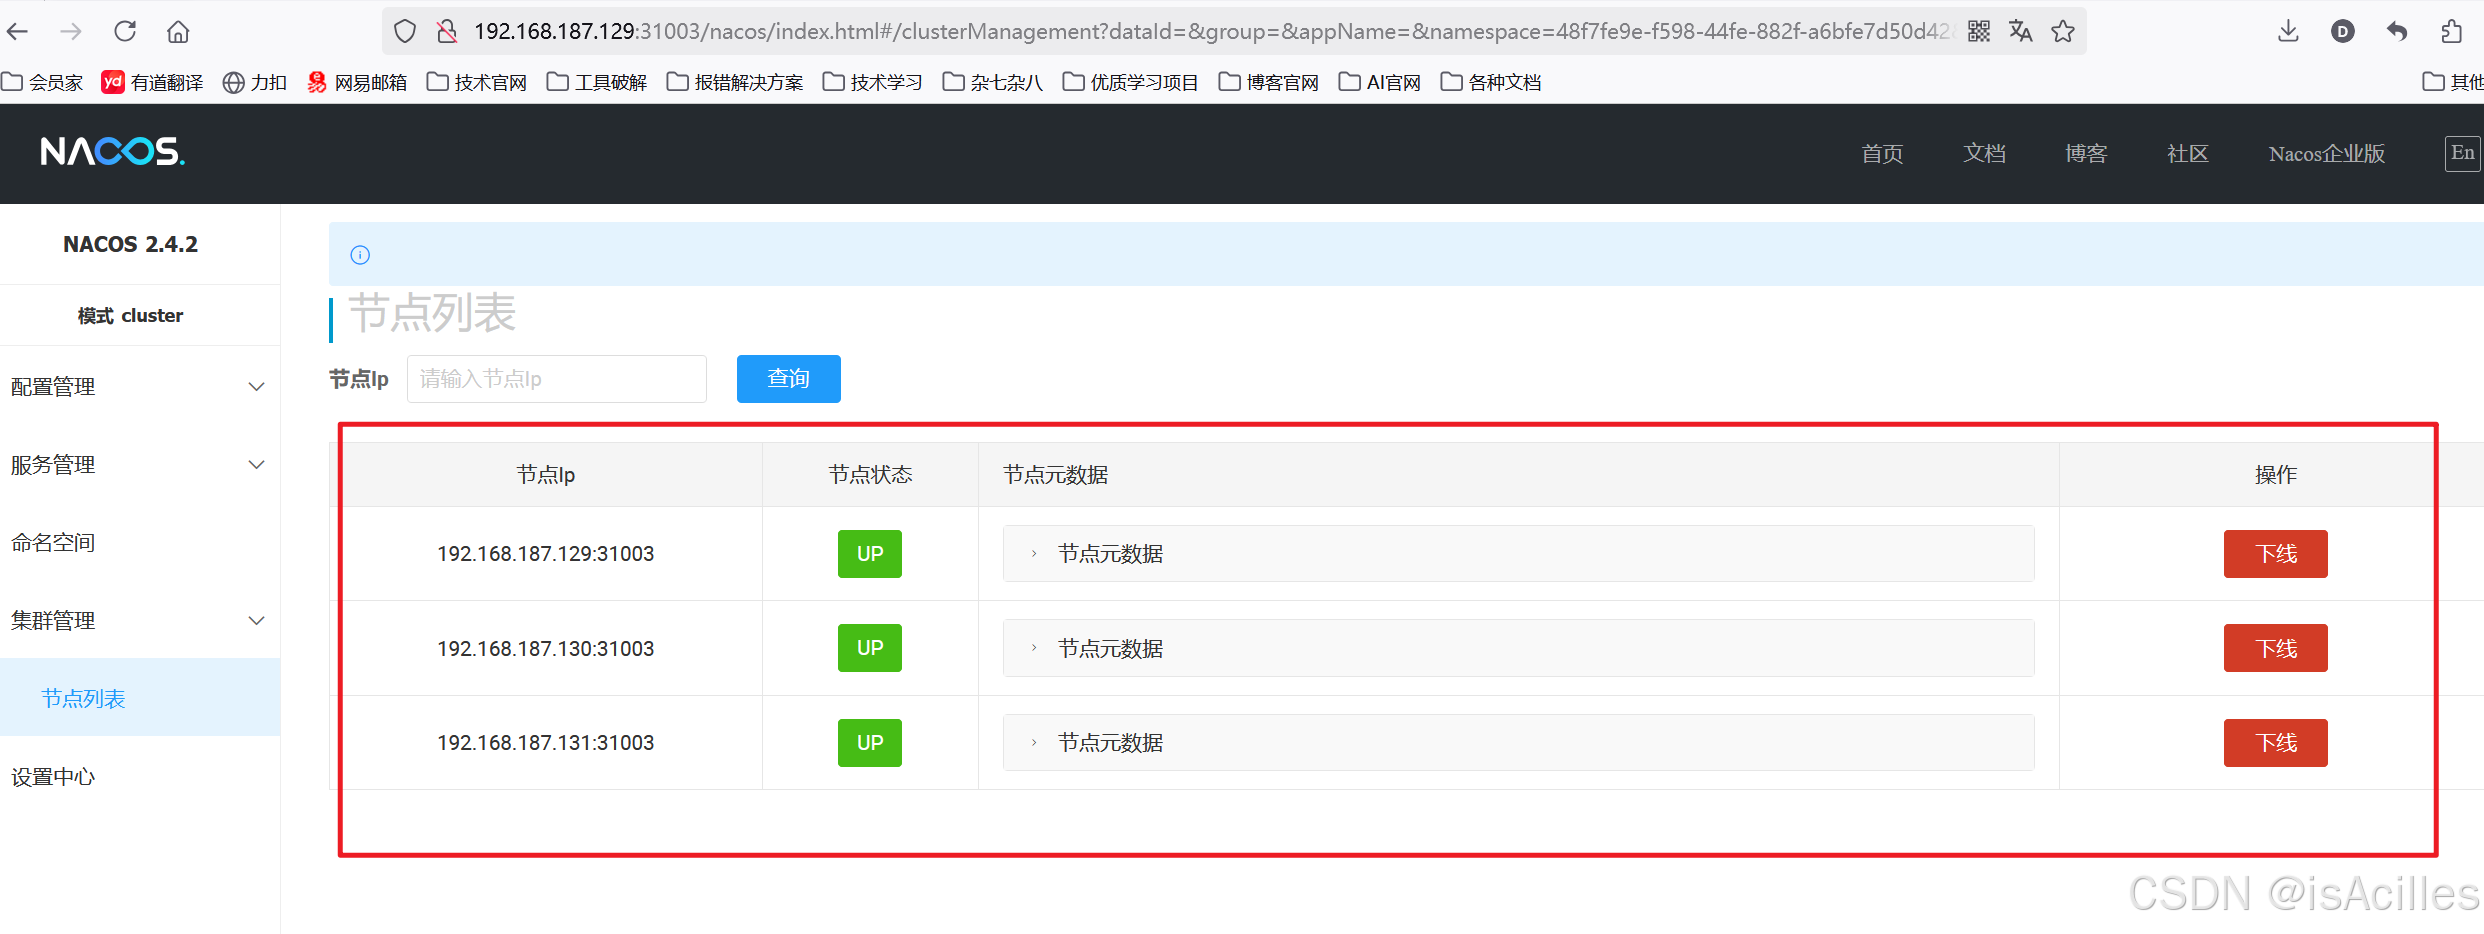
三.搭建nginx实现负载均衡
1.创建新的目录结构
mkdir -p /usr/local/nginx/{conf,conf.d,logs,html}2.修改配置文件
cat > /usr/local/nginx/conf/nginx.conf << 'EOF'
user  nginx;
worker_processes  auto;

error_log  /var/log/nginx/error.log notice;
pid        /var/run/nginx.pid;

events {
    worker_connections  1024;
}

http {
    include       /etc/nginx/mime.types;
    default_type  application/octet-stream;

    log_format  main  '$remote_addr - $remote_user [$time_local] "$request" '
                      '$status $body_bytes_sent "$http_referer" '
                      '"$http_user_agent" "$http_x_forwarded_for"';

    access_log  /var/log/nginx/access.log  main;

    sendfile        on;
    keepalive_timeout  65;

    # Nacos 负载均衡配置
    upstream nacos-cluster {
        # 你的三个 Nacos 节点
        server 192.168.187.129:31003 weight=1 max_fails=3 fail_timeout=30s;
        server 192.168.187.130:31003 weight=1 max_fails=3 fail_timeout=30s;
        server 192.168.187.131:31003 weight=1 max_fails=3 fail_timeout=30s;
    }

    # 默认服务器
    server {
        listen       80;
        listen  [::]:80;
        server_name  localhost;

        location / {
            root   /usr/share/nginx/html;
            index  index.html index.htm;
        }

        error_page   500 502 503 504  /50x.html;
        location = /50x.html {
            root   /usr/share/nginx/html;
        }
    }

    # Nacos 服务器配置
    server {
        listen 8848;
        server_name localhost;

        location / {
            proxy_pass http://nacos-cluster;
            proxy_set_header Host $host;
            proxy_set_header X-Real-IP $remote_addr;
            proxy_set_header X-Forwarded-For $proxy_add_x_forwarded_for;
            proxy_connect_timeout 60;
            proxy_send_timeout 60;
            proxy_read_timeout 60;

            # 添加健康检查配置
            health_check interval=3000 rise=2 fall=5 timeout=5000;
        }

        # 专门的 Nacos 配置
        location /nacos {
            proxy_pass http://nacos-cluster;
            proxy_set_header Host $host;
            proxy_set_header X-Real-IP $remote_addr;
            proxy_set_header X-Forwarded-For $proxy_add_x_forwarded_for;
            proxy_connect_timeout 60;
            proxy_send_timeout 60;
            proxy_read_timeout 60;
        }
    }
}
EOF
# 指定运行 Nginx 的用户和用户组
user nginx;# 自动设置工作进程数量为 CPU 核心数
worker_processes auto;# 错误日志配置:路径和日志级别
error_log /var/log/nginx/error.log notice;# 进程 ID 文件路径
pid /var/run/nginx.pid;# 事件模块配置
events {
# 每个工作进程的最大并发连接数
worker_connections 1024;
}# HTTP 模块配置
http {
# 包含 MIME 类型定义
include /etc/nginx/mime.types;
# 默认 MIME 类型
default_type application/octet-stream;# 定义日志格式
log_format main '$remote_addr - $remote_user [$time_local] "$request" '
'$status $body_bytes_sent "$http_referer" '
'"$http_user_agent" "$http_x_forwarded_for"';# 访问日志配置
access_log /var/log/nginx/access.log main;# 启用高效文件传输
sendfile on;
# 连接超时时间
keepalive_timeout 65;# Nacos 集群负载均衡配置
upstream nacos-cluster {
# 使用 ip_hash 确保同一客户端请求到同一服务器
ip_hash;
# 定义 Nacos 节点
# max_fails: 允许请求失败次数
# fail_timeout: 失败超时时间
server 192.168.187.129:31003 max_fails=3 fail_timeout=30s;
server 192.168.187.130:31003 max_fails=3 fail_timeout=30s;
server 192.168.187.131:31003 max_fails=3 fail_timeout=30s;
}# 默认 HTTP 服务器配置
server {
# 监听 80 端口(IPv4)
listen 80;
# 监听 80 端口(IPv6)
listen [::]:80;
# 服务器名称
server_name localhost;# 默认网站路径配置
location / {
root /usr/share/nginx/html;
index index.html index.htm;
}# 错误页面配置
error_page 500 502 503 504 /50x.html;
location = /50x.html {
root /usr/share/nginx/html;
}
}# Nacos 负载均衡服务器配置
server {
# 监听 8848 端口
listen 8848;
server_name localhost;
# 代理超时设置
proxy_connect_timeout 60; # 连接超时
proxy_send_timeout 60; # 发送超时
proxy_read_timeout 60; # 读取超时
# 代理缓冲区设置
proxy_buffer_size 4k; # 缓冲区大小
proxy_buffers 4 32k; # 缓冲区数量和大小
proxy_busy_buffers_size 64k; # 繁忙缓冲区大小
proxy_temp_file_write_size 64k; # 临时文件写入大小
# 根路径代理配置
location / {
# 代理到 Nacos 集群
proxy_pass http://nacos-cluster;
# 设置代理 Header
proxy_set_header Host $host;
proxy_set_header X-Real-IP $remote_addr;
proxy_set_header X-Forwarded-For $proxy_add_x_forwarded_for;
# 定义故障转移条件
proxy_next_upstream error timeout http_500 http_502 http_503 http_504;
}# Nacos 专用路径配置
location /nacos {
proxy_pass http://nacos-cluster;
proxy_set_header Host $host;
proxy_set_header X-Real-IP $remote_addr;
proxy_set_header X-Forwarded-For $proxy_add_x_forwarded_for;
proxy_next_upstream error timeout http_500 http_502 http_503 http_504;
}
}
}
3.拉取 Nginx 镜像
docker pull nginx:latest4.启动nginx容器
docker run -d \
--name nginx \
--restart always \
--network host \
-v /usr/local/nginx/conf/nginx.conf:/etc/nginx/nginx.conf:ro \
-v /usr/local/nginx/logs:/var/log/nginx \
-v /usr/local/nginx/html:/usr/share/nginx/html:ro \
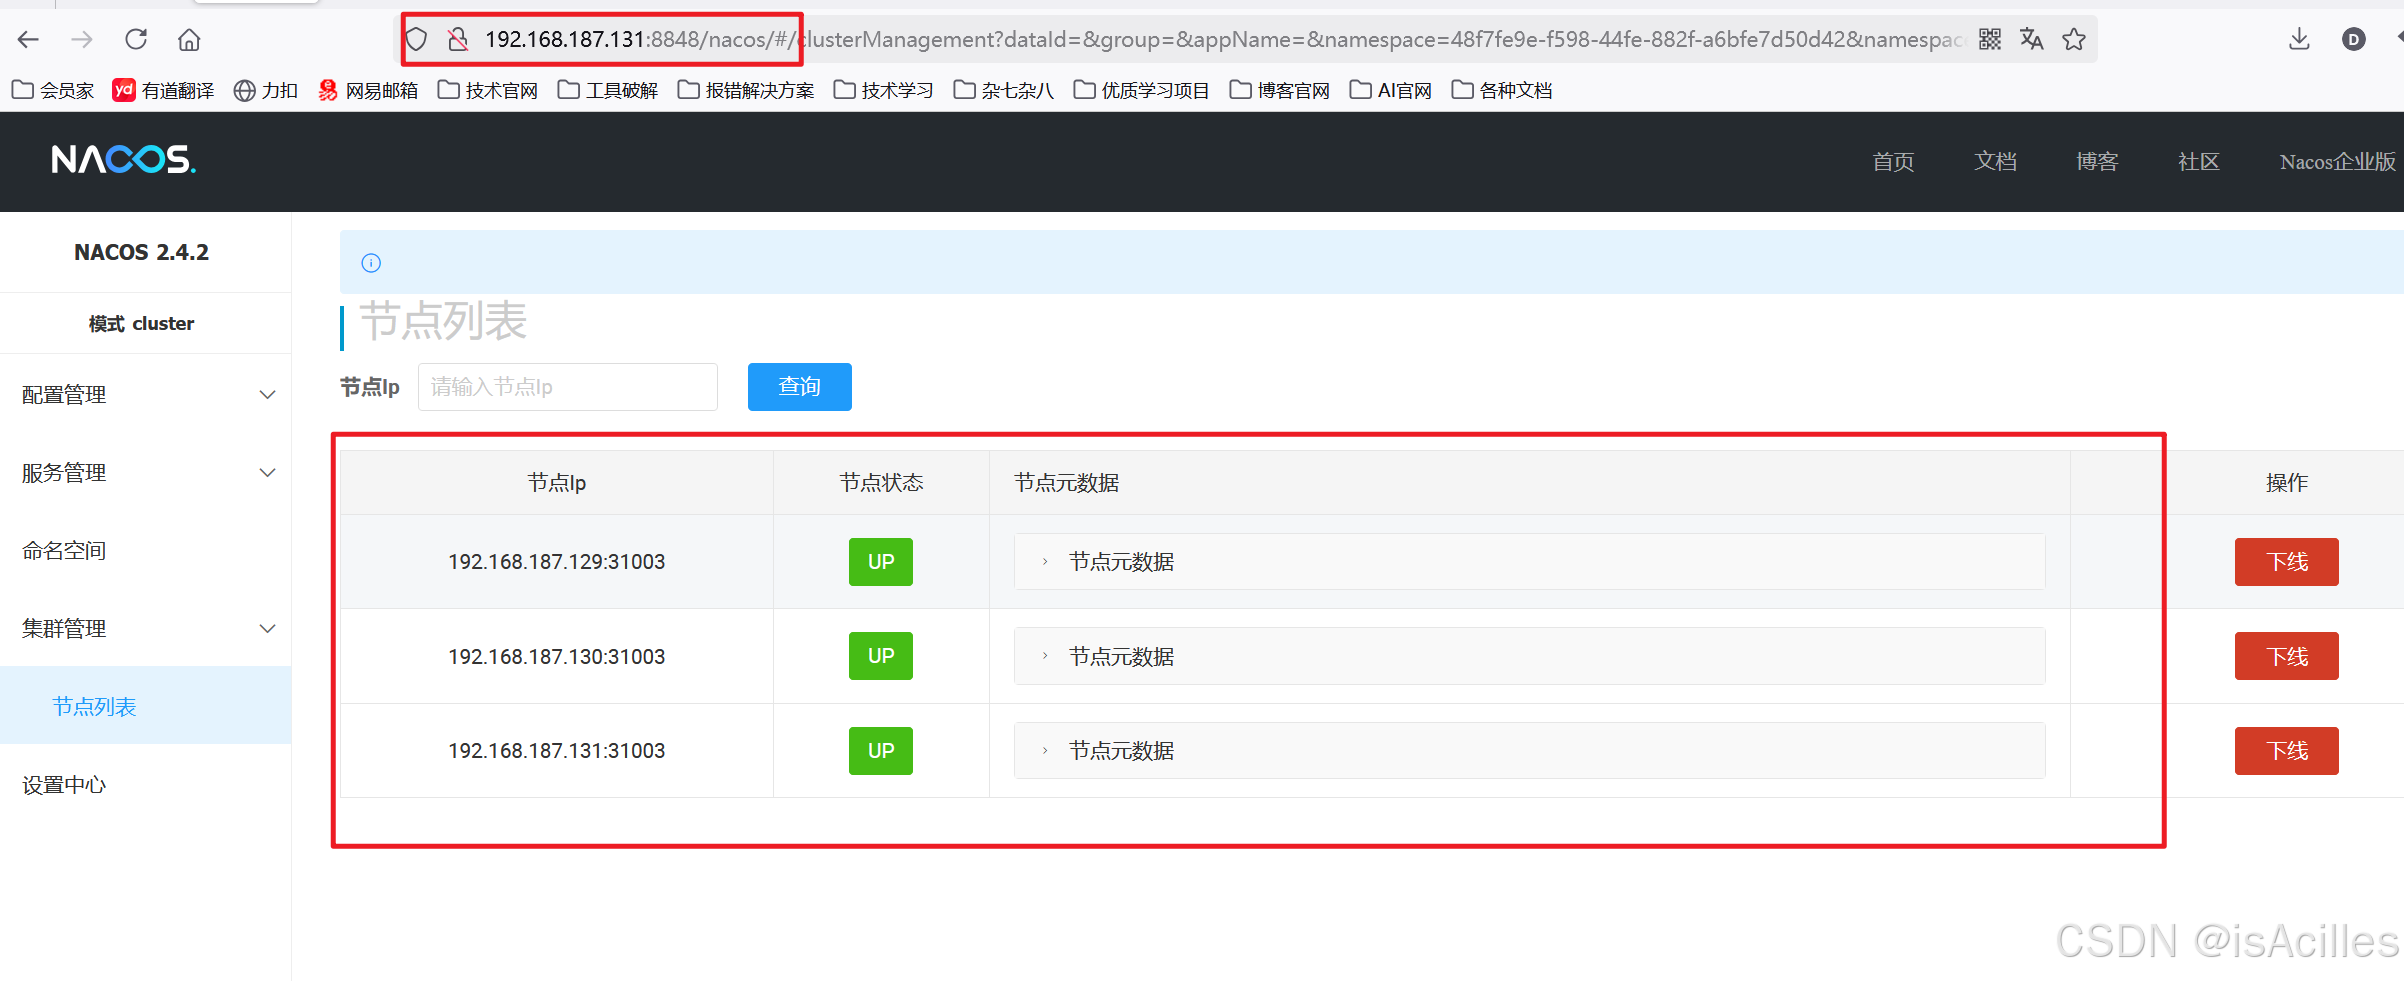
nginx:latest页面上进行验证,成功


 569
569

 被折叠的 条评论
为什么被折叠?
被折叠的 条评论
为什么被折叠?
 到【灌水乐园】发言


