


MySQL – Maxwell – Kafka – MySQL 的日志数据同步
一、配置信息
- 使用组件
MySQL、Maxwell、Kafka(CDH集群)、zookeeper(CDH集群) - 版本
MySQL和linux版本:Ver 15.1 Distrib 5.5.68-MariaDB, for Linux (x86_64) using readline 5.1
Maxwell 版本:maxwell-1.10.7
Kafka 版本:

zookeeper版本:

注:
1)MySQL版本查看命令:mysql -V
2)Kafka/Zookeeper版本查看:cdh集群的 主机 – 选择任意一个节点 – 组件


二、组件配置
- mysql的配置
配置完成后查看权限#登录mysql mysql -u.... -p..... #创建maxwell初试化数据存储库 create database maxwell #创建用户并修改用户权限 grant all privileges on *.* to maxwell@localhost identified by '123456'; GRANT ALL PRIVILEGES ON *.* TO 'maxwell'@'%' IDENTIFIED BY '123456' WITH GRANT OPTION; GRANT ALL PRIVILEGES ON *.* TO 'maxwell'@'srv191' IDENTIFIED BY '123456' WITH GRANT OPTION; GRANT ALL PRIVILEGES ON *.* TO 'maxwell'@localhostIDENTIFIED BY '123456' WITH GRANT OPTION; #刷新配置 flush privileges;
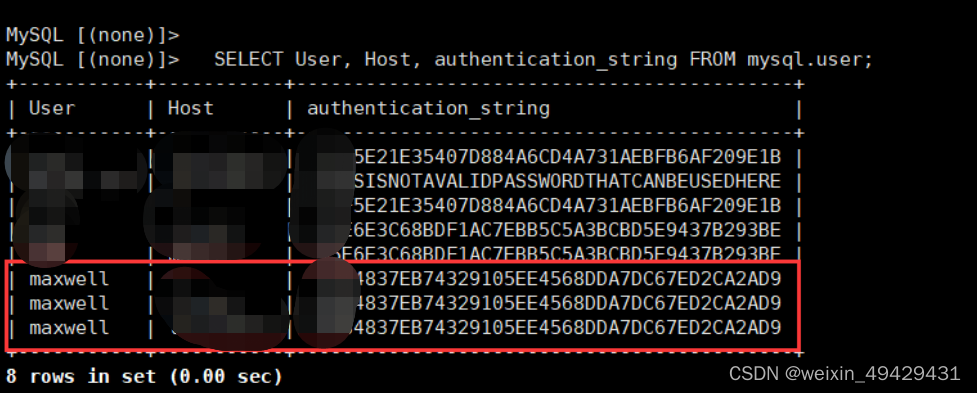
可以看到SELECT User, Host, authentication_string FROM mysql.user;
- maxwell的配置
maxwell的配置可以根据安装好的maxwell目录下 config.properties 配置模板进行配置。首先自定义文件,将模板内容进行拷贝,然后进行具体配置,如下:
daemon=true
log_level=info

producer=kafka

kafka_topic=kafka01
#kafka.bootstrap.servers=localhost:9092
kafka.bootstrap.servers=*.*.*.*:9092,*.*.*.*:9092,*.*.*.*:9092

host=*.*.*.*
user=maxwell
password=123456
port=3306
schema_database=maxwell

#maxwell启动端口
http_port=9003
http_diagnostic=true
http_path_prefix=/
metrics_type=jmx|http|datadog

# These are 0.9-specific. They may or may not work with other versions.
kafka.compression.type=snappy
kafka.metadata.fetch.timeout.ms=5000
kafka.retries=0
kafka.acks=1

######### kinesis ####################
kinesis_stream=maxwell

# include *only* these databases
#include_dbs=db1,/db\\d+/
include_dbs=test
# exclude these databases (will override an include)
#exclude_dbs=db3,/db\\d+/
exclude_dbs=*

# include *only* these tables
#include_tables=tbl1,/tbl\\d+/
include_tables=person
注释:
producer=kafka:实时监控到的日志发送到kafka生产者
kafka.bootstrap.servers=...:9092,...:9092,...:9092:配置的本地kafka节点IP地址以及端口号,kafka默认端口号9092
host=...:本地Mysql安装节点IP地址
user=maxwell:用户名
password=123456:用户密码(按照自己设置输入)
kafka_topic=kafka:实时监控到的日志数据发送kafkaTopic下(默认发送maxwell)
include_dbs=test:过滤除test数据库下所有日志数据
include_tables=表名,表名:可以指定不需要过滤日志数据的表名
三、kakfa配置
Kafka中有一个自动创建主题的配置开关 Topic Auto Creation,可以根据需要进行配置。
四、consumer API
api主要涉及的就是JSONObject日志解析,可以使用已有的相关的Json类进行解析,也可以自定义解析。下面是根据topic存储日志的json字符串结构进行自定义解析的代码:
- 主函数,这里我创建了多个消费对象
public class ConsumerMain { public static void main(String[] args) { // 调用consumer配置方法 consumer() Properties pro = new ConsumerProperties().consumer(); // 创建 kafka consumer 对象 KafkaConsumer<String, String> consumer1 = new KafkaConsumer<>(pro); KafkaConsumer<String, String> consumer2 = new KafkaConsumer<>(pro); KafkaConsumer<String, String> consumer3 = new KafkaConsumer<>(pro); // 调用mysql消费日志和解析的方法 consumerLog() new ConsumerUtils().consumerLog(consumer1); new ConsumerUtils().consumerLog(consumer2); new ConsumerUtils().consumerLog(consumer3); } } - 连接配置
public class ConsumerProperties { public Properties consumer() { // 创建配置对象 Properties properties = new Properties(); try { properties.load(new InputStreamReader(Object.class.getResourceAsStream("/kafka.properties"),StandardCharsets.UTF_8)); } catch (IOException e) { e.printStackTrace(); } return properties; } } - 日志解析
public class ConsumerUtils { // 创建mysql数据库连接 Connection conn = null; Statement statement = null; PreparedStatement ps = null; // 消费日志 public void consumerLog(KafkaConsumer<String, String> consumer) { // 创建map映射,存储日志信息 HashMap<String, String> map1 = new HashMap<String, String>(); // 存储 database、table、type 信息 HashMap<String, String> map2 = new HashMap<String, String>(); // 存储 data 信息 HashMap<String, String> map3 = new HashMap<String, String>(); // 存储 old_data 信息 // 指定消费者消费主题 consumer.subscribe(readProp("config", "topics")); while (true) { // 获取消费数据集 ConsumerRecords<String, String> consumerRecords = consumer.poll(Duration.ofMillis(100)); if (consumerRecords.isEmpty()) { continue; } // 创建中间集合变量 String[] list1 = null; String[] list2 = null; String[] list3 = null; // 遍历消费数据集 for (ConsumerRecord<String, String> consumerRecord : consumerRecords) { try { // 获取日志 String v = consumerRecord.value(); // 日志切分 String[] splits = v.split("\\{"); // 日志过滤(如果maxwell有过滤条件,则可省略) if (splits.length >= 3) { list1 = splits[1].split("\\}")[0].split(","); list2 = splits[2].split("\\}")[0].split(","); System.out.println("list1=" + Arrays.toString(list1)); System.out.println("list2=" + Arrays.toString(list2)); } // 更新日志 old_data 数据收集 if (splits.length >= 4) { list3 = splits[3].split("\\}")[0].split(","); } // 日志处理 if (list1 != null) { for (int i = 0; i < list1.length - 1; i++) { if (list1[i].contains("type") || list1[i].contains("database") || list1[i].contains("table")) { String[] type = list1[i].replaceAll("\\\"", "").split(":"); map1.put(type[0], type[1]); } } } if (map1.isEmpty()) continue; // 判断是否是指定数据库内指定表的日志 if (map1.get("database").equals("test") && map1.get("table").equals("person")) { if (list2 != null) { for (String s : list2) { String[] data = s.split(":"); map2.put(data[0].replaceAll("\"", ""), data[1]); } } if (list3 != null) { for (String s : list3) { String[] data = s.split(":"); map3.put(data[0].replaceAll("\"", ""), data[1]); } } System.out.println(map1 + "\n" + map2 + "\n" + map3); // insert sql 拼接 if (map1.get("type").equals("insert")) { insertSQL(map1, map2); System.out.println("insert..."); } // delete sql 拼接 if (map1.get("type").equals("delete")) { deleteSQL(map1, map2); System.out.println("delete"); } // update 日志拼接 if (map1.get("type").equals("update")) { updateSQL(map1, map2, map3); System.out.println("update"); } } } catch (Exception e) { e.printStackTrace(); } finally { // 关闭连接 JDBCUtils.close(statement, conn); } // 清空map映射 map1.clear(); map2.clear(); map3.clear(); //同步提交 当前线程会阻塞,直到offset提交成功 consumer.commitSync(); } } } // insert public void insertSQL(HashMap<String, String> map1, HashMap<String, String> map2) throws Exception { // 创建中间集合变量 ArrayList<String> list1 = new ArrayList<String>(); ArrayList<String> list2 = new ArrayList<String>(); // 将map2的key、value 分别添加到 list1、list2 Iterator<Map.Entry<String, String>> iterator = map2.entrySet().iterator(); while (iterator.hasNext()) { Map.Entry<String, String> next = iterator.next(); list1.add(next.getKey()); list2.add(next.getValue()); } // 从map1中获取表名 String table = map1.get("table"); // key、value 处理 String fields = list1.toString().replaceAll("\\[", "").replaceAll("\\]", ""); String values = list2.toString().replaceAll("\\[", "").replaceAll("\\]", ""); // 测试表 conn = JDBCUtils.getConnection(); // sql 拼接 String sql = "insert into " + table + "(" + fields + ") values(?)"; ps = conn.prepareCall(sql); ps.setString(1, values); boolean execute = ps.execute(); } // delete public void deleteSQL(HashMap<String, String> map1, HashMap<String, String> map2) throws Exception { // sql 条件字符串 String kv = ""; Iterator<Map.Entry<String, String>> iterator = map2.entrySet().iterator(); while (iterator.hasNext()) { Map.Entry<String, String> next = iterator.next(); // 过滤 file=null where 条件后不能出现 file=null 的情况 if (!next.getValue().equals("null")) { // 条件拼接 kv += next.getKey() + "=" + next.getValue() + ","; } } // 条件处理 String kv1 = kv.substring(0, kv.length() - 1).replaceAll(",", " and "); // 获取表名 String table = map1.get("table"); // 测试表 conn = JDBCUtils.getConnection(); // sql 拼接 String sql = "delete " + table + " from where ?"; ps = conn.prepareCall(sql); ps.setString(1, kv1); boolean execute = ps.execute(); } // update public void updateSQL(HashMap<String, String> map1, HashMap<String, String> map2,HashMap<String, String> map3) throws Exception { // data 和 old_data 相同 key 的 value 互换 Iterator<String> iterator2 = map2.keySet().iterator(); while (iterator2.hasNext()) { String next2 = iterator2.next(); Iterator<String> iterator3 = map3.keySet().iterator(); while (iterator3.hasNext()) { String next3 = iterator3.next(); if (next2.equals(next3)) { String temp = map2.get(next2); map2.put(next2, map3.get(next3)); map3.put(next3, temp); } } } // 条件处理 String oldValues = map2.toString().replaceAll("\\{", "").replaceAll("\\}", "").replaceAll(",", " and "); // 更新处理 String newValues = map3.toString().replaceAll("\\{", "").replaceAll("\\}", ""); // 获取表名 String table = map1.get("table"); // 测试表 String table1 = "person_copy1"; conn = JDBCUtils.getConnection(); statement = conn.createStatement(); // 拼接 sql String sql = "update " + table1 + " set " + newValues + " where " + oldValues; // 执行 sql statement.execute(sql); } public List<String> readProp(String confName, String fn1) { String[] topics = ResourceBundle.getBundle(confName).getString(fn1).split(","); return new ArrayList<>(Arrays.asList(topics)); } } - 配置文件
kafka.properties
druid.propertiesbootstrap.servers=... auto.offset.reset=latest enable.auto.commit=false key.deserializer=org.apache.kafka.common.serialization.StringDeserializer value.deserializer=org.apache.kafka.common.serialization.StringDeserializer group.id=...driverClassName=com.mysql.jdbc.Driver #mysql jdbc connection url=jdbc:mysql://*.*.*.*:3306/test? useSSL=false&serverTimezone=UTC&characterEncoding=utf-8&autoReconnect=true username=maxwell password=123456 initialSize=5 maxActive=10 maxWait=3000
总结:主要的难点在于maxwell的相关配置和日志解析代码。maxwell第一次使用,json日志解析使用JsonObject方法解析有写,这里就不在往下写了。如果哪位大佬有更好的方式希望能够指点指点!!!


 1488
1488

 被折叠的 条评论
为什么被折叠?
被折叠的 条评论
为什么被折叠?
 到【灌水乐园】发言


