


 本文详细介绍如何使用IntelliJ IDEA快速创建Spring Boot项目,包括配置本地Maven仓库、设置JDK版本及启动项目的全过程。
本篇文章是新手使用idea快速搭建springboot工程全流程的详解和启动过程。
1、idea快速创建springboot工程
- 点击左上角file–>new–>project进入创建项目页面
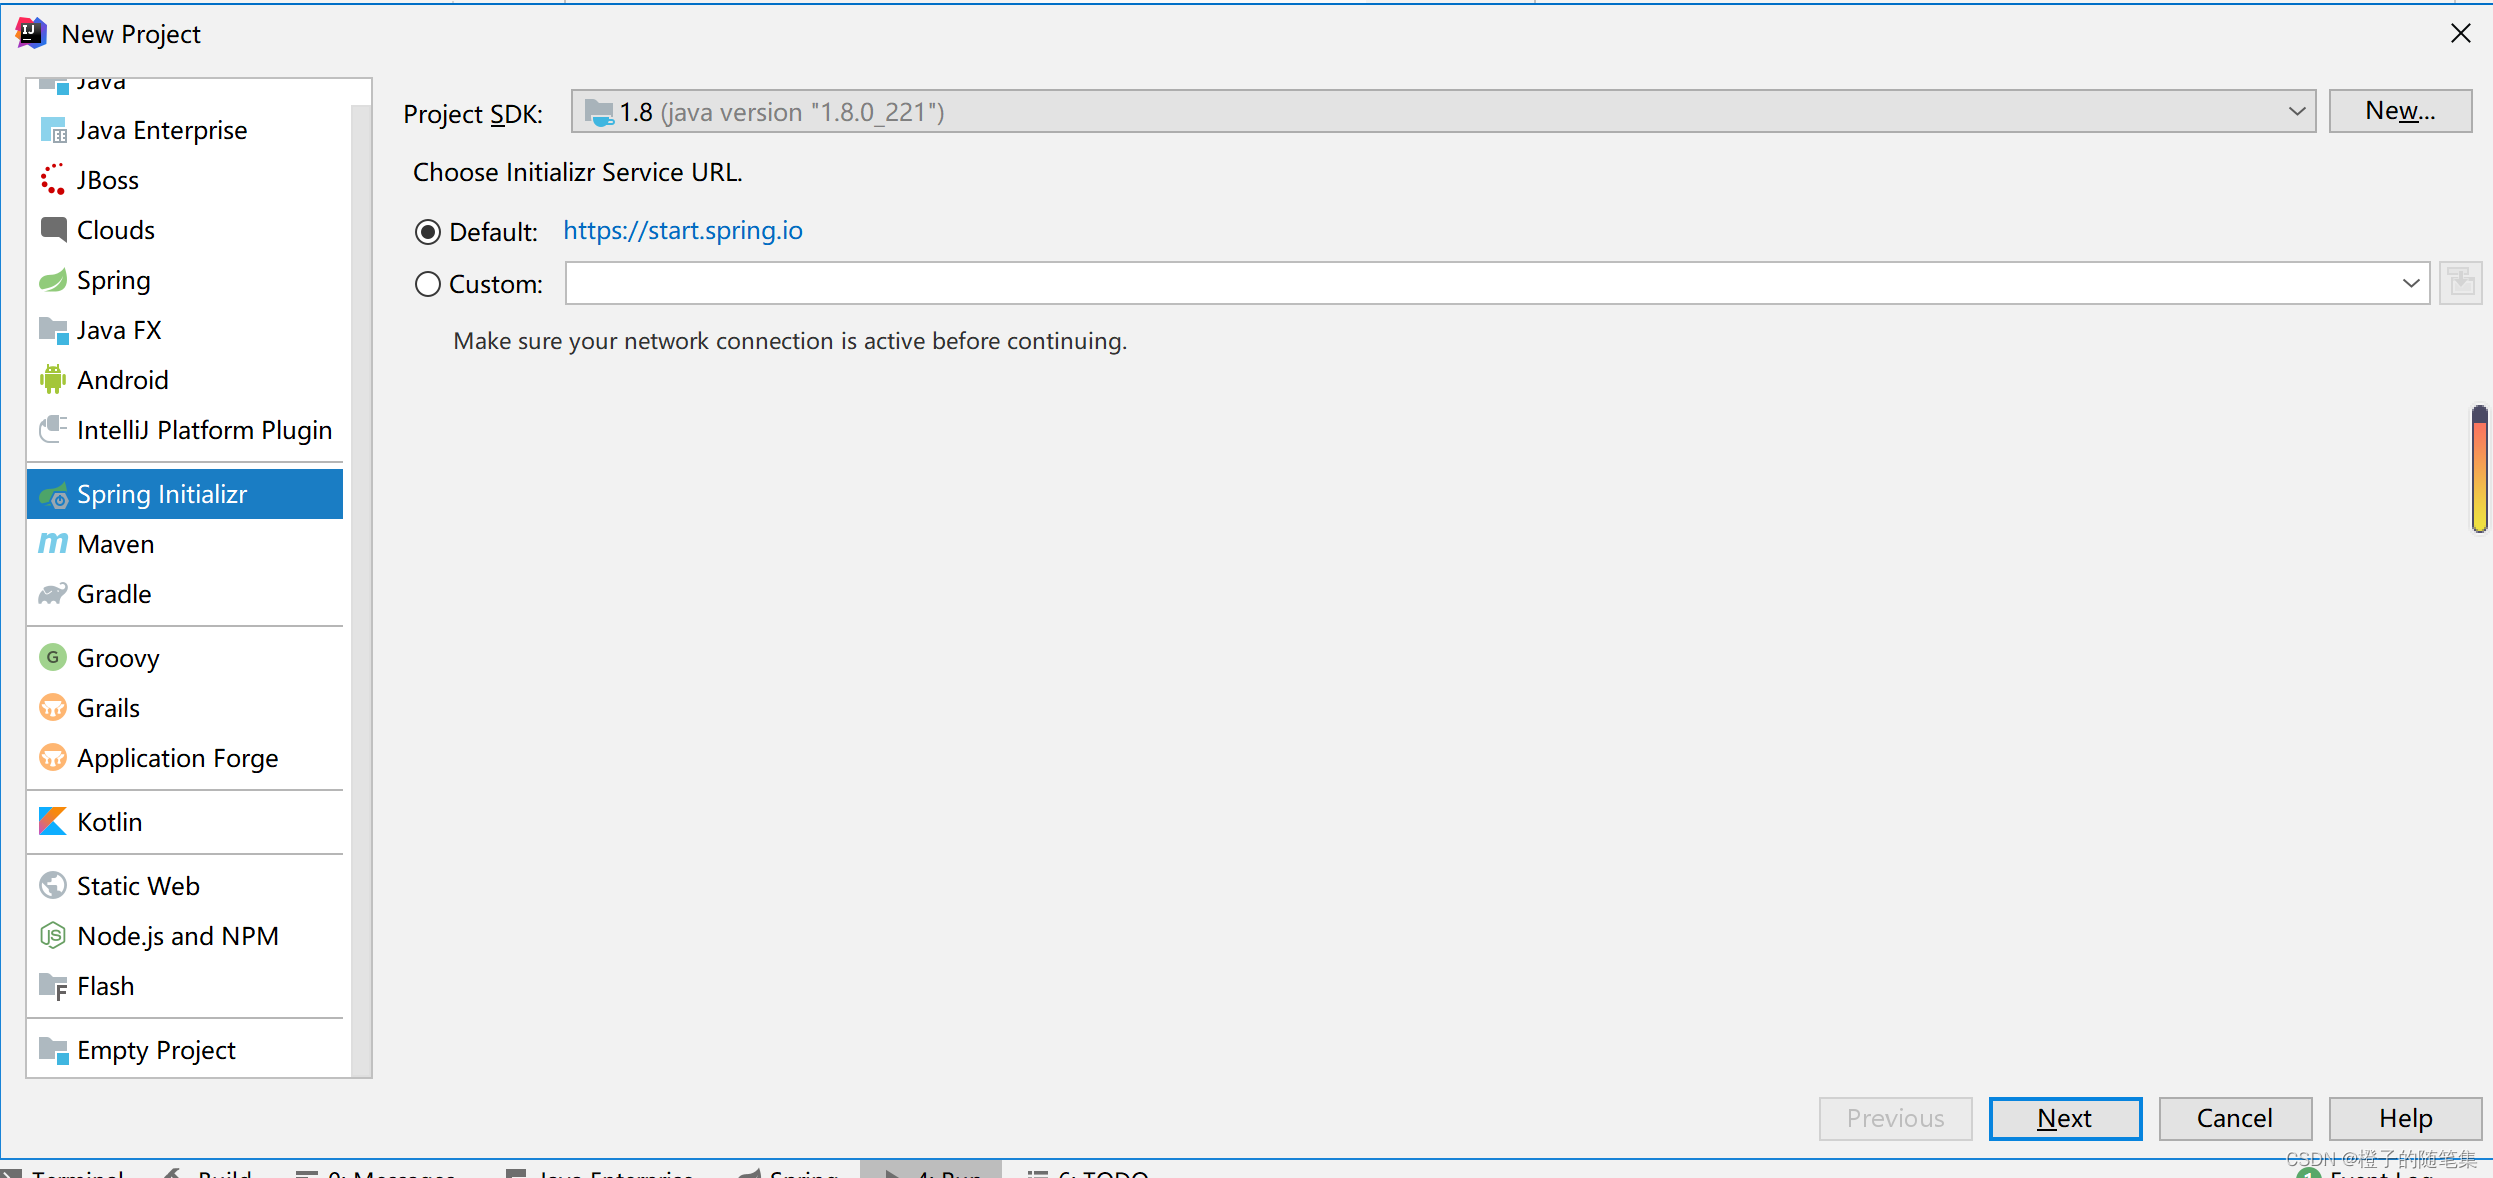
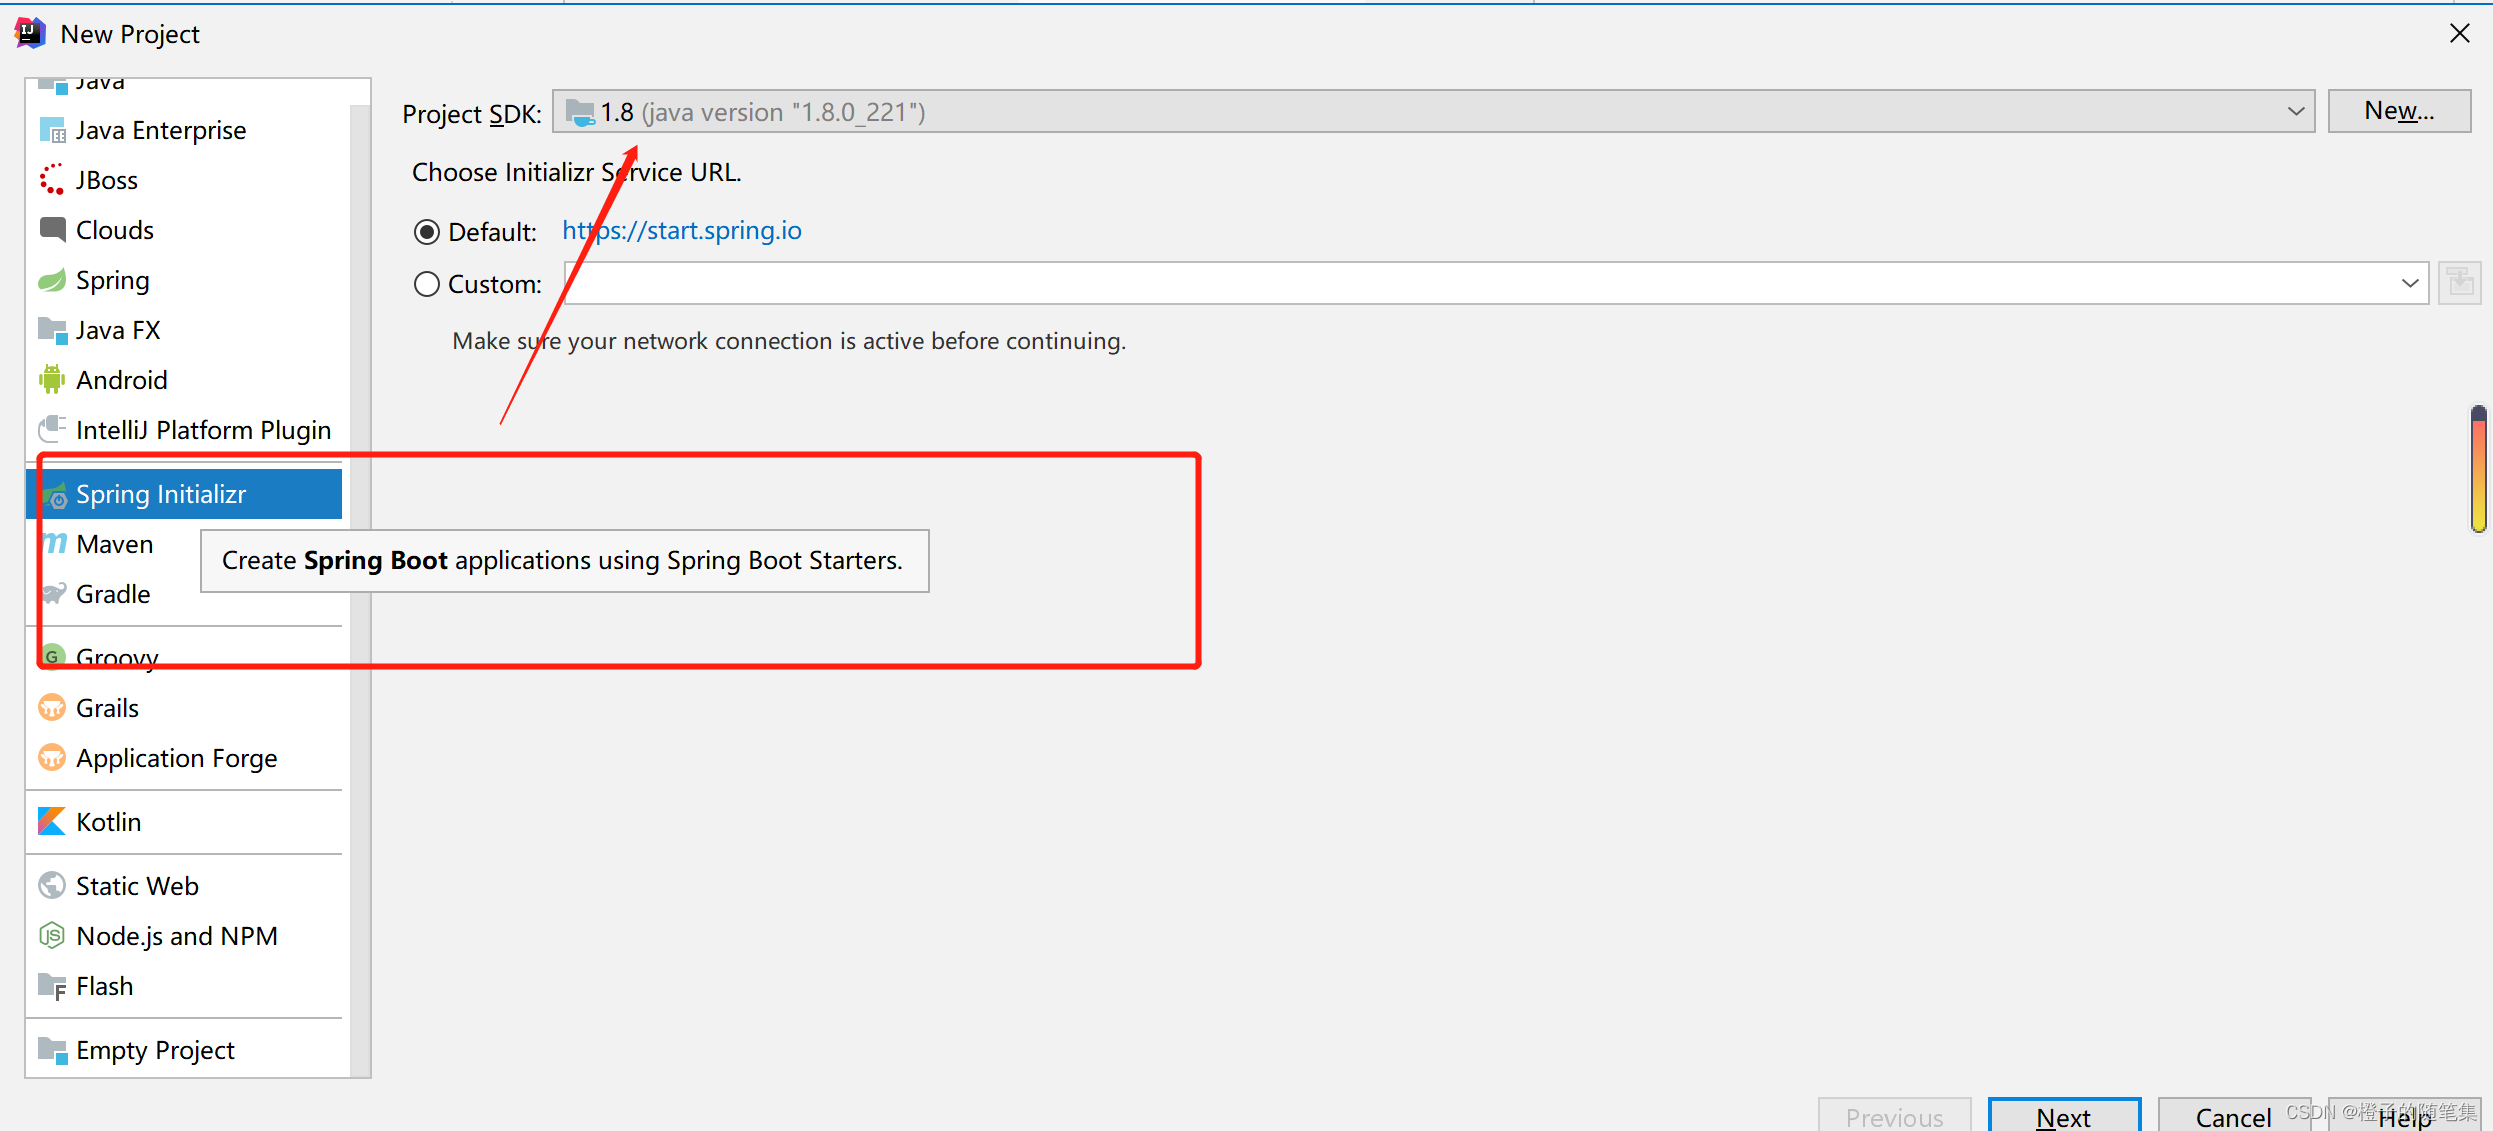
- 选择spring initializr和对应的jdk版本
-
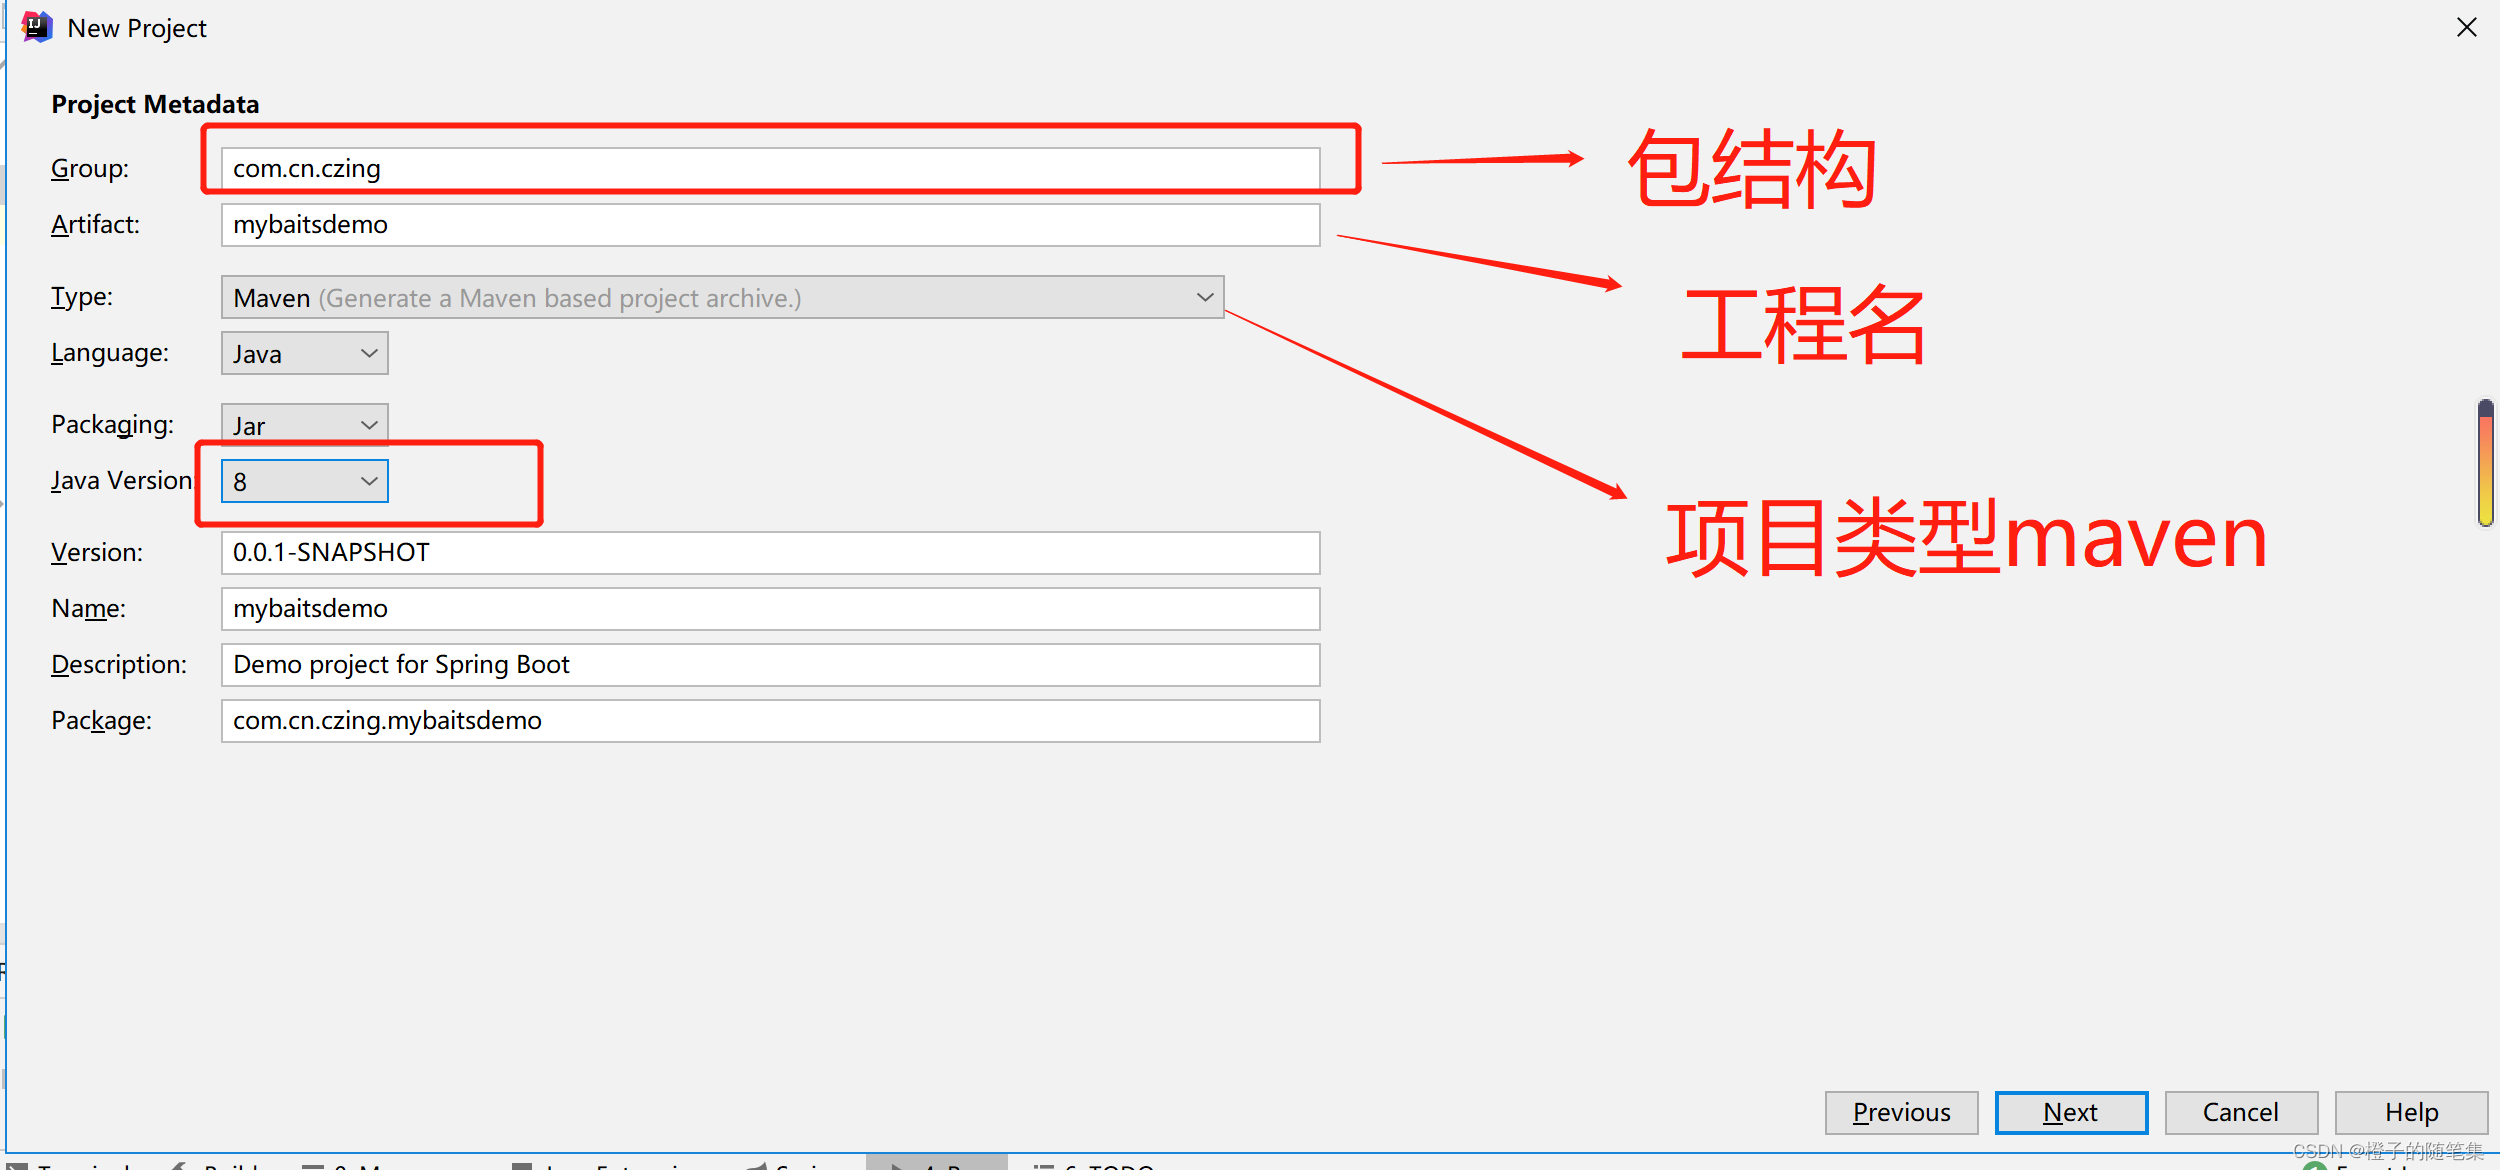
点击下一步,编辑项目相关信息
-
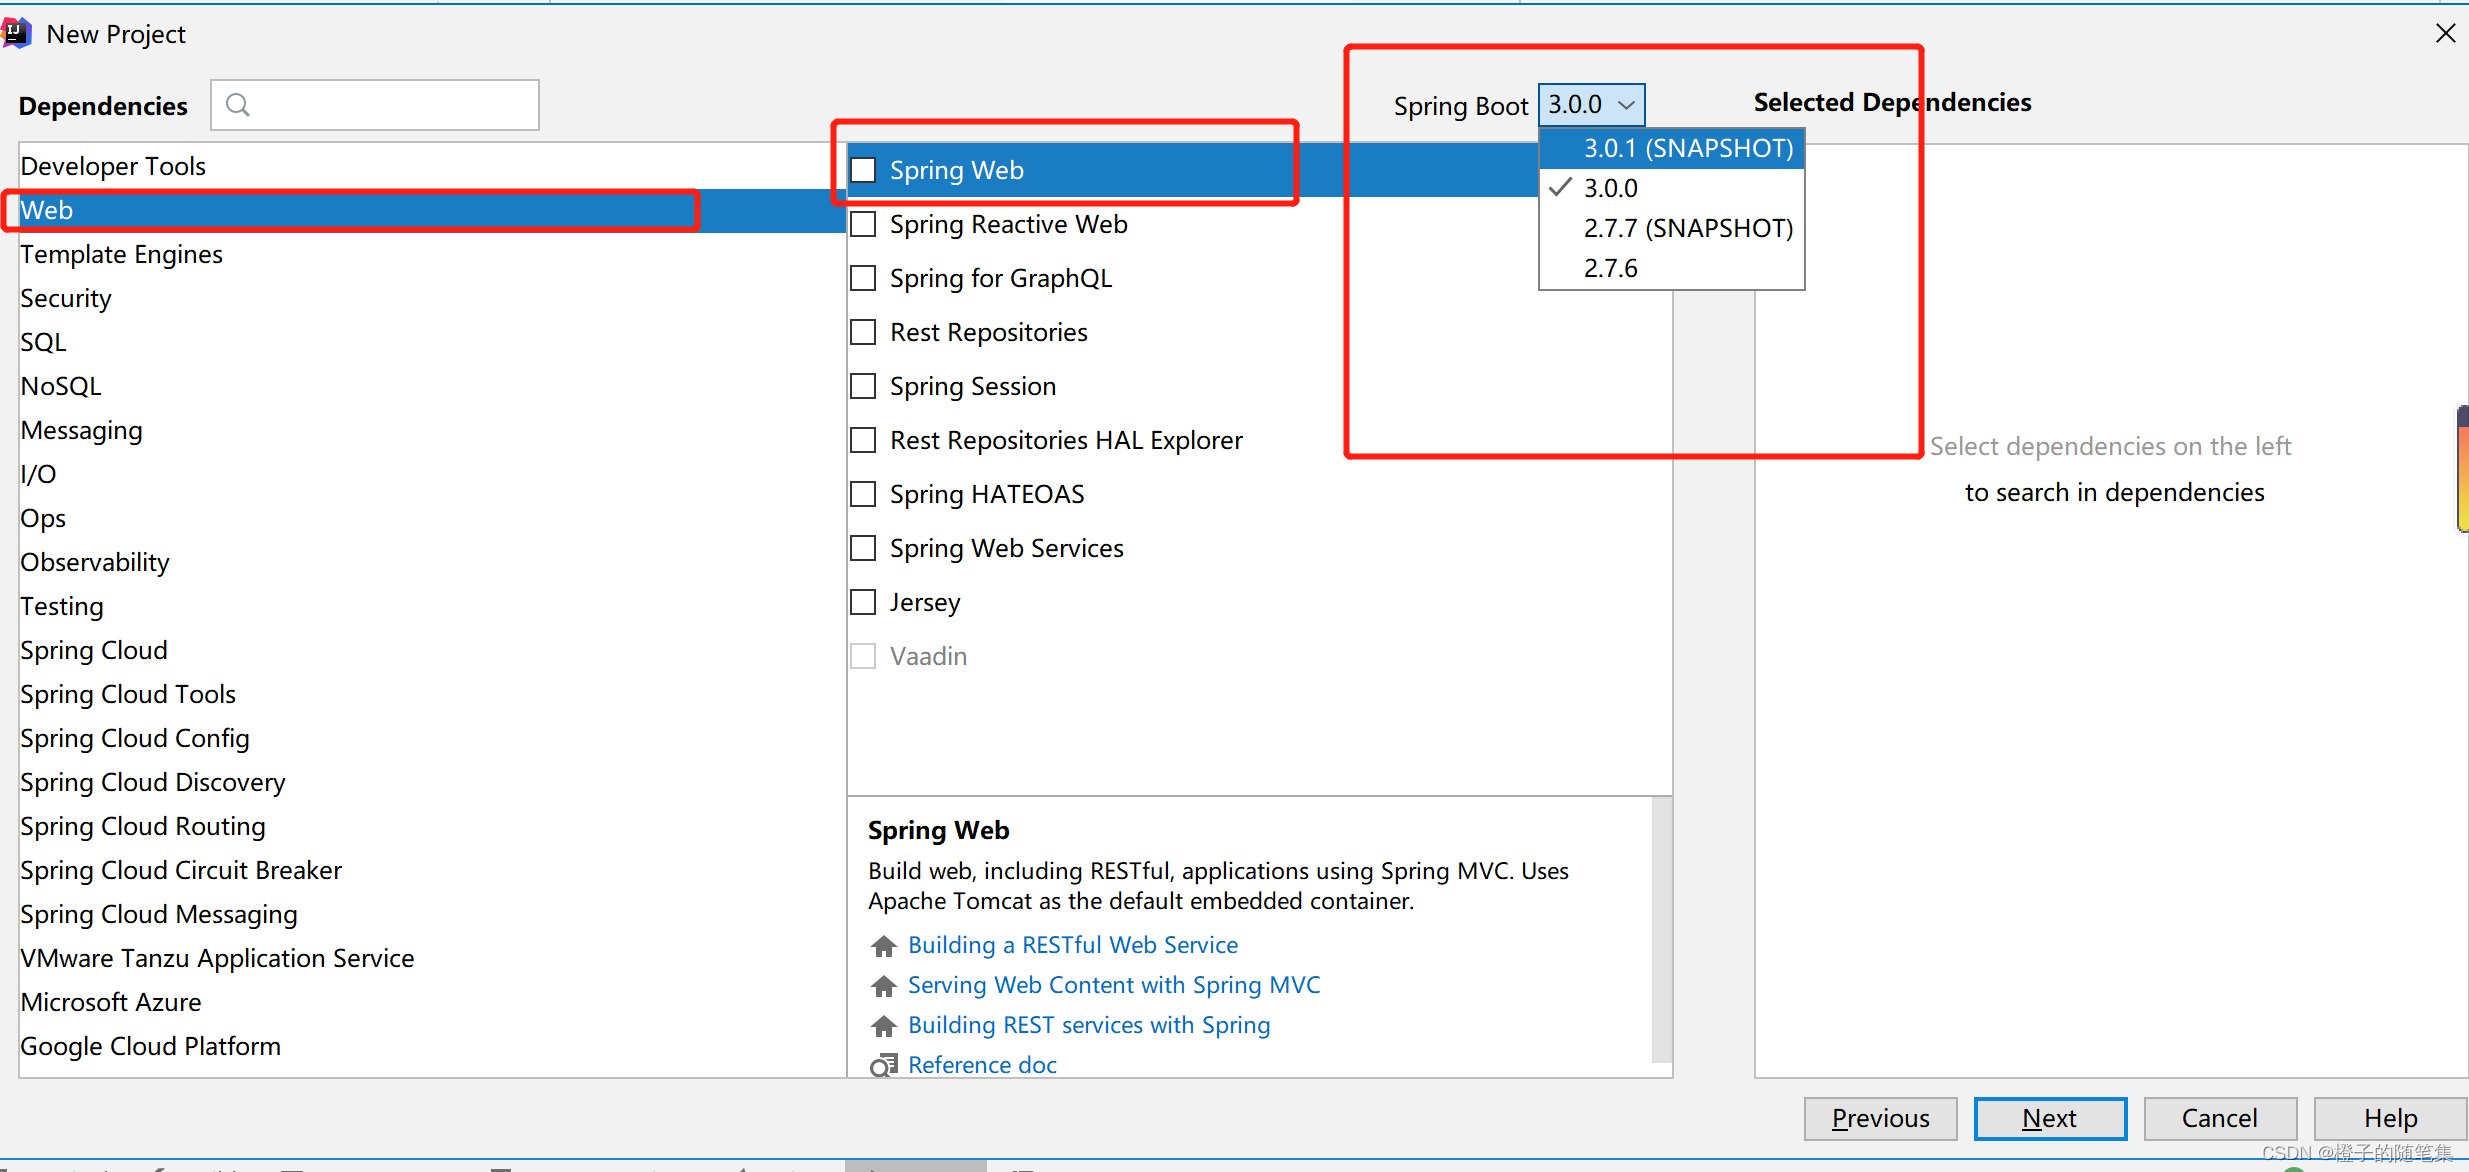
选择对应使用的springboot版本
-
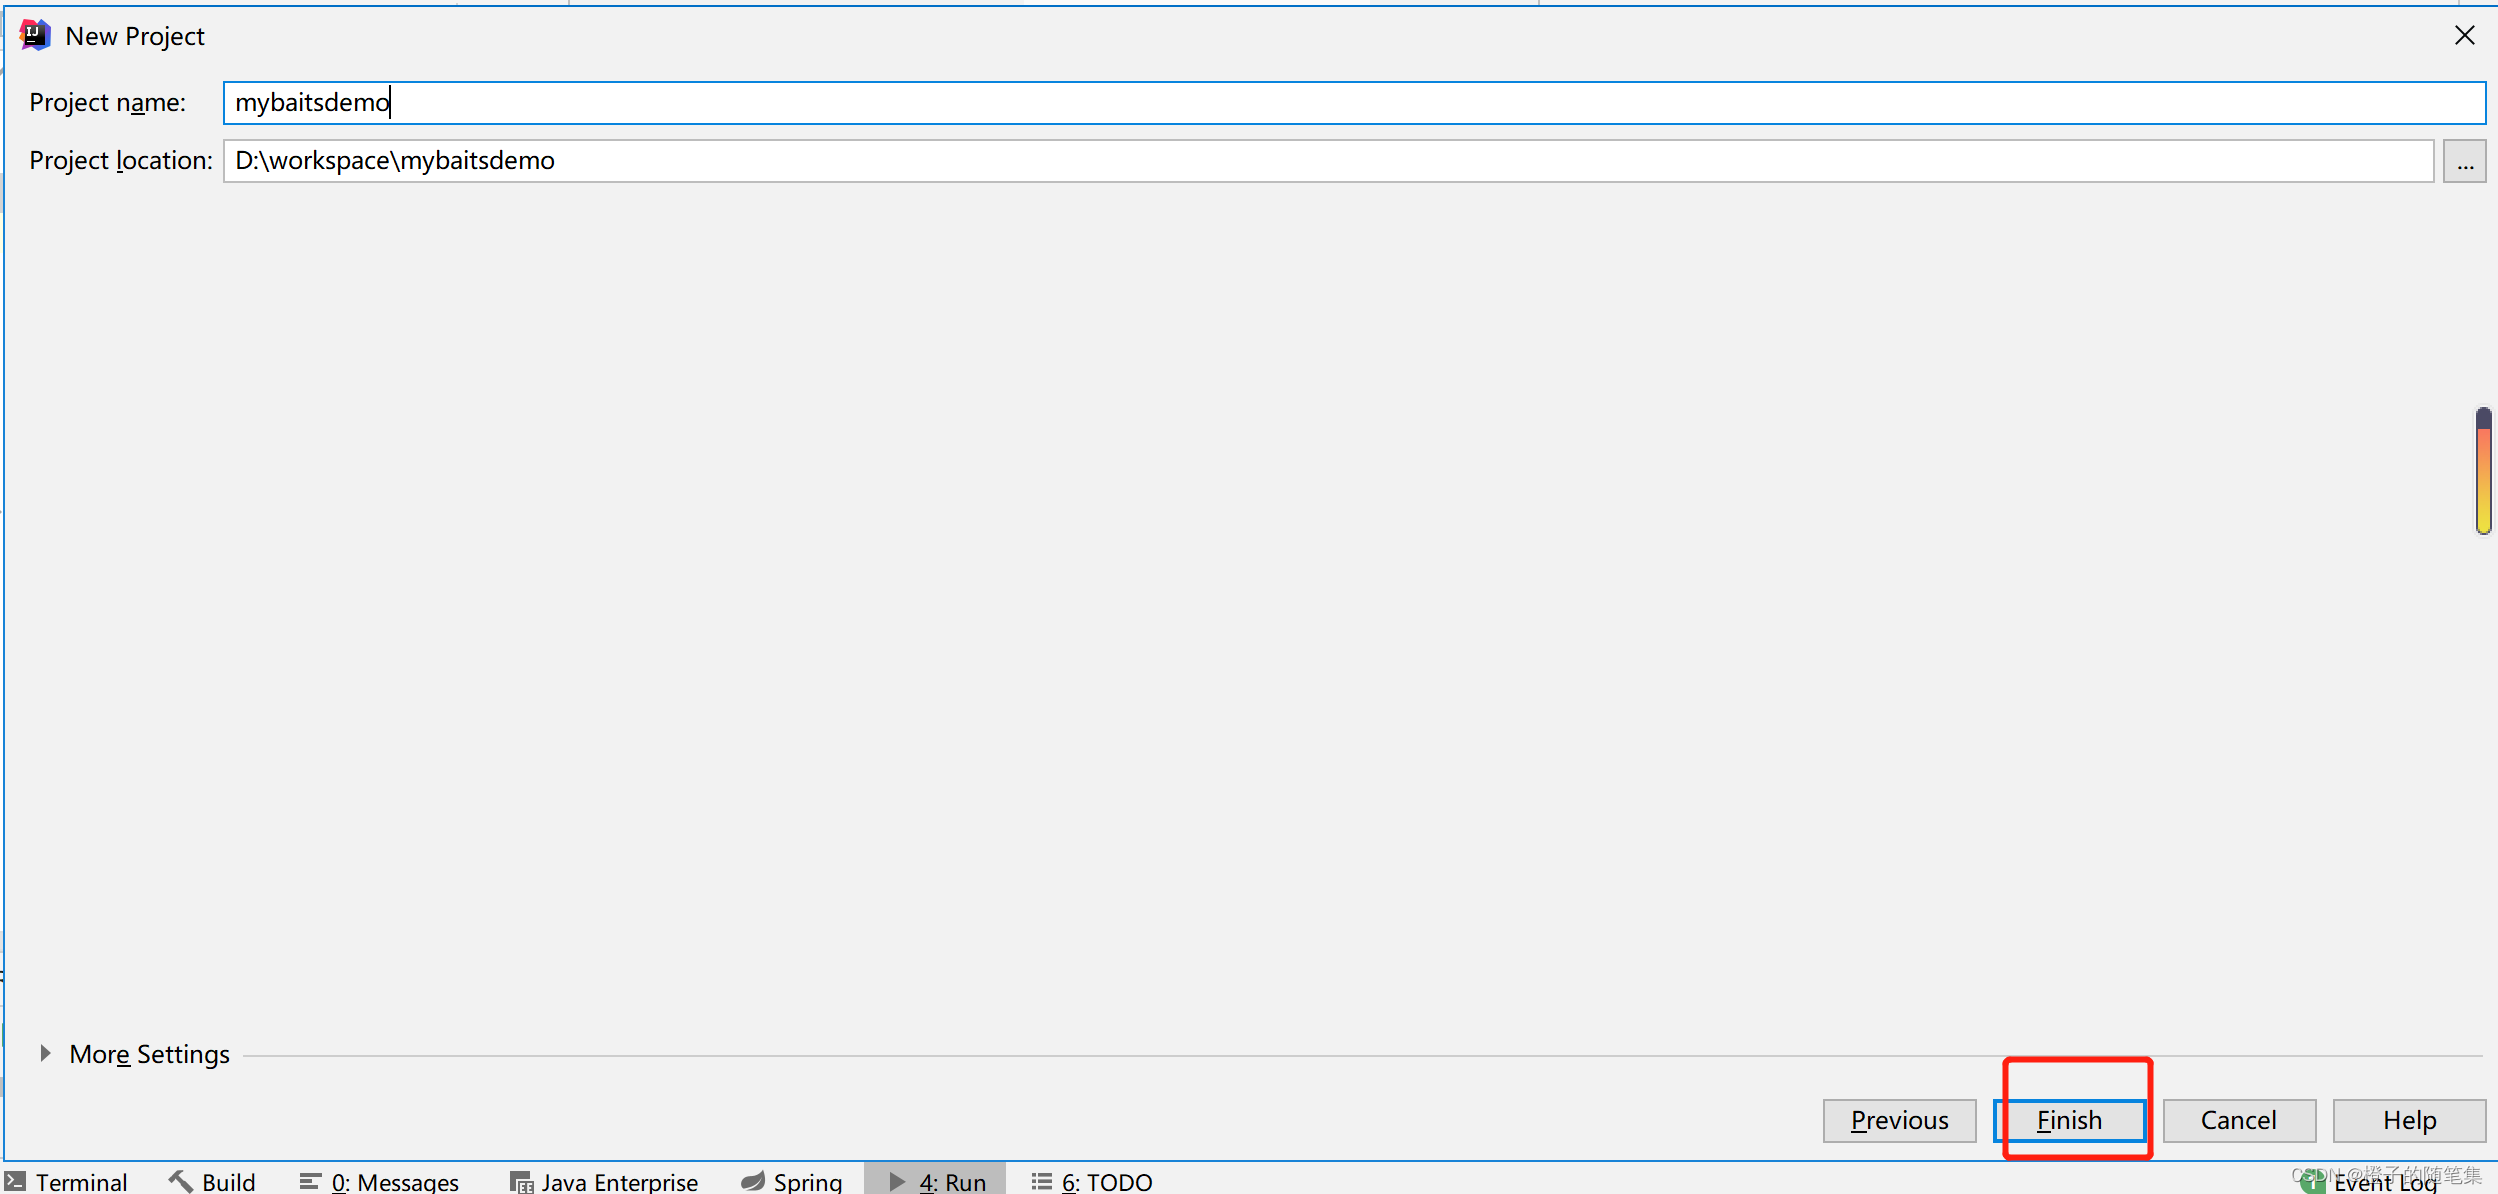
确认项目信息,点击finish
-
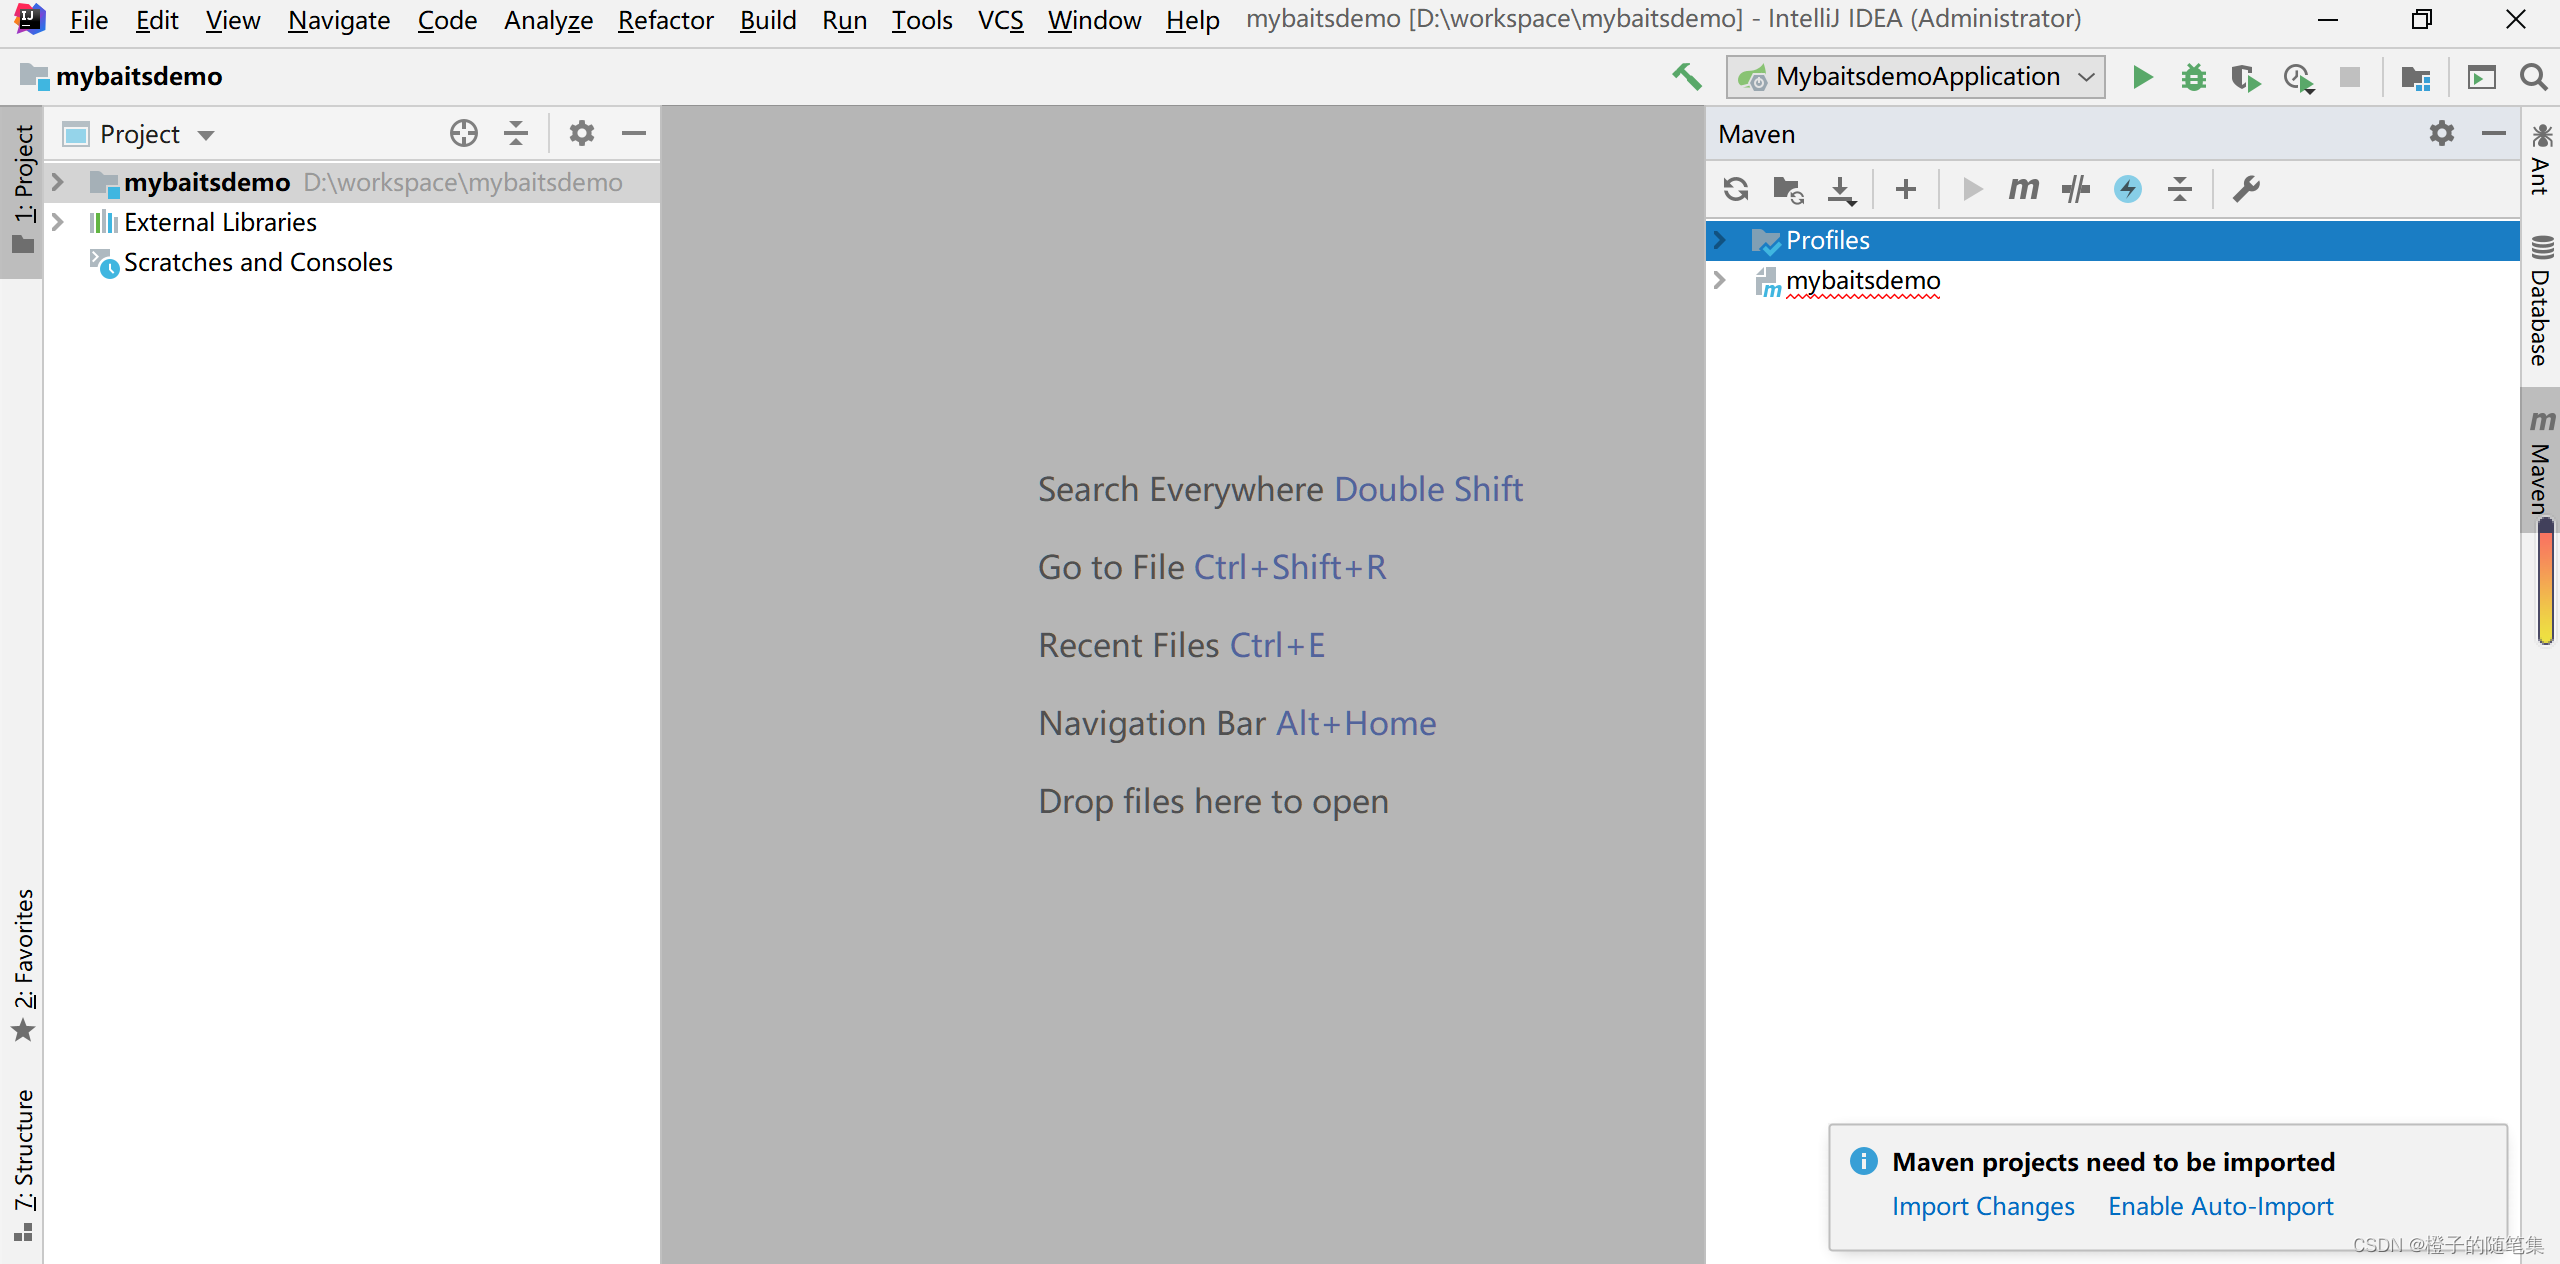
创建完成基本的springboot项目框架
-
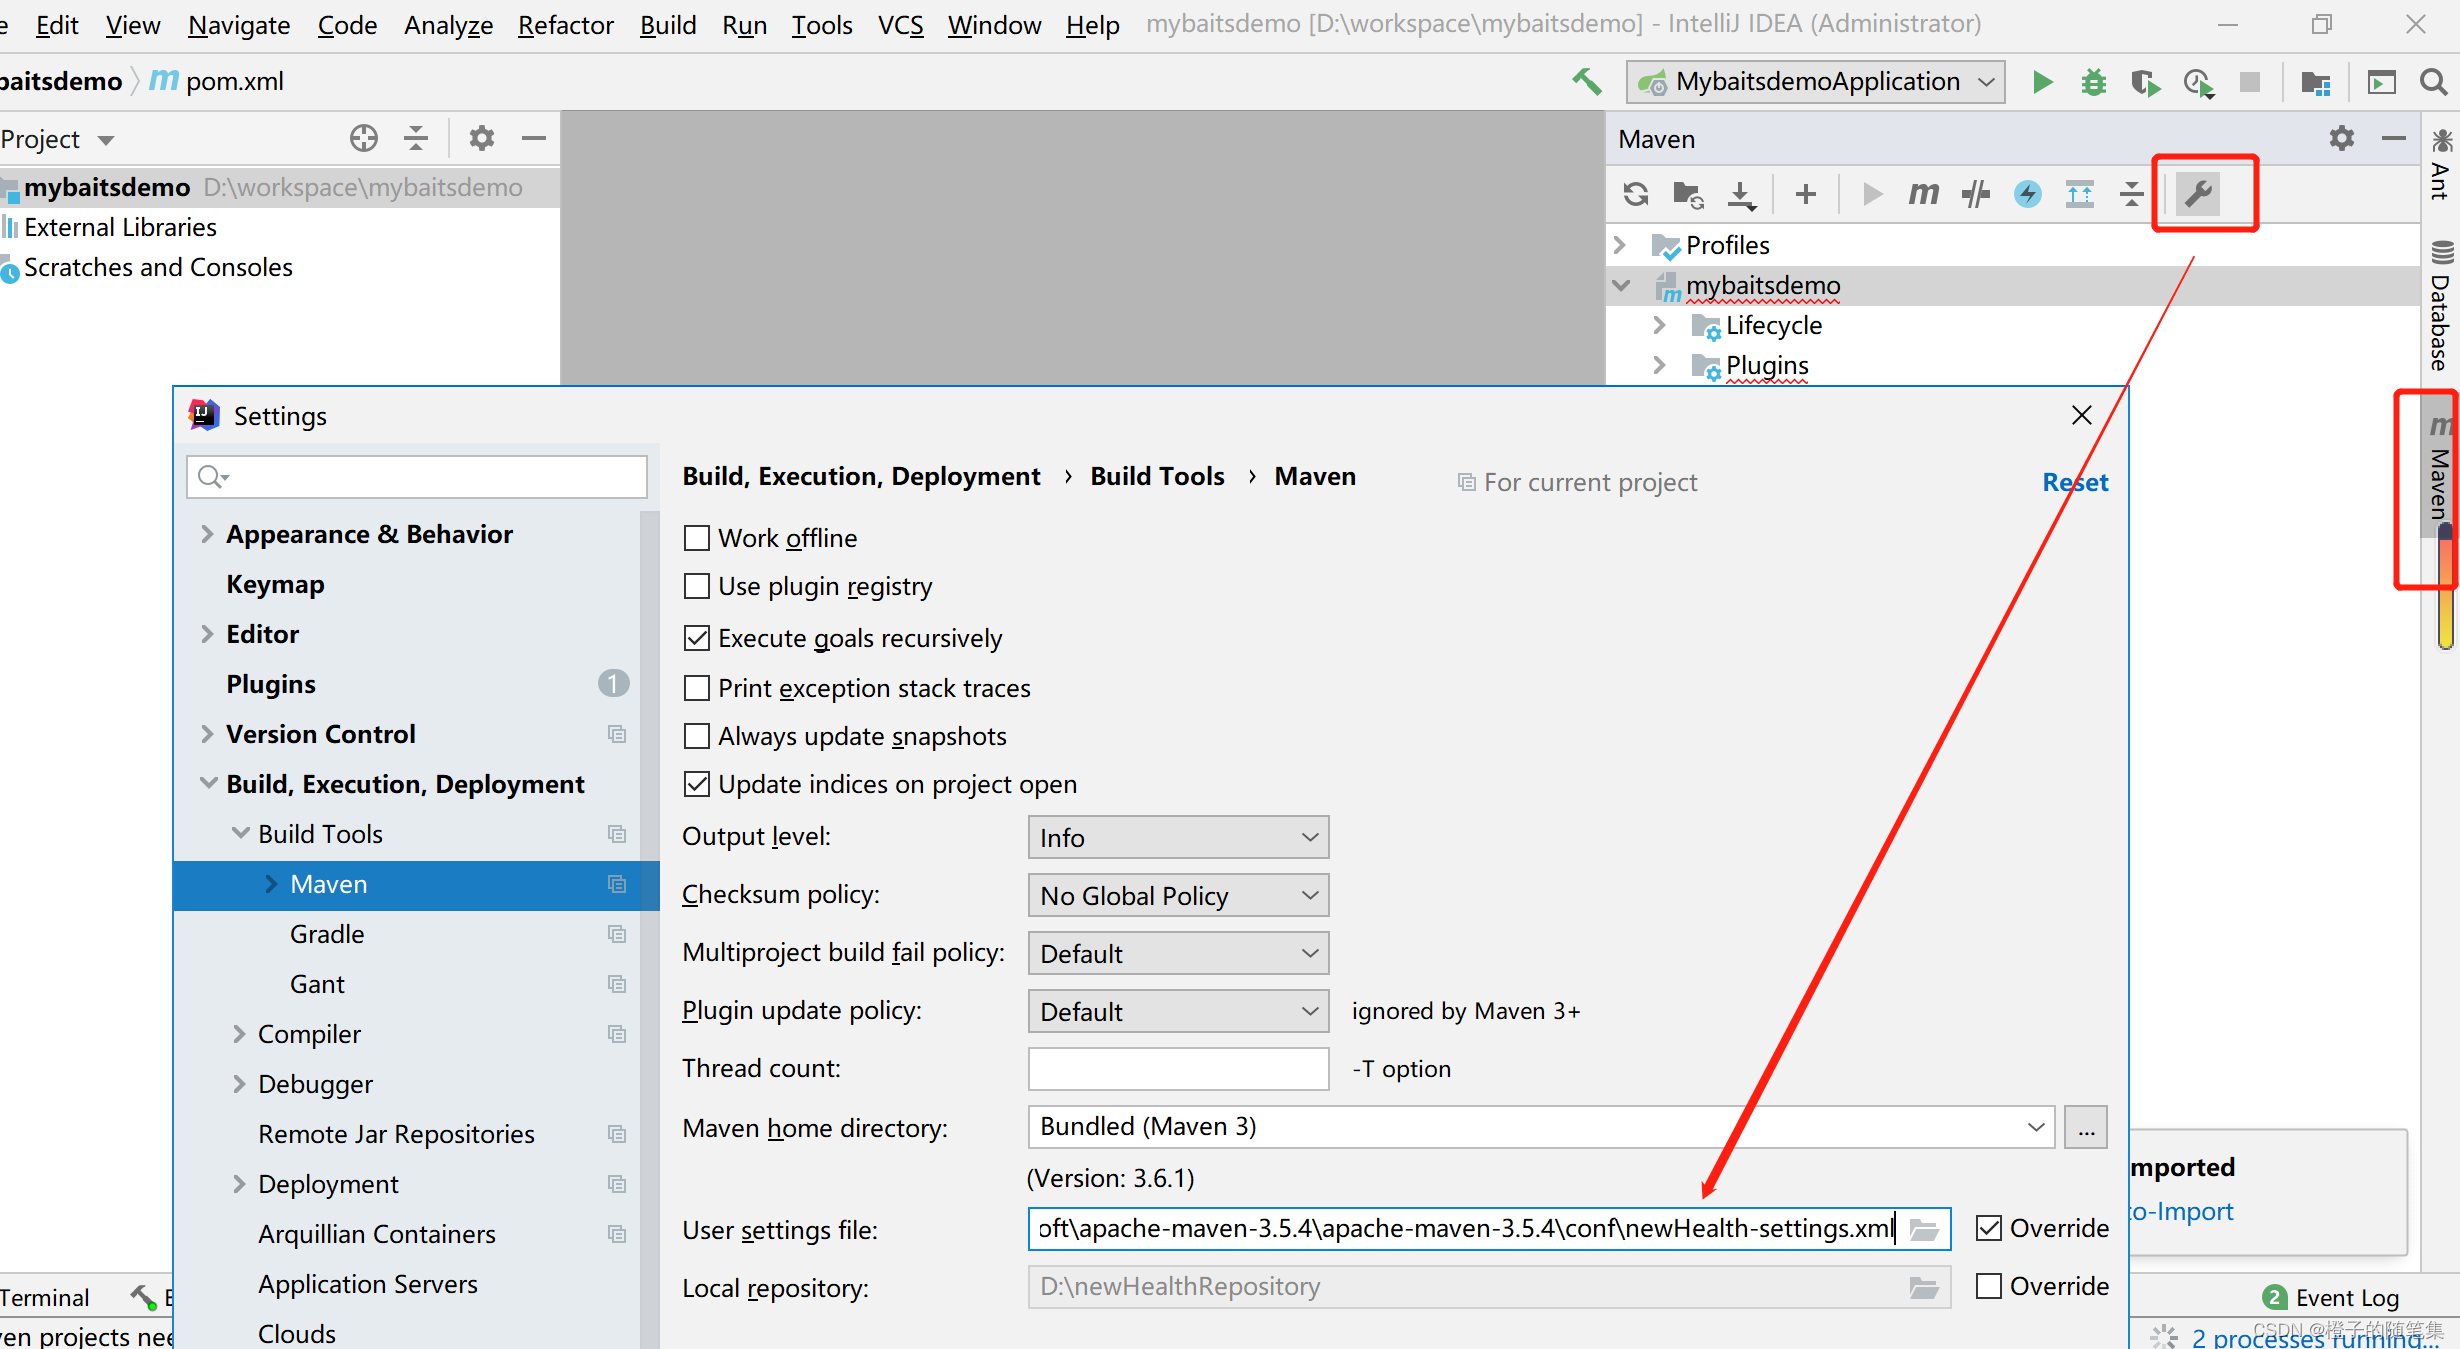
设置本地maven信息
-
具体maven的setting文件如下,如果仓库地址不对可能下载不下来对应jar
<?xml version="1.0" encoding="UTF-8" ?>

<!--
Licensed to the Apache Software Foundation (ASF) under one
or more contributor license agreements.  See the NOTICE file
distributed with this work for additional information
regarding copyright ownership.  The ASF licenses this file
to you under the Apache License, Version 2.0 (the
"License"); you may not use this file except in compliance
with the License.  You may obtain a copy of the License at
    http://www.apache.org/licenses/LICENSE-2.0
Unless required by applicable law or agreed to in writing,
software distributed under the License is distributed on an
"AS IS" BASIS, WITHOUT WARRANTIES OR CONDITIONS OF ANY
KIND, either express or implied.  See the License for the
specific language governing permissions and limitations
under the License.
-->

<!--
 | This is the configuration file for Maven. It can be specified at two levels:
 |
 |  1. User Level. This settings.xml file provides configuration for a single user,
 |                 and is normally provided in ${user.home}/.m2/settings.xml.
 |
 |                 NOTE: This location can be overridden with the CLI option:
 |
 |                 -s /path/to/user/settings.xml
 |
 |  2. Global Level. This settings.xml file provides configuration for all Maven
 |                 users on a machine (assuming they're all using the same Maven
 |                 installation). It's normally provided in
 |                 ${maven.home}/conf/settings.xml.
 |
 |                 NOTE: This location can be overridden with the CLI option:
 |
 |                 -gs /path/to/global/settings.xml
 |
 | The sections in this sample file are intended to give you a running start at
 | getting the most out of your Maven installation. Where appropriate, the default
 | values (values used when the setting is not specified) are provided.
 |
 |-->
<settings xmlns="http://maven.apache.org/SETTINGS/1.0.0"
          xmlns:xsi="http://www.w3.org/2001/XMLSchema-instance"
          xsi:schemaLocation="http://maven.apache.org/SETTINGS/1.0.0 http://maven.apache.org/xsd/settings-1.0.0.xsd">
    <!-- localRepository
     | The path to the local repository maven will use to store artifacts.
     |
     | Default: ${user.home}/.m2/repository
    <localRepository>/path/to/local/repo</localRepository>
    -->
    <!--自定义本地仓库路径-->
    <localRepository>D:\newHealthRepository</localRepository>
    <!-- interactiveMode
     | This will determine whether maven prompts you when it needs input. If set to false,
     | maven will use a sensible default value, perhaps based on some other setting, for
     | the parameter in question.
     |
     | Default: true
    <interactiveMode>true</interactiveMode>
    -->

    <!-- offline
     | Determines whether maven should attempt to connect to the network when executing a build.
     | This will have an effect on artifact downloads, artifact deployment, and others.
     |
     | Default: false
    <offline>false</offline>
    -->

    <!-- pluginGroups
     | This is a list of additional group identifiers that will be searched when resolving plugins by their prefix, i.e.
     | when invoking a command line like "mvn prefix:goal". Maven will automatically add the group identifiers
     | "org.apache.maven.plugins" and "org.codehaus.mojo" if these are not already contained in the list.
     |-->
    <pluginGroups>
        <!-- pluginGroup
         | Specifies a further group identifier to use for plugin lookup.
        <pluginGroup>com.your.plugins</pluginGroup>
        -->
    </pluginGroups>

    <!-- proxies
     | This is a list of proxies which can be used on this machine to connect to the network.
     | Unless otherwise specified (by system property or command-line switch), the first proxy
     | specification in this list marked as active will be used.
     |-->
    <proxies>
        <!-- proxy
         | Specification for one proxy, to be used in connecting to the network.
         |
        <proxy>
          <id>optional</id>
          <active>true</active>
          <protocol>http</protocol>
          <username>proxyuser</username>
          <password>proxypass</password>
          <host>proxy.host.net</host>
          <port>80</port>
          <nonProxyHosts>local.net|some.host.com</nonProxyHosts>
        </proxy>
        -->
    </proxies>

    <!-- servers
     | This is a list of authentication profiles, keyed by the server-id used within the system.
     | Authentication profiles can be used whenever maven must make a connection to a remote server.
     |-->
    <servers>

    </servers>
    <mirrors>
	<mirror>
  <id>aliyunmaven</id>
  <mirrorOf>*</mirrorOf>
  <name>阿里云公共仓库</name>
  <url>https://maven.aliyun.com/repository/public</url>
</mirror>

        <mirror>
            <id>alimaven-central</id>
            <mirrorOf>central</mirrorOf>
            <name>aliyun maven</name>
            <url>http://maven.aliyun.com/nexus/content/repositories/central/</url>
        </mirror>
        <mirror>
            <id>jboss-public-repository-group</id>
            <mirrorOf>central</mirrorOf>
            <name>JBoss Public Repository Group</name>
            <url>http://repository.jboss.org/nexus/content/groups/public</url>
        </mirror>
    </mirrors>
    <profiles>
        <profile>
            <id>jdk18</id>
            <activation>
                <jdk>1.8</jdk>
                <activeByDefault>true</activeByDefault>
            </activation>
            <properties>
                <maven.compiler.source>1.8</maven.compiler.source>
                <maven.compiler.target>1.8</maven.compiler.target>
                <maven.compiler.compilerVersion>1.8</maven.compiler.compilerVersion>
            </properties>
        </profile>

    </profiles>
</settings>
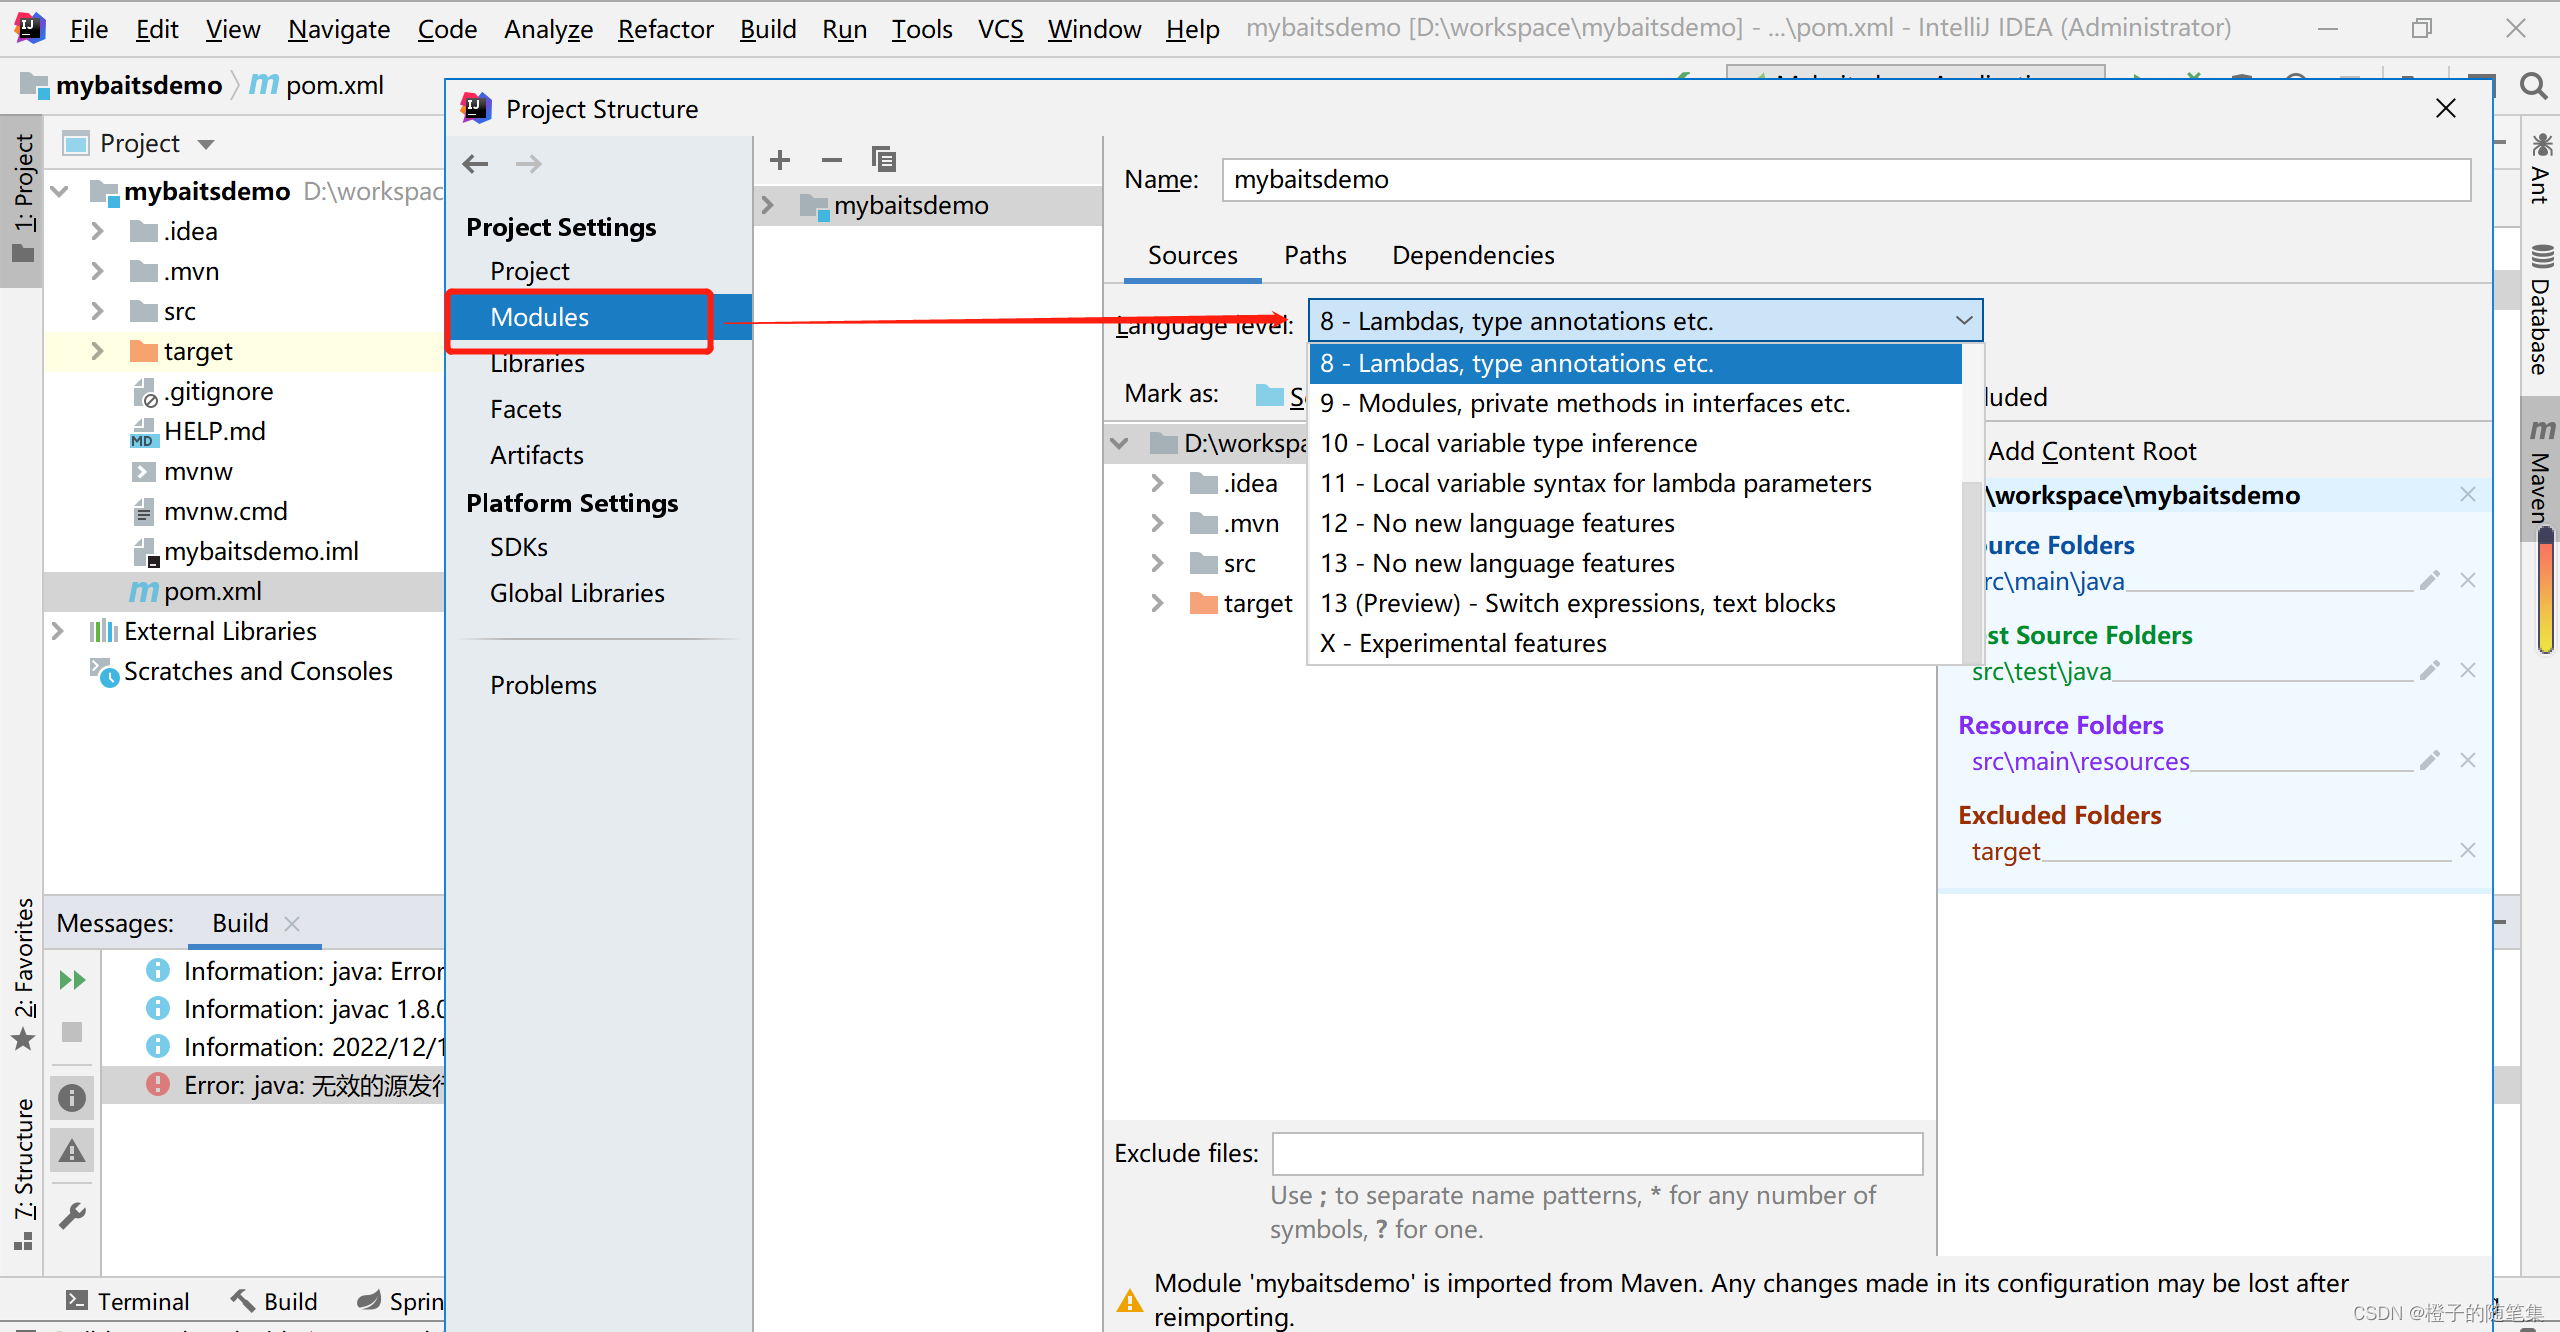
- 确认模块的编译版本和pom是否一致
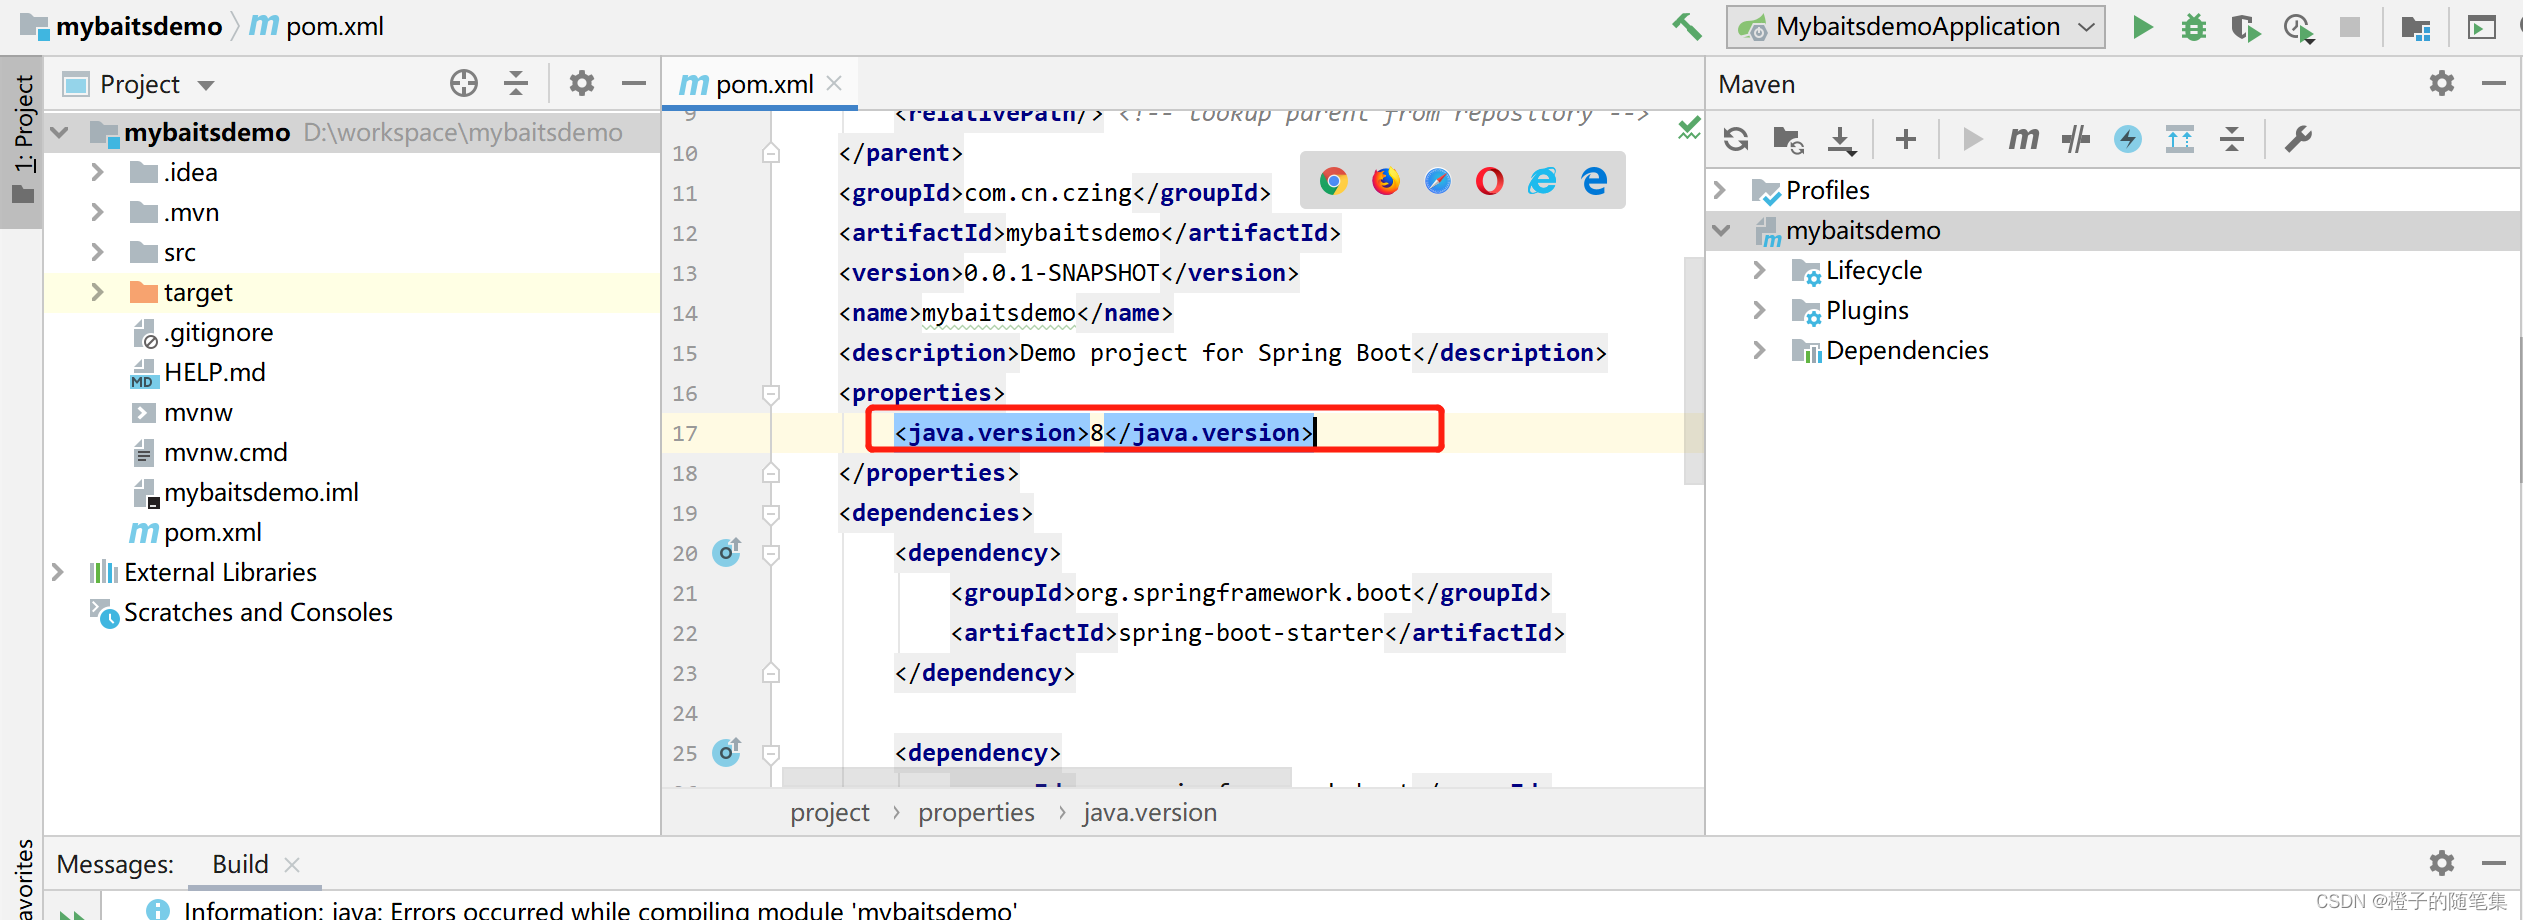
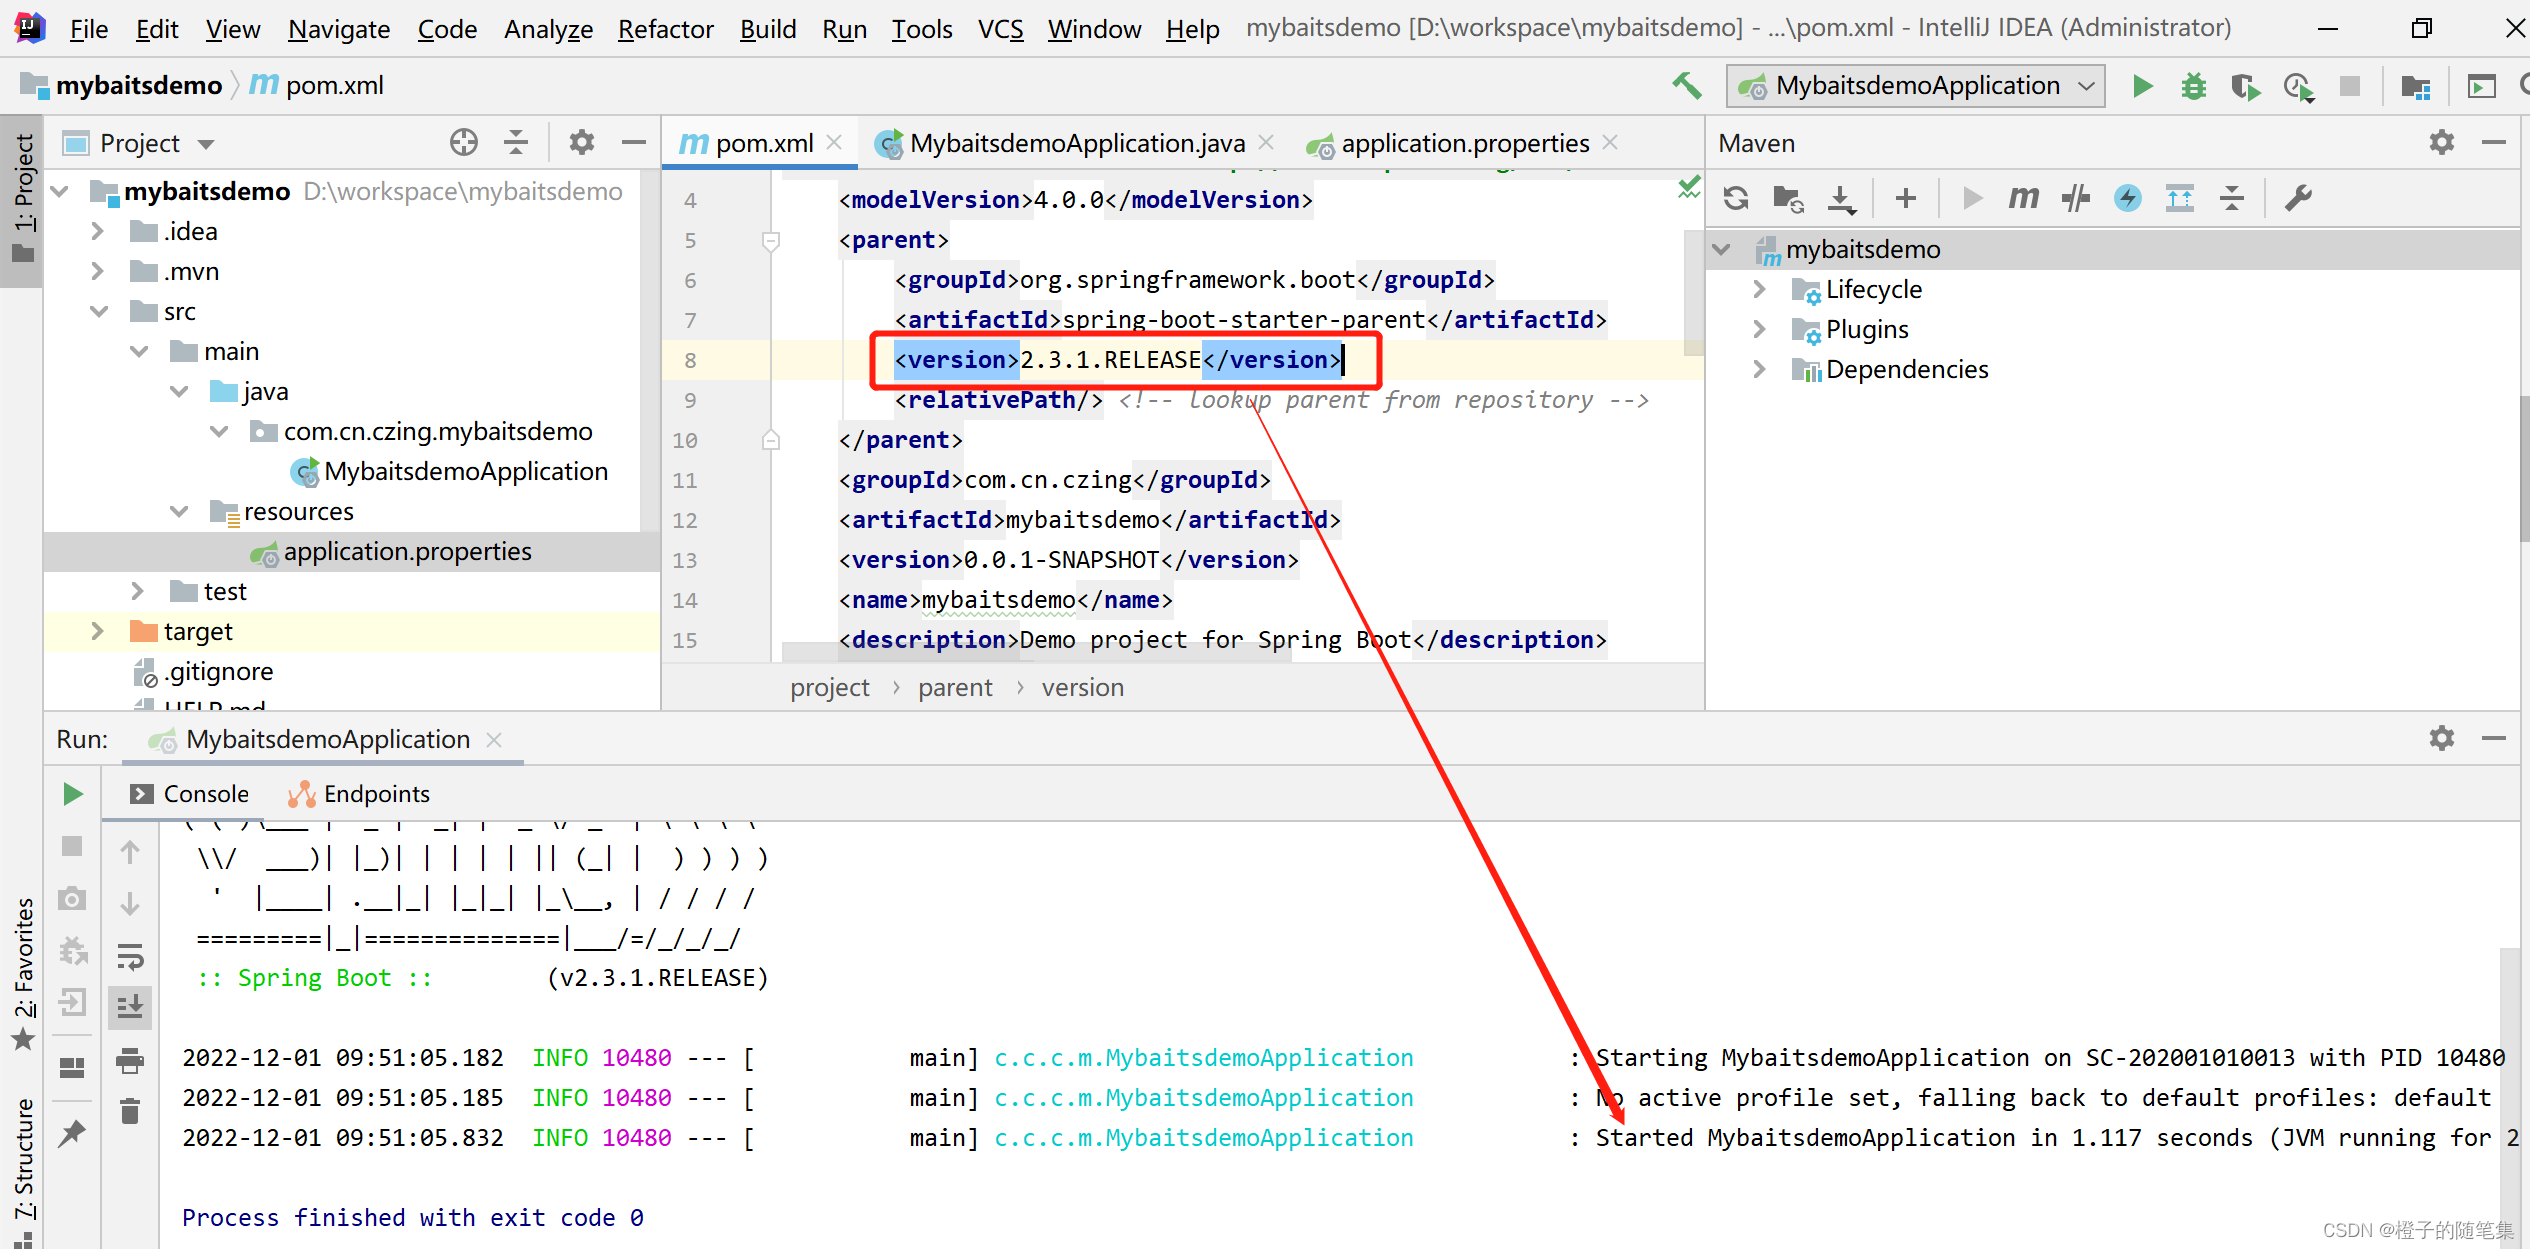
- 启动项目
如果启动报错:无效的目标发行版17,修改下面截图的参数再启动。

启动成功
后面可以根据自己想测试的技术点,增加配置文件,pom依赖和具体代码demo,开始搞起来吧!


 887
887

 被折叠的 条评论
为什么被折叠?
被折叠的 条评论
为什么被折叠?
 到【灌水乐园】发言


