


 本文详细探讨了Spring Boot的自动装配原理,展示了如何整合Quartz实现定时任务,并介绍了PageHelper分页插件的使用。此外,还讲解了Thymeleaf作为模板引擎在JSP中应用,强调其区别于静态资源的特点,不能通过浏览器直接访问。
1.springboot自动装配原理
(
1
)默认自动扫描的包 【主启动类所在的包以及子包】
@SpringBootApplication
@MapperScan(basePackages = {"com.springboot.mapper"})
//@ComponentScan(basePackages = {"com.springboot"}) //认为的指定扫描那些包
public class DemoApplication {

    public static void main(String[] args) {
        SpringApplication.run(DemoApplication.class, args);
    }

}
如果想扫描其他的包,则必须人为的指定。
@ComponentScan(basePackages = {"com.springboot"}) //认为的指定扫描那些包
(
2
)自动装配类。
web---AutoConfigurtionDispactherServlet---
自动装配
DispatcherServlet
类


只要引入相关的启动类依赖,则会加载对于的自动装配类。
2.springboot整合定时器Quartz
应用场景
:
1. 比如购买火车票,抢到票以后,如果半小时内没有支付,则取消订单。 --- 定时器 select * fromt where now-time>=302. 比如删除无用的文件。更新头像 (1.jpg)---->2.jpg---- 磁盘【大量的空间浪费】 ---- 清除无效的图片。 -- 比如凌晨 4 点
使用步骤 :
https://cron.qqe2.com/
1.
引入相关的依赖
<!-- 引入定时依赖 --><dependency><groupId> org.springframework.boot </groupId><artifactId> spring-boot-starter-quartz </artifactId></dependency
2.
创建一个任务类以及任务功能
@Component //交于spring容器创建该类的对象
public class MyTask {

    @Scheduled(cron="0/10 * * * * ?")
    public void task(){
        System.out.println("~~~~~~~~~~~~~~~~~~~~");//代码逻辑
    }


}
3.
启动定时器的注解
@SpringBootApplication
@MapperScan(basePackages = {"com.springboot.mapper"})
//@ComponentScan(basePackages = {"com.springboot"}) //认为的指定扫描那些包
@EnableScheduling //开启定时器的注解
public class DemoApplication {

    public static void main(String[] args) {
        SpringApplication.run(DemoApplication.class, args);
    }

}
3. 分页插件PageHelper
(1)加入PageHelper的启动依赖
<dependency><groupId>com.github.pagehelper</groupId><artifactId>pagehelper-spring-boot-starter</artifactId><version>1.2.13</version></dependency>
(
2
)
controller
的代码
@RestController
public class UserController {
    @Resource
    private User user;
    @GetMapping("list")
    public PageInfo<User> list(@RequestParam Integer currentPage,@RequestParam Integer pageSize){
        PageHelper.startPage(currentPage,pageSize);
        List<User> all=user.findAll();
        PageInfo<User> pageInfo=new PageInfo<>(all);
        return pageInfo;

    }
}
4. thymeleaf模板引擎---JSP
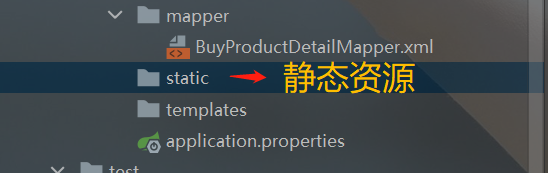
静态资源可以被浏览器直接访问, templates 模板引擎,它无法通过浏览器直接访问。
如何使用
thymeleaf:
(1)
引入相关的依赖
<dependency>
    <groupId>org.springframework.boot</groupId>
    <artifactId>spring-boot-starter-thymeleaf</artifactId>
</dependency>
(
2
)必须在网页中引入
<html xmlns:th="http://www.thymeleaf.org">
(
3
)可以使用
thymeleaf
标签库
<!--jstl标签库-->
<button>添加</button>
  <table>
        <tr>
            <th>编号</th>
            <th>姓名</th>
            <th>年龄</th>
            <th>性别</th>
            <th>操作</th>
        </tr>
        <tr th:each="item : ${pageInfo.list}">
            <th th:text="${item.id}"></th>
            <th th:text="${item.name}">姓名</th>
            <th th:text="${item.age}">年龄</th>
            <th  th:if="${item.sex==0}">男</th>
            <th  th:if="${item.sex!=0}">女</th>
            <th  >

                <a href="#">删除</a>
                <a href="#">修改</a>
            </th>
        </tr>
  </table>


 被折叠的 条评论
为什么被折叠?
被折叠的 条评论
为什么被折叠?
 到【灌水乐园】发言


