


是的最近沉迷后端 补一波spring security笔记 最近网上看了好多spring security的帖子 最大的问题就是都太老了 里面的api写法配置什么的全部都是过期 所以整理了一遍新的写发
1. spring security 是干嘛的
简单干脆的概况就是安全框架 主要包含两方面功能
认证(用户识别) 和 权限
2. 使用
pom文件添加依赖
        <dependency>
            <groupId>org.springframework.boot</groupId>
            <artifactId>spring-boot-starter-security</artifactId>
        </dependency>
然后此刻我们运行我们的springboot会发现一个神奇的现象
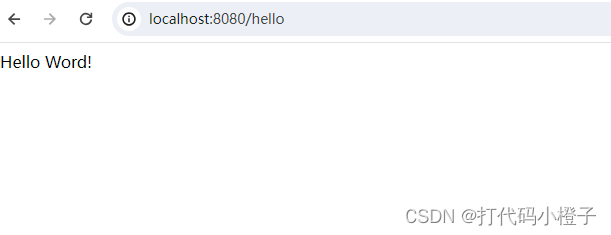
这里我有一个简单接口
package org.example.springtest.controller;
import org.springframework.web.bind.annotation.RequestMapping;
import org.springframework.web.bind.annotation.RestController;
@RestController
public class HelloController {
    @RequestMapping("/hello")
    public String Hello(){
        return "Hello Word!";
    }
}
访问 http://localhost:8080/hello
正常来说应该会返回字符串直接 但是现在会直接跳到登录页面,这个登录是框架自动加的 强制我们去登录认证
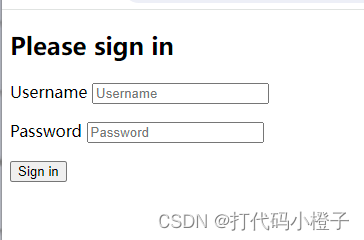
默认密码就在我们控制台中

默认账号为 user
登录成功后就可以继续访问了
3. 身份验证
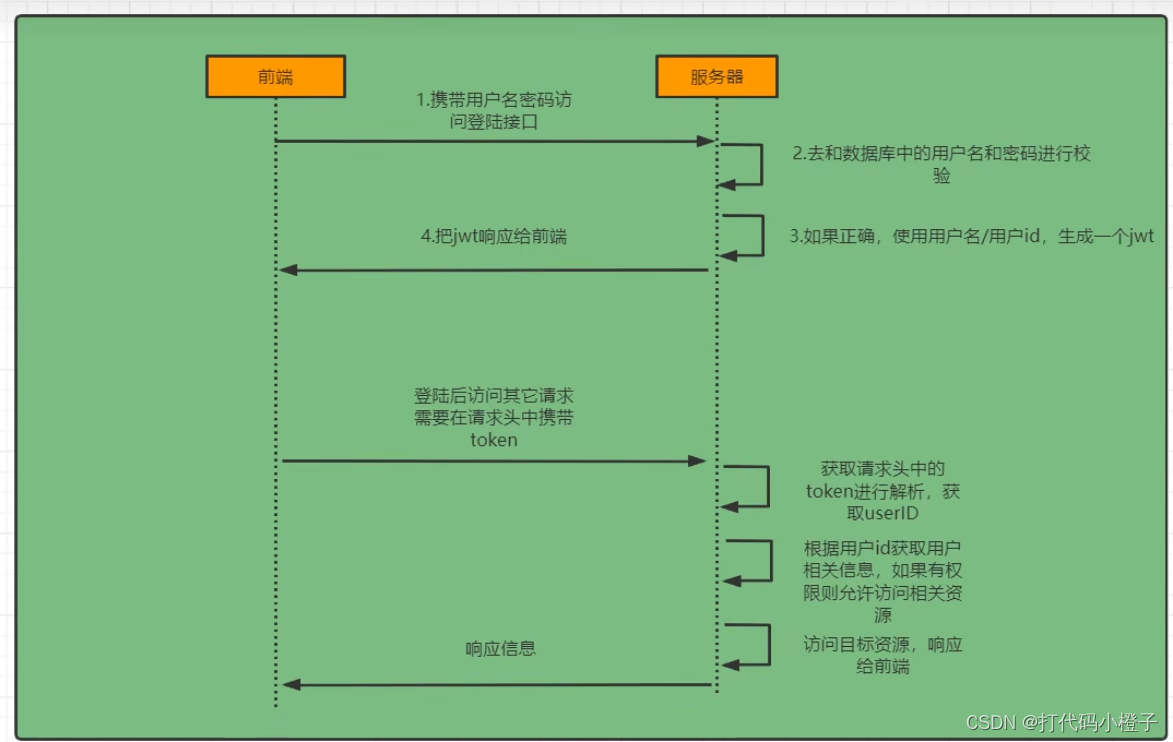
这波直接盗图
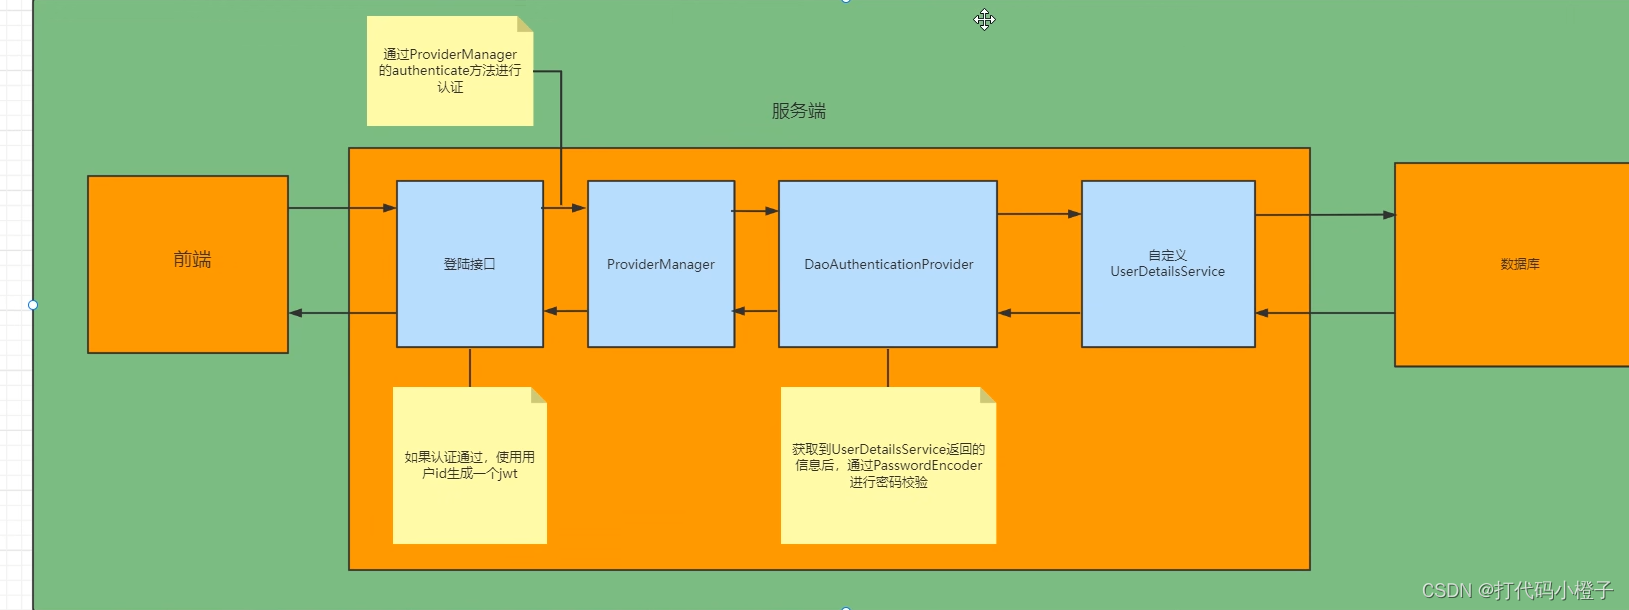
4. spingsecurity原理
其实他本身就是一条过滤器链,内部包含各种过滤器。
UsernamePasswordAuthenticationFilter 一听就知道负责用户登录的
ExceptionTranslationFiler 处理过滤器链中的异常
FilterSecurityInterceptor 权限校验
5. 自定义认证方案
除了直接登录之外,还要考虑接下来用户信息的存储和后续校验
(1)登录:
自定义登录接口
调用providerManager方法认证 成功生成jwt
把用户信息存进redis中
(2)校验
定义jwt过滤器
获取token
解析token中的userid
从redis中获取
存入SecurityContextHolder
6.开始coding
(1)完成上文的添加maven依赖
(2)创建userDetail实体类 因为在spring security中 对象都是封装在这个实体中的 这是是我们要自定义
package org.example.springtest.entity;

import lombok.AllArgsConstructor;
import lombok.Data;
import lombok.NoArgsConstructor;
import org.springframework.security.core.GrantedAuthority;
import org.springframework.security.core.userdetails.UserDetails;

import java.util.Collection;
@Data
@NoArgsConstructor
@AllArgsConstructor

public class LoginUser implements UserDetails {
    private SysUser sysUser;

    @Override
    public Collection<? extends GrantedAuthority> getAuthorities() {
        return null;
    }

    @Override
    public String getPassword() {
        return sysUser.getPassword();
    }

    @Override
    public String getUsername() {
        return sysUser.getUsername();
    }

    @Override
    public boolean isAccountNonExpired() {
        return true;
    }

    @Override
    public boolean isAccountNonLocked() {
        return true;
    }

    @Override
    public boolean isCredentialsNonExpired() {
        return true;
    }

    @Override
    public boolean isEnabled() {
        return true;
    }
}
(3)编写userDetailSevice的实现类 逻辑非常的简单
package org.example.springtest.service.impl;

import com.baomidou.mybatisplus.core.conditions.query.QueryWrapper;
import jakarta.annotation.Resource;
import org.example.springtest.entity.LoginUser;
import org.example.springtest.entity.SysUser;
import org.example.springtest.exception.AppException;
import org.example.springtest.exception.AppExceptionCodeMsg;
import org.example.springtest.service.SysUserService;
import org.springframework.security.core.userdetails.UserDetails;
import org.springframework.security.core.userdetails.UserDetailsService;
import org.springframework.security.core.userdetails.UsernameNotFoundException;
import org.springframework.stereotype.Component;

import java.util.Objects;
@Component
public class UserDetailServiceImpl implements UserDetailsService {
    @Resource
    private SysUserService sysUserService;
    @Override
    public UserDetails loadUserByUsername(String username) throws UsernameNotFoundException {
        QueryWrapper<SysUser> queryWrapper=new QueryWrapper<>();
        queryWrapper.eq("username",username);
        SysUser sysUser=sysUserService.getOne(queryWrapper);
        if(Objects.isNull(sysUser)){
            throw new AppException(AppExceptionCodeMsg.USERNAME_NOT_EXITS);
        }
        return new LoginUser(sysUser);
    }
}
就是查我们自己的表 我的是sys_user 所以引入sysUserSevice 查询之后返回一个通过我们自定义包装的userDetail实体,如果没查到直接抛异常。
(4)编写配置信息
config
注意老版都是要用什么WebSecurityConfigurationAdpter 这些都已经被官方弃用了,新版直接下面这么写就行。
package org.example.springtest.config;

import org.springframework.context.annotation.Bean;
import org.springframework.context.annotation.Configuration;
import org.springframework.security.config.annotation.web.builders.HttpSecurity;
import org.springframework.security.config.annotation.web.configuration.EnableWebSecurity;
import org.springframework.security.config.annotation.web.configurers.AbstractHttpConfigurer;
import org.springframework.security.crypto.bcrypt.BCryptPasswordEncoder;
import org.springframework.security.crypto.password.PasswordEncoder;
import org.springframework.security.web.SecurityFilterChain;

@Configuration
@EnableWebSecurity
// Security自定义配置器
public class SecurityConfig     {
    @Bean
    public PasswordEncoder passwordEncoder() {
        return new BCryptPasswordEncoder();
    }
//    @Bean
//    public SecurityFilterChain securityFilterChain(HttpSecurity http) throws Exception {
//         http
//                //关闭csrf
//                .csrf(AbstractHttpConfigurer::disable)
//                //关闭跨域
//                .cors(AbstractHttpConfigurer::disable)
//                .authorizeHttpRequests((auth) -> auth
//                        .requestMatchers("/api/admin/**").hasRole("ADMIN")
//                        .requestMatchers("/api/user/**").hasRole("USER")
//                        .anyRequest().authenticated()
//                );
//         return http.build();
//
//    }
}
到这一步基本的就完成了,但是这里主要数据库存的密码应该也是通过BCryptPasswordEncoder加密的密码,所以我写了一个测试类来生成密码
    @Autowired
    PasswordEncoder passwordEncoder;

    @Test
    public void generateUserPassWord(){
        System.out.println(passwordEncoder.encode("1234"));
        System.out.println(passwordEncoder.matches("1234","$2a$10$P7ewYAX3DSvtnnQ5Wid8KOAOfQx7PpZ85J5.d9HHqulfyplNaP2I6"));
    }
把生成的1234密码加到数据库
ok然后访问接口发现又跳到了登录页面 输入密码1234 登录成功!最基本的就结束了,简单的用户认证,密码加密。
接下来就是重头戏了 我们不能一直用框架提供的安全登录页面 毕竟现在都是前后端分离,我们需要自己实现自定义的登陆验证。
7.自定义登陆接口
(1)自定义登陆控制层
简单例子了就
package org.example.springtest.controller;

import io.swagger.v3.oas.annotations.Operation;
import io.swagger.v3.oas.annotations.tags.Tag;
import jakarta.annotation.Resource;
import org.example.springtest.entity.User;
import org.example.springtest.service.LoginService;
import org.springframework.web.bind.annotation.PostMapping;
import org.springframework.web.bind.annotation.RequestBody;
import org.springframework.web.bind.annotation.RestController;

import java.util.HashMap;

@Tag(name = "登录")
@RestController
public class LoginController {
    @Resource
    private LoginService loginService;

    @Operation(summary = "用户登录")
    @PostMapping("/user/login")
    public HashMap<String, Object> login(@RequestBody User user) {
        return loginService.login(user);
    }
}
然后这里的User类型是我自定义的 后面登陆传输数据的格式
package org.example.springtest.entity;

import lombok.Data;

import java.io.Serializable;

@Data
public class User implements Serializable {
    private String username;
    private String password;
    private String identifyCode;
}
但是现在问题就来了,未经授权的接口都会被security阻挡,但是我们的登录页面肯定是不需要身份验证的,登录请求也是不需要身份验证就可以访问的,不然没法登录了。
所以接下来去配置security
(2)修改配置
这里我是最新版的写法
package org.example.springtest.config;

import org.springframework.context.annotation.Bean;
import org.springframework.context.annotation.Configuration;
import org.springframework.security.authentication.AuthenticationManager;
import org.springframework.security.config.annotation.authentication.configuration.AuthenticationConfiguration;
import org.springframework.security.config.annotation.web.builders.HttpSecurity;
import org.springframework.security.config.annotation.web.configuration.EnableWebSecurity;
import org.springframework.security.config.annotation.web.configurers.AbstractHttpConfigurer;
import org.springframework.security.config.http.SessionCreationPolicy;
import org.springframework.security.crypto.bcrypt.BCryptPasswordEncoder;
import org.springframework.security.crypto.password.PasswordEncoder;
import org.springframework.security.web.SecurityFilterChain;

@Configuration
@EnableWebSecurity
// Security自定义配置器
public class SecurityConfig {
    @Bean
    public PasswordEncoder passwordEncoder() {
        return new BCryptPasswordEncoder();
    }

    @Bean
    public AuthenticationManager authenticationManager(AuthenticationConfiguration authenticationConfiguration) throws Exception {
        return authenticationConfiguration.getAuthenticationManager();
    }

    @Bean
    public SecurityFilterChain securityFilterChain(HttpSecurity http) throws Exception {
        http
                //关闭csrf
                .csrf(AbstractHttpConfigurer::disable)
                .sessionManagement((sessionManagement) -> sessionManagement.sessionCreationPolicy(SessionCreationPolicy.STATELESS))
                .authorizeHttpRequests((auth) -> auth
//                        .requestMatchers("/api/admin/**").hasRole("ADMIN")
//                        .requestMatchers("/api/user/**").hasRole("USER")
                                .requestMatchers("/user/login").permitAll()
                                .anyRequest().authenticated();
                );
        return http.build();
    }
}
这样的话我们/user/login接口就可以跳过身份认证。其他的接口都需要认真,同时呢这里多了一个authenticationManager,这个我们后面登录认证需要使用,本来他是被security默认创建的,但是当我们自定义实现登陆认证,userDetail后,这个默认生产的manager就会返回空,也就是不再默认生成,所以我们需要注入一个新的。
(3)配置实现后就是service业务层了
接口类 非常的朴素就登陆就好
package org.example.springtest.service;

import org.example.springtest.entity.User;

import java.util.HashMap;

public interface LoginService {
     HashMap<String,Object> login(User user);
}
实现类
package org.example.springtest.service.impl;

import jakarta.annotation.Resource;
import org.example.springtest.entity.LoginUser;
import org.example.springtest.entity.User;
import org.example.springtest.exception.AppException;
import org.example.springtest.exception.AppExceptionCodeMsg;
import org.example.springtest.service.LoginService;
import org.example.springtest.utlis.JwtUtil;
import org.springframework.data.redis.core.RedisTemplate;
import org.springframework.security.authentication.AuthenticationManager;
import org.springframework.security.authentication.UsernamePasswordAuthenticationToken;
import org.springframework.security.core.Authentication;
import org.springframework.stereotype.Service;

import java.util.HashMap;
import java.util.Objects;


@Service
public class LoginServiceImpl implements LoginService {
    @Resource
    private AuthenticationManager authenticationManager;
    @Resource
    RedisTemplate<String,Object> redisTemplate;
    @Override
    public HashMap<String, Object> login(User user) {
        UsernamePasswordAuthenticationToken authenticationToken = new UsernamePasswordAuthenticationToken(user.getUsername(), user.getPassword());
        Authentication authentication = authenticationManager.authenticate(authenticationToken);
        //验证没通过
        if (Objects.isNull(authentication)) {
            throw new AppException(AppExceptionCodeMsg.USERNAME_NOT_EXITS);
        }
        LoginUser loginUser= (LoginUser) authentication.getPrincipal();
        HashMap<String, Object> hashMap=new HashMap<>();
        Long userId=loginUser.getSysUser().getId();
        hashMap.put("token",JwtUtil.getJwtTokenByUesr(loginUser.getSysUser()));
        hashMap.put("userId", userId);
        redisTemplate.opsForValue().set("loginUser"+userId,loginUser);
        //认证通过生成jwt
        return hashMap;
    }
}
这里同时运用了jwt生产token以及redis缓存用户信息,加一下说明吧这里。
(4)jwt
这里我用的比较简单 这是引入
  <dependency>
            <groupId>com.auth0</groupId>
            <artifactId>java-jwt</artifactId>
            <version>3.11.0</version>
        </dependency>
然后创建工具类 自己编的也比较无脑
package org.example.springtest.utlis;

import com.auth0.jwt.JWT;
import com.auth0.jwt.JWTCreator;
import com.auth0.jwt.algorithms.Algorithm;
import com.auth0.jwt.interfaces.DecodedJWT;
import org.example.springtest.entity.SysUser;
import org.springframework.stereotype.Component;

import java.util.Calendar;

@Component
public class JwtUtil {
    private static final String SING = "WangChenTestToken";

    public static String getJwtTokenByUesr(SysUser sysUser) {
        //获取日历对象
        Calendar calendar = Calendar.getInstance();
        //默认7天过期
        calendar.add(Calendar.MINUTE, 30);
        //新建一个JWT的Builder对象
        JWTCreator.Builder builder = JWT.create();
        //将map集合中的数据设置进payload
        builder
                .withClaim("username", sysUser.getUsername())
                .withClaim("email", sysUser.getEmail())
                .withClaim("age", sysUser.getAge())
                .withClaim("sex", sysUser.getSex());

        //设置过期时间和签名
        String sign = builder.withExpiresAt(calendar.getTime()).sign(Algorithm.HMAC256(SING));
        return sign;
    }

    /**
     * 验签并返回DecodedJWT
     *
     * @param token 令牌
     */
    public static DecodedJWT getTokenInfo(String token) {
        return JWT.require(Algorithm.HMAC256(SING)).build().verify(token);
    }
    public static String getPayLoadValue(DecodedJWT decodedJWT,String key){
        return decodedJWT.getClaim(key).asString();
    }
}
(5)redis
这个就没什么好说的了 看一下其他博主redis怎么玩就行
ok一切就绪 我们直接测试
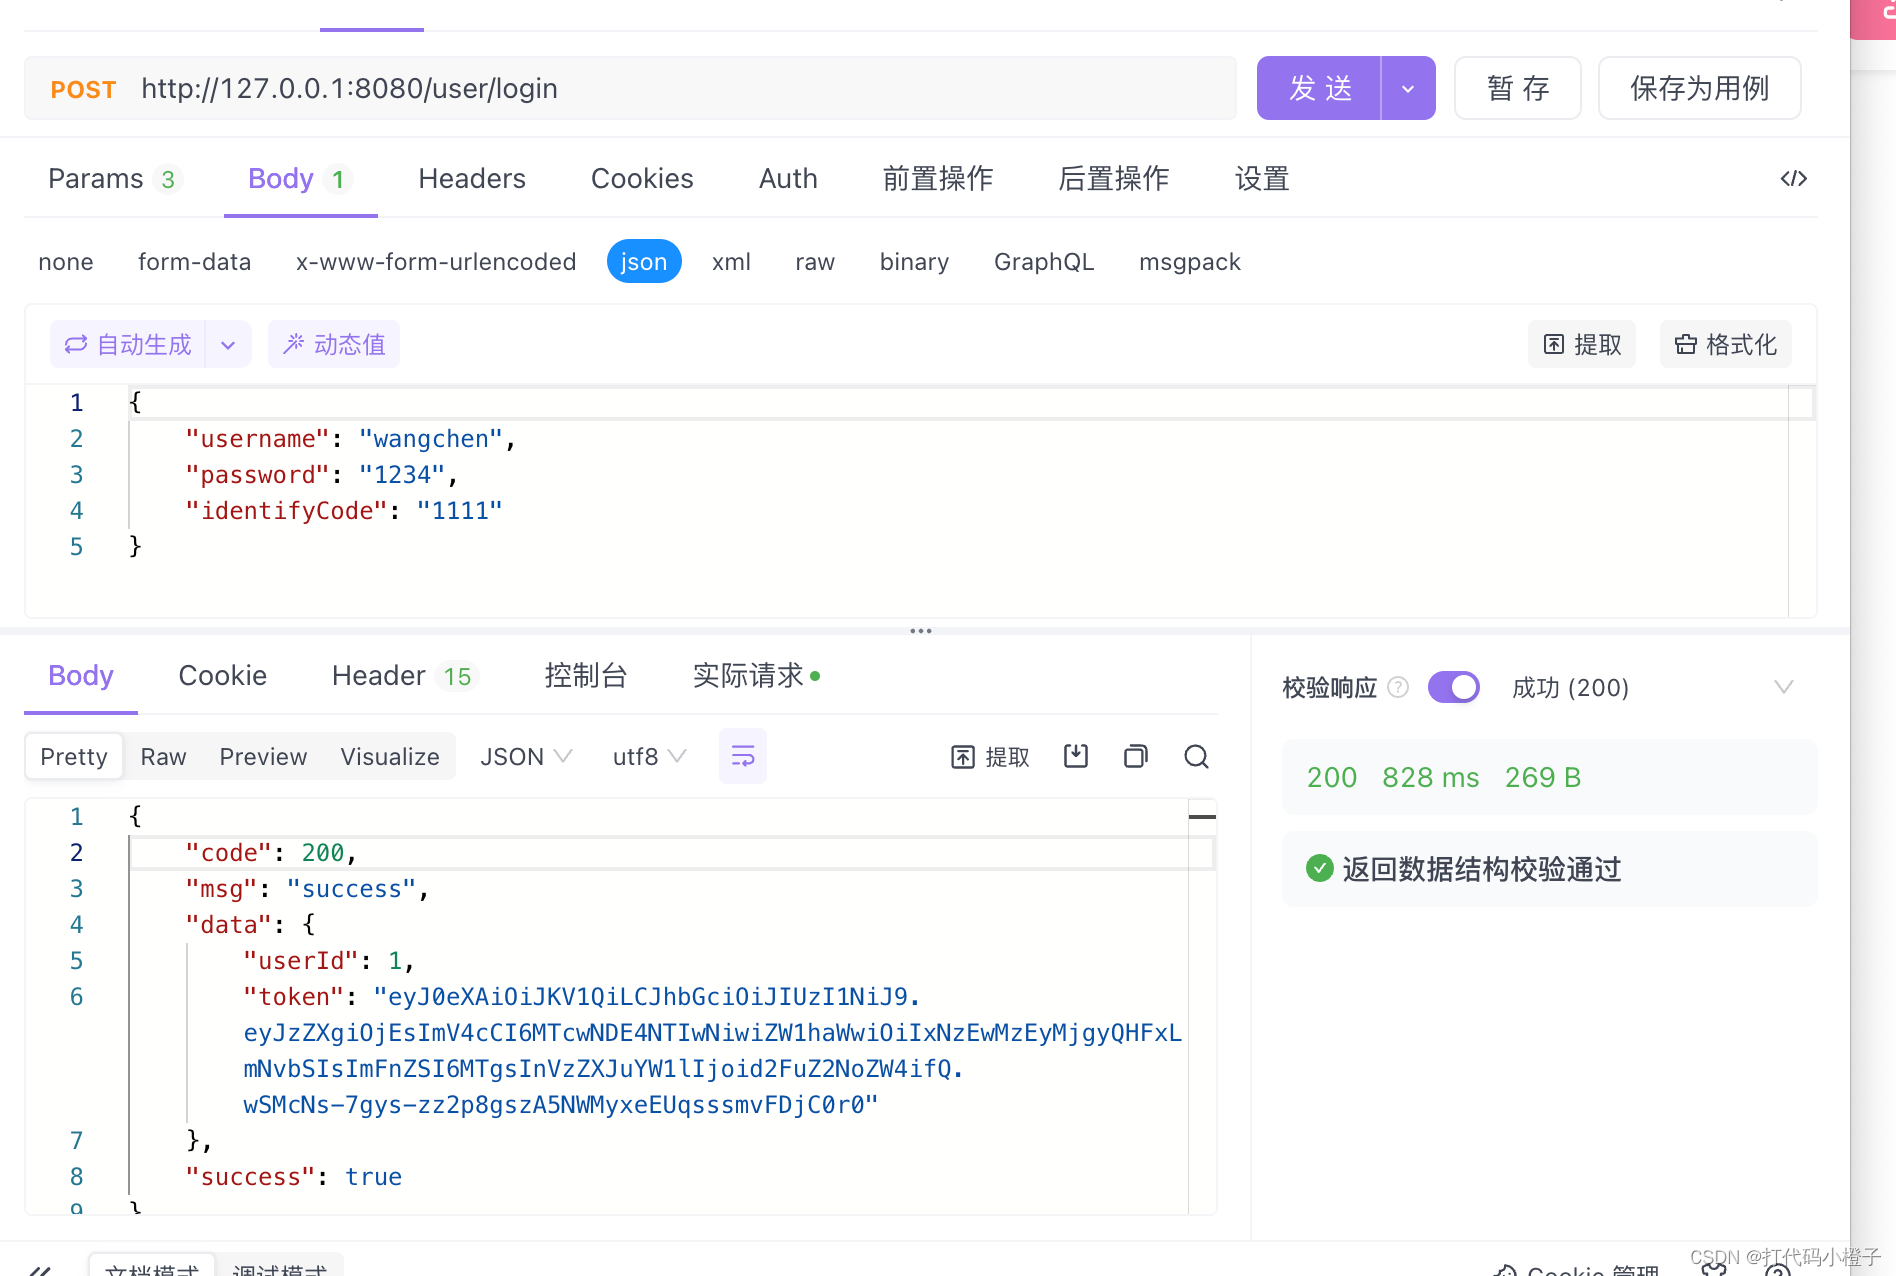
结果非常的成功,当然了这里我用了统一返回结果封装 可以看我上文,所以返回了该格式,然后我们看一下redis
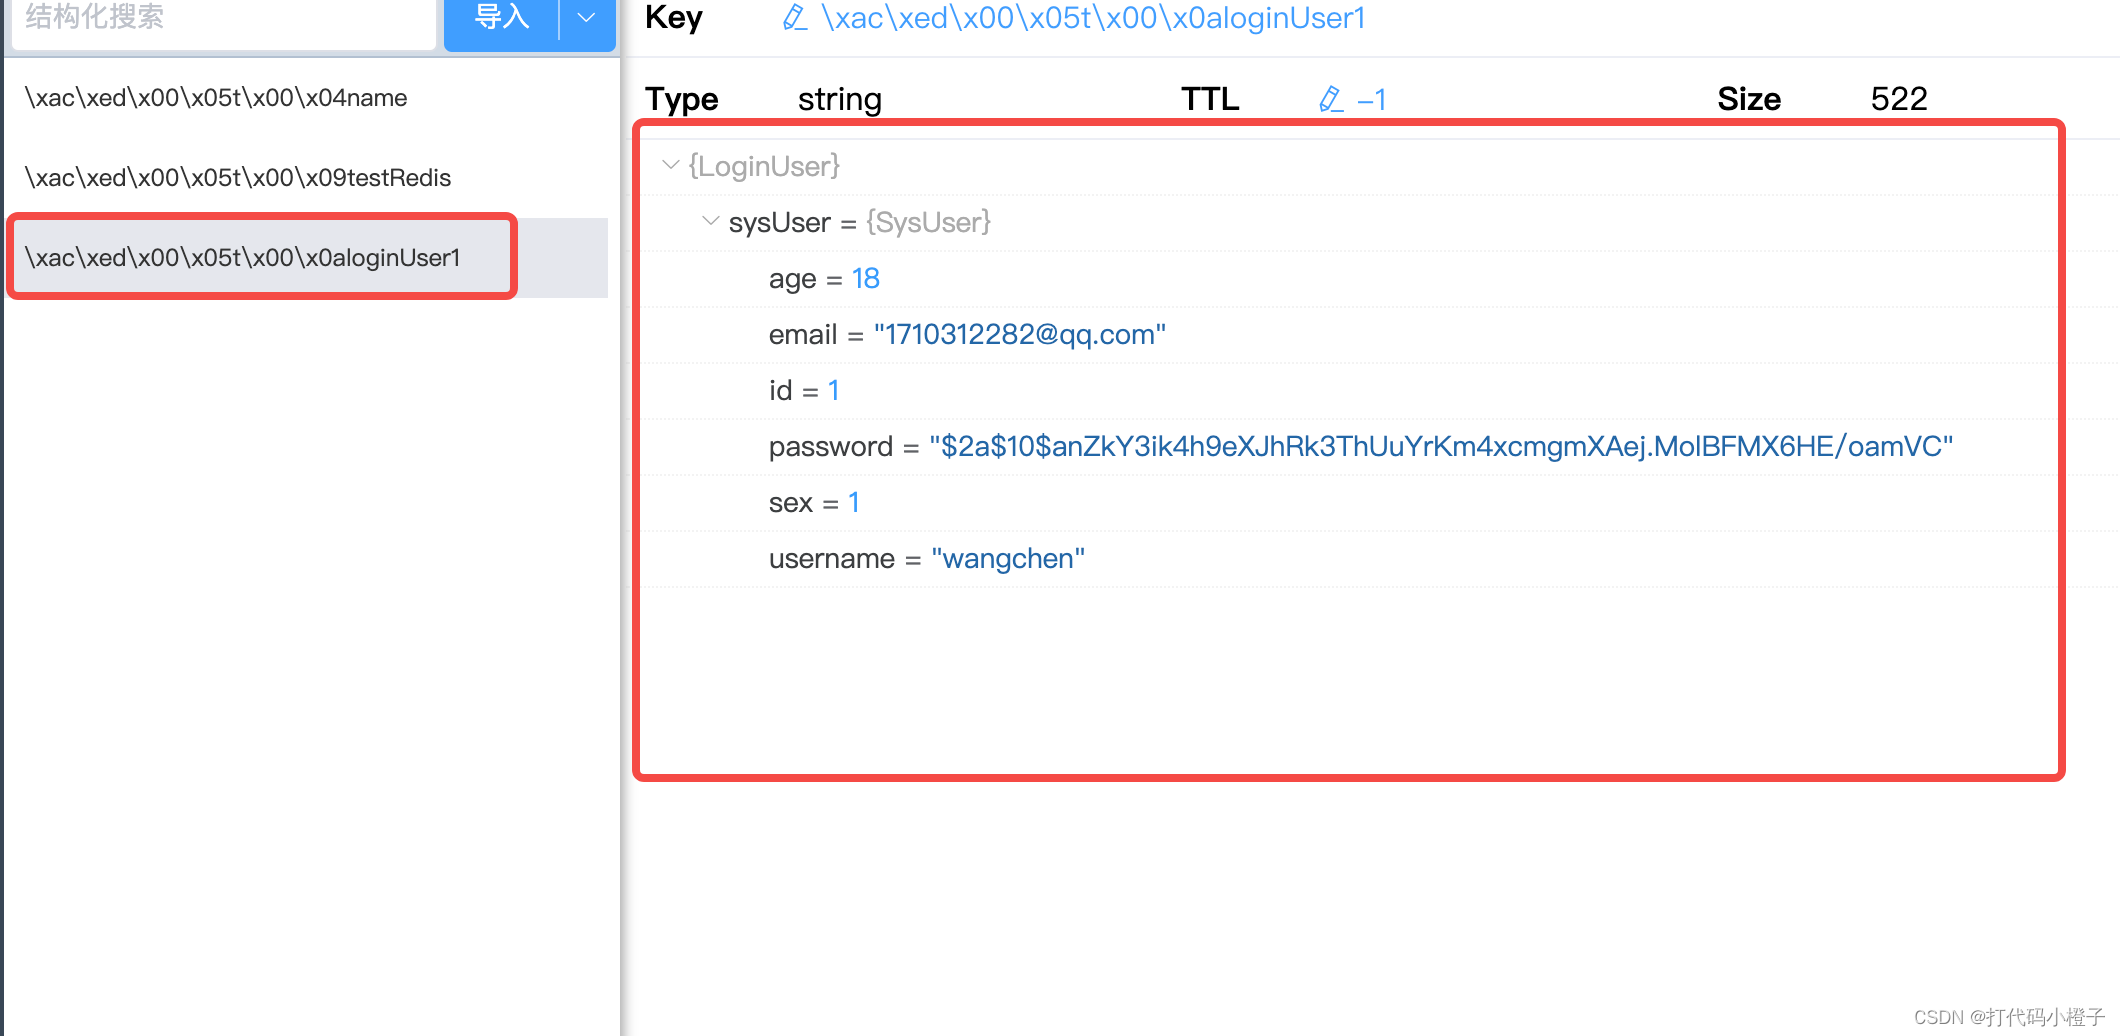
所以也是非常的ok redis也缓存了我们用户的基本信息,ok后续的马上更新


 758
758

 被折叠的 条评论
为什么被折叠?
被折叠的 条评论
为什么被折叠?
 到【灌水乐园】发言


