


ssm聚合工程
项目结构划分 为什么要进行项目结构的划分?
实际的项目都是有一个团队完成的,如果一个结构中只有一个项目,那么所有团队成员都共享一个项目难免会出现文件冲突,尤其是一些配置文件。(例文件上传)所以我们在实际工作中会对具体的功能进行划分,划分成不同功能的项目,当在运行时将多个项目当成一个整体来运行,这样就避免了一些不必要问题的产生。这时maven就出现了,实现项目的管理。
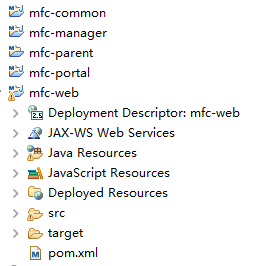
项目结构划分图

项目名称的确认
admin1907
什么是jar包 什么是war包
jar包的介绍
JAR(归档文件)是与平台无关的文件格式,它允许将许多文件组合成一个压缩文件。JavaSE程序可以打包成Jar包。
war包的介绍
war是一个可以直接运行的web模块,通常用于网站,打成包部署到容器中。以Tomcat来说,将war包放置在其\webapps\目录下,然后启动Tomcat,这个包就会自动解压,就相当于发布了。 根据结构图创建项目工程
集成ssm
在桌面找集成文档
把依赖关系复制到parent中,你会看到依赖可以传递。
集成spring
在web项目的web.xml添加 <context-param>
<param-name>contextConfigLocation</param-name>
<param-value>classpath*:spring/spring-*.xml</param-value>
</context-param>
<listener>
<listener-class>org.springframework.web.context.ContextLoaderListener</listener-class> </listener>
添加spring文件
在项目src/main/resources目录中增加spring文件夹,并在其中增加spring-context.xml配置文件,并添加如下图内容。

集成springmvc框架
在web模块中添加
<servlet>
<servlet-name>springmvc</servlet-name>
<servlet-class>org.springframework.web.servlet.DispatcherServlet</servlet-class>
<init-param>
<param-name>contextConfigLocation</param-name>
<param-value>classpath:spring/springmvc-context.xml</param-value>
</init-param>
<load-on-startup>1</load-on-startup>
</servlet>
<servlet-mapping>
<servlet-name>springmvc</servlet-name>
<url-pattern>/</url-pattern>
</servlet-mapping>
添加springmvc配置文件
在项目src/main/resources/spring目录中,增加springmvc-context.xml配置文件。
<?xml version="1.0" encoding="UTF-8"?>
<beans xmlns="http://www.springframework.org/schema/beans" xmlns:xsi="http://www.w3.org/2001/XMLSchema-instance" xmlns:context="http://www.springframework.org/schema/context" xmlns:p="http://www.springframework.org/schema/p" xmlns:mvc="http://www.springframework.org/schema/mvc" xsi:schemaLocation="http://www.springframework.org/schema/mvc http://www.springframework.org/schema/mvc/spring-mvc-4.0.xsd http://www.springframework.org/schema/beans http://www.springframework.org/schema/beans/spring-beans.xsd http://www.springframework.org/schema/context http://www.springframework.org/schema/context/spring-context-4.0.xsd">
</beans>
在springmvc-context.xml添加扫描controller
<context:component-scan base-package="com.atguigu.*" use-default-filters="false" > <context:include-filter type="annotation" expression="org.springframework.stereotype.Controller"/>
</context:component-scan>
配置静态页面不被拦截
在配置文件中增加<mvc:default-servlet-handler/>, <mvc:annotation-driven />即可
有多个视图解析器解决办法
<bean class="org.springframework.web.servlet.mvc.annotation.AnnotationMethodHandlerAdapter" >
<property name="messageConverters" >
<list> <bean class="org.springframework.http.converter.json.MappingJacksonHttpMessageConverter" >
<property name="supportedMediaTypes" >
<list>
<value>application/json;charset=UTF-8</value>
</list>
</property>
</bean>
</list>
</property>
</bean>
增加文件上传解析器MultipartResolver
<bean id="multipartResolver" class="org.springframework.web.multipart.commons.CommonsMultipartResolver" p:defaultEncoding="UTF-8" >
<property name="maxUploadSize" value="2097152"/>
<property name="resolveLazily" value="true"/>
</bean>
集成mybatis
文档配置
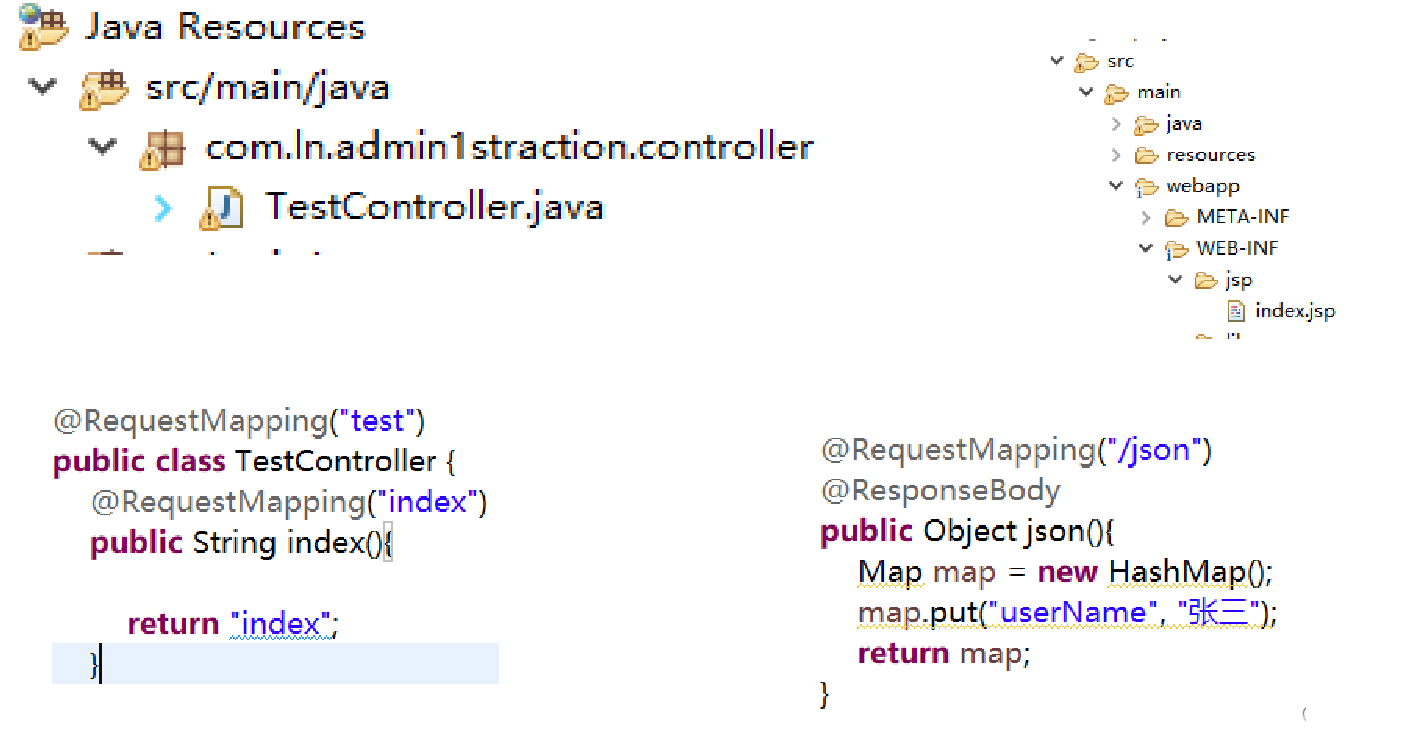
添加跳转页面和json测试
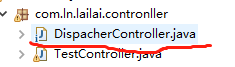
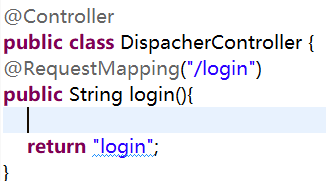
登录页面实现
第一步在后台创建跳转的类
第二步 。
第三步
第四步
<%@page pageEncoding="UTF-8"%>
<!DOCTYPE html>
<html lang="zh-CN">
<head>
<meta charset="UTF-8">
<meta http-equiv="X-UA-Compatible" content="IE=edge">
<meta name="viewport" content="width=device-width, initial-scale=1"> 。
第五步验证页面信息
@ResponseBody
@RequestMapping("/doAJAXLogin")
public Object doAJAXLogin(User user, HttpSession session) {
AJAXResult result = new AJAXResult();
User dbUser = userService.query4Login(user);
if ( dbUser != null ) {
session.setAttribute("loginUser", dbUser);
@RequestMapping("/logout")
public String logout(HttpSession session) {
//session.removeAttribute("loginUser");
session.invalidate();
return "redirect:login";
}
分页异步刷新数据的实现
第一步
1把tbody死数据删除
2把<li>标签下的内容全部删掉
ajax异步刷新 (别忘了修改路径)
//分页查询
function pageQeury(pageno){
$.ajax({
type:"post",
url:"<%=request.getContextPath()%>/dologin",
data:{
"pageno":pageno,
"pagesize":2
},
success : function(result) {
if(result.success){
window.location.href="main";
}else{
alert("分页查询失败");
}
}
});
}
在tbody标签添加id
分别定义table中的数据和分页工具栏的数据
var tableContext="";
var pageCentext="";
$("#userData").html("tableContext"); $(".pagination").html("pageCentext");
后台实现步骤
1由于是ajax实现 不需要跳转页面 所以返回值类型为Object
//分页查询
@ResponseBody
@RequestMapping("/pageQeury")
public Object pageQeury(Integer pageno,Integer pagesize){
AJAXResult result = new AJAXResult();
return result;
}
思路
定义起始页和每页多少条
map.put("start", (pageno-1)*pagesize);
map.put("size", pagesize);
List<User> users=userService.pageQeury(map);
分页需要的固定代码
@ResponseBody
@RequestMapping("/pageQeury")
public Object pageQeury(Integer pageno,Integer pagesize){
AJAXResult result = new AJAXResult();
try {
//分页查询
Map<String, Object> map = new HashMap<String, Object>(); map.put("start", (pageno-1)*pagesize);
map.put("size", pagesize);
//查询分页数据
List<User> users=userService.pageQeury(map);
//查询总条数
int totalsize=userService.pageQeurycount(map);
// 最大页码(总页码)
int totalno = 0;
if ( totalsize % pagesize == 0 ) {
totalno = totalsize / pagesize;
} else {
totalno = totalsize / pagesize + 1;
}
// 分页对象
Page<User> userPage = new Page<User>(); userPage.setDatas(users); userPage.setTotalno(totalno); userPage.setTotalsize(totalsize); userPage.setPageno(pageno); result.setData(userPage);
result.setSuccess(true);
} catch (Exception e) {
e.printStackTrace();
result.setSuccess(false);
}
return result;
}
mapper.xml
<?xml version="1.0" encoding="UTF-8"?>
<!DOCTYPE mapper PUBLIC "-//mybatis.org//DTD Mapper 3.0//EN" "http://mybatis.org/dtd/mybatis-3-mapper.dtd">
<mapper namespace="com.atguigu.atcrowdfunding.dao.UserDao" >
</mapper>
前端页面需要的固定值
if(result.success){
var tableContent="";
var pageContent = "";
var userPage = result.data;
var users = userPage.datas;
$.each(users, function(i, user){
tableContent += '<tr>';
tableContent += ' <td>'+(i+1)+'</td>';
tableContent += ' <td><input type="checkbox" name="userid" value="'+user.id+'"></td>'; tableContent += ' <td>'+user.loginname+'</td>'; tableContent += ' <td>'+user.name+'</td>';
tableContent += ' <td>'+user.email+'</td>';
tableContent += ' <td>';
tableContent += ' <button type="button" οnclick="goAssignPage('+user.id+')" class="btn btn-success btn-xs"><i class=" glyphicon glyphicon-check"></i></button>';
tableContent += ' <button type="button" οnclick="goUpdatePage('+user.id+')" class="btn btn-primary btn-xs"><i class=" glyphicon glyphicon-pencil"></i></button>';
tableContent += ' <button type="button" οnclick="deleteUser('+user.id+', \''+user.loginname+'\')" class="btn btn-danger btn-xs"><i class=" glyphicon glyphicon-remove"></i></button>';
tableContent += ' </td>'; tableContent += '</tr>'; });
if ( pageno > 1 ) {
pageContent += '<li><a href="#" οnclick="pageQeury('+(pageno-1)+')">上一页</a></li>';
}
for ( var i = 1; i <= userPage.totalno; i++ ) {
if ( i == pageno ) {
pageContent += '<li class="active"><a href="#">'+i+'</a></li>';
} else {
pageContent += '<li ><a href="#" οnclick="pageQeury('+i+')">'+i+'</a></li>';
}
}
if ( pageno < userPage.totalno ) { pageContent += '<li><a href="#" οnclick="pageQeury('+(pageno+1)+')">下一页</a></li>';
}
$("#userData").html(tableContent); $(".pagination").html(pageContent); }else{
alert("分页查询失败");
}
}
});
模糊查询


 908
908

 被折叠的 条评论
为什么被折叠?
被折叠的 条评论
为什么被折叠?
 到【灌水乐园】发言


