


 本文介绍了Android中基础的数据存储方式——文件存储。通过`openFileOutput`和`openFileInput`方法,结合IO流,实现数据的写入和读取。文件默认存储在/data/data/<包名>/files/目录下,使用MODE_PRIVATE或MODE_APPEND模式决定写入方式。
今天我们来学习下文件存储。文件存储算是Android中最为基础的一种数据存储方式了。它比较适合用于存储一些简单的文本数据后二进制数据。
那么我们就先来看下Android是如何通过文件来保存数据的
将数据存储到文件中
首先,我们需要创建一个新的项目,并修改activity_main.xml文件。我就直接上代码了,毕竟挺简单的。
<LinearLayout xmlns:android="http://schemas.android.com/apk/res/android"
xmlns:app="http://schemas.android.com/apk/res-auto"
xmlns:tools="http://schemas.android.com/tools"
android:layout_width="match_parent"
android:layout_height="match_parent"
tools:context=".MainActivity">

<EditText
    android:id="@+id/edit"
    android:layout_width="wrap_content"
    android:layout_height="wrap_content"
    android:layout_weight="4"
    android:hint="在这里输入内容"/>

<Button
    android:id="@+id/button"
    android:layout_width="wrap_content"
    android:layout_height="wrap_content"
    android:layout_weight="1"
    android:text="保存" />

</LinearLayout>
代码比较简单,我们创了一个EditText和Button。EditText用于输入文本内容。Button用于实现保存数据到文件之中。等你输入完你的内容,按下保存键,这样你输入的内容就会在回收前存储到文件之中去。
然后,我们就要写主要代码了。一样的,直接上代码。
public class MainActivity extends AppCompatActivity {

private EditText edit;

@Override
protected void onCreate(Bundle savedInstanceState) {
    super.onCreate(savedInstanceState);
    setContentView(R.layout.activity_main);
    edit = findViewById(R.id.edit); //得到文本输入框的控件
    Button btn1 = findViewById(R.id.button); //得到保存按钮的控件
    //保存按钮的点击事件
    btn1.setOnClickListener(new View.OnClickListener() {
        @Override
        public void onClick(View v) {
            //获取edit中的数据
            String inputText = edit.getText().toString().trim();
            //调用保存数据方法
            save(inputText);
        }
    });
}


public void save(String  inputText){
    FileOutputStream out = null;
    BufferedWriter writer = null;
    try {
        out=openFileOutput("data", Context.MODE_PRIVATE);
        writer = new BufferedWriter(new OutputStreamWriter(out));
        writer.write(inputText);
    } catch (IOException e) {
        e.printStackTrace();
    }finally {

            try {
                if(writer != null) {
                    writer.close();
                }
            } catch (IOException e) {
                e.printStackTrace();
            }

   		 }

  }
}
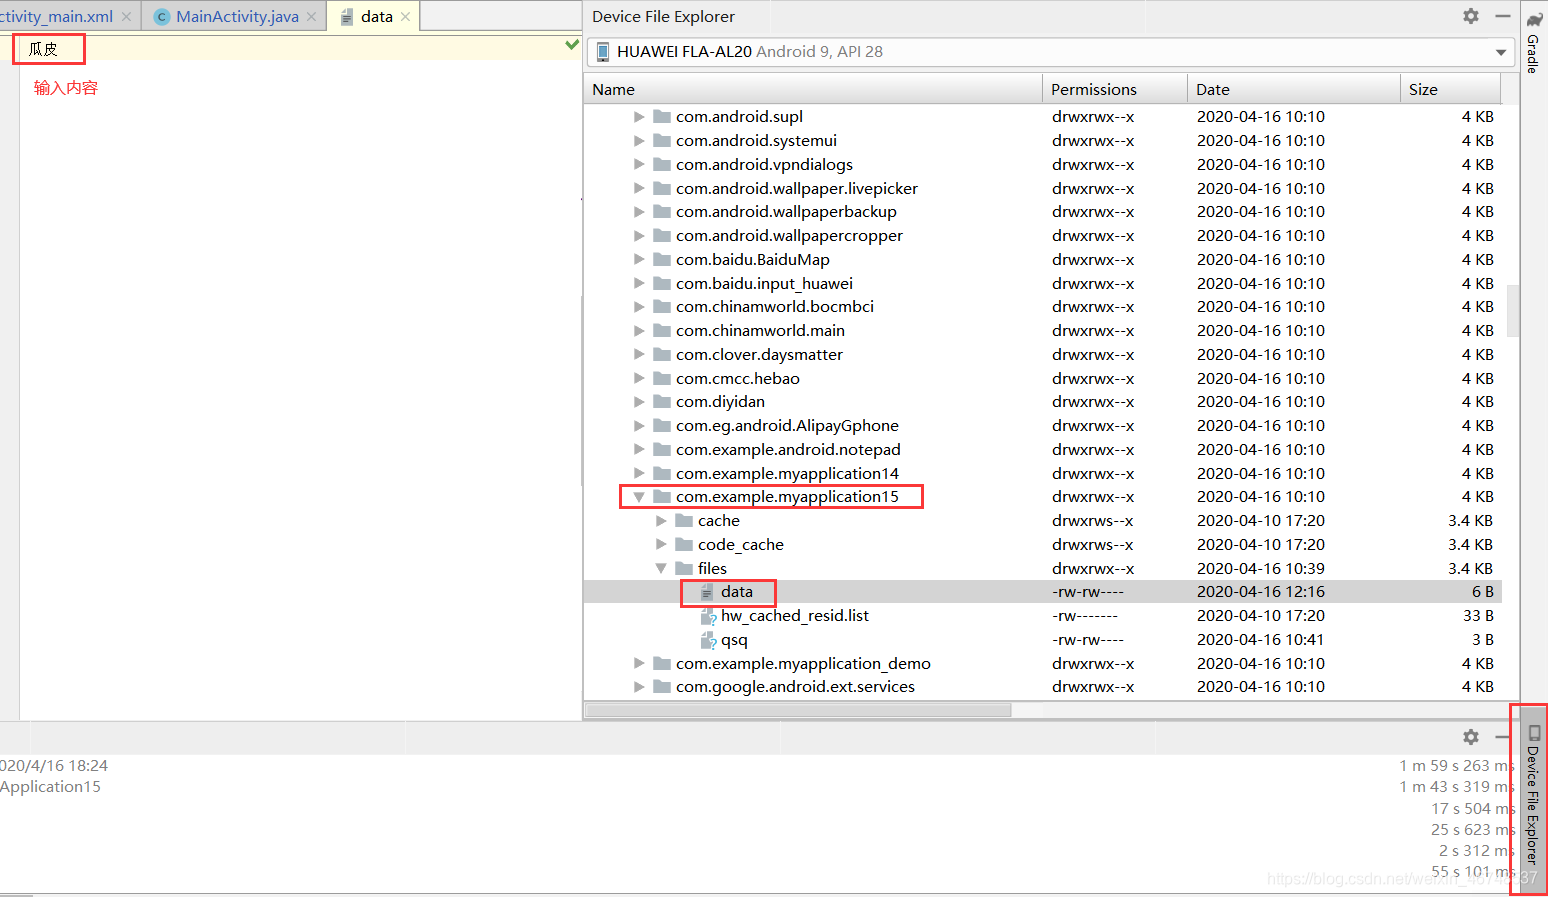
这里我们调用了content类中的openFileOutput()方法,可以用于把数据存储到指定的文件中去。这个方法有两个参数,第一个参数是文件名(注意:文件名不可以包含路径),所有文件都是默认存储在 /data/data/<包名>/files/目录下面。第二个参数是文件的操作模式,主要有两种模式,一个是MODE_PRIVATE,一个是MODE_APPEND。其中MODE_PRIVATE是默认模式,表示覆盖文件的内容。而MODE_APPEND是如果改文件存在就往改文件里追加内容,如果不存在,就创建新文件。其实还有另外两种但不能用了,被Android4.2版本抛弃了。
上面的代码还是比较容易理解的,我们通过openFileOutput来得到一个FileOutputStream对象,再通过FileOutputStream对象来创建一个OutputStreamWriter对象,在使用OutputStreamWriter对象创建一个BufferedWriter对象。这样我们就能够通过BufferedWriter来讲文件内容写入到文件中。
大体的转化是这样的:openFileOutput --> FileOutputStream --> OutputStreamWriter --> BufferedWriter
以上我们的将数据存储到文件中的代码就写完了。我们可以在下图中看到我们输入的内容。
从文件中读取数据
刚刚我们往文件中存储了数据,现在我们来把我们刚刚存进去的数据读取出来。
和数据存储到文件中一样,Content类中提供了openFileInput()方法,它用于从文件中读取数据。它比openFileOutPut简单点,他只有一个参数,就是你要读取的文件名。然后系统就会去/data/data/<包名>/files/目录下加载这个文件,并返回一个FileInputStream对象,然后在通过io留的方式将数据读取出来。这里要注意的是,读取必须和存储在同一个项目中,如果在不同的项目中,他们的路径不一样,会找不到你要的文件。
那我们就开始完善一下之前的代码,同样的,我们先修改Activity_main.xml文件。
<LinearLayout xmlns:android="http://schemas.android.com/apk/res/android"
xmlns:app="http://schemas.android.com/apk/res-auto"
xmlns:tools="http://schemas.android.com/tools"
android:layout_width="match_parent"
android:layout_height="match_parent"
tools:context=".MainActivity">

<EditText
    android:id="@+id/edit"
    android:layout_width="wrap_content"
    android:layout_height="wrap_content"
    android:layout_weight="4"
    android:hint="在这里输入内容"/>

<Button
    android:id="@+id/button"
    android:layout_width="wrap_content"
    android:layout_height="wrap_content"
    android:layout_weight="1"
    android:text="保存" />

<Button
    android:id="@+id/button2"
    android:layout_width="wrap_content"
    android:layout_weight="1"
    android:layout_height="wrap_content"
    android:text="读取" />

</LinearLayout>
我们只是在文件中加了一个读取的按钮,这里也很简单不需要过多的讲解。
接下来就是MainActivity代码了。
public class MainActivity extends AppCompatActivity {

private EditText edit;

@Override
protected void onCreate(Bundle savedInstanceState) {
    super.onCreate(savedInstanceState);
    setContentView(R.layout.activity_main);
    edit = findViewById(R.id.edit);
    Button btn2 = findViewById(R.id.button2);
    btn2.setOnClickListener(new View.OnClickListener() {
        @Override
        public void onClick(View v) {
            String inputText = load(); //用字符串转读取到的内容
            if(!TextUtils.isEmpty(inputText)){ //判断内容是否为空
                edit.setText(inputText); //把内容用输入框显示
                edit.setSelection(inputText.length()); //将输入光标移到到文本的最后,以便继续输入
                Toast.makeText(MainActivity.this,inputText,Toast.LENGTH_SHORT).show(); // 弹出读取的内容
            }

        }
    });

}

public String load(){
    FileInputStream in = null;
    BufferedReader reader = null;
    StringBuilder sb = new StringBuilder();  //创建一个StringBuilder对象
    try {
        in = openFileInput("data"); //得到你要读取的文件名
        reader = new BufferedReader(new InputStreamReader(in)); //读取文件内容
        String line ="";
        while ((line = reader.readLine()) !=null){
            sb.append(line); //将读取到的内容放到StringBuilder对象中
        }
    } catch (Exception e) {
        e.printStackTrace();
    }finally {
        if(reader != null){
            try{
                reader.close();
            } catch (IOException e) {
                e.printStackTrace();
            }
        }
    }
    return  sb.toString(); //返回读取的内容
}
}
在这段代码中,我们先通过openFileInput()获取到FileInputStream对象,然后借助FileInputStream对象创建一个InputStreamReader对象,再用InputStreamReader对象创建一个BufferedReader对象,这样我们就通过BufferedReader一行一行的进行读取,在把文件中的内容读取出来,放在StringBuilder对象中,最后将读取的内容返回。我们在读取按钮的点击事件中,得到读取的内容,并把内容用输入框和弹出来显示。
大体的转化为:openFileInput --> FileIntputStream --> IntputStreamReader --> BufferedReader --> BufferedReader
读取的代码我们也写完了。现在我们来看下整体的效果。
文件存储我们就这样讲完了,用到的核心技术就是Content类中的openFileInput( )和openFileOutput(),再用io流的方式来进行操作,你懂了嘛?


 被折叠的 条评论
为什么被折叠?
被折叠的 条评论
为什么被折叠?
 到【灌水乐园】发言


