


1. 前置准备
1.1 配置源
[root@localhost ~]# mkdir /mnt/cdrom
[root@localhost ~]# mount /dev/cdrom /mnt/cdrom/
mount: /dev/sr0 写保护,将以只读方式挂载
[root@localhost ~]# cd /etc/yum.repos.d/
[root@localhost yum.repos.d]# ls
CentOS-Base.repo  CentOS-Debuginfo.repo  CentOS-Media.repo    CentOS-Vault.repo
CentOS-CR.repo    CentOS-fasttrack.repo  CentOS-Sources.repo
[root@localhost yum.repos.d]# mkdir bak
[root@localhost yum.repos.d]# mv * bak/
mv: 无法将目录"bak" 移动至自身的子目录"bak/bak" 下
[root@localhost yum.repos.d]# vim Centos_local.repo
[development]
name=centos7
baseurl=file:///mnt/cdrom
enabled=1
gpgcheck=0
[root@localhost ~]# vim /etc/fstab
/dev/cdrom /mnt/cdrom iso9660 defaults 0 0

[root@localhost ~]# vim /etc/resolv.conf
nameserver 223.5.5.5

[root@localhost yum.repos.d]# wget http://mirrors.163.com/.help/CentOS7-Base-163.repo
[root@localhost yum.repos.d]# wget -O /etc/yum.repos.d/epel.repo http://mirrors.aliyun.com/repo/epel-7.repo
[root@localhost yum.repos.d]# yum clean all
[root@localhost yum.repos.d]# yum makecache
1.2 DHCP服务
(1)安装
[root@localhost ~]# yum install dhcp(2)配置
[root@localhost ~]# cd /usr/share/doc/dhcp-4.2.5/
[root@localhost dhcp-4.2.5]# ls
dhcpd6.conf.example  dhcpd.conf.example  ldap
[root@localhost dhcp-4.2.5]# cp dhcpd.conf.example /etc/dhcp/

[root@localhost dhcp-4.2.5]# cd /etc/dhcp/
[root@localhost dhcp]# ls
dhclient.d             dhcpd6.conf  dhcpd.conf.example
dhclient-exit-hooks.d  dhcpd.conf   scripts
[root@localhost dhcp]# cp dhcpd.conf dhcpd.conf.bak
[root@localhost dhcp]# mv dhcpd.conf.example dhcpd.conf
[root@localhost dhcp]# vim dhcpd.conf
subnet 192.168.10.0 netmask 255.255.255.0 {
  range 192.168.10.3 192.168.10.100;
  option domain-name-servers ns1.internal.example.org;
  option domain-name "internal.example.org";
  option routers 192.168.10.2;
  default-lease-time 600;
  max-lease-time 7200;
  next-server 192.168.10.100;
  filename "pxelinux.0";
}
1.3 TFTP服务
(1)安装
[root@localhost ~]# yum install tftp-server(2)配置
[root@localhost ~]# vim /etc/xinetd.d/tftp
service tftp
{
        socket_type             = dgram
        protocol                = udp
        wait                    = yes
        user                    = root
        server                  = /usr/sbin/in.tftpd
        server_args             = -s /var/lib/tftpboot
        disable                 = no   # 此处改为no
        per_source              = 11
        cps                     = 100 2
        flags                   = IPv4
}
1.4 FTP服务
(1)安装
[root@localhost ~]# yum install vsftpd2. 自动化安装实例
2.1 主机规划
192.168.10.100 DHCP,TFTP,FTP 部署服务器
2.2 初始化系统环境
[root@localhost ~]# systemctl stop firewalld
[root@localhost ~]# systemctl disable firewalld
Removed symlink /etc/systemd/system/multi-user.target.wants/firewalld.service.
Removed symlink /etc/systemd/system/dbus-org.fedoraproject.FirewallD1.service.
[root@localhost ~]# sed -i.bak 's/=enforcing/=disabled/' /etc/sysconfig/selinux
[root@localhost ~]# setenforce 0
2.3 创建目录结构
[root@localhost ~]# cd /var/ftp/
[root@localhost ftp]# mkdir centos6u8
[root@localhost ftp]# mkdir centos7u6
[root@localhost ftp]# cd /var/lib/tftpboot/
[root@localhost tftpboot]# mkdir centos6u8
[root@localhost tftpboot]#  mkdir centos7u6
2.4 配置DHCP
[root@localhost ~]# vim /etc/dhcp/dhcpd.conf
subnet 192.168.10.0 netmask 255.255.255.0 {
  range 192.168.10.3 192.168.10.100;	# IP范围
  option domain-name-servers 223.5.5.5;   #DNS服务器地址
  option subnet-mask 255.255.255.0;
  option routers 192.168.10.2;
  default-lease-time 600;
  max-lease-time 7200;
  next-server 192.168.10.100;	# 下一个访问的服务器地址(TFTP服务器)
  filename "pxelinux.0";		# 在TFTP服务器上共享的启动文件名
}

# 启动
[root@localhost ~]# systemctl start dhcpd
[root@localhost ~]# systemctl enable dhcpd
Created symlink from /etc/systemd/system/multi-user.target.wants/dhcpd.service to /usr/lib/systemd/system/dhcpd.service.
[root@localhost ~]# netstat -tunalp|grep 67
udp        0      0 0.0.0.0:67              0.0.0.0:*                           77050/dhcpd
udp        0      0 0.0.0.0:67              0.0.0.0:*                           9474/dnsmasq
2.5 配置tftp
[root@localhost ~]# vim /etc/xinetd.d/tftp
service tftp
{
        socket_type             = dgram
        protocol                = udp
        wait                    = yes
        user                    = root
        server                  = /usr/sbin/in.tftpd
        server_args             = -s /var/lib/tftpboot
        disable                 = no   # 改为no
        per_source              = 11
        cps                     = 100 2
        flags                   = IPv4
}
(1)安装tfpt动态管理工具
[root@localhost ~]# yum install xinetd(2)将客户端锁需要的启动引导文件复制到服务器
[root@localhost ~]# yum install syslinux    #通过该软件包获取引导文件
[root@localhost ~]# cp /usr/share/syslinux/pxelinux.0 /var/lib/tftpboot/
(3)配置启动文件
[root@localhost ~]# cp /mnt/cdrom/isolinux/vesamenu.c32 /var/lib/tftpboot/
# 配置内核文件
[root@localhost ~]# mkdir /iso
# 将iso镜像传入其中
[root@localhost ~]# mount -o loop -t iso9660 /iso/CentOS-6.8-x86_64-bin-DVD1.iso /var/ftp/centos6u8
mount: /dev/loop0 写保护,将以只读方式挂载
[root@localhost ~]# mount -o loop -t iso9660 /iso/CentOS-7-x86_64-Everything-1810.iso /var/ftp/centos7u6/
mount: /dev/loop1 写保护,将以只读方式挂载
# 编辑脚本,开机自动挂载
[root@localhost ~]# vim /etc/rc.d/rc.local
if [ -f iso/CentOS-7-x86_64-Everything-1810.iso ]
then
  mount -o loop -t iso9660 /iso/CentOS-6.8-x86_64-bin-DVD1.iso /var/ftp/centos6u8
  mount -o loop -t iso9660 /iso/CentOS-7-x86_64-Everything-1810.iso /var/ftp/centos7u6
fi
[root@localhost ~]# chmod +x /etc/rc.d/rc.local

[root@localhost ~]# cp /var/ftp/centos7u6/isolinux/vesamenu.c32 /var/lib/tftpboot/
[root@localhost ~]# cp /var/ftp/centos7u6/isolinux/vmlinuz /var/lib/tftpboot/centos7u6/
[root@localhost ~]# cp /var/ftp/centos7u6/isolinux/initrd.img /var/lib/tftpboot/centos7u6/

[root@localhost ~]# cp /var/ftp/centos6u8/isolinux/initrd.img /var/lib/tftpboot/centos6u8/
[root@localhost ~]# cp /var/ftp/centos6u8/isolinux/vmlinuz /var/lib/tftpboot/centos6u8/

[root@localhost ~]# mkdir /var/lib/tftpboot/pxelinux.cfg
[root@localhost ~]# cp /var/ftp/centos7u6/isolinux/isolinux.cfg /var/lib/tftpboot/pxelinux.cfg/default
(4)修改启动配置文件
[root@localhost pxelinux.cfg]# pwd
/var/lib/tftpboot/pxelinux.cfg
[root@localhost pxelinux.cfg]# vim default
[root@localhost pxelinux.cfg]# cat default
default vesamenu.c32
timeout 600
display boot.msg
# Clear the screen when exiting the menu, instead of leaving the menu displayed.
# For vesamenu, this means the graphical background is still displayed without
# the menu itself for as long as the screen remains in graphics mode.
menu clear
menu background splash.png #背景图片,可以修改
menu title CentOS 7
menu vshift 8
menu rows 18
menu margin 8
#menu hidden
menu helpmsgrow 15
menu tabmsgrow 13
# Border Area
menu color border * #00000000 #00000000 none
# Selected item
menu color sel 0 #ffffffff #00000000 none
# Title bar
menu color title 0 #ff7ba3d0 #00000000 none
# Press [Tab] message
menu color tabmsg 0 #ff3a6496 #00000000 none
# Unselected menu item
menu color unsel 0 #84b8ffff #00000000 none
# Selected hotkey
menu color hotsel 0 #84b8ffff #00000000 none
# Unselected hotkey
menu color hotkey 0 #ffffffff #00000000 none
# Help text
menu color help 0 #ffffffff #00000000 none
# A scrollbar of some type? Not sure.
menu color scrollbar 0 #ffffffff #ff355594 none
# Timeout msg
menu color timeout 0 #ffffffff #00000000 none
menu color timeout_msg 0 #ffffffff #00000000 none
# Command prompt text
menu color cmdmark 0 #84b8ffff #00000000 none
menu color cmdline 0 #ffffffff #00000000 none
# Do not display the actual menu unless the user presses a key. All that is displayed is a timeout message.
menu tabmsg Press Tab for full configuration options on menu items.
menu separator # insert an empty line
menu separator # insert an empty line
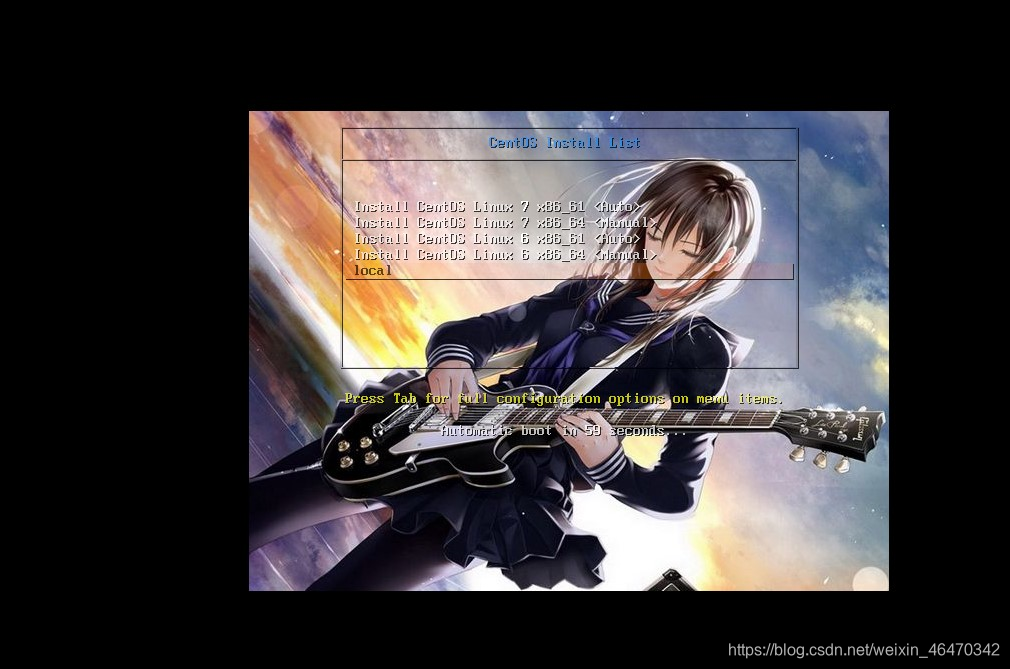
label centos7 64 <Auto Installation>
menu label Install CentOS Linux ^7 x86_61 <Auto>
kernel /centos7u6/vmlinuz
append initrd=/centos7u6/initrd.img inst.stage2=ftp://192.168.10.100/centos7u6
inst.repo=ftp://192.168.10.100/centos7u6 inst.ks=ftp://192.168.10.100/centos7-ks.cfg
label centos7 64 <Manual Installation>
menu label Install CentOS Linux ^7 x86_64 <Manual>
kernel /centos7u6/vmlinuz
append initrd=/centos7u6/initrd.img inst.stage2=ftp://192.168.10.100/centos7u6
label centos6 64 <Auto Installation>
menu label Install CentOS Linux ^6 x86_61 <Auto>
kernel /centos6u8/vmlinuz
append initrd=/centos6u8/initrd.img inst.stage2=ftp://192.168.10.100/centos6u8
inst.repo=ftp://192.168.10.100/centos6u8 inst.ks=ftp://192.168.10.100/centos6-ks.cfg
label centos6 64 <Manual Installation>
menu label Install CentOS Linux ^6 x86_64 <Manual>
kernel /centos6u8/vmlinuz
append initrd=/centos6u8/initrd.img inst.stage2=ftp://192.168.10.100/centos6u8
label local
menu default menu lebel Boot from ^local drive
localboot 0xffff
menu end[root@localhost tftpboot]# cp /var/ftp/centos7u6/isolinux/splash.png ./(5)启动服务
[root@localhost ~]# systemctl start xinetd.service
[root@localhost ~]# systemctl enable xinetd.service
[root@localhost ~]# netstat -tunalp |grep 69
tcp        0      0 0.0.0.0:6000            0.0.0.0:*               LISTEN      16906/X
tcp6       0      0 :::6000                 :::*                    LISTEN      16906/X
udp        0      0 0.0.0.0:69              0.0.0.0:*                           78813/xinetd
2.5 创建自动应答文件
(1)安装服务
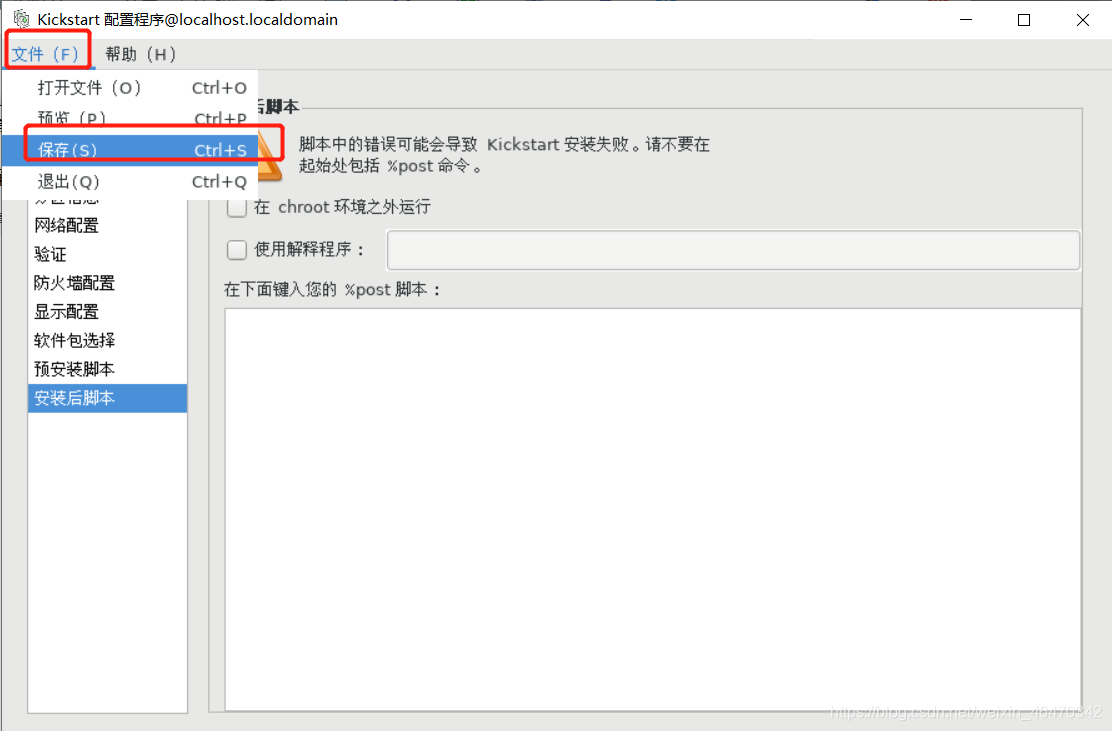
[root@localhost ~]# yum install system-config-kickstart(2)创建自动应答文件
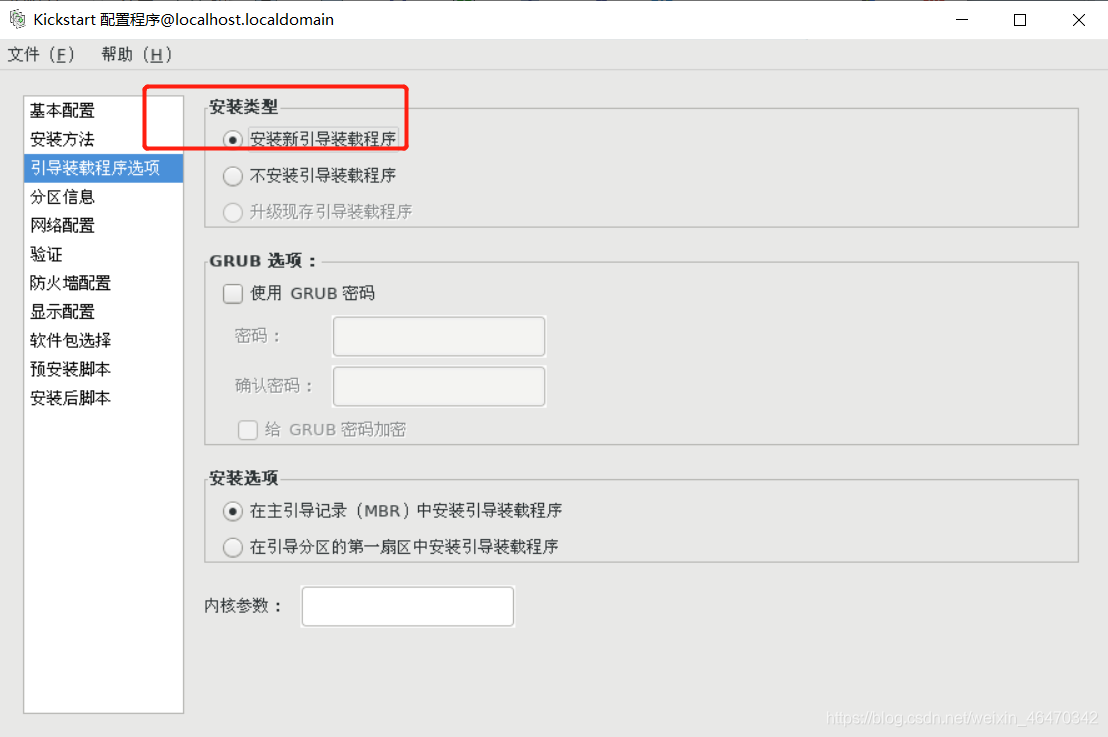
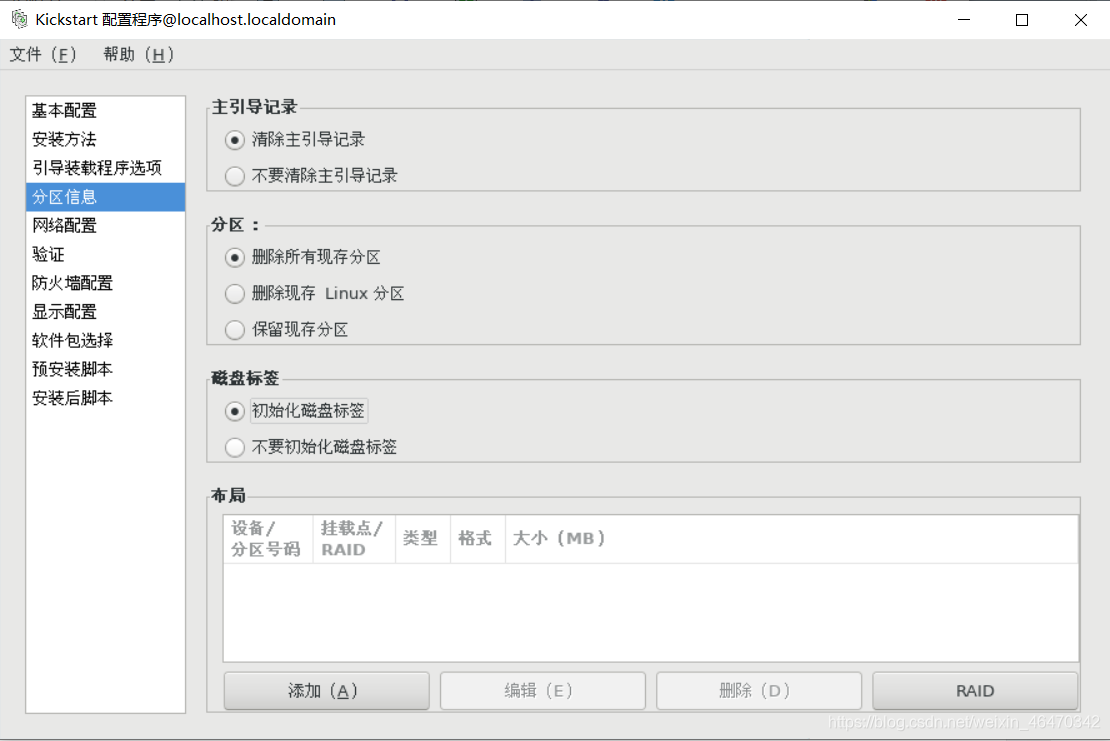
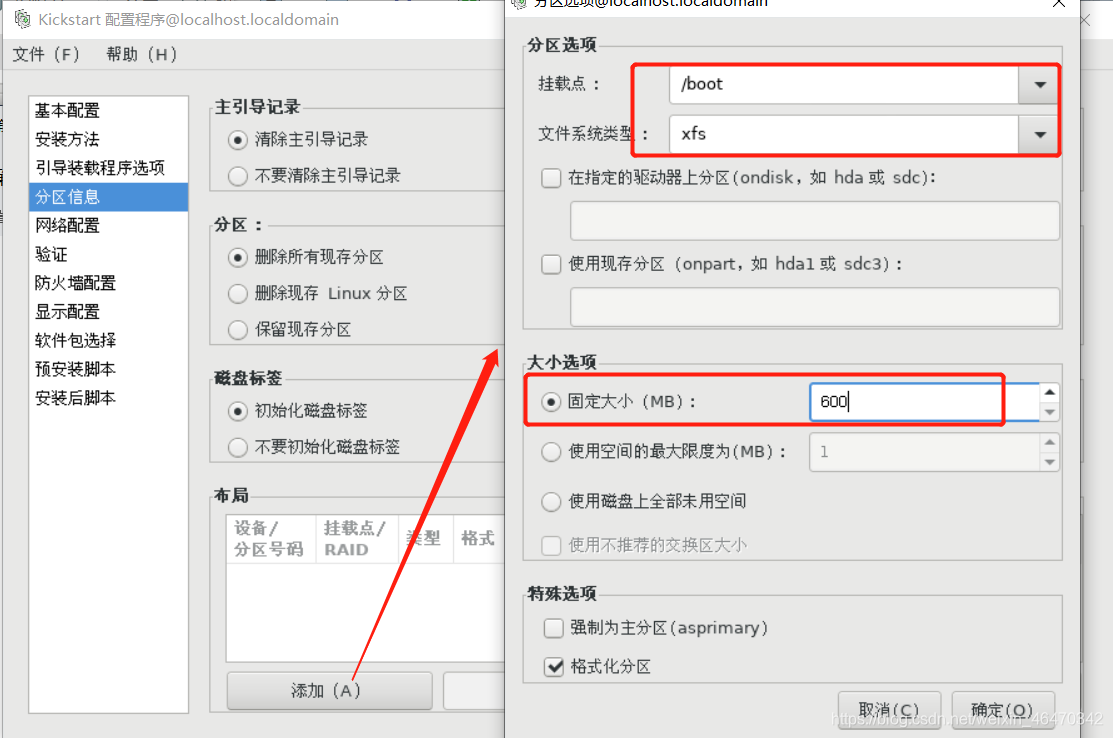
[root@localhost ~]# system-config-kickstart
# 会自动弹出图形化界面,如下
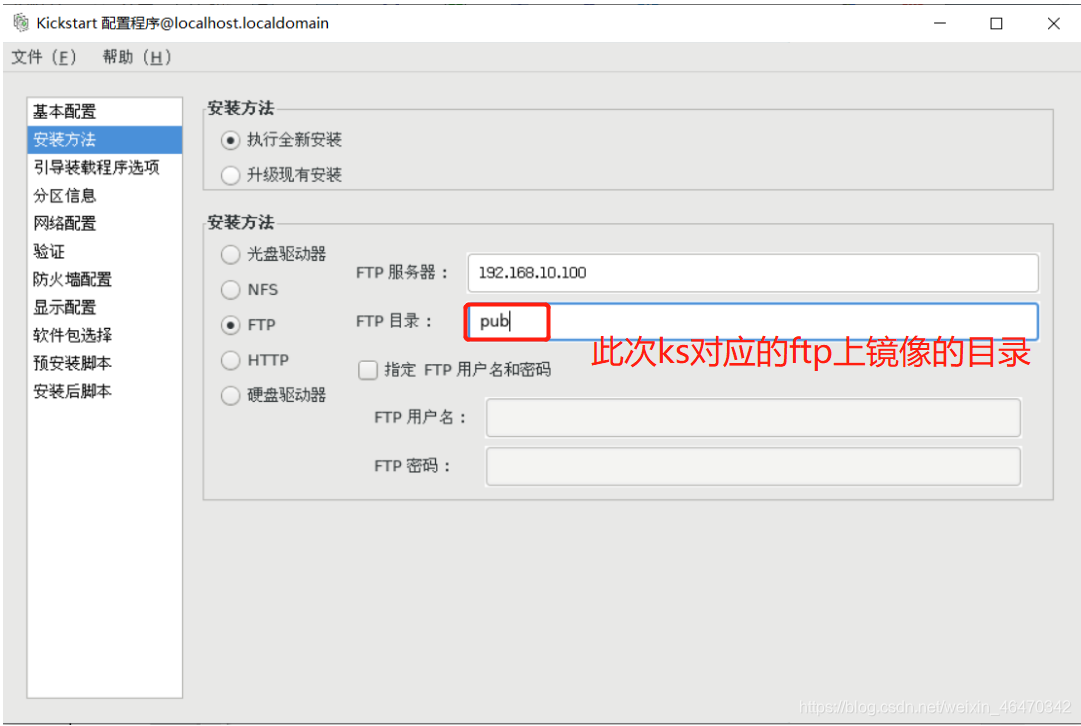
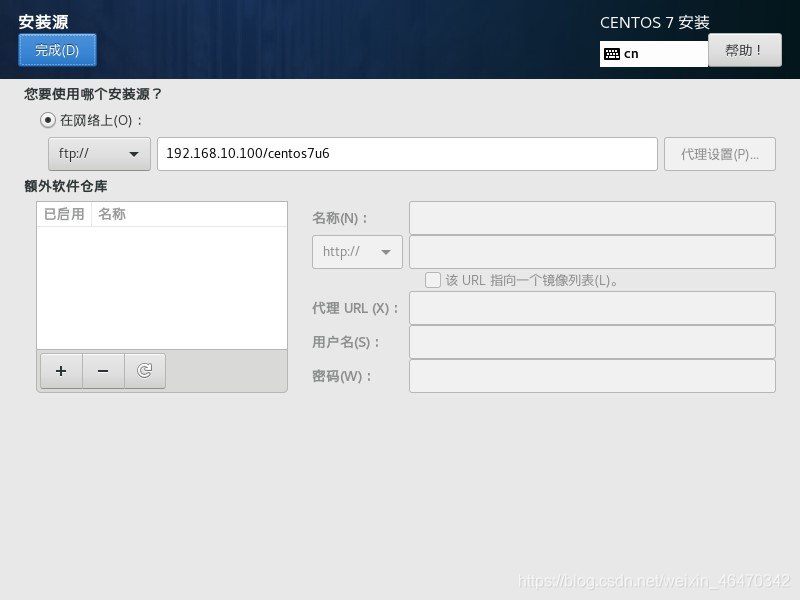
注意,下面此图,pub需要设置为ftp中的镜像目录(此次生成ks文件对应的镜像目录)
(3) 查看
[root@localhost ~]# ls
centos7-ks.cfg
[root@localhost ~]# cat centos7-ks.cfg
#platform=x86, AMD64, 或 Intel EM64T
#version=DEVEL
# Install OS instead of upgrade
install
# Keyboard layouts
keyboard 'us'
# Root password
rootpw --iscrypted $1$avCGIjyK$.wwqxYEG./nBgGypVL.gh0
# Use network installation
url --url="ftp://192.168.10.100/centos7u6"
# System language
lang en_US
# System authorization information
auth --useshadow --passalgo=sha512
# Use text mode install
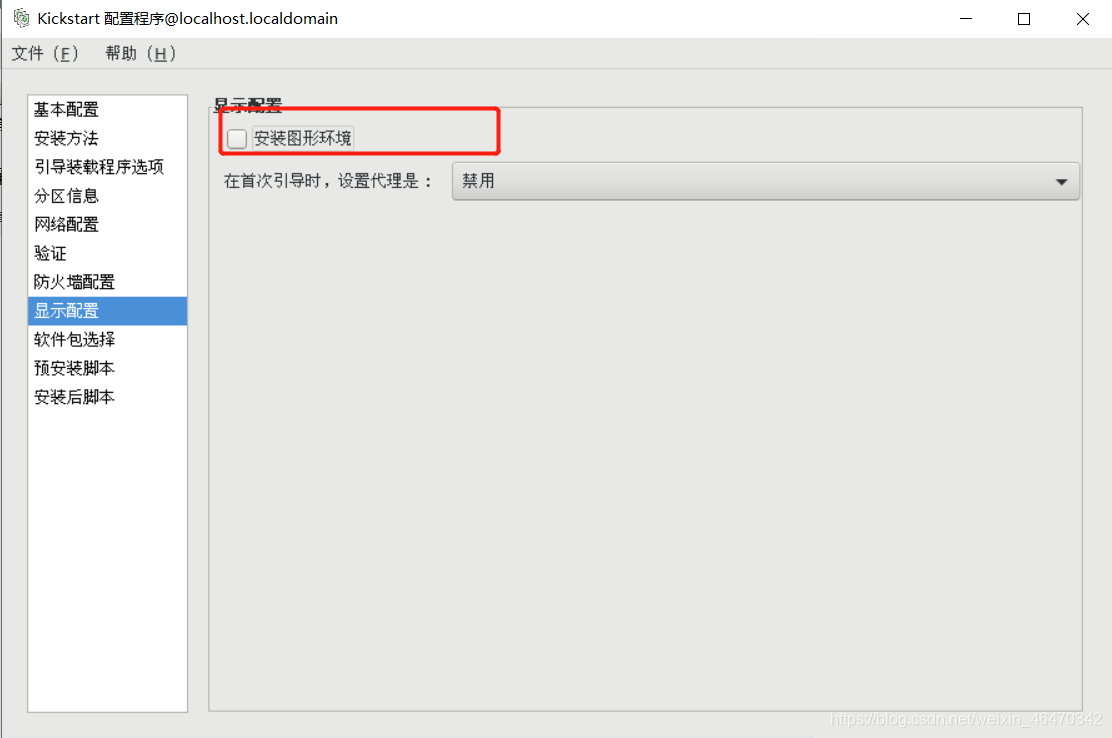
text
# SELinux configuration
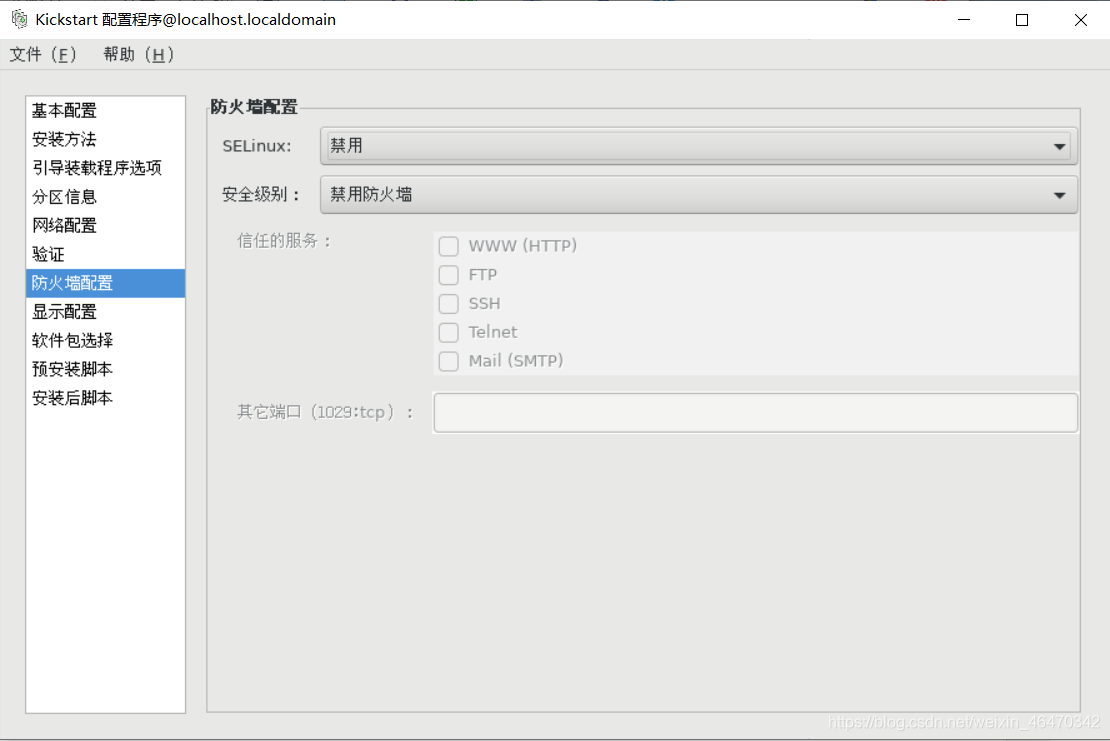
selinux --disabled
# Do not configure the X Window System
skipx
# Firewall configuration
firewall --disabled
# Reboot after installation
reboot
# System timezone
timezone Africa/Abidjan
# System bootloader configuration
bootloader --location=mbr
# Clear the Master Boot Record
zerombr
# Partition clearing information
clearpart --all --initlabel
# Disk partitioning information
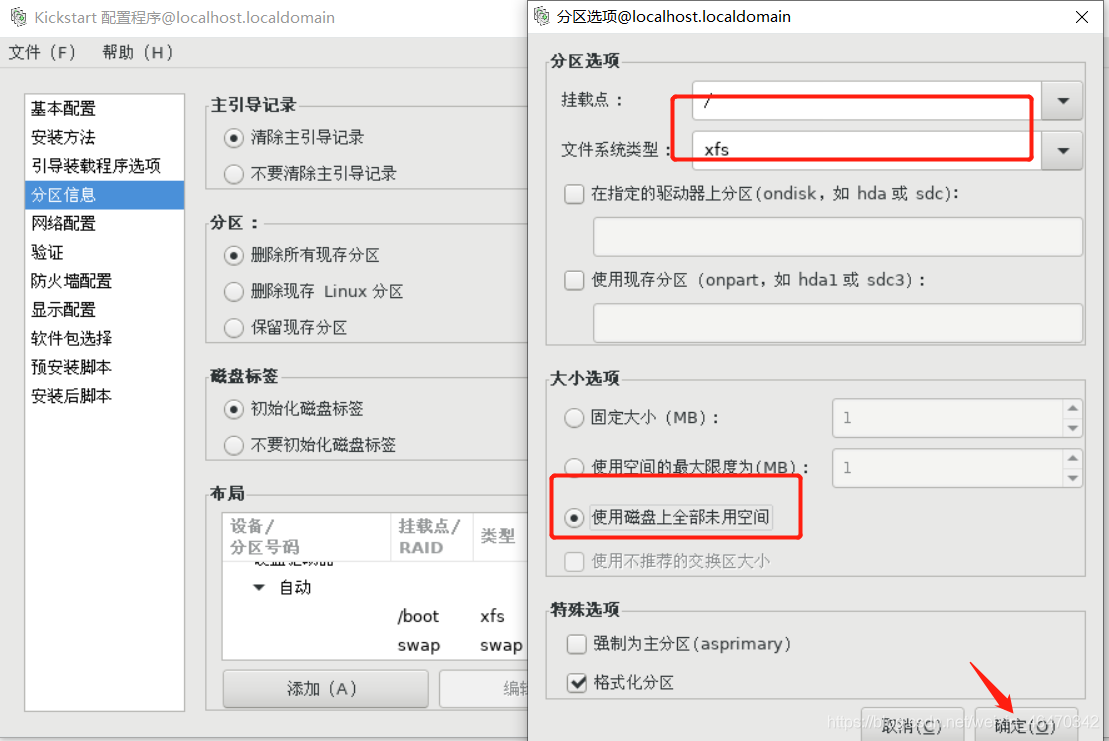
part /boot --fstype="xfs" --size=600
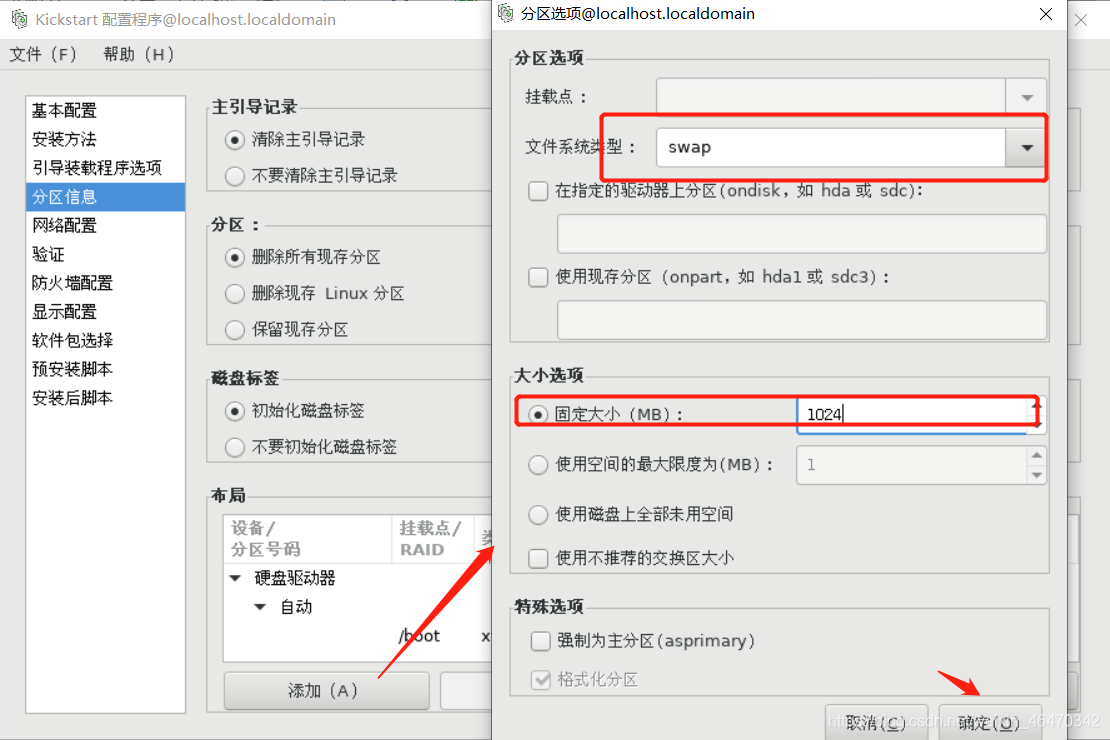
part swap --fstype="swap" --size=1024
part / --fstype="xfs" --grow --size=1
# 手动添加如下几行
%packages
@base
net-tools
@core
%end(4)检查
[root@localhost ~]# ksvalidator centos7-ks.cfg
[root@localhost ~]#
(5)放到指定位置
[root@localhost ~]# mv centos7-ks.cfg /var/ftp/2.6 启动ftp服务器
[root@localhost ~]# systemctl start vsftpd
[root@localhost ~]# systemctl enable vsftpd
2.7 测试
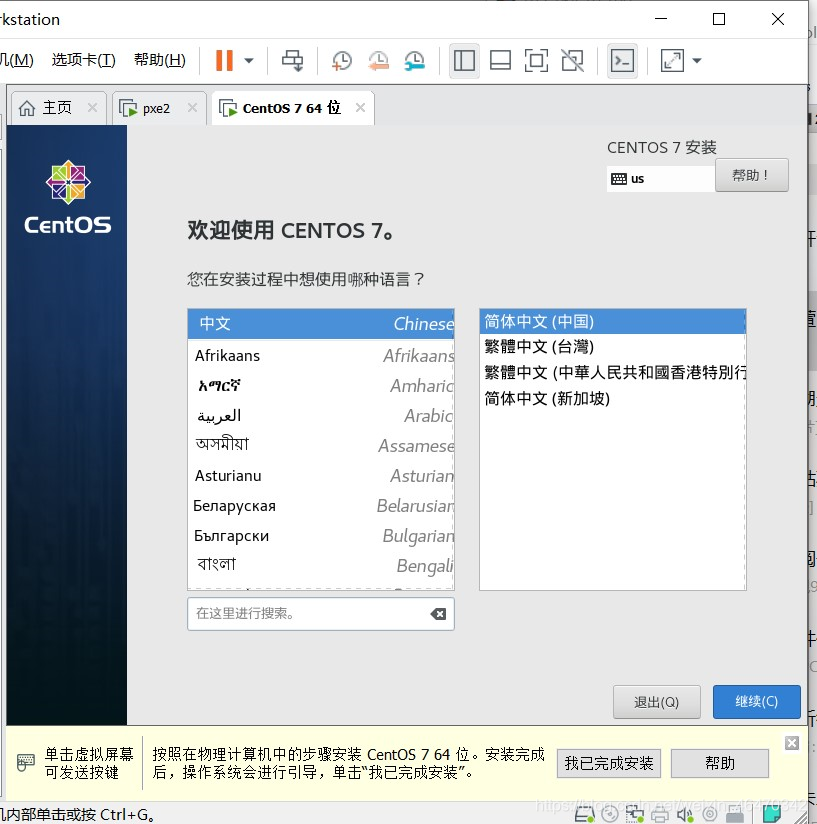
创建一个新的空白虚拟机测试,不要挂载镜像。
提示没有镜像,是否启动网络引导,选择确定,如示:
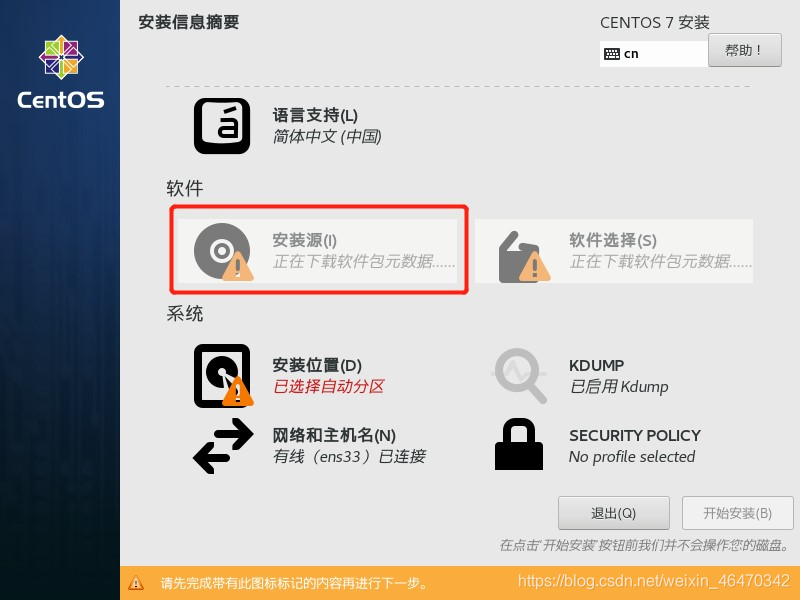
接下来会自动安装,此处省略,等待即可。
3. 遇到的错误:
(1)自动安装若给的1u1g,可能会报错,如下(内存最少2G)
(2)会弹出如下界面,是由于ks文件没有起到作用或者ks中的地址出错。。。其实这也是手动模式的安装方式了,此次因为ks中ftp地址写错出现此问题
# 如上,会弹出这个界面,其实这种就是手动安装模式了
-------------------------------------------------------------------------------------------------------返回目录


 477
477

 被折叠的 条评论
为什么被折叠?
被折叠的 条评论
为什么被折叠?
 到【灌水乐园】发言


