


nginx优化
11.创建日志切割脚本 12.去掉不需要的日志统计 13.目录(文件)访问控制
14.配置ip和301跳转 15.防盗链 16.内部身份验证 17.安装php
11.创建日志切割脚本
日志优化的目的,是为了一天日志一压缩,按天存放,超过10天的删除
创建日志切割脚本,编写脚本(这脚本很完美的)
[root@nginx ~]# cd /usr/local/nginx/logs/
[root@nginx logs]# vim cut_nginx_log.sh #日志切割脚本
#!/bin/bash
date=$(date +%F -d -1day) #由于是每天00:00:00/01点开始执行的,所以要减一天
cd /usr/local/nginx/logs #进到日志文件目录当中
if [ ! -d cut ] ; then
mkdir cut #如果没有cut目录就创一个,有的话往下执行
fi
mv access.log cut/access_$(date +%F -d -1day).log #每天移动这个日志到cut目录下
mv error.log cut/error_$(date +%F -d -1day).log #每天移动这个日志到cut目录下
/usr/local/nginx/sbin/nginx -s reload #重启nginx,重新生成日志文件!
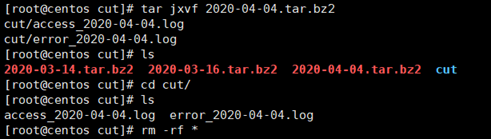
tar -jcvf cut/$date.tar.bz2 cut/access_$(date +%F -d -1day).log cut/error_$(date +%F -d -1day).log #将cut目录下的日志打包
rm -rf cut/access* && rm -rf cut/error* #删除日志,只留打包文件
find /usr/local/nginx/logs/cut -type f -mtime +10 | xargs rm -rf
#将10天前的所有文件(日志)删除,只保留10天内的日志,就行监控一样不用保留很多天!
添加权限
[root@nginx logs]# chmod +x cut_nginx_log.sh #添加可执行
添加计划任务
[root@nginx ~]# cat >>/var/spool/cron/root<<eof
00 00 * * * /bin/sh /usr/local/nginx/logs/cut_nginx_log.sh >/dev/null 2>&1
eof #以上命令等同于root用户执行crontab -e
执行脚本
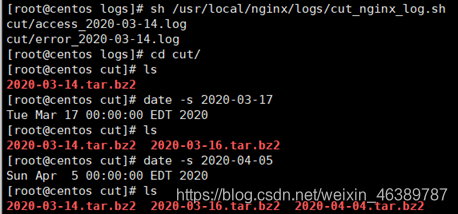
[root@nginx ~]# sh /usr/local/nginx/logs/cut_nginx_log.sh
查看结果
[root@nginx ~]# ls /usr/local/nginx/logs/cut
2019-07-07.tar.bz2
12.去掉不需要的日志统计(写到虚拟主机当中)
健康检查的日志,不用输入到log中,因为这些日志没有意义,我们分析的话只需要分析访问日志,看看一些页面链接,如200,301,404的状态吗,在SEO中很重要,而且我们统计PV是页面计算,这些都没有意义,反而消耗了磁盘IO,降低了服务器性能,我们可以屏蔽这些如图片,js,css这些不宜变化的内容
[root@nginx logs]# vim /usr/local/nginx/conf/nginx.conf
100 location ~ .*.(js|jpg|jpeg|JPG|JPEG|css|bmp|gif|GIF)$ {
101 access_log off; #以…结尾的这些不宜变化的内容我不看了
102 }
日志格式优化(在全局当中开启注释)
[root@nginx logs]# vim /usr/local/nginx/conf/nginx.conf #开启25-29行
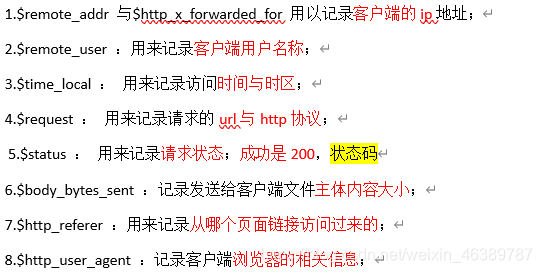
25 log_format main '$remote_addr - $remote_user [$time_local] “$request” ’
26 '$status $body_bytes_sent “$http_referer” ’
27 ‘“$http_user_agent” “$http_x_forwarded_for”’;
28
29 access_log logs/access.log main;
13.目录(文件)访问控制
主要用在禁止目录下指定文件被访问,当然也可以禁止所有文件被访问!一般什么情况下用?比如是有存储共享,这些文件本来都只是一些下载资源文件,那么这些资源文件就不允许被执行(访问),如sh,py,pl,php等等
禁止访问images下面的php程序文件
[root@nginx ~]# vim /usr/local/nginx/conf/nginx.conf
103 location ~ ^/images/.*.(php|php5|.sh|.py|.pl)$ {
104 deny all; #禁止用户访问images目录下…文件。
105 }
重启服务
[root@nginx ~]# nginx -s reload
创建测试文件
[root@nginx ~]# mkdir /usr/local/nginx/html/images
[root@nginx ~]# echo “<?php phpinfo(); ?>” > /usr/local/nginx/html/images/index.php
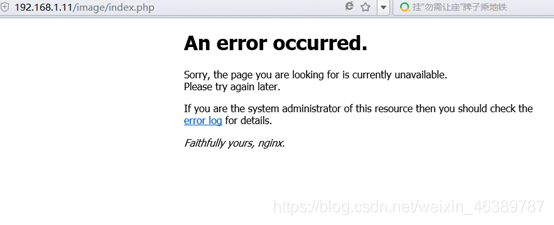
测试访问
http://192.168.100.101/image/index.php
多个目录书写方法
[root@nginx ~]# vim /usr/local/nginx/conf/nginx.conf
location ~ ^/images/(attachment|avatar)/.*\.(php|php5|.sh|.py|.py)$ {
deny all; #禁止用户访问…目录下的…文件
}
对目录进行访问限制
创建2个目录
[root@nginx ~]# mkdir -p /usr/local/nginx/html/{aa,bb}
创建测试文件
[root@nginx ~]# echo ‘aa’ > /usr/local/nginx/html/aa/index.html
[root@nginx ~]# echo ‘bb’ > /usr/local/nginx/html/bb/index.html
配置目录拒绝访问(或者下面那种书写方式)
[root@nginx ~]# vim /usr/local/nginx/conf/nginx.conf
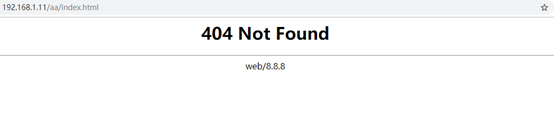
113 location /aa/ { return 404 ; } #返回404报错
114 location /bb/ { return 403 ; } #返回403报错
重载nginx
[root@nginx ~]# nginx -s reload
测试
http://192.168.100.101/aa/index.html
http://192.168.100.101/bb/index.html

也可以配置deny all方式拒绝
[root@nginx ~]# vim /usr/local/nginx/conf/nginx.conf #修改内容
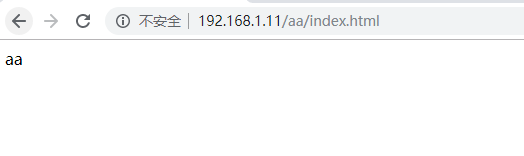
113 location ~ ^/(aa)/ {
allow 192.168.100.0/24; #允许…网段访问这个aa目录
114 deny all; #匹配即停止,除100.0网段,拒绝所有
115 }
116 location /bb/ { return 403 ; }
[root@nginx ~]# nginx -s reload
http://192.168.100.101/aa/index.html
对整个网站根目录访问控制
针对整个网站的写法,对/限制就OK,允许1.0网段访问网站
[root@nginx ~]# vim /usr/local/nginx/conf/nginx.conf
118 location ~ / {
119 allow 192.168.1.0/24; #可以写IP段,也可以写IP
120 deny all;
121 }
通过if语句控制,给以友好的错误提示
拒绝192.168.1.254访问网站
[root@nginx ~]# vim /usr/local/nginx/conf/nginx.conf
118 location ~ / {
119 allow 192.168.100.0/24;
120 if ( $remote_addr = 192.168.100.22 ) {
121 return 404;
122 }
123 deny all;
124 }
[root@nginx ~]# nginx -s reload
测试:
http://192.168.100.101/,我当前就是100.22,所以访问不成功
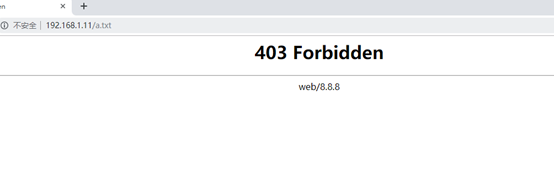
配置nginx禁止访问*.txt文件
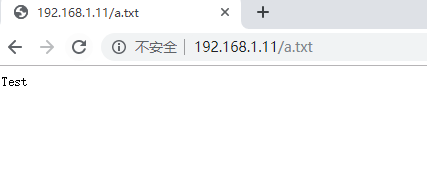
创建测试文件
[root@nginx ~]# echo Test > /usr/local/nginx/html/a.txt
测试
http://192.168.100.101/a.txt
配置规则,禁止访问txt
[root@nginx ~]# vim /usr/local/nginx/conf/nginx.conf
106 location ~* \.(txt|doc)$ {
107 if ( -f $request_filename) {
108 root /usr/local/nginx/html;
rewrite ^/(.*)$ http://www.baidu.com last;
#rewrite跳转规则,当访问以.txt.doc结尾的给你跳转到那个页面
109 break;
110 }
111 deny all;
112 }
重载nginx
[root@nginx ~]# nginx -s reload
测试
http://192.168.100.101/a.txt
14.配置ip和301跳转
有时候,我们发现访问网站的时候,使用IP也是可以的,我们可以把这一层给屏蔽掉,让其直接反馈给403,也可以做跳转
跳转的做法,修改配置文件
[root@nginx ~]# vim /usr/local/nginx/conf/nginx.conf
server {
listen 80;
server_name _ #添加一个下划线
rewrite ^ http://www.baidu.com$request_uri?; #只要匹配上这个虚拟主机,就会直接跳转到百度上
重置nginx
[root@nginx ~]# nginx -s reload
测试
http://192.168.100.101
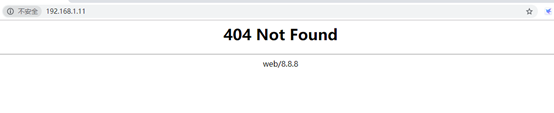
403反馈的做法
[root@nginx ~]# vim /usr/local/nginx/conf/nginx.conf
server { #重新添加一个server
listen 80 default_server;
server_name _;
return 403;
} #只要你输入的不是www.qingniao.com就给你跳转到403页面
301跳转的做法
我们域名在解析的过程中,将qingniao.com跳转到 www.qingniao.com
由80端口切换到443端口。(重定向)
配置301跳转
 [root@nginx ~]# vim /usr/local/nginx/conf/nginx.conf
server {
    listen       80;
    root        html;
    server_name  www.qingniao.com qingniao.com;
                if (\$host = 'qingniao.com' ) {
                        rewrite ^/(.*)$ http://www.qingniao.com/\$1 permanent;
                        }	#在原server当中修改添加这些话
$1表示不管你qingniao.com后面加什么,都跳转到www.qingniao.com…
rewrite ^/(.*)\$ https://www.qingniao.com/$1 permanent;	#加密的服务,当你端口是443
permanent	返回301永久重定向,页面永久被移走	#用360极速浏览器
修改hosts
[root@nginx ~]# vim /etc/hosts
192.168.100.101 www.qingniao.com
192.168.100.101 qingniao.com
重载nginx
[root@nginx ~]# nginx -s reload
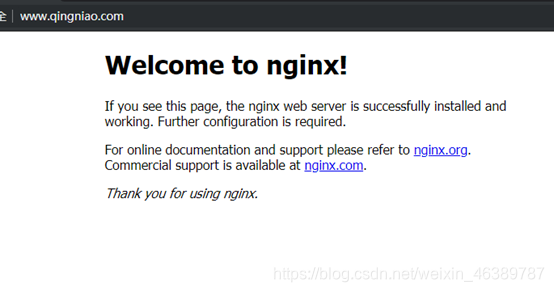
测试
http://www.qingniao.com/
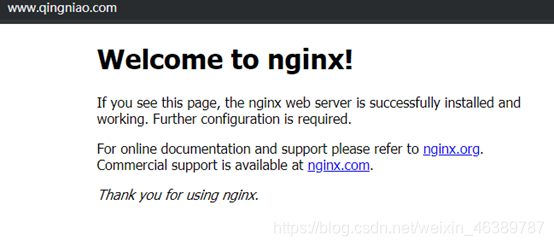
http://qingniao.com
15.防盗链
防止别人直接从你网站引用图片等链接,消耗了你的资源和网络流量,那么我们的解决办法由几种:
1:水印,品牌宣传,你的带宽,服务器足够(不建议弄)
2:防火墙,直接控制,前提是你知道IP来源(不建议弄)
3:防盗链策略
错误页面的提示,对于自定义错误页面,可以定义到404页面(选一个)
[root@nginx ~]# vim /usr/local/nginx/conf/nginx.conf
error_page 404 /404.html;
直接给予404的错误提示(选一个),本实验做的是这个
[root@nginx ~]# vim /usr/local/nginx/conf/nginx.conf
location / {
root html;
index index.html index.htm;
} #直接再第一个localtion下面填写以下内容
location ~* .(jpg|gif|png|swf|flv|wma|wmv|asf|mp3|mmf|zip|rar)$ {
valid_referers none blocked *.qingniao.com qingniao.com;
if ($invalid_referer) {
return 404;
}
}
设置图片,来做rewrite跳转(选一个)
[root@nginx ~]# vim /usr/local/nginx/conf/nginx.conf
location ~* \.(jpg|gif|png|swf|flv|wma|wmv|asf|mp3|mmf|zip|rar)$ {
valid_referers none blocked *.qingniao.com qingniao.com;
if ($invalid_referer) {
rewrite ^/ http://www.qingniao.com/img/test.jpg;
}
}
记得上传这个图片,只要你不是通过www.qingniao.com和qingniao.com访问过来的,我就给你返回这张照片
防盗链测试
使用apache做为一个测试站点,域名为www.test.com,在测试页上做一个超链接,链接nginx站点的一张图片
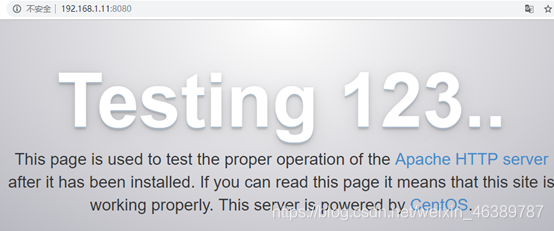
安装httpd(还在这个服务器)
[root@nginx ~]# yum -y install httpd
配置httpd
修改监听端口为8080,修改ServerName为www.test.com:8080,不然两个80端口会有冲突
[root@nginx ~]# vim /etc/httpd/conf/httpd.conf
Listen 8080
ServerName www.test.com:8080
新建测试文件
Yum安装的httpd,网站根目录为/var/www/html
[root@nginx ~]# vim /var/www/html/test.html
<\a href=“http://www.qingniao.com/qingniao.jpg”>lianjie</a>
上传qingniao.jpg图片
[root@nginx ~]# cd /usr/local/nginx/html/
[root@nginx html]# ls
50x.html bbs index.html qingniao.jpg
修改hosts(记得在自己本地也添加)
[root@nginx html]# vim /etc/hosts
192.168.100.101 www.test.com #最后添加这一行
启动httpd
[root@nginx ~]# systemctl start httpd
测试
http://192.168.100.101:8080/
http://192.168.100.101:8080/test.html
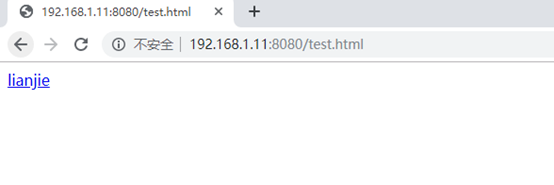
点击lianjie
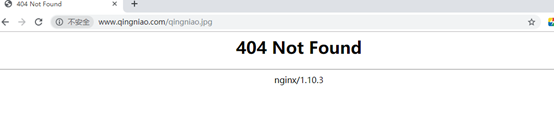
可以看到超链接被拒绝了,说明防盗链做成功了
直接打开http://www.qingniao.com/qingniao.jpg

16.内部身份验证
配置认证
[root@nginx ~]# vim /usr/local/nginx/conf/nginx.conf
location /bbs/ {
auth_basic “haha”;
auth_basic_user_file /usr/local/nginx/conf/passwd;
}
auth_basic #在弹窗显示的网站名称
auth_basic_user_file; #指定保存用户名密码的文件
用户创建
[root@nginx ~]# yum -y install httpd #安装htpasswd工具
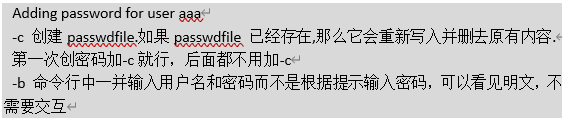
[root@nginx ~]# htpasswd -cb /usr/local/nginx/conf/passwd aaa 123
授权
[root@nginx ~]# chmod 400 /usr/local/nginx/conf/passwd
#设完密码后有的,默认没有。密钥文件也要设置400,只有属主能看这个文件
[root@nginx ~]# chown nginx /usr/local/nginx/conf/passwd
创建目录
[root@nginx ~]# mkdir /usr/local/nginx/html/bbs
重载nginx
[root@nginx ~]# nginx -s reload
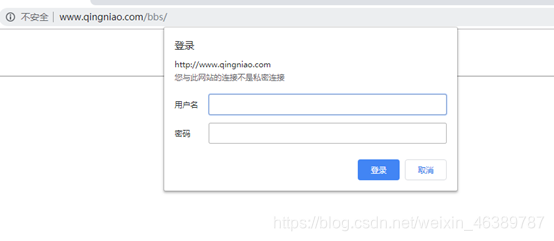
测试
http://www.qingniao.com/bbs/
17.安装php
在Nginx中,我们使用的是php-fpm来对php页面解析,PHP-FPM其实是PHP源代码的一个补丁,指在将FastCGI进程管理整合进PHP包中。必须将它patch到你的PHP源代码中,再编译安装PHP后才可以使用。
从PHP5.3.3开始,PHP中直接整合了PHP-FPM,所以从PHP5.3.3版本以后,不需要下载PHP-FPM补丁包了,下面是PHP-FPM官方发出来的通知:http:#php-fpm.org/download

安装依赖:
[root@nginx ~]# yum -y install php-mcrypt libmcrypt libmcrypt-devel autoconf freetype gd libmcrypt libpng libpng-devel libjpeg libxml2 libxml2-devel zlib curl curl-devel re2c bzip2-devel libmcrypt-devel freetype-devel libjpeg-devel
安装libmcrypt
上传软件包
[root@nginx ~]# ls
anaconda-ks.cfg libmcrypt-2.5.7.tar.gz nginx-1.10.3.tar.gz php-5.6.36.tar.gz
[root@nginx ~]# tar zxf libmcrypt-2.5.7.tar.gz
[root@nginx ~]# cd libmcrypt-2.5.7/
[root@nginx libmcrypt-2.5.7]# ./configure --prefix=/usr/local/libmcrypt && make && make install
解压、安装PHP包
[root@nginx ~]# tar -zxvf php-5.6.36.tar.gz -C /usr/local/src/
安装php,预编译
[root@nginx ~]# cd /usr/local/src/php-5.6.36/
[root@nginx php-5.6.36]# ./configure --prefix=/usr/local/php5.6 --with-mysql=mysqlnd --with-pdo-mysql=mysqlnd --with-mysqli=mysqlnd --with-openssl --enable-fpm --enable-sockets --enable-sysvshm --enable-mbstring --with-freetype-dir --with-jpeg-dir --with-png-dir --with-zlib --with-libxml-dir=/usr --enable-xml --with-mhash --with-mcrypt=/usr/local/libmcrypt --with-config-file-path=/etc --with-config-file-scan-dir=/usr/local/php5.6/etc/ --with-bz2 --enable-maintainer-zts
参数选项
Php配置选项中文手册
http://php.net/manual/zh/configure.about.php
注,相关选项的解释:
–prefix=/usr/local/php5.6 //安装位置
–with-mysql=mysqlnd //支持mysql
–with-pdo-mysql=mysqlnd //支持pdo模块
–with-mysqli=mysqlnd //支持mysqli模块
注:上面的三选项的作用:数据库与php不在一个服务器上,指定此种方式,安装数据库连接驱动
–with-apxs2 #将php编译为Apache的一个模块进行使用
–enable-mbstring #多字节字符串的支持
–with-curl #支持cURL
–with-gd #支持gd库
–enable-fpm #支持构建fpm
–with-config-file-path #设置配置文件路径
–with-openssl #支持openssl模块
–enable-fpm #支持fpm模式
–enable-sockets #启用socket支持
–enable-sysvshm #启用系统共享内存支持
–enable-mbstring #多字节字串、像我们的中文就是多字节字串
–with-freetype-dir #支持freetype、就要装freetype-devel、跟字体相关的、字体解析工具
–with-jpeg-dir
–with-png-dir
注:上面的二选项的作用:处理jpeg、png图片的、php可以动态生成jpeg图片
–with-zlib #是个压缩库、在互联网传输时用来压缩传输的
–with-libxml-dir=/usr #这个libxml是用来解析xml的、指定/usr下
–enable-xml #支持xml的
–with-mhash #支持mhash
–with-mcrypt=/usr/local/libmcrypt #libmcrypt-devel这个程序包所指定的
–with-config-file-path=/usr/local/php5.6/etc #指定配置文件的存放路径的
–with-config-file-scan-dir=/etc/php.d #配置文件扫描路径
–with-bz2 #支持BZip2
–enable-maintainer-zts
编译
[root@nginx php-5.6.36]# make -j 4
安装
[root@nginx php-5.6.36]# make install
修改fpm配置php-fpm.conf.default文件名称
[root@nginx ~]# cd /usr/local/php5.6/etc/
[root@nginx etc]# cp php-fpm.conf.default php-fpm.conf
生成php.ini配置文件
[root@nginx ~]# cp /usr/local/src/php-5.6.36/php.ini-production /usr/local/php5.6/etc/php.ini #主的辅助配置文件
修改默认运行账号
修改默认运行用户,组为nginx
[root@nginx etc]# vim php-fpm.conf
user = nginx
group = nginx
复制php-fpm启动脚本到init.d
[root@nginx ~]# cp /usr/local/src/php-5.6.36/sapi/fpm/init.d.php-fpm /etc/init.d/php-fpm
赋予执行权限
[root@nginx ~]# chmod +x /etc/init.d/php-fpm
添加开机启动
[root@nginx ~]# chkconfig --add php-fpm
[root@nginx ~]# chkconfig php-fpm on
启动服务
[root@nginx ~]# /etc/init.d/php-fpm start
Starting php-fpm done
查看端口监听状态
[root@nginx ~]# netstat -antpu | grep php-fpm
tcp 0 0 127.0.0.1:9000 0.0.0.0:* LISTEN 7767/php-fpm: maste
生成php测试文件
[root@nginx ~]# vim /usr/local/nginx/html/a.php
<?php phpinfo(); ?>[root@nginx ~]# vim /usr/local/nginx/conf/nginx.conf
location / {
root html;
index index.php index.html index.htm; #修改这一行
}
重启服务
[root@nginx ~]#nginx -s reload
测试(要没访问成功就往下执行)
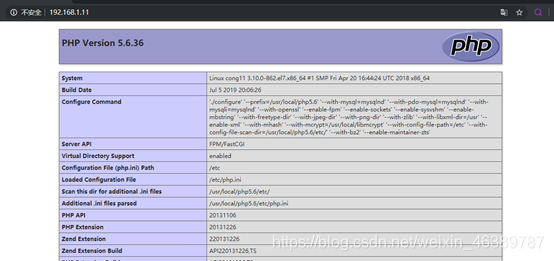
http://192.168.100.101/a.php
由于没有设置nginx和php连接的接口,所以访问不成功
配置nginx支持index.php(具体的参数详解,在上篇博客nginx优化1当中)
修改配置文件(要么打开注释,要么直接添加),添加nginx和php的fastcgi
修改nginx.conf配置文件,在http标签中添加如下:
[root@nginx ~]# vim /usr/local/nginx/conf/nginx.conf #在http标签中添加如下:
42 fastcgi_connect_timeout 300;
43 fastcgi_send_timeout 300;
44 fastcgi_read_timeout 300;
45 fastcgi_buffer_size 64k;
46 fastcgi_buffers 4 64k;
47 fastcgi_busy_buffers_size 128k;
48 fastcgi_temp_file_write_size 128k;
49 #fastcgi_temp_path /data/ngx_fcgi_tmp;
50 fastcgi_cache_path /data/ngx_fcgi_cache levels=2:2 #缓存路径,levels目录层次2级
51 keys_zone=ngx_fcgi_cache:512m #定义了一个存储区域名字,缓存大小
52 inactive=1d max_size=40g; #不活动的数据在缓存中多长时间,目录总大小
[root@nginx ~]# vim /usr/local/nginx/conf/nginx.conf #在server标签当中添加以下行
location ~ .*.(php|php5)?$
{
fastcgi_pass 127.0.0.1:9000;
fastcgi_index index.php;
include fastcgi.conf;
fastcgi_cache ngx_fcgi_cache;
fastcgi_cache_valid 200 302 1h;
fastcgi_cache_valid 301 1d;
fastcgi_cache_valid any 1m;
fastcgi_cache_min_uses 1;
fastcgi_cache_use_stale error timeout invalid_header http_500;
fastcgi_cache_key http://$host$request_uri;
fastcgi_param SCRIPT_FILENAME /usr/local/nginx/html$fastcgi_script_name;
include fastcgi_params;
}
测试
http://192.168.100.101/


 被折叠的 条评论
为什么被折叠?
被折叠的 条评论
为什么被折叠?
 到【灌水乐园】发言


