


playwright可以很方面的重新再次执行失败的用例,在v1.44版本中,支持了--last-failed选项,可以实现重新执行失败用例测试case。
1. 版本支持
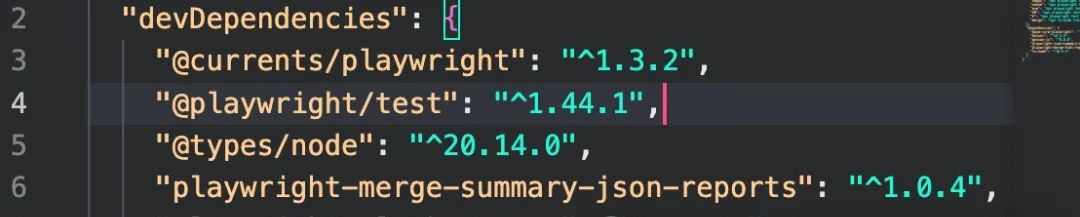
首先,确保Playwright在v1.44 以上版本
-
• Browser Versions
-
•
Chromium 125.0.6422.14 -
•
Mozilla Firefox 125.0.1 -
•
WebKit 17.4 -
• 明确测试支持的:
-
•
Google Chrome 124 -
•
Microsoft Edge 124
2. 使用命令
npx playwright test--last-failed例如一下的测试,将有一半的时间失败。 运行后,我看到了这些结果。
npx playwright test
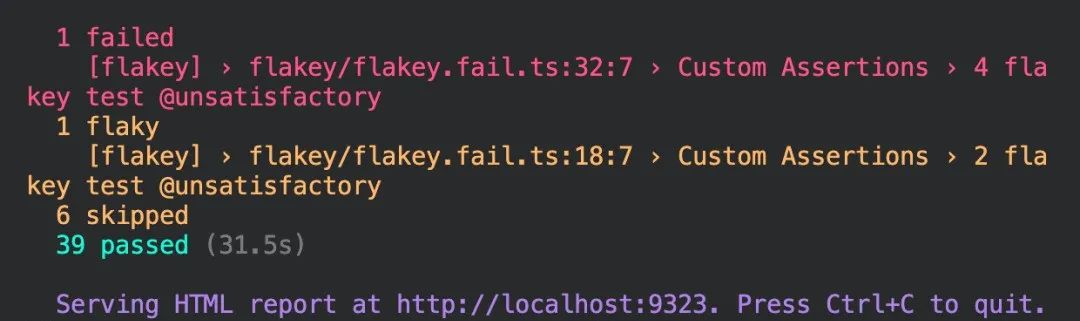
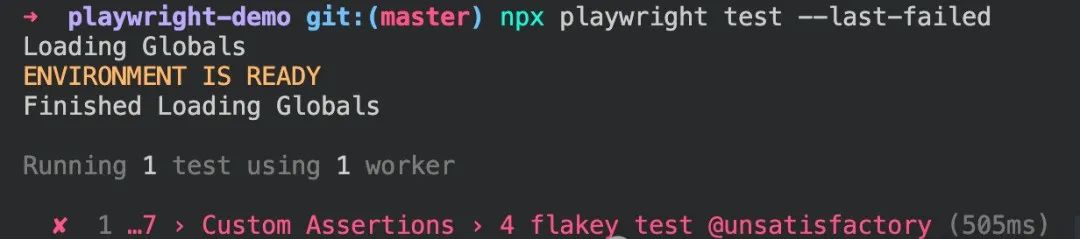
现在可以运行该命令,这将重新运行失败的 1 测试。在下面的场景中,它失败了,但在“重试”时它通过了。这表明该命令将对上次运行中处于失败状态的任何测试进行排队。
npx playwright test --last-failed--last-failed
小结
虽然重新运行失败的测试可能不是最佳做法,但对于那些希望获得快速反馈的人来说,这是一个很好的解决方案。如果您依赖此策略,并且从不花时间调试或维护测试,则自动化套件和您对它的信心将遇到问题。
基于python版本的快速上手版本
3. 前提条件
需要安装以下软件包:
-
•
playwright -
•
pytest-playwright -
•
pytest-xdist
默认最新版本即可。
3.1 文件夹结构
项目的基本文件夹结构如下:
/pages
/tests
conftest.py
requirements.txt
3.2 安装
在requirements.txt文件中添加所需的软件包:
playwright>=1.44.0
pytest-playwright>=0.5.0
pytest-xdist>=3.6.1
然后运行以下命令:
pip install -r requirements.txt注意:根据操作系统的不同,可能需要使用pip3。
接着运行:
playwright install此命令将安装所需的浏览器。
4. 开始测试
4.1 添加基本测试
添加一个基本测试 使用Playwright进行基本的登录测试:
/tests/test_login.py
from playwright.sync_api import Page, expect

def test_login_success(page: Page):
    page.goto('https://react-redux.realworld.io/#/login')
    page.get_by_placeholder('Email').type('test_playwright_login@test.com')
    page.get_by_placeholder('Password').type('Test123456')
    page.get_by_role('button', name='Sign in').click()
    expect(page.get_by_role('link', name='test_playwright_login')).to_be_visible()
4.2 运行测试
在有界面模式下运行单个测试。Playwright默认在无界面模式下运行。
pytest -k test_login_success --headed运行所有测试:
pytest选择浏览器:
pytest --browser webkit --browser firefox4.3. 实现页面对象模式
要开始使用页面对象模式(POM),我们需要添加以下内容: pages/login_page.py
from playwright.sync_api importPage

classLogin:
def __init__(self, page:Page):
self.page = page
self.email_input = page.get_by_placeholder('Email')
self.password_input = page.get_by_placeholder('Password')
self.signin_button = page.get_by_role('button', name='Sign in')

defgoto(self):
self.page.goto('/#/login')
pages/navbar_page.py
from playwright.sync_api import Page

class Navbar:
    def __init__(self, page: Page):
        self.page = page

    def user_link(self, username: str):
return self.page.get_by_role('link', name=username)将应用程序的基本URL添加到conftest.py文件中作为一个fixture:
conftest.py
import pytest

@pytest.fixture(scope='session')
def base_url():
    return 'https://react-redux.realworld.io/'
现在,测试代码如下: tests/test_login.py
from playwright.sync_api importPage, expect
from pages.login_page importLogin
from pages.navbar_page importNavbar

def test_login_success(page:Page):
    login =Login(page)
    navbar =Navbar(page)
    login.goto()
    login.email_input.type('test_playwright_login@test.com')
    login.password_input.type('Test123456')
    login.signin_button.click()
    expect(navbar.user_link('test_playwright_login')).to_be_visible()
4.5 使用Pytest Fixtures实例化页面对象
我们可以使用Pytest的fixtures来实例化页面对象,而不是在每个测试中进行实例化。
在conftest.py文件中添加以下内容:
conftest.py
import pytest
from playwright.sync_api importPage
from pages.login_page importLogin
from pages.navbar_page importNavbar

@pytest.fixture(scope='session')
def base_url():
return'https://react-redux.realworld.io/'

@pytest.fixture
def page(page:Page)->Page:
    timeout =10000
    page.set_default_navigation_timeout(timeout)
    page.set_default_timeout(timeout)
return page

@pytest.fixture
def login(page)->Login:
returnLogin(page)

@pytest.fixture
def navbar(page)->Navbar:
returnNavbar(page)
现在测试代码如下:
tests/test_login.py
from playwright.sync_api import expect
from users import USERS

def test_login_success(login, navbar):
    login.goto()
    login.email_input.type(USERS.user_01.email)
    login.password_input.type(USERS.user_01.password)
    login.signin_button.click()
    expect(navbar.user_link(USERS.user_01.username)).to_be_visible()
4.6 移除测试中的用户数据
我们创建一个users.py文件来存储用户数据。DictObject是一个实用类,用于通过对象表示法访问字典值。我们将其保存在这里。
users.py
import json

classDictObject(object):
def __init__(self, dict_):
self.__dict__.update(dict_)

@classmethod
def from_dict(cls, d):
return json.loads(json.dumps(d), object_hook=DictObject)

USERS =DictObject.from_dict({
'user_01':{
'username':'test_playwright_login',
'email':'test_playwright_login@test.com',
'password':'Test123456'
}
})
更新后的测试代码:
tests/test_login.py
from playwright.sync_api import expect
from users import USERS

def test_login_success(login, navbar):
    login.goto()
    login.email_input.type(USERS.user_01.email)
    login.password_input.type(USERS.user_01.password)
    login.signin_button.click()
    expect(navbar.user_link(USERS.user_01.username)).to_be_visible()
4.7并行运行测试
要并行运行测试,我们使用pytest-xdist。到目前为止,应该已经安装了它。
pytest -n 5其中-n是工作进程的数量。
4.8管理环境数据
通常,我们希望在不同的环境中运行测试。因此,我们需要根据所选的环境设置基本URL。
在conftest.py文件中添加以下更改:
conftest.py
def pytest_addoption(parser):
    parser.addoption("--env", action="store",default="staging")

@pytest.fixture(scope='session', autouse=True)
def env_name(request):
return request.config.getoption("--env")

@pytest.fixture(scope='session')
def base_url(env_name):
if env_name =='staging':
return'https://react-redux.realworld.io/'
elif env_name =='production':
return'https://react-redux.production.realworld.io/'
else:
exit('Please provide a valid environment')
之后,我们可以通过如下方式传递环境名称作为参数:
pytest --env staging4.9 定义全局的测试前后操作
conftest.py
@pytest.fixture(scope="function", autouse=True)
def before_each_after_each(page:Page, base_url):
# 这里的代码在每个测试之前运行
print('before the test runs')

# 在每个测试之前导航到起始URL
    page.goto(base_url)
yield

# 这里的代码在每个测试之后运行
print('after the test runs')这个fixture可以添加到conftest.py中并应用到每个测试,或者可以在单个测试模块中定义并仅应用于该模块中的测试。
5.0标记测试
我们可以使用Pytest的标记功能来标记测试。
import pytest

@pytest.mark.login
def test_login_success():
# ...我们必须在pytest.ini文件中注册自定义标记(在根文件夹中添加一个新文件)。
pytest.ini
[pytest]
markers =
    login: mark test as a login test.
    slow: mark test as slow.
要运行带有自定义标记的测试,我们使用:
pytest -m login6 工具
Codegen
此工具可以实时生成捕获操作的测试。它对于生成定位器和断言非常有用。如果我们使用POM,则需要将生成的代码重构到POM中。
Playwright Inspector
这是一个调试工具,可以逐步运行测试等操作。
Trace Viewer
Trace Viewer记录测试的结果,以便以后进行回顾,并提供每个执行操作的实时预览。这在CI中运行测试时特别有用。
希望这篇文章对你有所帮助,祝你使用Playwright愉快!


 5863
5863

 被折叠的 条评论
为什么被折叠?
被折叠的 条评论
为什么被折叠?
 到【灌水乐园】发言


