


RabbitMQ在springboot中使用起来非常简单,如果不涉及到一些高级场景的使用,只需要非常少的配置。springboot提供了spring-boot-starter-amqp对消息的各种支持。
使用
我们知道,RabbitMQ把消息发送给队列时有四种消息路由策略:
- direct(直连)
- fanout(分发)
- topic (主题)
- headers(头部)
我们来看看最常用的direct、fanout、topic在springboot中如何使用。
创建工程,添加对应依赖:
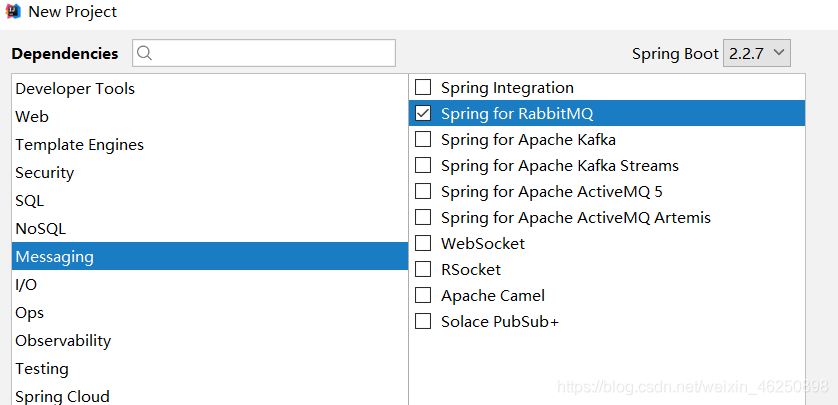
工程创建后,pom.xml的依赖:
	<dependencies>
		<dependency>
			<groupId>org.springframework.boot</groupId>
			<artifactId>spring-boot-starter-amqp</artifactId>
		</dependency>
		<dependency>
			<groupId>org.springframework.boot</groupId>
			<artifactId>spring-boot-starter-web</artifactId>
		</dependency>
		<dependency>
			<groupId>org.springframework.boot</groupId>
			<artifactId>spring-boot-starter-test</artifactId>
			<scope>test</scope>
		</dependency>
		<dependency>
			<groupId>org.springframework.amqp</groupId>
			<artifactId>spring-rabbit-test</artifactId>
			<scope>test</scope>
		</dependency>
	</dependencies>
然后在application.yml中配置RabbitMQ的基本信息:
spring:
  rabbitmq:
    #默认地址localhost
    host: 192.168.56.101
    #默认端口5672
    port: 5672
    username: guest
    password: guest
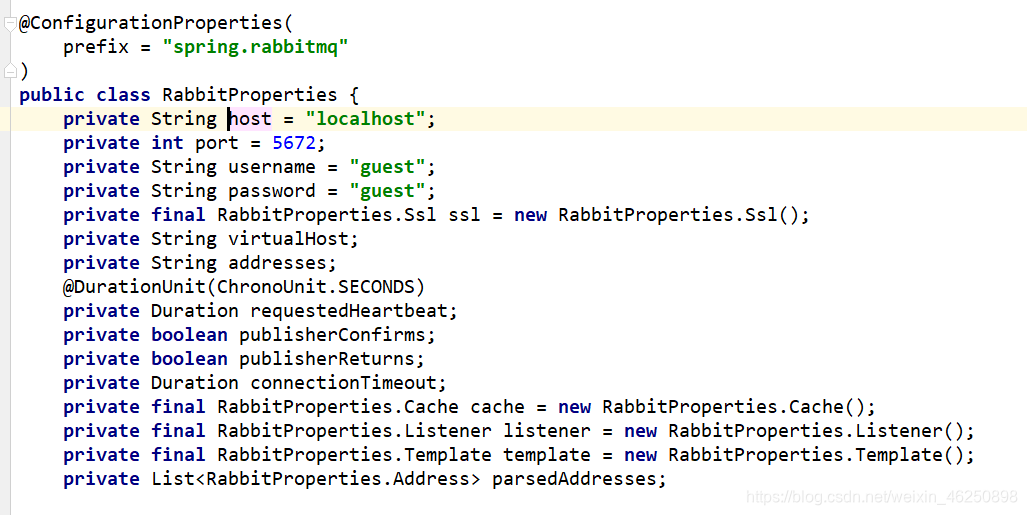
所有可以配置的信息都在RabbitProperties类中看到:
接下来使用direct exchange(直连交换机)。
direct exchange
创建DirectConfig类配置相关队列等信息:
package com.xsw.springbootrabbitmqtest.config;

import org.springframework.amqp.core.Binding;
import org.springframework.amqp.core.BindingBuilder;
import org.springframework.amqp.core.DirectExchange;
import org.springframework.amqp.core.Queue;
import org.springframework.context.annotation.Bean;
import org.springframework.context.annotation.Configuration;

@Configuration
public class DirectConfig {
    //创建直连交换机
    @Bean
    public DirectExchange directExchangeTest(){
        return new DirectExchange("directExchangeTest",true,false);
    }
    //创建队列
    @Bean
    public Queue directQueueTest(){
        /*
        参数:
            name:       队列名
            durable:    是否持久化
            exclusive:  排他性,是否只有当前连接可用
            autoDelete: 没有生产者和消费者使用此队列时,是否自动删除队列
         */
        return new Queue("directQueueTest",true,false,false);
    }

    //绑定
    @Bean
    public Binding binding(){
        return BindingBuilder.bind(directQueueTest()).to(directExchangeTest()).with("routingkey");
    }
}
创建Send类发送消息到名为“directExchangeTest”的交换机:
package com.xsw.springbootrabbitmqtest;

import org.springframework.amqp.rabbit.core.RabbitTemplate;
import org.springframework.beans.factory.annotation.Autowired;
import org.springframework.stereotype.Component;

@Component
public class Send {
	//RabbitTemplate是springboot为我们封装好的操作消息的类
    @Autowired
    RabbitTemplate rabbitTemplate;

    public void send(){
        rabbitTemplate.convertAndSend("directExchangeTest","routingkey","hello direct");
        System.out.println("已发送消息");
    }
}
在测试类中运行发送消息的方法:
package com.xsw.springbootrabbitmqtest;

import org.junit.Test;
import org.junit.runner.RunWith;
import org.springframework.amqp.core.*;
import org.springframework.amqp.rabbit.core.RabbitTemplate;
import org.springframework.beans.factory.annotation.Autowired;
import org.springframework.boot.test.context.SpringBootTest;
import org.springframework.test.context.junit4.SpringRunner;

import java.util.Collection;
import java.util.Map;

@RunWith(SpringRunner.class)
@SpringBootTest
public class SpringbootRabbitmqtestApplicationTests {

	@Autowired
	Send send;

	@Test
	public void test(){
		send.send();
	}

}
可以看到控制台:

此时,可以去RabbitMQ管理界面查看消息是否发送服务器:

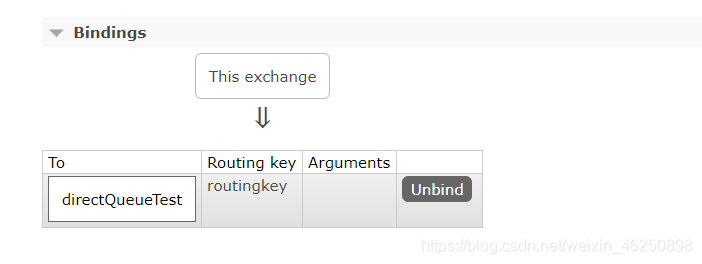
可以看到的是,消息已经发送到RabbitMQ了(没有消费者监听队列,还没有消费消息)。
创建Recv类用于接收消息:
package com.xsw.springbootrabbitmqtest;


import org.springframework.amqp.rabbit.annotation.RabbitHandler;
import org.springframework.amqp.rabbit.annotation.RabbitListener;
import org.springframework.stereotype.Component;

@Component
@RabbitListener(queues = "directQueueTest") //添加@RabbitListner注解监听“directQueueTest”队列
public class Recv {

    @RabbitHandler
    public void test(String message){
        System.out.println(message);
    }

}
接下来运行springboot主程序,看消费者是否收到了消息:

可以看到,控制台打印了消费者接收到的之前推送的消息。
fanout exchange
再来看看fanout交换机的使用,创建FanoutConfig:
package com.xsw.springbootrabbitmqtest.config;


import org.springframework.amqp.core.Binding;
import org.springframework.amqp.core.BindingBuilder;
import org.springframework.amqp.core.FanoutExchange;
import org.springframework.amqp.core.Queue;
import org.springframework.context.annotation.Bean;
import org.springframework.context.annotation.Configuration;

@Configuration
public class FanoutConfig {
    //创建名为fanoutExchangeTest的交换机
    @Bean
    public FanoutExchange fanoutExchangeTest(){
        return new FanoutExchange("fanoutExchangeTest",true,false);
    }

    //创建三个队列用于测试
    @Bean
    public Queue queue1(){
        return new Queue("queue1",true,false,false);
    }
    @Bean
    public Queue queue2(){
        return new Queue("queue2",true,false,false);
    }
    @Bean
    public Queue queue3(){
        return new Queue("queue3",true,false,false);
    }
    //将三个队列绑定到交换机
    @Bean
    public Binding binding1(){
        return BindingBuilder.bind(queue1()).to(fanoutExchangeTest());  //这里不用路由键,因为在fanout路由规则下路由键会被忽略
    }
    @Bean
    public Binding binding2(){
        return BindingBuilder.bind(queue2()).to(fanoutExchangeTest());  //这里不用路由键,因为在fanout路由规则下路由键会被忽略
    }
    @Bean
    public Binding binding3(){
        return BindingBuilder.bind(queue3()).to(fanoutExchangeTest());  //这里不用路由键,因为在fanout路由规则下路由键会被忽略
    }
}
接下来创建FanoutSend类:
@Component
public class FanoutSend {

    @Autowired
    RabbitTemplate rabbitTemplate;

     public void send(){
        rabbitTemplate.convertAndSend("fanoutExchangeTest",null,"hello fanout");
        System.out.println("发送消息");
    }
}
在测试类中发送消息:
	@Test
	public void test(){
//		send.send();
		fanoutSend.send();
	}

消息发送成功,创建3个消费者接收消息,FanoutRecv1.java:
/*
监听队列:queue1
 */
@Component
@RabbitListener(queues = "queue1")
public class FanoutRecv1 {
    @RabbitHandler
    public void test(String message){
        System.out.println("FanoutRecvq received message:"+message);
    }
}
FanoutRecv2.java:
/*
监听队列:queue2
 */
@Component
@RabbitListener(queues = "queue2")
public class FanoutRecv2 {
    @RabbitHandler
    public void test(String message){
        System.out.println("FanoutRecv2 received message:"+message);
    }
}
FanoutRecv3.java:
@Component
@RabbitListener(queues = "queue3")
public class FanoutRecv3 {
    @RabbitHandler
    public void Test(String message){
        System.out.println("FanoutRecv3 received message:"+message);
    }
}
运行springboot主程序,可以看到控制台:

可以看到只要发送到 fanoutExchange 这个分发交换机的消息, 三个队列都绑定这个交换机,所以三个消息接收类都监听到了这条消息。
topic
接下来使用topic exchange,创建TopicConfig类:
@Configuration
public class TopicConfig {
    @Bean
    public TopicExchange topicExchangeTest(){
        return new TopicExchange("topicExchangeTest");
    }
    @Bean
    public Queue queueA(){
        return new Queue("queue_a");
    }
    @Bean
    public Queue queueB(){
        return new Queue("queue_b");
    }
    @Bean
    public Queue queueC(){
        return new Queue("queue_c");
    }

    @Bean
    public Binding bindingA(){
        //将队列a绑定到topicExchangeTest交换机,绑定的路由键为#.news,这样凡是消息携带的路由键以news结尾都会推送到该队列中
        return BindingBuilder.bind(queueA()).to(topicExchangeTest()).with("#.news");
    }
    @Bean
    public Binding bindingB(){
        //将队列b绑定到交换机,绑定的路由键为china.#,这样凡是消息携带的路由键以China开头都会推送到该队列中
        return BindingBuilder.bind(queueB()).to(topicExchangeTest()).with("china.#");
    }
    @Bean
    public Binding bindingC(){
        //usa.#表示会把与usa相关的信息推送队列
        return BindingBuilder.bind(queueC()).to(topicExchangeTest()).with("usa.#");
    }
}
创建TopicSend类发送消息:
@Component
public class TopicSend {

    @Autowired
    RabbitTemplate rabbitTemplate ;

    public void sendChinaNews(){
        rabbitTemplate.convertAndSend("topicExchangeTest","china.news","欢迎订阅中国新闻");
    }
    public void sendUsaNews(){
        rabbitTemplate.convertAndSend("topicExchangeTest","usa.news","欢迎订阅美国新闻");
    }
}
在测试类中发送路由键为china.new的消息:
	@Test
	public void test(){
//		send.send();
//		fanoutSend.send();
		topicSend.sendChinaNews();
	}
接着创建3个类用于监听3个队列
TopicRecv1.java:
/*
监听名为queue_a的队列
 */
@Component
@RabbitListener(queues = "queue_a")
public class TopicRecv1 {
    @RabbitHandler
    public void test(String message){
        System.out.println("TopicRecv1 接收到了路由键为 #.news 的消息:"+message);
    }
}
TopicRecv2.java
/*
监听名为queue_b的队列
 */
@Component
@RabbitListener(queues = "queue_b")
public class TopicRecv2 {
    @RabbitHandler
    public void test(String message){
        System.out.println("TopicRecv2 接收到了路由键为 china.# 的消息:"+message);
    }
}
TopicRecv3.java
/*
监听名为queue_c的队列
 */
@Component
@RabbitListener(queues = "queue_c")
public class TopicRecv3 {
    @RabbitHandler
    public void test(String message){
        System.out.println("TopicRecv3 接收到了路由键为 usa.# 的消息:"+message);
    }
}
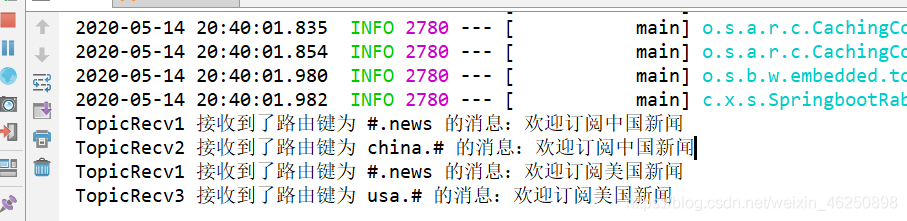
接下来,运行springboot主程序,控制台输出:

可以看到TopicRecv1和TopicRecv2都收到了消息,只有TopicRecv3没有收到,因为他只订阅usa相关的消息。
继续在测试类中发送路由键为usa.#的消息:
	@Test
	public void test(){
//		send.send();
//		fanoutSend.send();
//		topicSend.sendChinaNews();
		topicSend.sendUsaNews();
	}
可以看到控制台输出:
此时,TopicRecv1和TopicRecv3接收到了消息,只有TopicRecv2没有接收到消息,因为他只订阅了china相关的消息。
总结:以上就是简单的使用。


 被折叠的 条评论
为什么被折叠?
被折叠的 条评论
为什么被折叠?
 到【灌水乐园】发言


