


 本文介绍了如何在Django项目中使用Celery任务队列,并配合Redis作为消息 broker。内容包括Redis的安装方法,以及在Django的settings.py、celery.py和tasks.py文件中的配置步骤。此外,还提到了通过flower工具进行Web监控的实现。
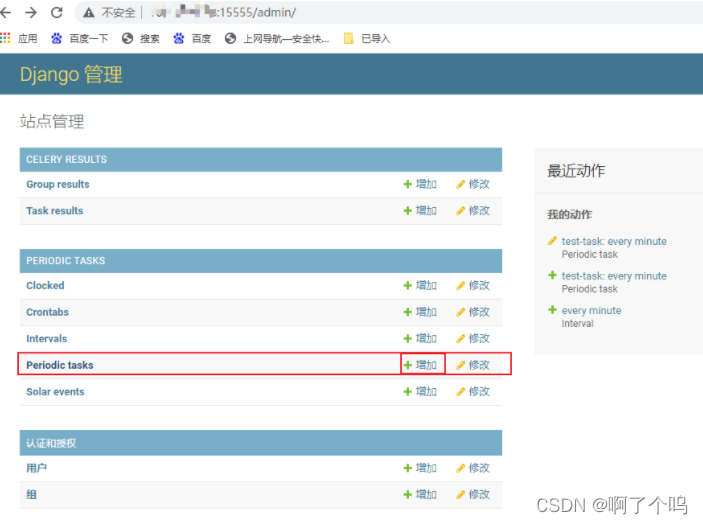
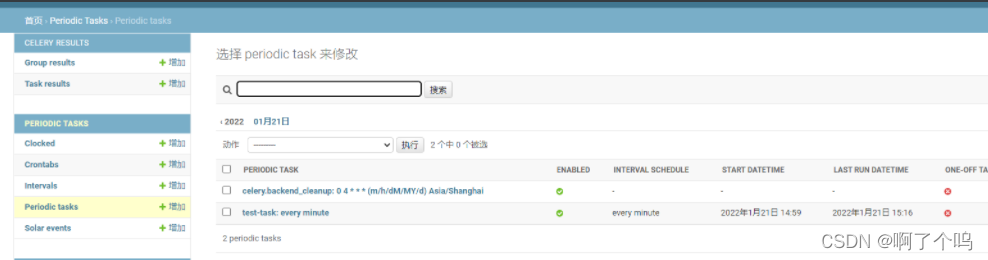
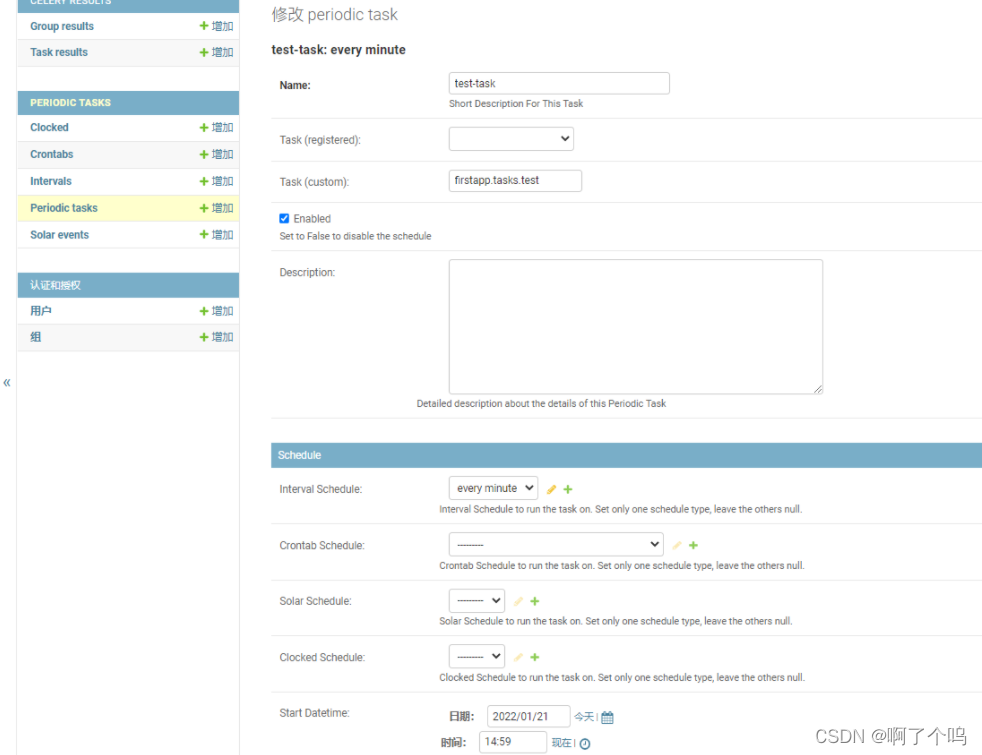
Django中使用celery
安装redis:
(37条消息) CentOS 8安装Redis的两种方式_sinat_41292836的博客-优快云博客_centos8 redis
win10下安装redis - W.Yentl - 博客园 (cnblogs.com)
# windows下的命令
redis-server.exe redis.windows.conf
redis-server --service-install redis.windows.conf
redis-server --service-start
redis-server --service-stop
redis-cli.exe -h 127.0.0.1 -p 6379
redis-cli
pip3 install celery
pip install django-celery-results
pip3 install django-celery-beat
pip3 install redis
python manage.py makemigrations
python manage.py migrate
settings.py
INSTALLED_APPS += [
	'django_celery_results',
	'django_celery_beat'
]


CELERY_BROKER_URL = 'redis://127.0.0.1:6379/2'
# CELERY_RESULT_BACKEND = 'redis://127.0.0.1:6379/3'
CELERY_RESULT_BACKEND = 'django_db' #使用django orm 作为结果存储
CELERY_RESULT_SERIALIZER = 'json'  # 结果序列化方案

CELERY_IMPORTS = (
	'app01.tasks',
)
celery.py
#!/usr/bin/env python3
# -*- coding:utf-8 -*-
# Author:sy
from __future__ import absolute_imports, unicode_literals
import os
from celery import Celery, platforms

os.environ.setdefault('DJANGO_SETTINGS_MODULE', 'celery_test.settings')
app = Celery('celery_test')
app.config_from_object('django.conf:settings', namespace='CELERY') # 使用CELERY_作为前缀,在settings中写配置
app.autodiscover_tasks()  #发现每个app下的tasks.py
platforms.C_FORCE_ROOT = True
tasks.py
# -*- coding:utf8 -*-
from __future__ import absolute_import, unicode_literals
from celery import shared_task
import time
# 这里不再使用@app.task, 而是使用@shared_task, 是指定可以在其他app中也可以调用这个任务
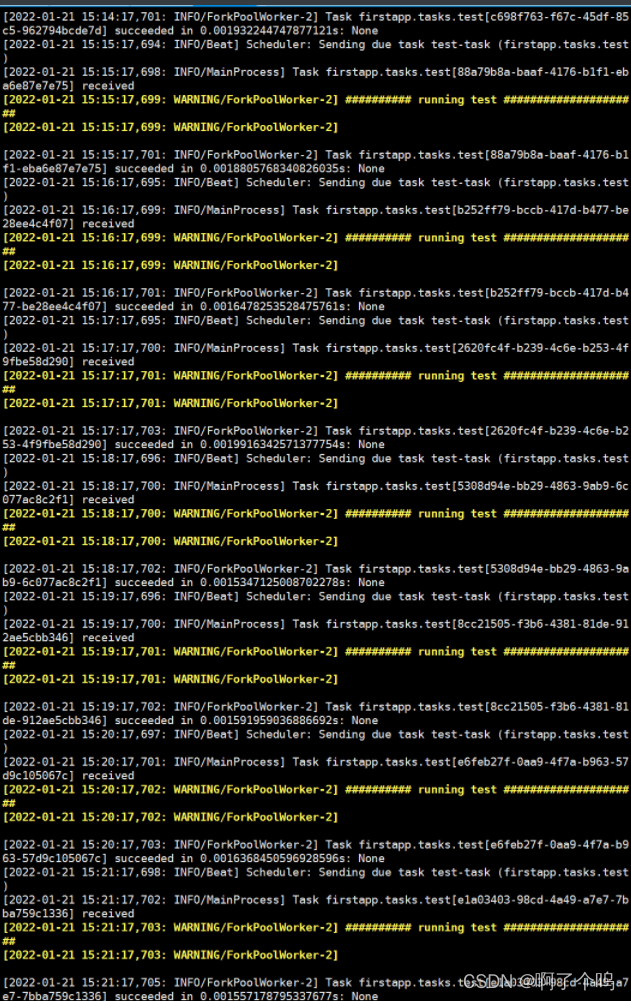
@shared_task
def add(x,y):
print('########## running add #####################')
return x + y
@shared_task
def minus(x,y):
# time.sleep(30)
print('########## running minus #####################')
return x - y
builddemo/builddemo/__init__.py文件中加入如下内容
from __future__ import absolute_import, unicode_literals
from .celery import app as celery_app
__all__ = ['celery_app']
https://github.com/Ran-oops/celery_learning/tree/master/celery_test
python manage.py createsuperuser
❯ celery -A builddemo worker -l info --beat
Running a worker with superuser privileges when the
worker accepts messages serialized with pickle is a very bad idea!

If you really want to continue then you have to set the C_FORCE_ROOT
environment variable (but please think about this before you do).

User information: uid=0 euid=0 gid=0 egid=0


# 如此就能正常启动celery了
export C_FORCE_ROOT="true"

#在项目代码中
from celery import Celery, platforms # 导入platforms
platforms.C_FORCE_ROOT = True #加上这一行
export C_FORCE_ROOT="true"
celery -A [project-name] worker --beat --scheduler django --loglevel=info
# celery worker -A celeryd:application -n card_subscribe -Q card_subscribe -c 1 -l info
celery -A builddemo worker --pool=solo -l debug
celery -A builddemo worker  -l info
使用flower进行web监控
pip install flower
# 一个窗口输入命令
celery -A builddemo worker --beat --scheduler django --loglevel=info
# 另开一个窗口输入下面命令
celery -A builddemo flower --address=0.0.0.0 --port=11555

https://github.com/Ran-oops/builddemo.git


 3839
3839

 被折叠的 条评论
为什么被折叠?
被折叠的 条评论
为什么被折叠?
 到【灌水乐园】发言


