


 本文档详细介绍了树莓派的刷机、登录及vim版本更新步骤。从HDMI查看开机页面,到通过串口解除蓝牙占用进行登录,再到通过网络SSH登录和图形化远程桌面连接。此外,还讲解了如何更新vim版本,确保系统工具的最新状态。
目录
一:刷机


二:登录
-
HDMI线查看开机页面
-
串口登录
- 由于设备默认情况下,串口是与蓝牙相连接,需要断开蓝牙,把串口用来数据通信
- 打开SD卡根目录的"config.txt"文件,将以下内容添加在最后并且保存。
-
dtoverlay=pi3-miniuart-bt解除了对串口的占用
-
然后再修改根目录的"cmdline.txt",将里面的内容全部替换成以下内容,以防万一,请先备份好这个文件的原内容。
-
dwc_otg.lpm_enable=0 console=tty1 console=serial0,115200 root=/dev/mmcblk0p2 rootfstype=ext4 elevator=deadline fsck.repair=yes rootwait配置修改完成
-
默认账号:pi
默认密码:raspberry
- 由于设备默认情况下,串口是与蓝牙相连接,需要断开蓝牙,把串口用来数据通信
-
通过网络登录
-
sudo nano /etc/wpa_supplicant/wpa_supplicant.confnetwork={ ssid="你的无线网名字" psk="密码" }
-
nano是文档编辑器,CTRL+o,保存,回车确认,CTRL+x,退出
2.固定ip地址
sudo nano /etc/rc.local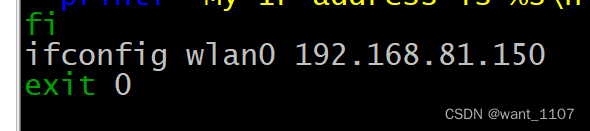
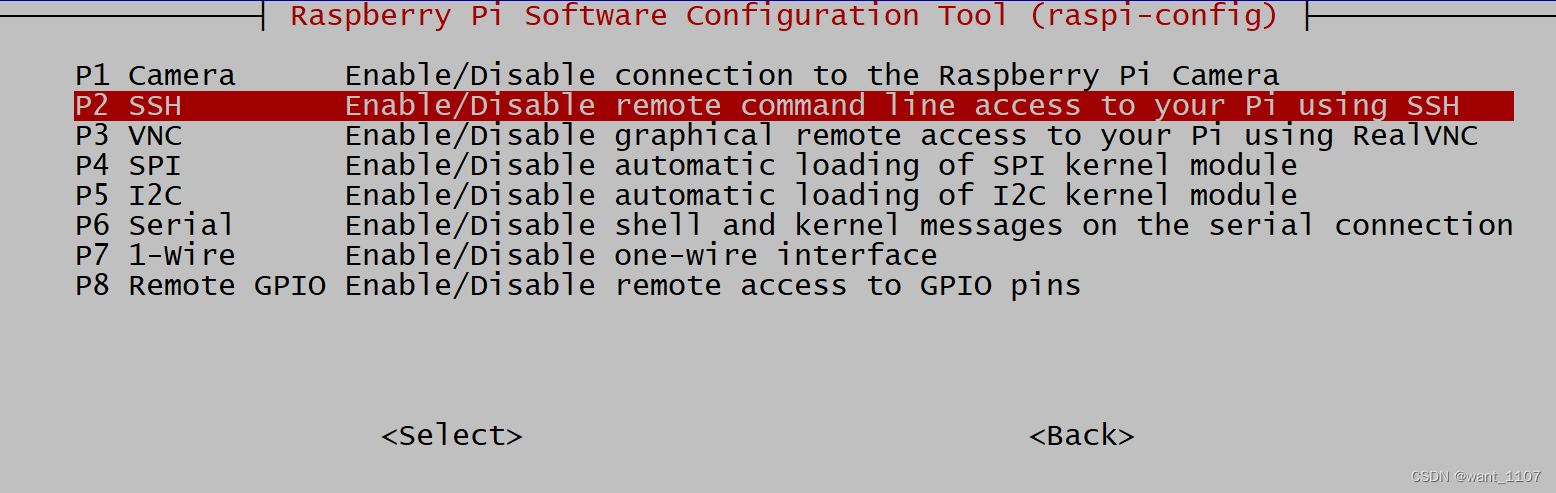
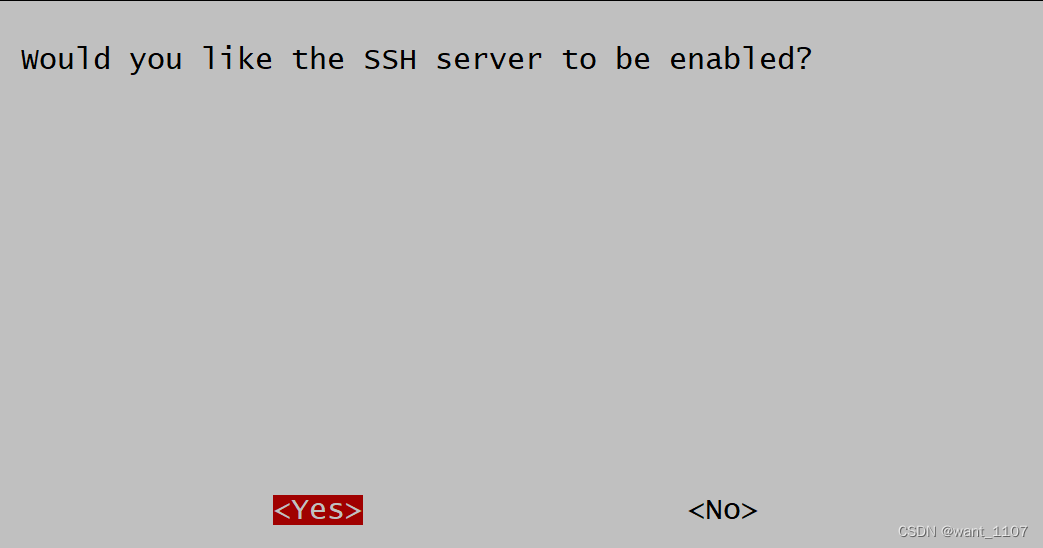
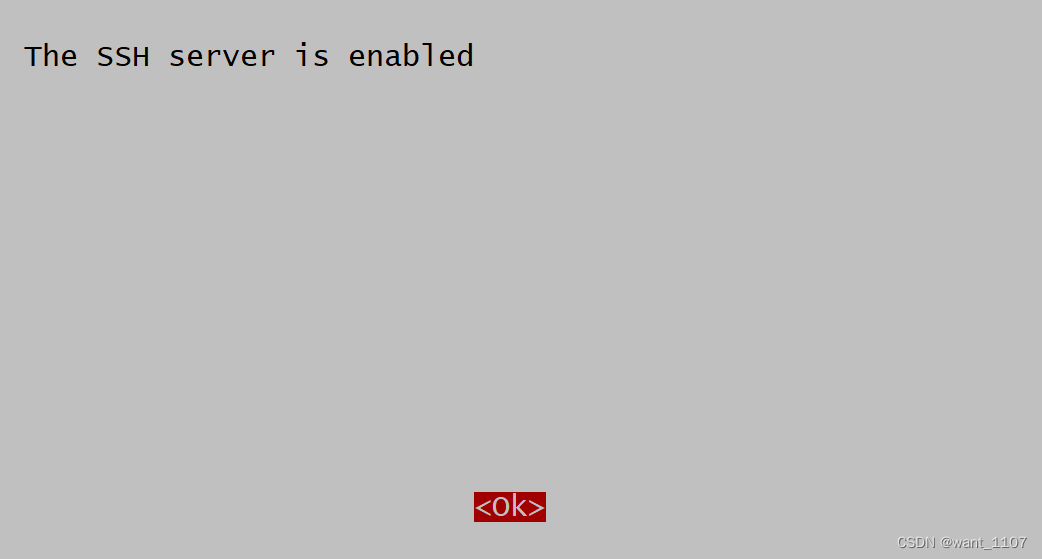
4.网络ssh登录
- 打开ssh功能
-
sudo raspi-config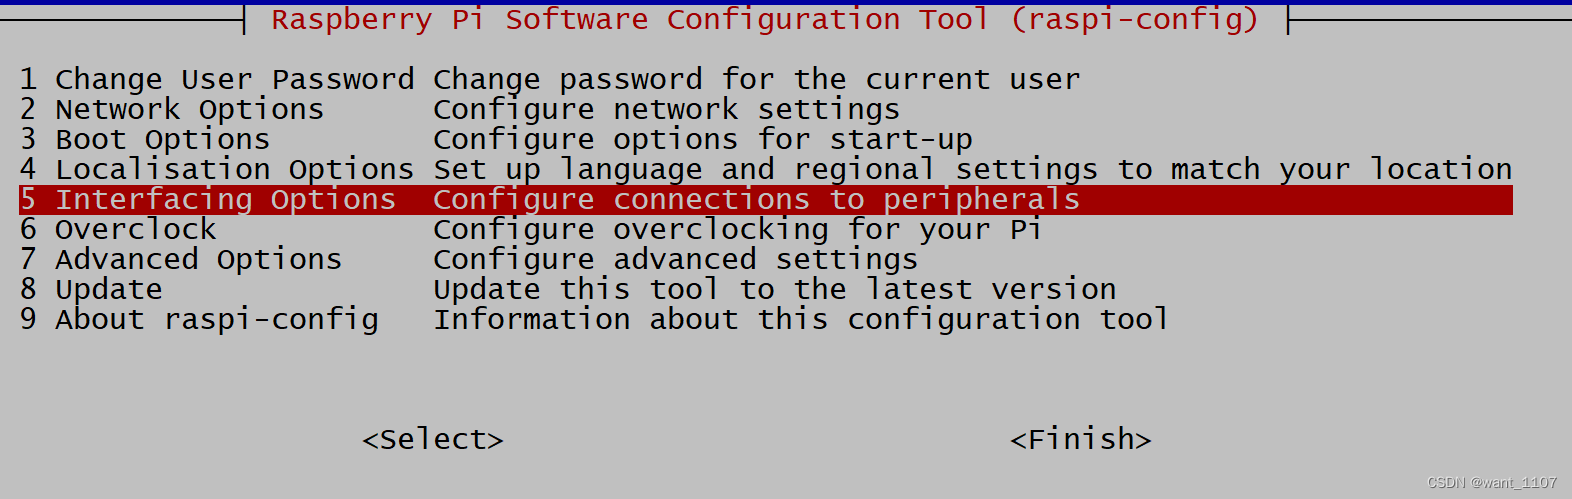
5.图形方式登录
-
windows用“远程桌面连接”自带软件登录sudo apt get install xrdp
三:更新vim版本
sudo nano /etc/apt/sources.list
用#注释或直接删除原有的内容,新增两条:
deb http://mirrors.tuna.tsinghua.edu.cn/raspbian/raspbian/ stretch main contrib non-free rpi
#deb-src http://mirrors.tuna.tsinghua.edu.cn/raspbian/raspbian/ stretch main contrib non-free rpi
CTRL+o,保存,CTRL+x,退出
更新源
sudo apt-get update安装新版vim
3.4sudo apt-get install vim


 906
906

 被折叠的 条评论
为什么被折叠?
被折叠的 条评论
为什么被折叠?
 到【灌水乐园】发言


