


SpringBoot
一、SpringBoot介绍
-
Spring为应对互联网应用的要求(高可靠、高并发、负载均衡等),推出了SpringBoot和微服务框架SpringCloud
SpringClooud完全建立在SpringBoot之上,虽然SpringBoot为微服务而生,但已然成为Java单体项目的首选框架
-
SpringBoot是一个基于Spring的框架,该框架的目的在于快速搭建Spring开发环境
-
SpringBoot让我们的框架搭建更加自动化、简单化、便捷化
-
Spring、StringMVC、MyBatis等框架技术都可以集成到SpringBoot中
-
SpringBoot可以理解为快速搭建框架的框架,之前在Spring、SpringMVC、MyBatis中使用的技术都可以在SpringBoot中直接使用
-
SpringBoot是主要基于注解和编程式配置实现,在SpringBoot中推荐使用properties或yml文件做为其配置文件
-
SpringBoot的开发理念是习惯优于配置,SpringBoot默认不支持JSP,推荐使用HTML或模板引擎技术
-
SpringBoot中内置Web服务器,不需要搭建外部Web服务器,在SpringBoot开发中更加推荐搭建jar项目而非war项目
-
SpringBoot推出Starter组件(自动配置器,每个Starter即为一个应用,它将相关配置、开发包都集成在Starter中),开发人员在应用中只要引入相关的Starter即可完成配置,从而让开发人员从复杂而繁琐的配置中解脱出来,实现项目的快速搭建
二、开发第一个SpringBoot应用
-
创建一个基于Maven的jar项目
-
在pom.xml中引入SpringBoot相关库文件
添加springBoot父项目,其中已定义约定好的内置配置
<!--
        引入springBoot的父项目,其中包含很多约定好的内置配置
    -->
    <parent>
        <groupId>org.springframework.boot</groupId>
        <artifactId>spring-boot-starter-parent</artifactId>
        <version>2.3.2.RELEASE</version>
    </parent>
添加SpringWeb Starter,会自动将springMVC所依赖的库文件同步添加,包含内置的tomcat
<!-- 引入springWeb依赖包,它会将springMVC的所有依赖包全部导入 starter-web的版本依赖父项目的版本号 --> <dependency> <groupId>org.springframework.boot</groupId> <artifactId>spring-boot-starter-web</artifactId> </dependency> -
编写SpringBoot的核心配置类(启动类)
该类是SpringBoot的入口来,其中包含main函数,该类启动后自动启动tomcat
该类必须使用注解@SpringBootApplication,该注解说明类为一个启动类,该注解中包含3个功能注解:
(1) @EnableAutoConfiguration:开启Spring的自动配置功能
(2) @ComponentScan:开启组件扫描器,它会对该配置类所在包及其子包进行扫描
(3) @Configuration:配置类注解,该注解允许配置Bean及导入其他配置类
package com.jiazhong; import org.springframework.boot.SpringApplication; import org.springframework.boot.autoconfigure.SpringBootApplication; /** * @Author: 加中实训 * @Date:2020/8/4 0:26 * @Description: SpringBoot的启动类 * @SpringBootApplication注解说明该类为一个springboot启动类 * 它包含三个注解的功能: * @EnableAutoConfiguration:开启Spring的自动配置功能 * @ComponentScan:开启组件扫描器,它会对该配置类所在包及其子包进行扫描 * @Configuration:配置类注解,该注解允许配置Bean及导入其他配置类 */ @SpringBootApplication public class WebApp { public static void main(String[] args) { //启动springboot应用 SpringApplication.run(WebApp.class,args); } } -
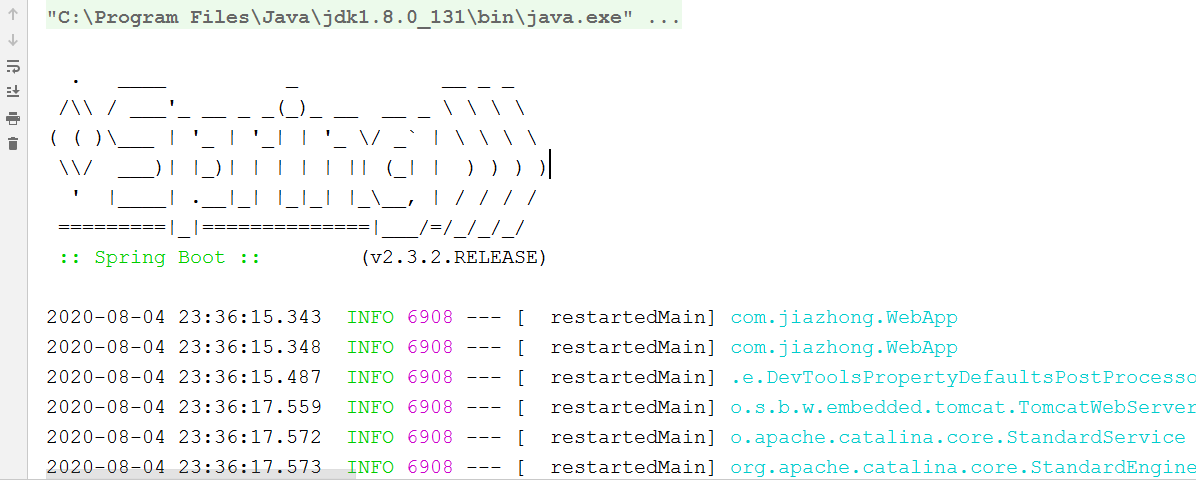
运行SpringBoot项目,检测框架基本搭建是否成功
-
使用application.properties或application.yml配置文件添加SpringBoot项目配置
application.properties文件
# 设置服务器端口号
server.port=80
# 配置项目的上下文路径(项目的访问路径)<注:路径前有一个"/">
server.servlet.context-path=/springboot-demo01
#配置日志
logging.level.root=info
logging.level.web=trace
application.yml文件
# 服务端配置 server: port: 8080 servlet: context-path: /springboot-demo # 配置日志级别 logging: level: root: info web: trace -
添加控制器类
package com.jiazhong.controller; import org.springframework.web.bind.annotation.GetMapping; import org.springframework.web.bind.annotation.RequestMapping; import org.springframework.web.bind.annotation.RestController; /** * @Author: 加中实训 * @Date:2020/8/4 0:38 * @Description: */ @RestController public class DemoController { @GetMapping("/demo1") public String demo1(){ return "你好,SpringBoot欢迎您!"; } } -
静态网页添加位置,在resources文件夹下新建一个static文件夹,项目中的静态内容都添加到该文件夹下
-
浏览器输入地址测试
http://localhost:8080/springboot-demo/demo1//测试控制器
http://localhost:8080/springboot-demo //测试首页
三、使用SpringBoot搭建项目整体框架
SpringBoot整合其他框架和组件时只需将其他框架或组件的Starter引入到Maven中并进行相关配置后即可使用
-
项目所使用相关框架及组件
- SpringBoot
- MyBatis
- Druid
- PageHelper
- FastJson
-
配置MyBatis
-
在pom.xml中引入MyBatis-Starter依赖包
<dependency> <groupId>org.mybatis.spring.boot</groupId> <artifactId>mybatis-spring-boot-starter</artifactId> <version>2.1.3</version> </dependency> -
在application.yml配置文件中添加mybatis配置
# MyBatis映射器路径配置
mybatis:
  mapper-locations: classpath:/mapper/*.xml
-
-
配置Druid
-
在pom.xml中引入Druid的Starter
<dependency> <groupId>com.alibaba</groupId> <artifactId>druid-spring-boot-starter</artifactId> <version>1.1.23</version> </dependency> -
在application.yml配置文件中添加数据源相关配置
spring:
  datasource:
    driver-class-name: com.mysql.jdbc.Driver
    url: jdbc:mysql://localhost:3306/test
    username: root
    password: root
    druid:
      initial-size: 3
      max-active: 5
      min-idle: 3
-
-
配置PageHelper
-
在pom.xml中引入PageHelper的Starter
<dependency> <groupId>com.github.pagehelper</groupId> <artifactId>pagehelper-spring-boot-starter</artifactId> <version>1.3.0</version> </dependency> -
在application.yml配置文件中添加PageHelper相关配置
# PageHelper相关配置
pagehelper:
  helper-dialect: mysql
  reasonable: true
-
-
配置FastJSON
-
在pom.xml中引入FastJSON的Starter
<dependency> <groupId>com.alibaba</groupId> <artifactId>fastjson</artifactId> <version>1.2.73</version> </dependency> -
在核心配置文件中添加FastJSON消息转换器
-
-
  # 服务器配置
  server:
    port: 8080 # 设置端口号
    servlet:
      context-path: /springBoot-project-01 # 设置项目的上下文路径

  #dataSource配置
  spring:
    datasource:
      driver-class-name: com.mysql.jdbc.Driver # 配置驱动类(可选)
      url: jdbc:mysql://localhost:3306/goods # url配置
      username: root
      password: root

      # 数据库连接池配置
      druid:
        initial-size: 10 # 配置初始化连接数
        max-active: 30 # 最大活动连接
        min-idle: 10 # 最小空闲连接
        max-wait: 1000 # 最大等待时间
  mybatis:
    # 配置MyBatis的映射文件
    mapper-locations: classpath:/mapper/**/*.xml

  # PageHelper配置
  pagehelper:
    helper-dialect: mysql # 配置方言
    reasonable: true # 合理化配置

  # 配置log4j日志
  logging:
    level:
      root: trace # 配置根级别
      web: trace # 配置web日志
      com.jiazhong.dao: debug # 配置dao日志
SpringBoot相关配置
-
添加SpringBoot开发调试工具插件(pom.xml中添加相关依赖),该工具可以实现项目的热启动
<dependency> <groupId>org.springframework.boot</groupId> <artifactId>spring-boot-devtools</artifactId> <optional>true</optional> </dependency> -
添加SpringBoot打包插件,通过该插件可以直接将SpringBoot项目打成一个可运行的jar包(pom.xml中添加插件)
 <build>
        <plugins>
            <!--springBoot Maven插件,可以将项目打包为一个可运行的Jar包-->
            <plugin>
                <groupId>org.springframework.boot</groupId>
                <artifactId>spring-boot-maven-plugin</artifactId>
            </plugin>
        </plugins>
    </build>
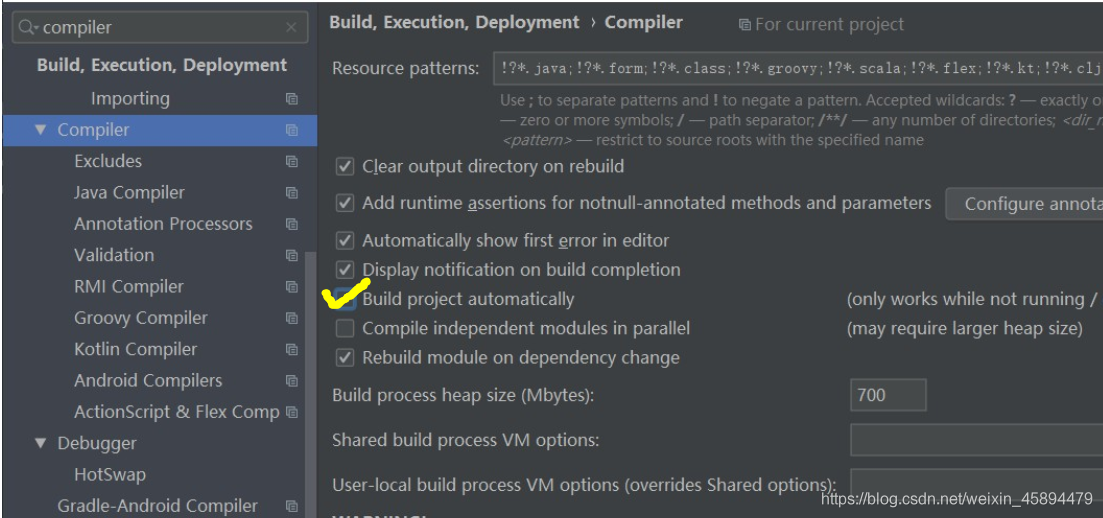
在idea中设置自动编译:
首先ctrl+alt+s打开设置(Other Settings 的设置是对整个工作空间项目都启作用,而Settings…的设置是对整个项目启作用),搜索Compliler,勾选Build project automatically,如下图所示:
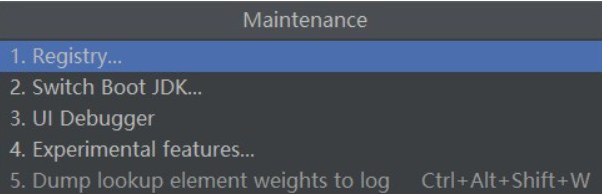
.按住ctrl + shift + alt + /,出现如下图所示界面,点击Registry…,如下图:
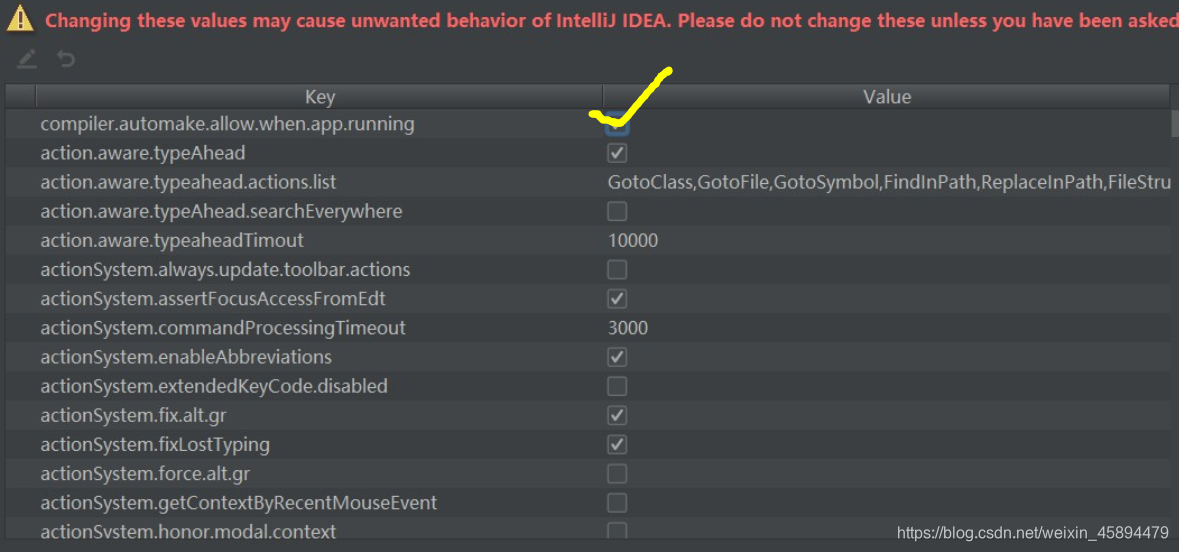
点击进入后,勾选compiler.automake.allow.when.app.running后关闭即可


 被折叠的 条评论
为什么被折叠?
被折叠的 条评论
为什么被折叠?
 到【灌水乐园】发言


