


前言
开发到此可发现多项目维护配置文件其实都是一样的,而且不利于后期统一维护,所以项目需要接入一个配置中心
第三方配置中心产品
微服务配置中心选型比较——Nacos、Apollo、Config
由于Disconf不再维护,下面对比一下Spring Cloud Config、Apollo和Nacos。
- Disconf:百度开源的配置管理中心,目前已经不维护了
- Spring Cloud Config: Spring Cloud 生态组件,可以和Spring Cloud体系无缝整合。
- Apollo: 携程开源的配置管理中心,具备规范的权限、流程治理等特性。
- Nacos: 阿里开源的配置中心,也可以做DNS和RPC的服务发现。
项目中接入spring cloud config
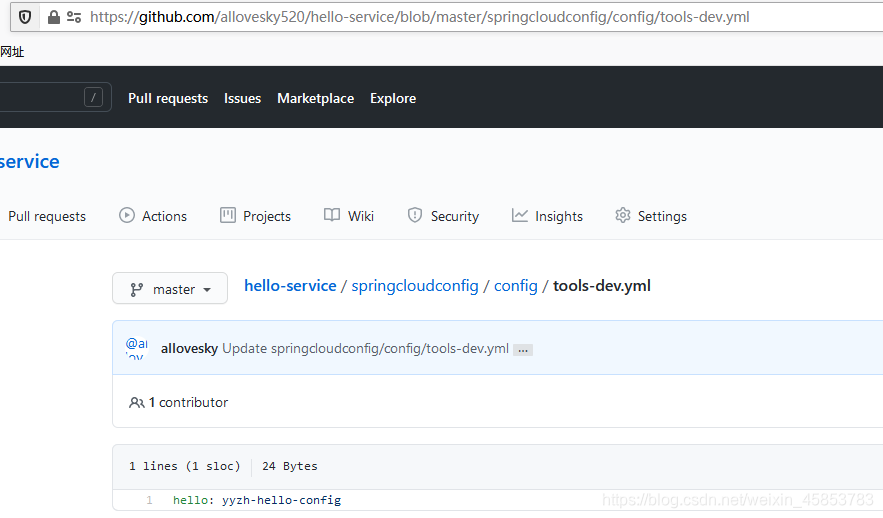
在github上创建一个配置文件
https://github.com/allovesky520/hello-service
创建一个config服务
依赖注入pom.xml
<?xml version="1.0" encoding="UTF-8"?>
<project xmlns="http://maven.apache.org/POM/4.0.0"
         xmlns:xsi="http://www.w3.org/2001/XMLSchema-instance"
         xsi:schemaLocation="http://maven.apache.org/POM/4.0.0 http://maven.apache.org/xsd/maven-4.0.0.xsd">
    <modelVersion>4.0.0</modelVersion>
    <parent>
        <groupId>org.springframework.boot</groupId>
        <artifactId>spring-boot-starter-parent</artifactId>
        <version>2.1.9.RELEASE</version>
        <relativePath/>
    </parent>

    <groupId>com.yyzh</groupId>
    <artifactId>hello-config</artifactId>
    <version>1.0-SNAPSHOT</version>
    <name>hello-config</name>

    <properties>
        <java.version>1.8</java.version>
        <spring-cloud.version>Greenwich.SR1</spring-cloud.version>

    </properties>


    <dependencies>
        <!-- spring cloud config 服务端包 -->
        <dependency>
            <groupId>org.springframework.cloud</groupId>
            <artifactId>spring-cloud-config-server</artifactId>
        </dependency>

        <!-- eureka client 端包 -->
        <dependency>
            <groupId>org.springframework.cloud</groupId>
            <artifactId>spring-cloud-starter-netflix-eureka-client</artifactId>
        </dependency>
    </dependencies>

    <!--管理spring cloud所有组件的版本-->
    <dependencyManagement>
        <dependencies>
            <dependency>
                <groupId>org.springframework.cloud</groupId>
                <artifactId>spring-cloud-dependencies</artifactId>
                <version>${spring-cloud.version}</version>
                <type>pom</type>
                <scope>import</scope>
            </dependency>
        </dependencies>
    </dependencyManagement>

    <build>
        <plugins>
            <plugin>
                <groupId>org.springframework.boot</groupId>
                <artifactId>spring-boot-maven-plugin</artifactId>
            </plugin>
        </plugins>
    </build>
</project>
启动类增加注释@EnableConfigServer
package com.yyzh;

import org.springframework.boot.SpringApplication;
import org.springframework.boot.autoconfigure.SpringBootApplication;
import org.springframework.cloud.client.discovery.EnableDiscoveryClient;
import org.springframework.cloud.config.server.EnableConfigServer;
import org.springframework.cloud.netflix.eureka.EnableEurekaClient;

@SpringBootApplication
@EnableConfigServer
@EnableEurekaClient
@EnableDiscoveryClient
public class ConfigApplication {
    public static void main(String[] args) {
        SpringApplication.run(ConfigApplication.class, args);
        System.out.println("config 配置中心服务启动...");
    }
}
配置文件
server:
  port: 3301
spring:
  application:
    name: hello-config
  cloud:
    config:
      server:
        git:
          uri: https://github.com/allovesky520/hello-service # git仓库的地址
          search-paths: springcloudconfig/config  # git仓库地址下的相对地址,可以配置多个,用,分割。
          username: #Git仓库用户名
          password: #Git仓库密码

# 更改Eureka更新频率将打破服务器的自我保护功能,生产环境下不建议自定义这些配置。
eureka:
  instance:
    prefer-ip-address: true #使⽤ip注册,否则会使⽤主机名注册了(此处考虑到对⽼版本的兼容,新版本经过实验都是ip)
    lease-expiration-duration-in-seconds: 90  # 续约到期时间(默认90秒)
    lease-renewal-interval-in-seconds: 30 # 续约更新时间间隔(默认30秒)
  client:
    healthcheck:
      enabled:  true    # 开启健康检查(需要spring-boot-starter-actuator依赖)
    register-with-eureka: true
    registry-fetch-interval-seconds: 30
    serviceUrl: #注册中心的注册地址
      defaultZone: http://admin:admin@localhost:8761/eureka/
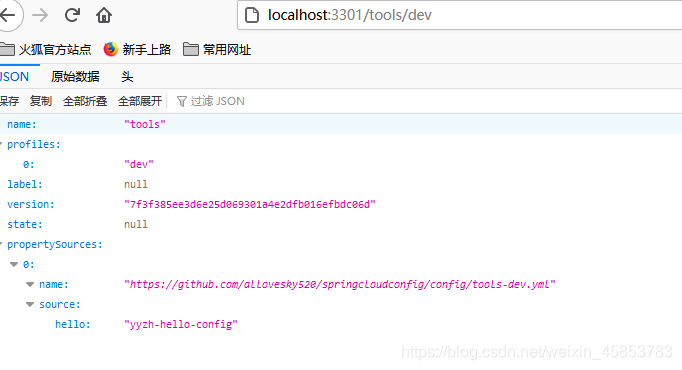
测试一下config是否链接到git
启动服务,接下来测试一下。
Spring Cloud Config 有它的一套访问规则,我们通过这套规则在浏览器上直接访问就可以。
- /{application}/{profile}[/{label}]
- /{application}-{profile}.yml
- /{label}/{application}-{profile}.yml
- /{application}-{profile}.properties
- /{label}/{application}-{profile}.properties
客户端
依赖注入pom.xml
    <parent>
        <groupId>org.springframework.boot</groupId>
        <artifactId>spring-boot-starter-parent</artifactId>
        <!-- 升级版本 -->
        <version>2.1.9.RELEASE</version>
        <relativePath/>
    </parent>
    <properties>
    	<!-- 升级版本 -->
    	<spring-cloud.version>Greenwich.SR1</spring-cloud.version>
    </properties>
    </parent>
        <!-- config配置中心客户端 -->
        <dependency>
            <groupId>org.springframework.cloud</groupId>
            <artifactId>spring-cloud-starter-config</artifactId>
        </dependency>
@Value注入属性
package com.springboot.demo.controller;

import com.springboot.demo.annotation.sysLog.aspect.SysLog;
import io.swagger.annotations.Api;
import org.springframework.beans.factory.annotation.Value;
import org.springframework.cloud.context.config.annotation.RefreshScope;
import org.springframework.web.bind.annotation.GetMapping;
import org.springframework.web.bind.annotation.RequestMapping;
import org.springframework.web.bind.annotation.RequestParam;
import org.springframework.web.bind.annotation.RestController;

@RestController
@RequestMapping("/v1/config")
@Api(value = "HelloConfig", tags = "测试配置中心", description = "测试配置中心")
public class HelloConfig {
    @Value("${hello}")
    private String hello;

    @SysLog("hello config")
    @GetMapping(value = "/hello")
    public String hello(@RequestParam("str") String str){
        return hello;
    }

}
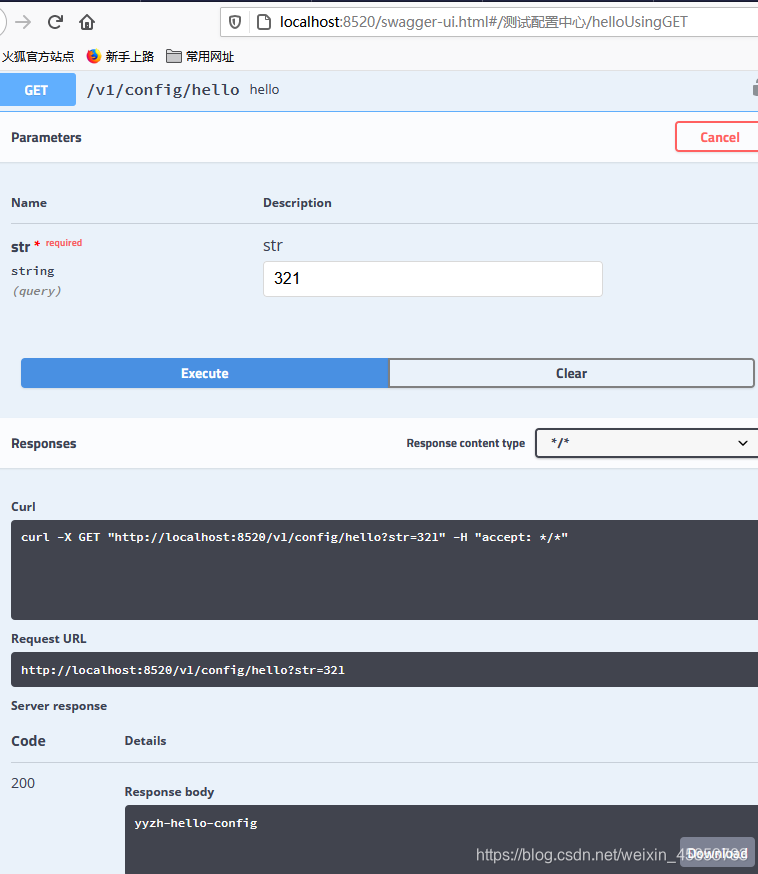
启动服务验证客户端是否可以取到config配置
拓展
项目启动顺序:
- register注册中心
- config配置中心
- 客户端
到此,项目已经可用,以下为拓展。
更新配置文件时需要刷新才能取到最新的配置,见此链接


 被折叠的 条评论
为什么被折叠?
被折叠的 条评论
为什么被折叠?
 到【灌水乐园】发言


