


1.创建SpringBoot项目
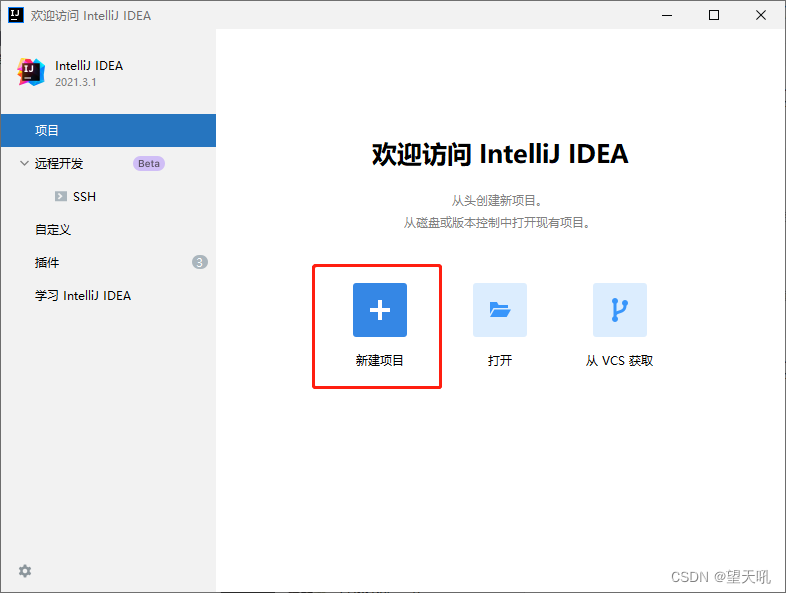
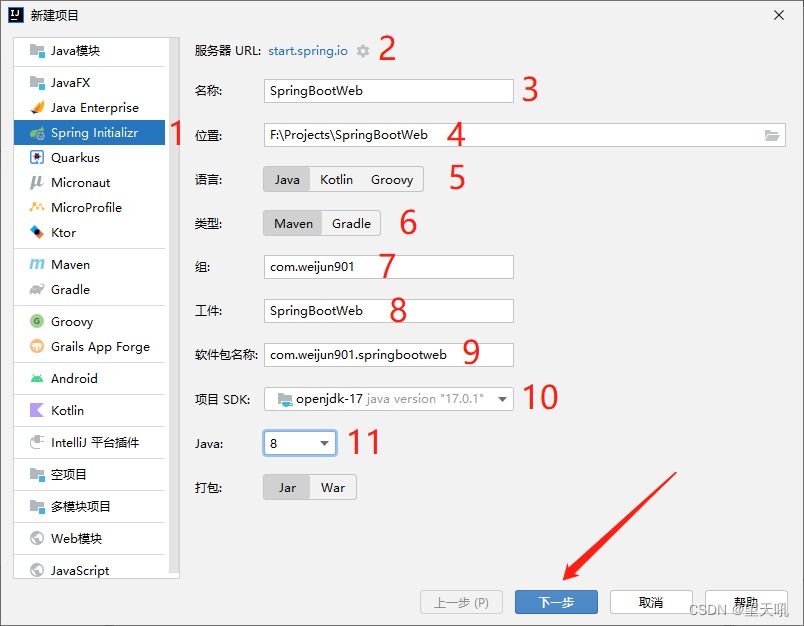
1.选择Sping项目初始化
2.选择服务器
国外通常是:https://start.spring.io
国内通常是:https://start.aliyun.com
3.项目名称随便起名
4.项目存储的本地目录
5.通常用Java
6.通常用Maven(构建,依赖管理[jar包管理])
7.通常为域名倒置
8.项目名
9.软件包名称:项目名填完自动生成
10.项目SDK
通常选择openjdk,原因是持久稳定开源免费
11.Java:通常选择版本8,兼容性强
12.打包方式:jar包
1.目前我选择2.7.2,应该是正式版本吧,这个是SpringBoot的版本
SNAPSHOT为快照版本不推荐选择,版本不稳定
2.要创建Web项目,所以选择Spring Web这一个功能就够了
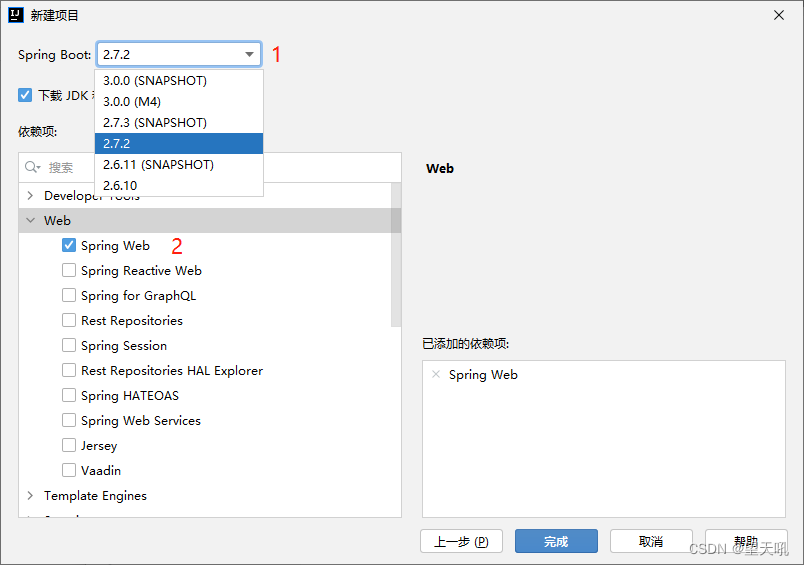
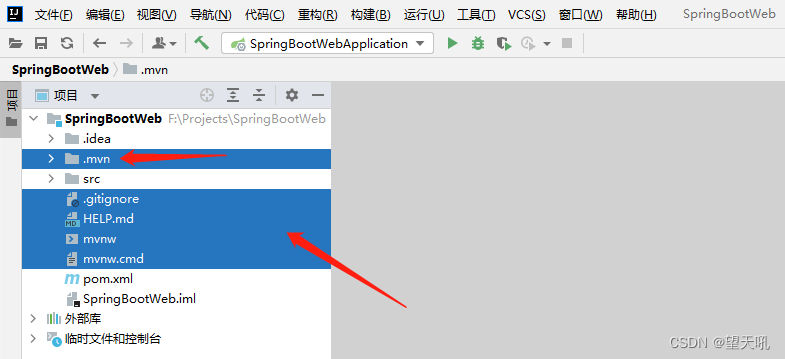
创建完毕后,多余的没有用的文件可以删除掉
2.测试
返回字符串
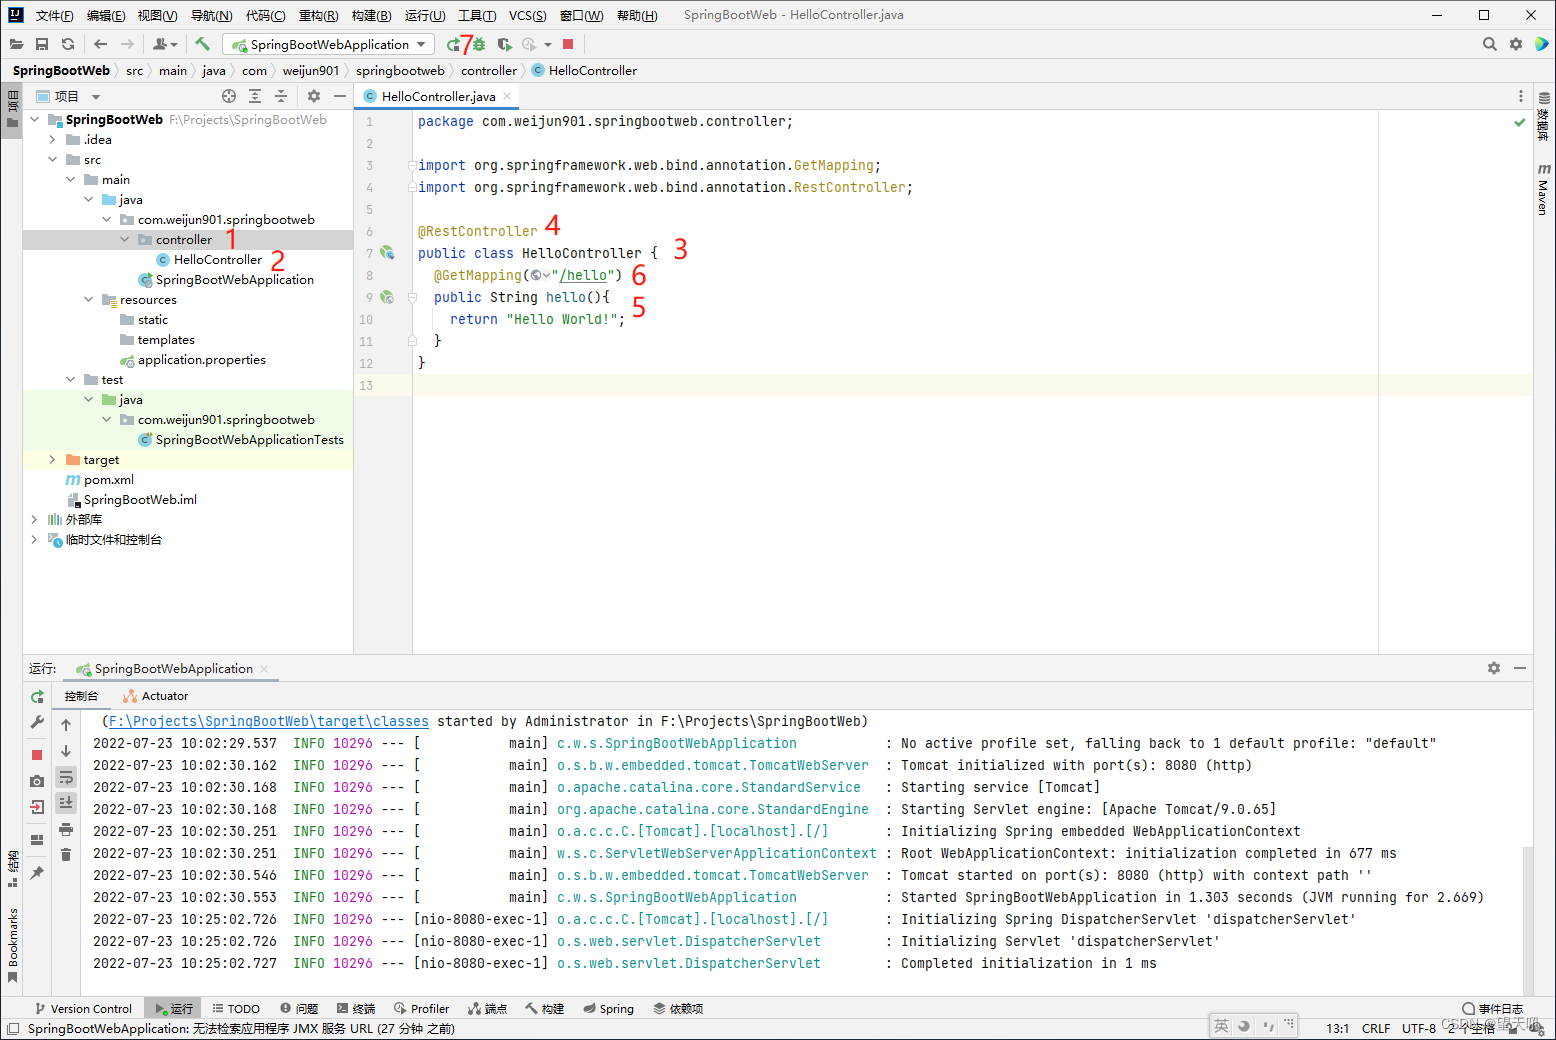
1.建立controller层
2.创建HelloController类
3.就是这个样子
4.加上注解@RestController
5.创建hello方法,return一个字符串
6.加上注解@GetMapping,当访问/hello的时候执行hello方法,返回字符串"Hello World!"
7.点击运行
package com.weijun901.springbootweb.controller;

import org.springframework.web.bind.annotation.GetMapping;
import org.springframework.web.bind.annotation.RestController;

@RestController
public class HelloController {
  @GetMapping("/hello")
  public String hello(){
    return "Hello World!";
  }
}
执行成功后,打开浏览器http://localhost:8080/hello
访问成功

3.依赖管理
主要问题就是:
不知道什么叫依赖,
不知道如何导入依赖,
不知道去哪找,
不知道哪个版本好。
依赖就好像我要使用某种功能,不用我自己去写,直接导入(自动装配)即可使用,即插即用。
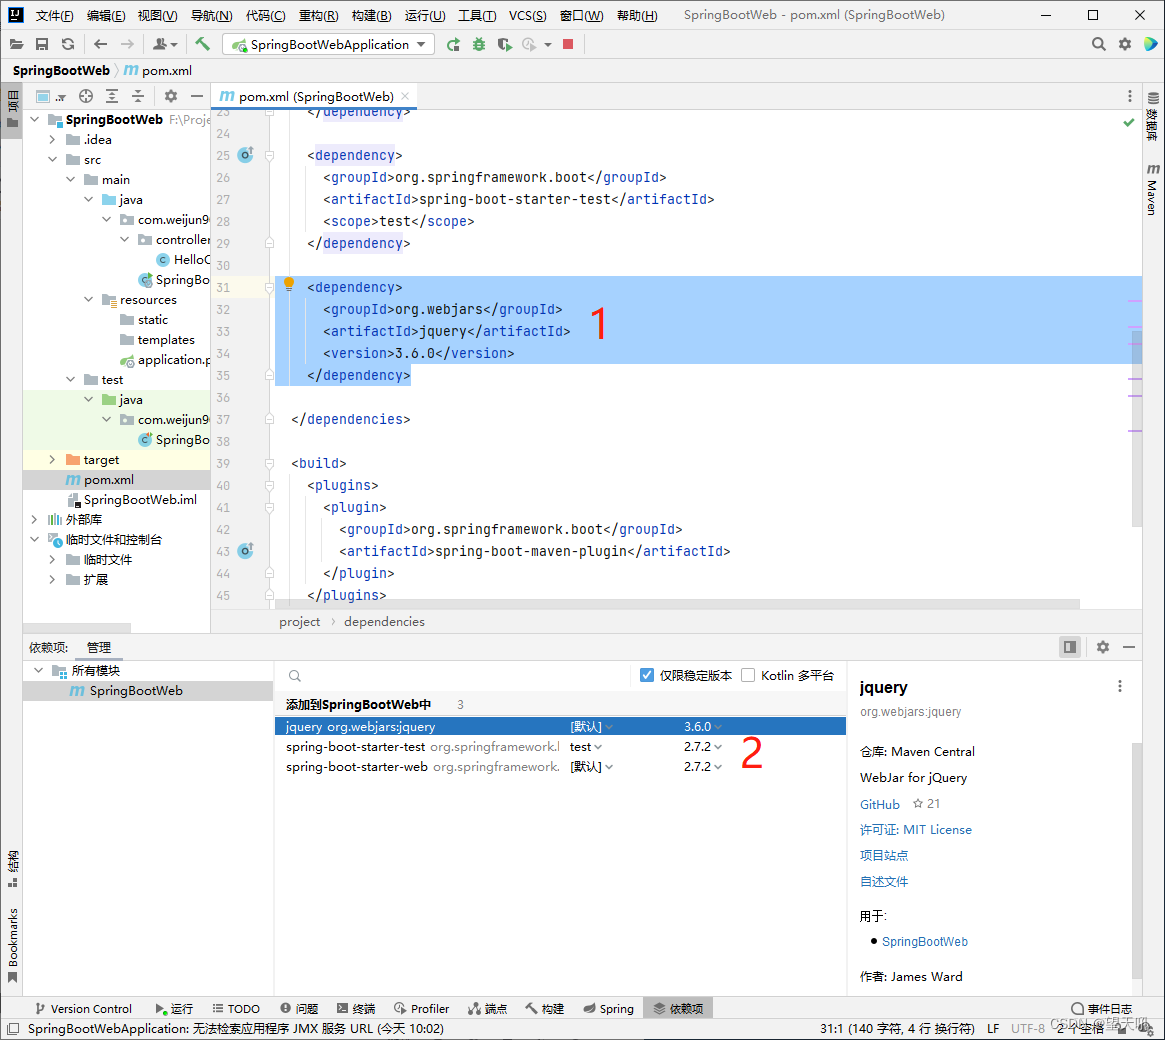
pom.xml是负责管理依赖的,可以添加和删除
<dependency>
  <groupId>org.webjars</groupId>
  <artifactId>jquery</artifactId>
  <version>3.6.0</version>
</dependency>
从webjars网站可以获得https://www.webjars.org/
也可以从其他官网获得
1.直接写出来
2.可以选择版本
如果没有这个显示,请重启你的IntelliJ,点击pom.xml
4.首页
4.1配置静态资源路径
修改resources目录下application.properties文件
以下设置的是resources目录下static目录下所有文件为静态文件
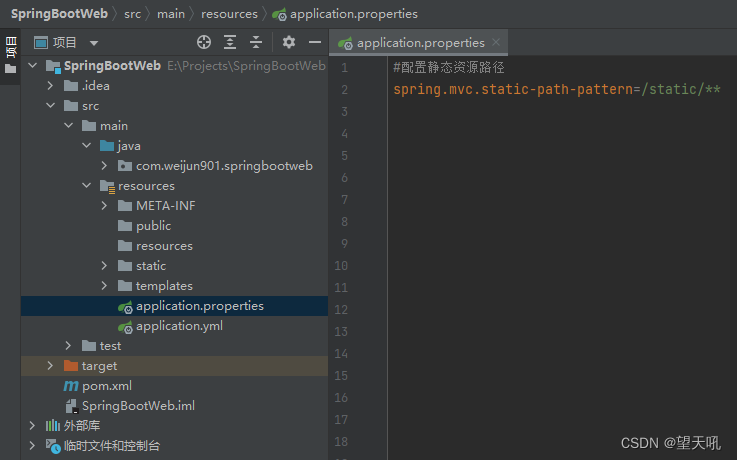
#配置静态资源路径
spring.mvc.static-path-pattern=/static/**
如果不设置的话,你弄一个静态html页,贴一张图片,用360浏览器打开有可能不显示图片,主要就是没有配置这个静态资源路径
4.2静态资源缓存
浏览器,有些时候按F5刷新网页没有变动,有可能是有静态资源缓存
必须得重新building,并且按Ctrl+F5刷新静态资源缓存即可访问。
依次访问顺序:resources>static>public>templates
默认先到resource找这个页面,如果没有就去static找,如果也没有就去public找,如果还是没有就去templates,再没有或者没有引入thymeleaf模板引擎,就报404错误。
4.3关于页面跳转
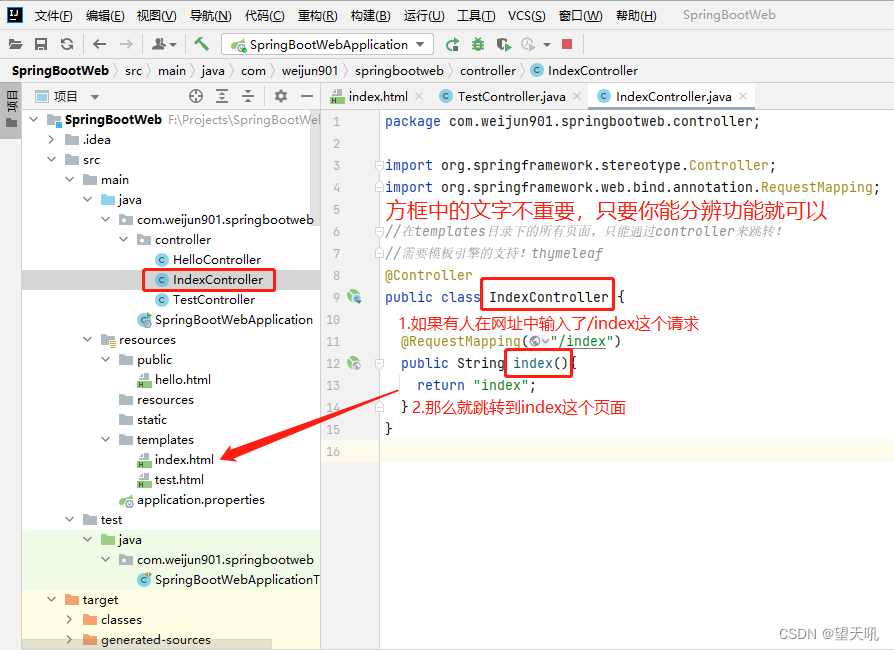
4.3.1其他页面的跳转方式
@RestController
@GetMapping
package com.weijun901.springbootweb.controller;

import org.springframework.web.bind.annotation.GetMapping;
import org.springframework.web.bind.annotation.RestController;

@RestController
public class IndexController {

  @GetMapping("/index")
  public String index(){
    return "index";
  }
}
4.3.2templates目录页面的跳转方式
@Controller
@RequestMapping
4.3.3页面跳转
跳转可以将代码变得更集中,修改起来方便类似于Router
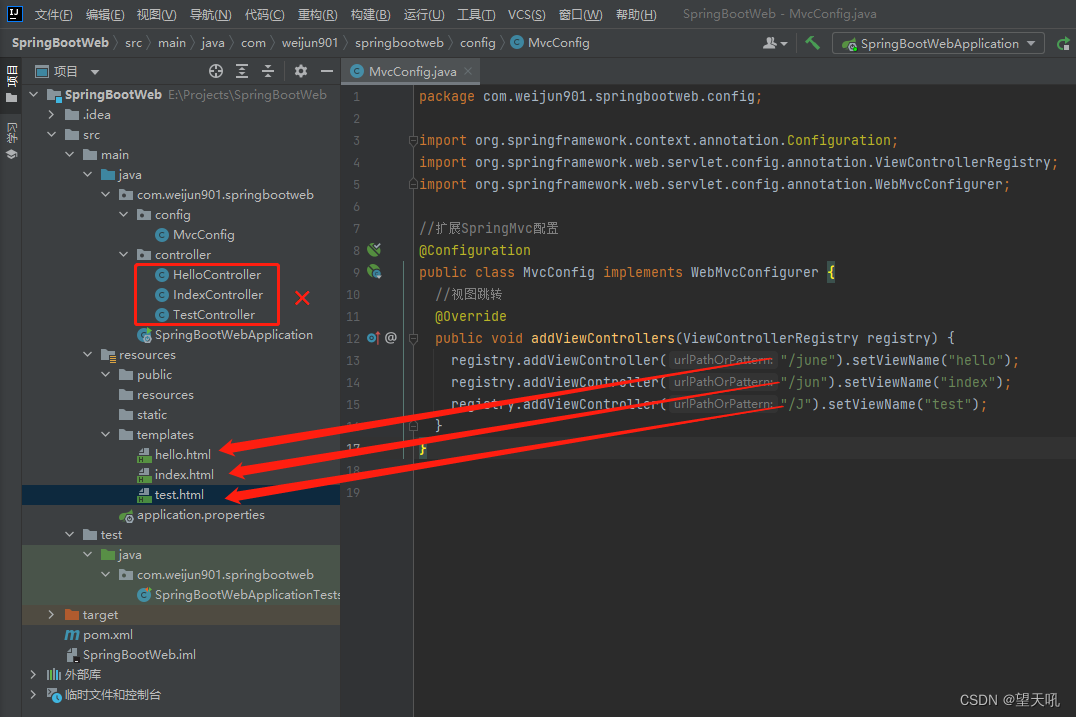
WebMvcConfigurer接口,重写addViewControllers方法
浏览器输入指定路径(字符)进行页面跳转
注意:首先要禁止其他页面的跳转方法,不然无法跳转
比如:在其他方法里面写了:浏览器输入/index跳转到index页面,这里就不能在浏览器输入/index跳转到list页面(路由冲突)。
package com.weijun901.springbootweb.config;

import org.springframework.context.annotation.Configuration;
import org.springframework.web.servlet.config.annotation.ViewControllerRegistry;
import org.springframework.web.servlet.config.annotation.WebMvcConfigurer;

//扩展SpringMvc配置
@Configuration
public class WebMvcConfig implements WebMvcConfigurer {
  //视图跳转
  @Override
  public void addViewControllers(ViewControllerRegistry registry) {
    registry.addViewController("/june").setViewName("hello");
    registry.addViewController("/jun").setViewName("index");
    registry.addViewController("/J").setViewName("test");
  }
}
5.thymeleaf模板引擎
5.1配置thymeleaf
导入thymeleaf依赖
pom.xml
    <dependency>
      <groupId>org.springframework.boot</groupId>
      <artifactId>spring-boot-starter-thymeleaf</artifactId>
    </dependency>
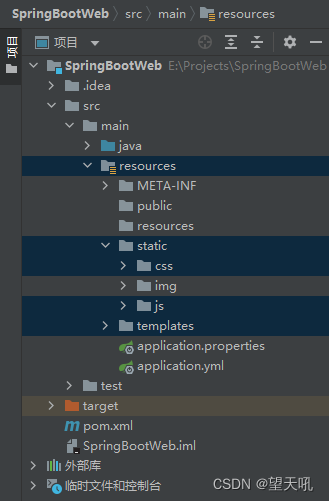
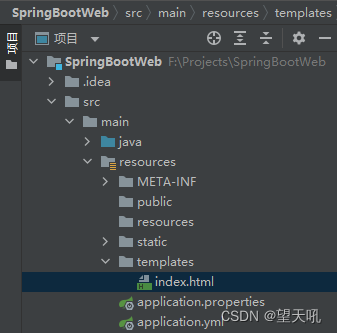
SpringBootWeb/src/main/resources下,新建文件
application.yml
spring:
  thymeleaf:
    prefix: classpath:/templates/
    suffix: .html
    mode: HTML5
    encoding: UTF-8
    cache: false
在resources文件夹下分别创建templates文件夹(主要放html文件)和static文件夹(主要放css、js文件)
5.2约束命名空间
<html lang="en" xmlns:th="http://www.thymeleaf.org">
5.3数据绑定
test.html
<!DOCTYPE html>
<html lang="en" xmlns:th="http://www.thymeleaf.org">
<head>
  <meta charset="UTF-8">
  <title>Thymeleaf</title>
</head>
<body>
<div th:text="${msg}"></div>
</body>
</html>
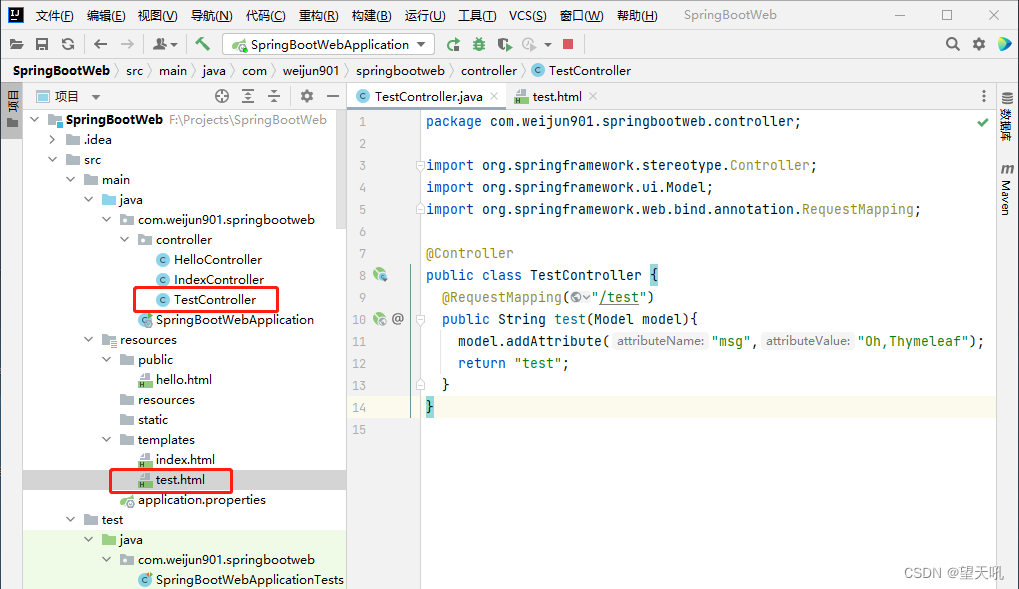
TestController.java
package com.weijun901.springbootweb.controller;

import org.springframework.stereotype.Controller;
import org.springframework.ui.Model;
import org.springframework.web.bind.annotation.RequestMapping;

@Controller
public class TestController {
  @RequestMapping("/test")
  public String test(Model model){
    model.addAttribute("msg","Oh,Thymeleaf");
    return "test";
  }
}
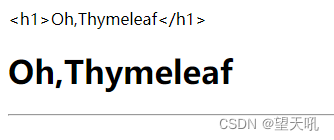
5.4 th:utext转义字符
th:text不转义
th:utext转义
同样是输出一句话,有两种不同的输出方法,方便HTML数据的转出控制
TestController.java
package com.weijun901.springbootweb.controller;

import org.springframework.stereotype.Controller;
import org.springframework.ui.Model;
import org.springframework.web.bind.annotation.RequestMapping;

@Controller
public class TestController {
  @RequestMapping("/test")
  public String test(Model model){
    model.addAttribute("msg","<h1>Oh,Thymeleaf</h1>");
    return "test";
  }
}
test.html
<!DOCTYPE html>
<html lang="en" xmlns:th="http://www.thymeleaf.org">
<head>
  <meta charset="UTF-8">
  <title>Thymeleaf</title>
</head>
<body>
<div th:text="${msg}"></div>
<div th:utext="${msg}"></div>
</body>
</html>
输出结果:
5.5 th:each遍历
显示数组列表
TestController.java
package com.weijun901.springbootweb.controller;

import org.springframework.stereotype.Controller;
import org.springframework.ui.Model;
import org.springframework.web.bind.annotation.RequestMapping;

import java.util.Arrays;

@Controller
public class TestController {
  @RequestMapping("/test")
  public String test(Model model){
    model.addAttribute("moons", Arrays.asList("January","February","March","April","May","June","July","August","September","October","November","December"));
    return "test";
  }
}
test.html
<!DOCTYPE html>
<html lang="en" xmlns:th="http://www.thymeleaf.org">
<head>
  <meta charset="UTF-8">
  <title>Thymeleaf</title>
</head>
<body>
  <div th:each="moon:${moons}" th:text="${moon}"></div>
</body>
</html>
6.修改项目端口号
SpringBootWeb/src/main/resources下,新建文件

application.yml
server:
  port: 80
  tomcat.uri-encoding: UTF-8
  tomcat:
    threads:
      max: 10
  servlet:
    session:
      timeout: 300
注意排版保持一致,也注意键值对的冒号后有一个空格
会话超时:servlet.session.timeout
最大线程:tomcat.threads.max
这两个如果有问题可以先删除掉。
之前我们打开浏览器要访问的是http://localhost:8080这个端口,现在我们直接打开http://localhost就可以了,不用加端口号了。
都配置完了,开始干活。
7.先聊聊三层架构MVC
什么是三层架构?
三层架构是指:视图层View、业务逻辑层Service、数据访问层DAO。
他们分别完成不同的功能。
View层:用于接收用户提交请求的代码
Service层:系统的业务逻辑主要在这里完成
DAO层:直接操作数据库的代码
为了更好的降低各层之间的耦合度,系统的复杂度,在三层架构程序设计中,采用面向抽象编程。即上层对下层的调用,是通过接口实现的。而下层对上层的真正服务提供者,是下层接口的实现类。服务标准(接口)是相同的,服务提供者(实现类)可以更换。 这就实现了层间解耦合。 发生在哪一层的变化,只需更改该层,不需要更改整个系统。层次清晰,分工明确,每层之间耦合度低——提高了效率,适应需求变化,可维护性高,可扩展性高。
Controller只负责管理,而Service负责实施。
Controller是管理业务调度和管理跳转的。
Service是管理具体的功能的。
DAO只完成增删改查,虽然可以1-n,n-n,1-1关联,模糊、动态、子查询都可以。但是无论多么复杂的查询,dao只是封装增删改查。至于增删查改如何去实现一个功能,dao是不管的。
dao层:数据访问层
dao层属于一种比较底层,比较基础的操作,具体到对于某个表的增删改查,也就是说某个DAO一定是和数据库的某一张表一一对应的,其中封装了增删改查基本操作,建议DAO只做原子操作,增删改查。
负责与数据库进行联络的一些任务都封装在此,dao层的设计首先是设计dao层的接口,然后在Spring的配置文件中定义此接口的实现类,然后就可以再模块中调用此接口来进行数据业务的处理,而不用关心此接口的具体实现类是哪个类,显得结构非常清晰,dao层的数据源配置,以及有关数据库连接参数都在Spring配置文件中进行配置。
service层:服务层
粗略的理解就是对一个或多个DAO进行的再次封装,封装成一个服务,所以这里也就不会是一个原子操作了,需要事物控制。
service层主要负责业务模块的应用逻辑应用设计。同样是首先设计接口,再设计其实现类,接着再Spring的配置文件中配置其实现的关联。这样我们就可以在应用中调用service接口来进行业务处理。service层的业务实,具体要调用已经定义的dao层接口,封装service层业务逻辑有利于通用的业务逻辑的独立性和重复利用性。程序显得非常简洁。
controller层
Controler负责请求转发,接受页面过来的参数,传给Service处理,接到返回值,再传给页面。
controller层负责具体的业务模块流程的控制,在此层要调用service层的接口来控制业务流程,控制的配置也同样是在Spring的配置文件里进行,针对具体的业务流程,会有不同的控制器。我们具体的设计过程可以将流程进行抽象归纳,设计出可以重复利用的子单元流程模块。这样不仅使程序结构变得清晰,也大大减少了代码量。
关系
3.Controller
2.Service
1.DAO
Service层是建立在DAO层之上的,建立了DAO层后才可以建立Service层,而Service层又是在Controller层之下的,因而Service层应该既调用DAO层的接口,又要提供接口给Controller层的类来进行调用,它刚好处于一个中间层的位置。每个模型都有一个Service接口,每个接口分别封装各自的业务处理方法。
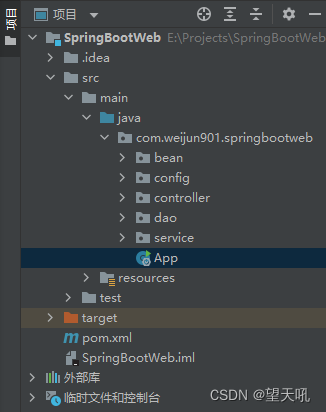
8.主程序入口
主程序从这里开始执行,当然名字可以随便起,不一定非得是App,也可以是SpringBootWebApplication这个是不是看着高大上了呢?
package com.weijun901.springbootweb;

import org.springframework.boot.SpringApplication;
import org.springframework.boot.autoconfigure.SpringBootApplication;

@SpringBootApplication
public class App {

  public static void main(String[] args) {
    SpringApplication.run(App.class, args);
  }

}
重点是加入这段注解@SpringBootApplication,它是Spring Boot项目的核心注解,目的是开启自动配置。表示从这里开始都被Springboot接管了。
9.Controller层
控制层里面主要写页面跳转以及返回字符串
新建一个UserController
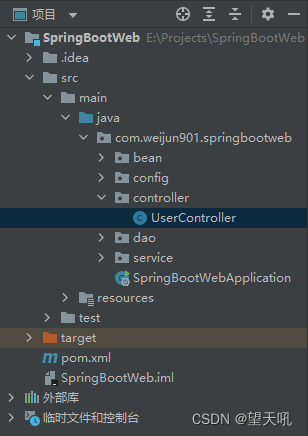
为什么要写UserController,因为我们数据库里面有一个表叫user
package com.weijun901.springbootweb.controller;

import org.springframework.stereotype.Controller;
import org.springframework.web.bind.annotation.RequestMapping;
import org.springframework.web.bind.annotation.ResponseBody;

@Controller
public class UserController {
  @RequestMapping("/hello")
  @ResponseBody
  public String hello(){
    return "Hello World!";
  }
在UserController.java文件中加入如下代码
	@RequestMapping("/index")
	public String index(Model model) {
		model.addAttribute("username", "weijun901");
		model.addAttribute("password", "123456");
		return "index";
	}
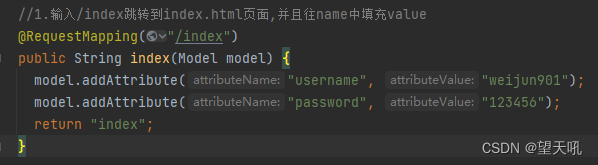
这样就相当于,当用户输入/index,进入到index.html页面,并且往输入框中填充内容username框填充"weijun901",password框填充"123456"
至此前端,后端已经打通,接下来就差把数据提交到数据库了
10.加入JPA依赖
用JPA方式往数据库添加数据
pom.xml加入mysql数据库连接器依赖
    <!--mysql数据库连接器-->
    <dependency>
      <groupId>mysql</groupId>
      <artifactId>mysql-connector-java</artifactId>
    </dependency>
pom.xml加入JPA依赖
    <!--jpa(已包含hibernate)-->
    <dependency>
      <groupId>org.springframework.boot</groupId>
      <artifactId>spring-boot-starter-data-jpa</artifactId>
    </dependency>
application.yml配置数据库信息
  datasource:
    url: jdbc:mysql://82.157.178.132:3306/mydb
    driver-class-name: com.mysql.cj.jdbc.Driver
    username: weijun901
    password: 123456
当时配置的时候有问题,连接不上数据库,后来提示因为数据库版本不同,建议使用另一种连接方式。
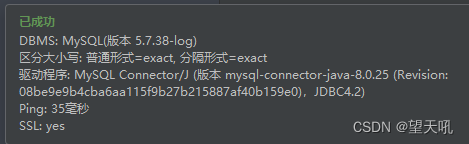
我服务器上面数据库的版本是:mysql5.7.38,连接dirver-class-name,实际上驱动程序的版本是8.0
如果是8.0就是com.mysql.cj.jdbc.Driver
如果8.0以下就是com.mysql.jdbc.Driver
application.yml配置JPA信息
  jpa:
    database: mysql
    show-sql: true
    hibernate:
      ddl-auto: update
      naming:
        physical-strategy: org.springframework.boot.orm.jpa.hibernate.SpringPhysicalNamingStrategy
    database-platform: org.hibernate.dialect.MySQL5InnoDBDialect
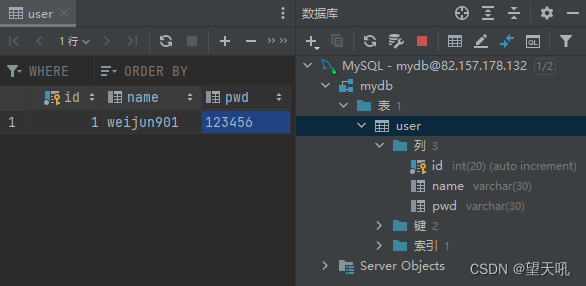
11.创建数据库

数据库mydb,表名user,id自增字段,username字段,password字段。
由于id设置的是自增字段,所以我们在往数据库里面添加信息的时候就不需要填写id这个信息了,是由数据库自动生成的,id字段是每一个表有需要有的字段,为将来查询方便而设置的字段,【唯一性,不可修改,自增】
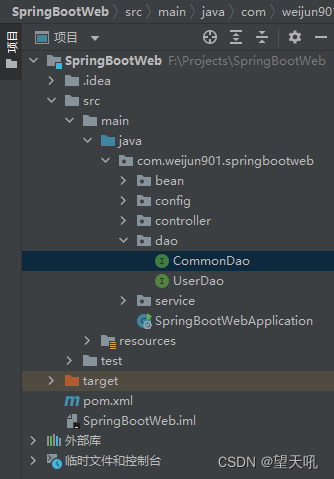
12.DAO层
12.1创建User实体类
通常我们创建实体类User就可以了,但是为了以后创建更多不同种类的实体类,我们创建bean包,并且把实体类User丢进去。
然后我们创建BaseBean基类,由于我们以后要创建的其他表都要有一个字段叫id,所以我们创建一个基类,把这个属性提取出来,以后用的时候方便,只要继承这个基类就可以了。
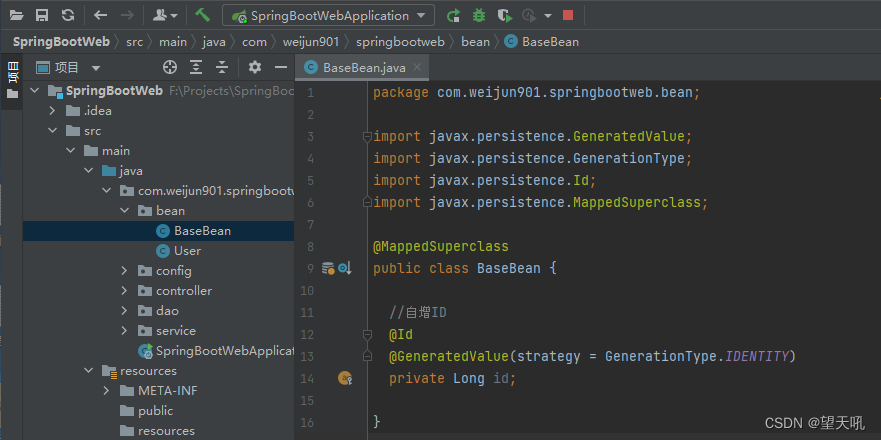
package com.weijun901.springbootweb.bean;

import javax.persistence.GeneratedValue;
import javax.persistence.GenerationType;
import javax.persistence.Id;
import javax.persistence.MappedSuperclass;

@MappedSuperclass
public class BaseBean {

  //自增ID
  @Id
  @GeneratedValue(strategy = GenerationType.IDENTITY)
  private Long id;

}
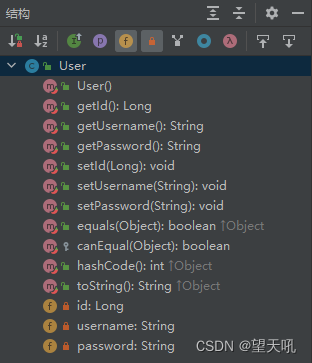
然后我们建立数据库中User表的实体类,其中有两个字段,一个是username,另一个是password
package com.weijun901.springbootweb.bean;

import lombok.Data;

import javax.persistence.*;

@Data
//表示这个类是一个实体类 //申明实体类
@Entity
//对应的数据库中表名称
@Table(name = "user") //配置实体类和表的映射关系
public class User extends BaseBean{
  //对应表中id这一列
  @Column(name = "id")
  //此属性为主键自增ID
  @Id
  private Long id;

  //对应表中username这一列
  @Column(name = "username")
  private String username;

  //对应表中password这一列
  @Column(name = "password")
  private String password;

}
加入@Data注解,就不用写get和set了,这个注解会自动创建实体类的方法
12.2创建service层UserService接口
粗略的理解就是对一个或多个DAO进行的再次封装,封装成一个服务,所以这里也就不会是一个原子操作了,需要事务控制。
service层主要负责业务模块的应用逻辑应用设计。同样是
首先设计接口,
再设计其实现类,
接着再Spring的配置文件中配置其实现的关联。
这样我们就可以在应用中调用service接口来进行业务处理。
service层的业务是:
具体要调用已经定义的dao层接口,
封装service层业务逻辑有利于通用的业务逻辑的独立性和重复利用性。
程序显得非常简洁。
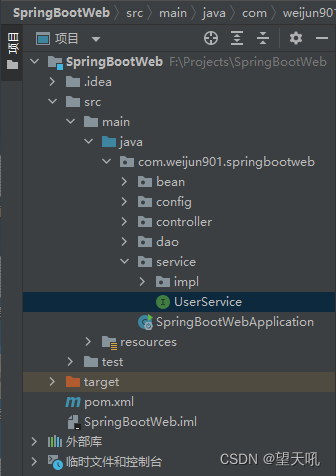
package com.weijun901.springbootweb.service;

import com.weijun901.springbootweb.bean.User;

public interface UserService {

  void save(User user);

}
这里我定义UserService的接口,然后再写他的实现类
创建Service实现类UserServiceImpl(实现类先暂时不管,等我们写了dao层再回来补上)
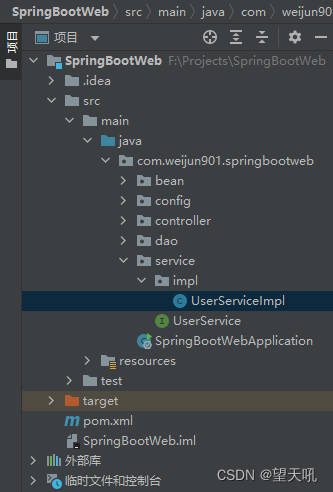
UserServiceImpl.java
package com.weijun901.springbootweb.service.impl;

import com.weijun901.springbootweb.bean.User;
import org.springframework.stereotype.Service;
import com.weijun901.springbootweb.service.UserService;

@Service
public class UserServiceImpl implements UserService {

  @Override
  public void save(User user) {

  }

}
12.3创建dao层接口
加入dao层,该层接口都是去继承JpaRepository接口。
在一个项目中,我们往往会创建一个公共接口来处理到数据库的请求,比如分页等,然后每个接口去继承它即可。
所以我们首先创建这个公共dao层接口:CommonDao
package com.weijun901.springbootweb.dao;

import org.springframework.data.jpa.repository.JpaRepository;
import org.springframework.stereotype.Repository;

import com.weijun901.springbootweb.bean.BaseBean;

//公共dao层接口
@Repository
public interface CommonDao<T extends BaseBean> extends JpaRepository<T,Long>{

}
加入UserDao继承CommonDao

package com.weijun901.springbootweb.dao;

import org.springframework.stereotype.Repository;
import com.weijun901.springbootweb.bean.User;

@Repository
public interface UserDao extends CommonDao<User> {

}
直接继承就行,啥也不用写。
Dao层写完,我们继续补全UserServiceImpl实现类

package com.weijun901.springbootweb.service.impl;

import com.weijun901.springbootweb.bean.User;
import com.weijun901.springbootweb.dao.UserDao;
import org.springframework.beans.factory.annotation.Autowired;
import org.springframework.stereotype.Service;
import com.weijun901.springbootweb.service.UserService;

@Service
public class UserServiceImpl implements UserService {

  @Autowired
  private UserDao userDao;

  @Override
  public void save(User user) {
    userDao.save(user);
  }

}
现在和数据库的链路层就已经搭好了。
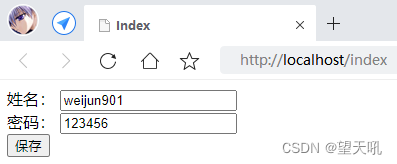
13.前端数据绑定
<!DOCTYPE html>
<html>
<head>
  <meta charset="UTF-8">
  <title>Index</title>
</head>
<body>
<form action="/save" method="post">
  <label>姓名:
    <input type="text" th:value="@{name}" name="name">
  </label><br/>
  <label>密码:
    <input type="text" th:value="@{pwd}" name="pwd">
  </label><br/>
  <button>保存</button>
</form>
</body>
</html>
修改UserController,在UserController类中增加保存用户的方法
  @Autowired
  private UserService userService;
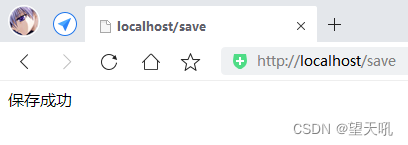
  @RequestMapping("/save")
  @ResponseBody
  public String save(User user){
    userService.save(user);
    return "保存成功";
  }

重启项目,访问http://localhost/index
输入姓名和密码点击保存,显示保存成功,就说明信息提交成功了
打开我们的mydb数据库user表刷新一下
可以看到我们提交的数据成功了。
14.获取数据库中userList
获取user表所有内容:
14.1 UserService接口添加用户获取对象的方法定义
UserService
package com.weijun901.springbootweb.service;

import com.weijun901.springbootweb.bean.User;

import java.util.List;

public interface UserService {

  //保存User对象
  void save(User user);

  //显示User对象列表
  List<User> getUserList();

}
14.2在实体类中添加方法实现
UserServiceImpl
  @Override
  public List<User> getUserList() {
    return userDao.findAll();
  }
14.3在Controller层中添加接受请求的方法
UserController
  @RequestMapping("/userList")
  public String userList(Model model){
    List<User> userList = userService.getUserList();
    model.addAttribute("userList",userList);
    return "list";
  }
14.4 templates创建list模板
<!DOCTYPE html>
<html xmlns:th="http://www.thymeleaf.org">
<head>
  <meta charset="UTF-8">
  <title>用户列表</title>
</head>
<body>
<a href="/"><button>返回到添加页面</button></a>
<div>
  <table style="border: 1px solid;">
    <tr>
      <th>用户名</th>
      <th>密码</th>
    </tr>
    <tr th:each="user : ${userList}">
      <td th:text="${user.name}"></td>
      <td th:text="${user.pwd}"></td>
    </tr>
  </table>
</div>
</body>
</html>
访问http://localhost/userList
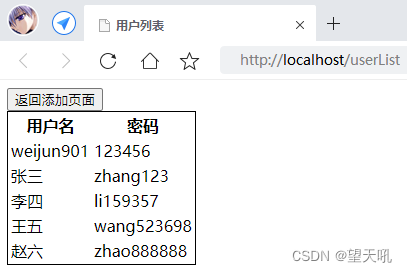
阶段性完结,撒花


 9965
9965

 被折叠的 条评论
为什么被折叠?
被折叠的 条评论
为什么被折叠?
 到【灌水乐园】发言


