


快速搭建SpringCloud(纯代码版)
简介
因为这是本人第一次写博客写的有不好的地方请多多谅解,因为最近自学了springcloud的一些东西所以想借此博客,来发表一片快速搭建一个微服务,顺便来巩固一下自己的学习。
。
Spring cloud搭建环境( 以maven多模块化的方法搭建)
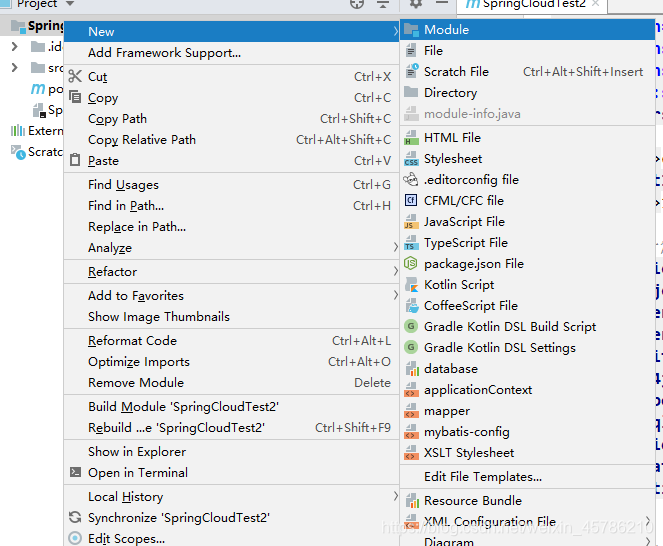
1.首先创建一个maven的主工程
最外层的pom文件
<!-- 统一管理jar包版本 -->
<properties>
    <project.build.sourceEncoding>UTF-8</project.build.sourceEncoding>
    <maven.compiler.source>1.8</maven.compiler.source>
    <maven.compiler.target>1.8</maven.compiler.target>
    <junit.version>4.12</junit.version>
    <log4j.version>1.2.17</log4j.version>
    <lombok.version>1.16.18</lombok.version>
    <mysql.version>5.1.47</mysql.version>
    <druid.version>1.1.16</druid.version>
    <mybatis.spring.boot.version>1.3.0</mybatis.spring.boot.version>
</properties>


    <!-- 子模块继承之后,提供作用:锁定版本+子modlue不用写groupId和version  -->
    <dependencyManagement>
        <dependencies>
            <!--spring boot 2.2.2-->
            <dependency>
                <groupId>org.springframework.boot</groupId>
                <artifactId>spring-boot-dependencies</artifactId>
                <version>2.2.2.RELEASE</version>
                <type>pom</type>
                <scope>import</scope>
            </dependency>
            <!--spring cloud Hoxton.SR1-->
            <dependency>
                <groupId>org.springframework.cloud</groupId>
                <artifactId>spring-cloud-dependencies</artifactId>
                <version>Hoxton.SR1</version>
                <type>pom</type>
                <scope>import</scope>
            </dependency>
            <!--spring cloud alibaba 2.1.0.RELEASE-->
            <dependency>
                <groupId>com.alibaba.cloud</groupId>
                <artifactId>spring-cloud-alibaba-dependencies</artifactId>
                <version>2.1.0.RELEASE</version>
                <type>pom</type>
                <scope>import</scope>
            </dependency>
            <dependency>
                <groupId>mysql</groupId>
                <artifactId>mysql-connector-java</artifactId>
                <version>${mysql.version}</version>
            </dependency>
            <dependency>
                <groupId>com.alibaba</groupId>
                <artifactId>druid</artifactId>
                <version>${druid.version}</version>
            </dependency>
            <dependency>
                <groupId>org.mybatis.spring.boot</groupId>
                <artifactId>mybatis-spring-boot-starter</artifactId>
                <version>${mybatis.spring.boot.version}</version>
            </dependency>
            <dependency>
                <groupId>junit</groupId>
                <artifactId>junit</artifactId>
                <version>${junit.version}</version>
            </dependency>
            <dependency>
                <groupId>log4j</groupId>
                <artifactId>log4j</artifactId>
                <version>${log4j.version}</version>
            </dependency>
            <dependency>
                <groupId>org.projectlombok</groupId>
                <artifactId>lombok</artifactId>
                <version>${lombok.version}</version>
                <optional>true</optional>
            </dependency>
        </dependencies>
    </dependencyManagement>

    <build>
        <plugins>
            <plugin>
                <groupId>org.springframework.boot</groupId>
                <artifactId>spring-boot-maven-plugin</artifactId>
                <configuration>
                    <fork>true</fork>
                    <addResources>true</addResources>
                </configuration>
            </plugin>
        </plugins>
    </build>
**
Spring cloud-Eureka注册中心
1.创建子工程Module
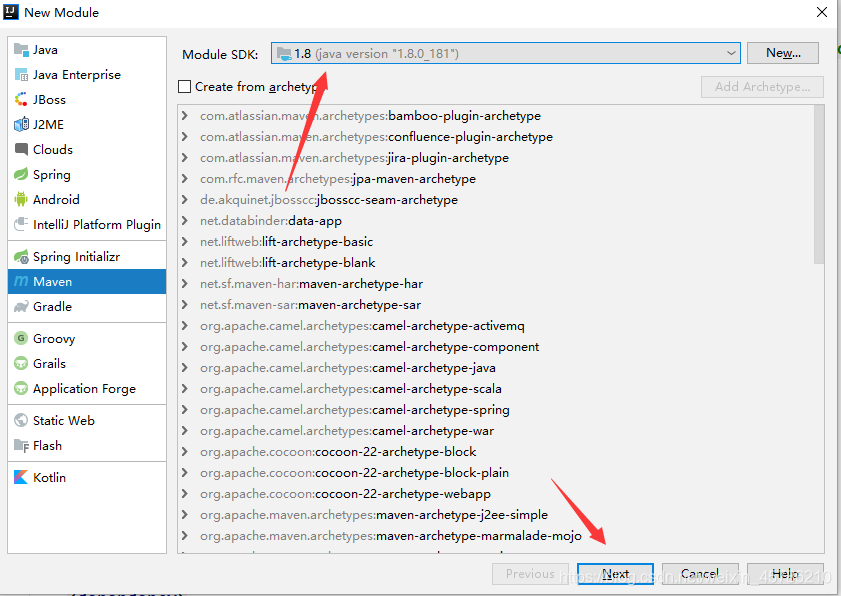
注意这里别忘记修改JDK1.8然后点下一步
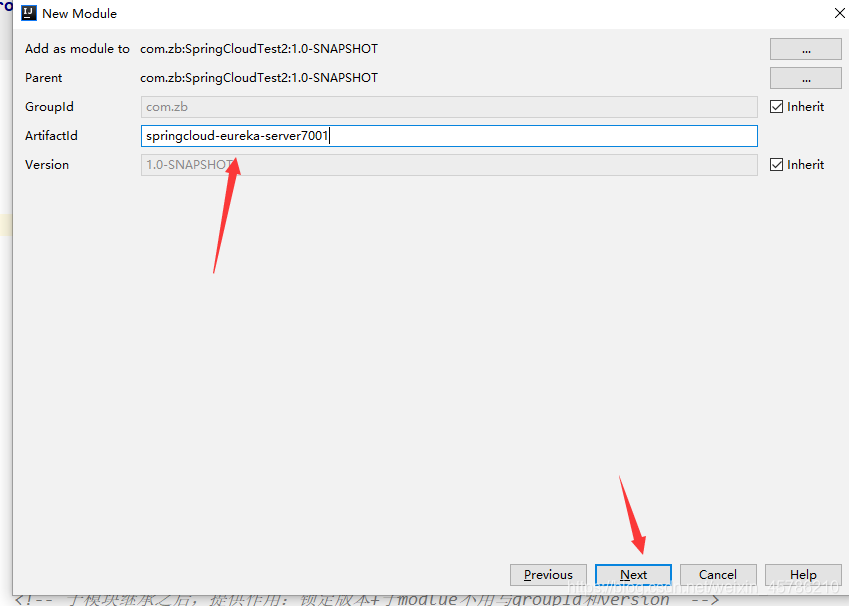
到这一步基本算创建好了,改个服务注册中心的名字就行
2.导入jar包
  <dependencies>
        <!--eureka-server-->
        <dependency>
            <groupId>org.springframework.cloud</groupId>
            <artifactId>spring-cloud-starter-netflix-eureka-server</artifactId>
        </dependency>

        <!--boot web actuator-->
        <dependency>
            <groupId>org.springframework.boot</groupId>
            <artifactId>spring-boot-starter-web</artifactId>
        </dependency>
        <dependency>
            <groupId>org.springframework.boot</groupId>
            <artifactId>spring-boot-starter-actuator</artifactId>
        </dependency>
        <!--一般通用配置-->
        <dependency>
            <groupId>org.springframework.boot</groupId>
            <artifactId>spring-boot-devtools</artifactId>
            <scope>runtime</scope>
            <optional>true</optional>
        </dependency>
        <dependency>
            <groupId>org.projectlombok</groupId>
            <artifactId>lombok</artifactId>
        </dependency>
        <dependency>
            <groupId>org.springframework.boot</groupId>
            <artifactId>spring-boot-starter-test</artifactId>
            <scope>test</scope>
        </dependency>
        <dependency>
            <groupId>junit</groupId>
            <artifactId>junit</artifactId>
        </dependency>
    </dependencies>
3.创建YMl文件
server:
  port: 7001 #修改端口号
eureka:
  instance:
    hostname: eureka7001.com  #eureka服务端口的名称

  client:
    register-with-eureka: false #false表示自己不向服务注册中心注册自己
    fetch-registry: false #false表示自己就是注册中心,职责就是维护服务的实例,并不要去检索服务


    service-url:
      defaultZone: http://eureka7001.com:7001/eureka/
4.创建主启动类
@SpringBootApplication
@EnableEurekaServer  //开启eureka服务
public class EurekaServerMain7001 {
    public static void main(String[] args) {
        SpringApplication.run(EurekaServerMain7001.class,args);
    }

}
5.测试
http://localhost:7001/或者
http://eureka7001.com:7001/ 注:eureka7001.com是服务端口的名称
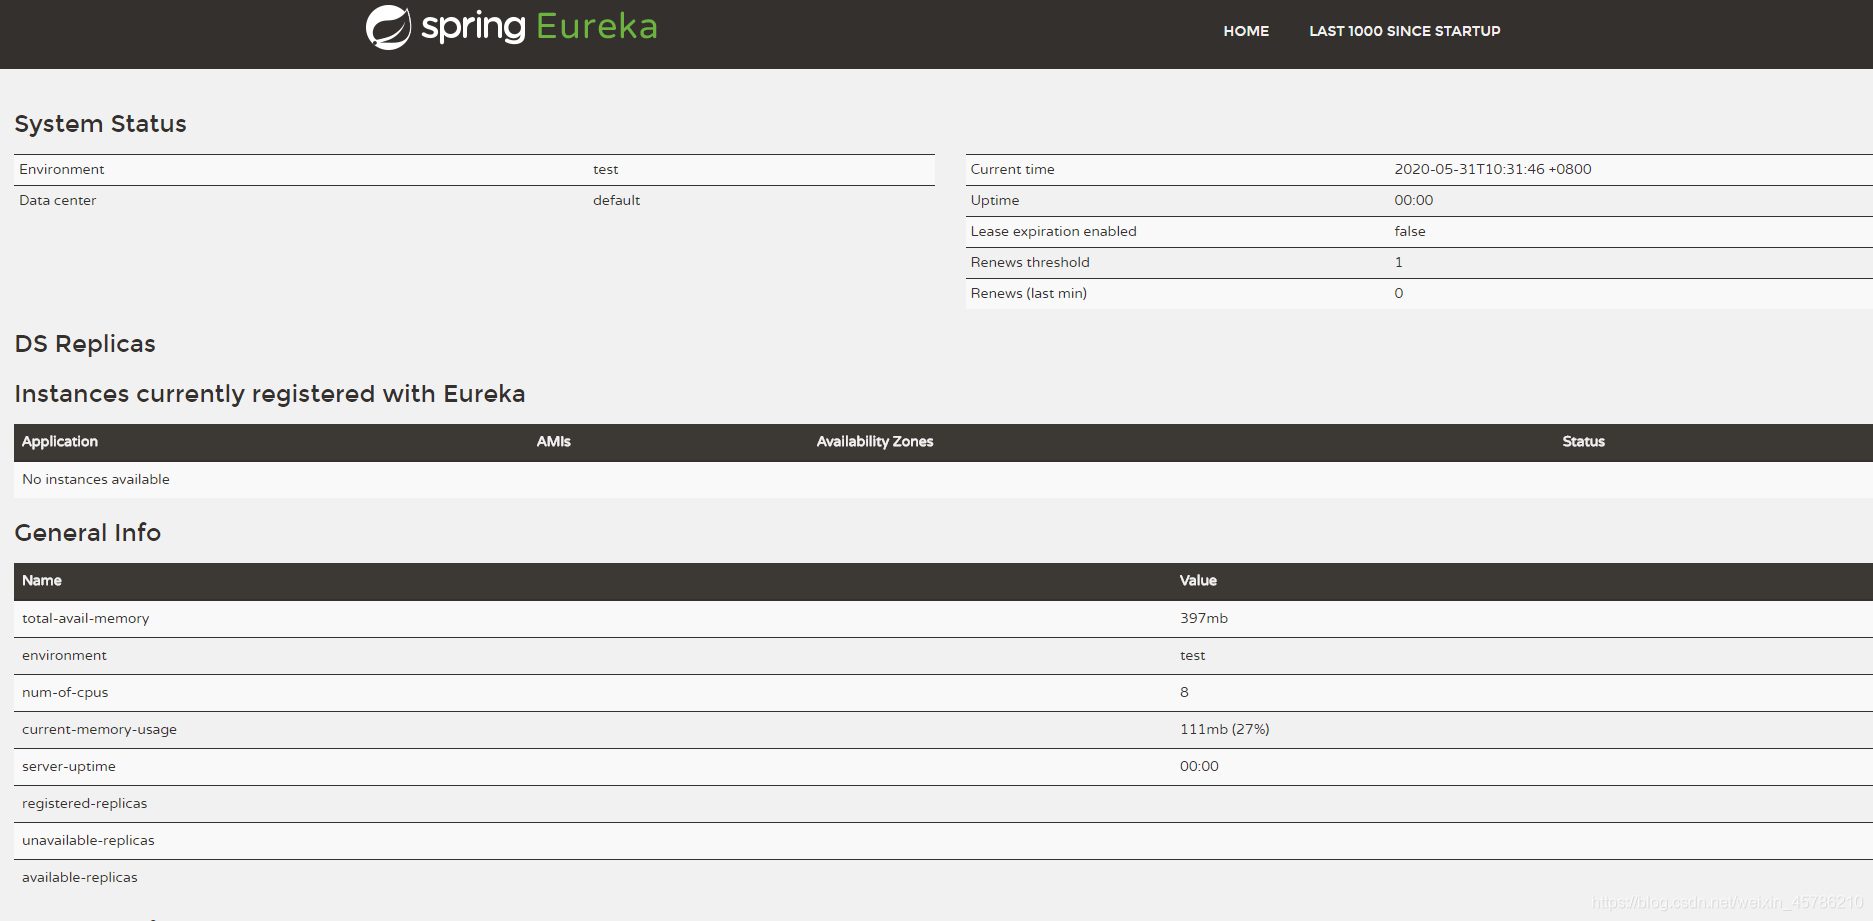
当出现这个页面基本就成功了,先做简单的单机后集群
创建服务提供者
1.建Module:springcloud-provider-student8001因为步骤跟前面一样也就不截图了
注意搭建集群的时候需要修改

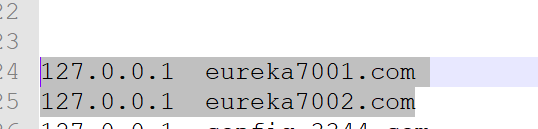
此目录下的hosts文件这样子才可以实现映射
127.0.0.1 eureka7001.com
127.0.0.1 eureka7002.com
2.添加jar包
 <dependencies>
        <!--包含了sleuth+zipkin-->
        <dependency>
            <groupId>org.springframework.cloud</groupId>
            <artifactId>spring-cloud-starter-zipkin</artifactId>
        </dependency>
        <!--eureka-client-->
        <dependency>
            <groupId>org.springframework.cloud</groupId>
            <artifactId>spring-cloud-starter-netflix-eureka-client</artifactId>
        </dependency>

        <dependency>
            <groupId>org.springframework.boot</groupId>
            <artifactId>spring-boot-starter-web</artifactId>
        </dependency>
        <dependency>
            <groupId>org.springframework.boot</groupId>
            <artifactId>spring-boot-starter-actuator</artifactId>
        </dependency>
        <dependency>
            <groupId>org.mybatis.spring.boot</groupId>
            <artifactId>mybatis-spring-boot-starter</artifactId>
        </dependency>
        <dependency>
            <groupId>com.alibaba</groupId>
            <artifactId>druid-spring-boot-starter</artifactId>
            <version>1.1.10</version>
        </dependency>
        <!--mysql-connector-java-->
        <dependency>
            <groupId>mysql</groupId>
            <artifactId>mysql-connector-java</artifactId>
        </dependency>
        <!--jdbc-->
        <dependency>
            <groupId>org.springframework.boot</groupId>
            <artifactId>spring-boot-starter-jdbc</artifactId>
        </dependency>
        <dependency>
            <groupId>org.springframework.boot</groupId>
            <artifactId>spring-boot-devtools</artifactId>
            <scope>runtime</scope>
            <optional>true</optional>
        </dependency>
        <dependency>
            <groupId>org.projectlombok</groupId>
            <artifactId>lombok</artifactId>
            <optional>true</optional>
        </dependency>
        <dependency>
            <groupId>org.springframework.boot</groupId>
            <artifactId>spring-boot-starter-test</artifactId>
            <scope>test</scope>
        </dependency>
    </dependencies>
3.创建YML配置文件
server:
  port: 8001 #服务端口号
spring:
  application:
    name: springcloud-student-server #服务提供者实例名称


  datasource:
    type: com.alibaba.druid.pool.DruidDataSource            # 当前数据源操作类型
    driver-class-name: org.gjt.mm.mysql.Driver              # mysql驱动包
    url: jdbc:mysql://localhost:3306/db2019?useUnicode=true&characterEncoding=utf-8&useSSL=false
    username: root
    password: ok

    mybatis:
      type-aliases-package: com.zb.entities    # 所有Entity别名类所在包

eureka:
  client:
    register-with-eureka: true #表示是否将自己注册进EurekaServer默认为true
    fetch-registry: true
    service-url:
      defaultZone: http://eureka7001.com:7001/eureka #单机版本
4.为了方便调用创建一个新Module:springcloud-api-commons把实体类放里面
(1)增添jar包
<dependencies>
        <dependency>
            <groupId>org.springframework.boot</groupId>
            <artifactId>spring-boot-devtools</artifactId>
            <scope>runtime</scope>
            <optional>true</optional>
        </dependency>
        <dependency>
            <groupId>org.projectlombok</groupId>
            <artifactId>lombok</artifactId>
            <optional>true</optional>
        </dependency>
        <dependency>
            <groupId>cn.hutool</groupId>
            <artifactId>hutool-all</artifactId>
            <version>5.1.0</version>
        </dependency>
    </dependencies>
(2)创建实体类Student
package com.zb.entity;

import lombok.Data;
import lombok.NoArgsConstructor;

/**
 * @author yyj
 * @create 2020-05-31-10:54
 */
@Data  //自动写getset方法
@NoArgsConstructor //自动创建无参构建方法
public class Student implements Serializable{

    private Integer id;
    private String name;
    private String address;
    private Integer age;


}
(3)创建结果集类CommonResult
@Data               //自动写getset方法
@AllArgsConstructor //创造一个全部带参的构造方法
@NoArgsConstructor  //无参构造方法
public class CommonResult<T> {

    private Integer code;       //状态码
    private String message;     //提示信息
    private T data;             //查询结果

    public CommonResult(Integer code,String message){
        this(code,message,null);
    }


}
5.回到服务提供者在pom文件加上新依赖
	    <!--引入自己定义的通用api包-->
		<dependency>
            <groupId>com.zb</groupId>
            <artifactId>springcloud-api-commons</artifactId>
            <version>${project.version}</version>
        </dependency>
6.创建dao层接口为了更直观一些直接用注解实现,实现了2个方法一个根据id查询学生信息一个是新增学生信息,为了方便以后就调用一个根据id查询学生信息
@Mapper
public interface StudentMapper {


    /**
     * 根据id查询学生信息
     * @param id
     * @return
     */
    @Select("select * from student where id=#{id}")
    public Student findByIdStudent(Integer id);
	 /**
     * 新增学生信息
     */
    @Insert("insert into student values (default,#{name},#{address},#{age})")
    public Integer insert(Student stu);

}
7.创建业务逻辑层service
public interface StudentService {

    public Student findByIdStudent(Integer id);

    public Integer insert(Student stu);

}
8.实现类
@Service
public class StudentServiceImpl implements StudentService {

    @Autowired
    private StudentMapper studentMapper;

    @Override
    public Student findByIdStudent(Integer id) {
        return studentMapper.findByIdStudent(id);
    }

    @Override
    public Integer insert(Student stu) {
        return studentMapper.insert(stu);
    }
}
9.创建controller层
@RestController
public class StudentController {

    @Autowired
    private StudentService studentService;

    @Value("${server.port}")
    private String port;


    @GetMapping(value = "/student/get/{id}")
    public CommonResult<Student> findByIdStudent(@PathVariable("id") Integer id){
        Student student = studentService.findByIdStudent(id);

        if (student!=null){
            return new CommonResult(200,"数据查询成功O(∩_∩)O+"+port,student);
        }else {
            return new CommonResult(444,"数据查询失败/(ㄒoㄒ)/~~",null);
        }

    }

    @PostMapping(value = "/student/add")
    public CommonResult create(@RequestBody Student stu){

        Integer result = studentService.insert(stu);
        if (result!=null){
            return new CommonResult(200,"数据插入成功O(∩_∩)O+"+port,result);
        }else {
            return new CommonResult(444,"数据插入失败/(ㄒoㄒ)/~~",null);
        }


    }


}
10.创建主启动类:StudentMain8001注意一定要在上一层创建
@SpringBootApplication
@EnableEurekaClient //作为客户端注册进eureka服务
public class StudentMain8001 {
    public static void main(String[] args) {
        SpringApplication.run(StudentMain8001.class,args);
    }
}
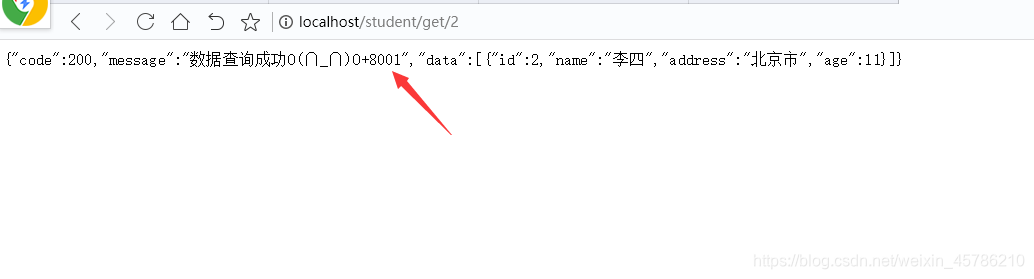
11.测试
在浏览器输入地址:http://localhost:8001/student/get/1

当出现这个说明没什么问题了
现在可以在刷新下
http://eureka7001.com:7001/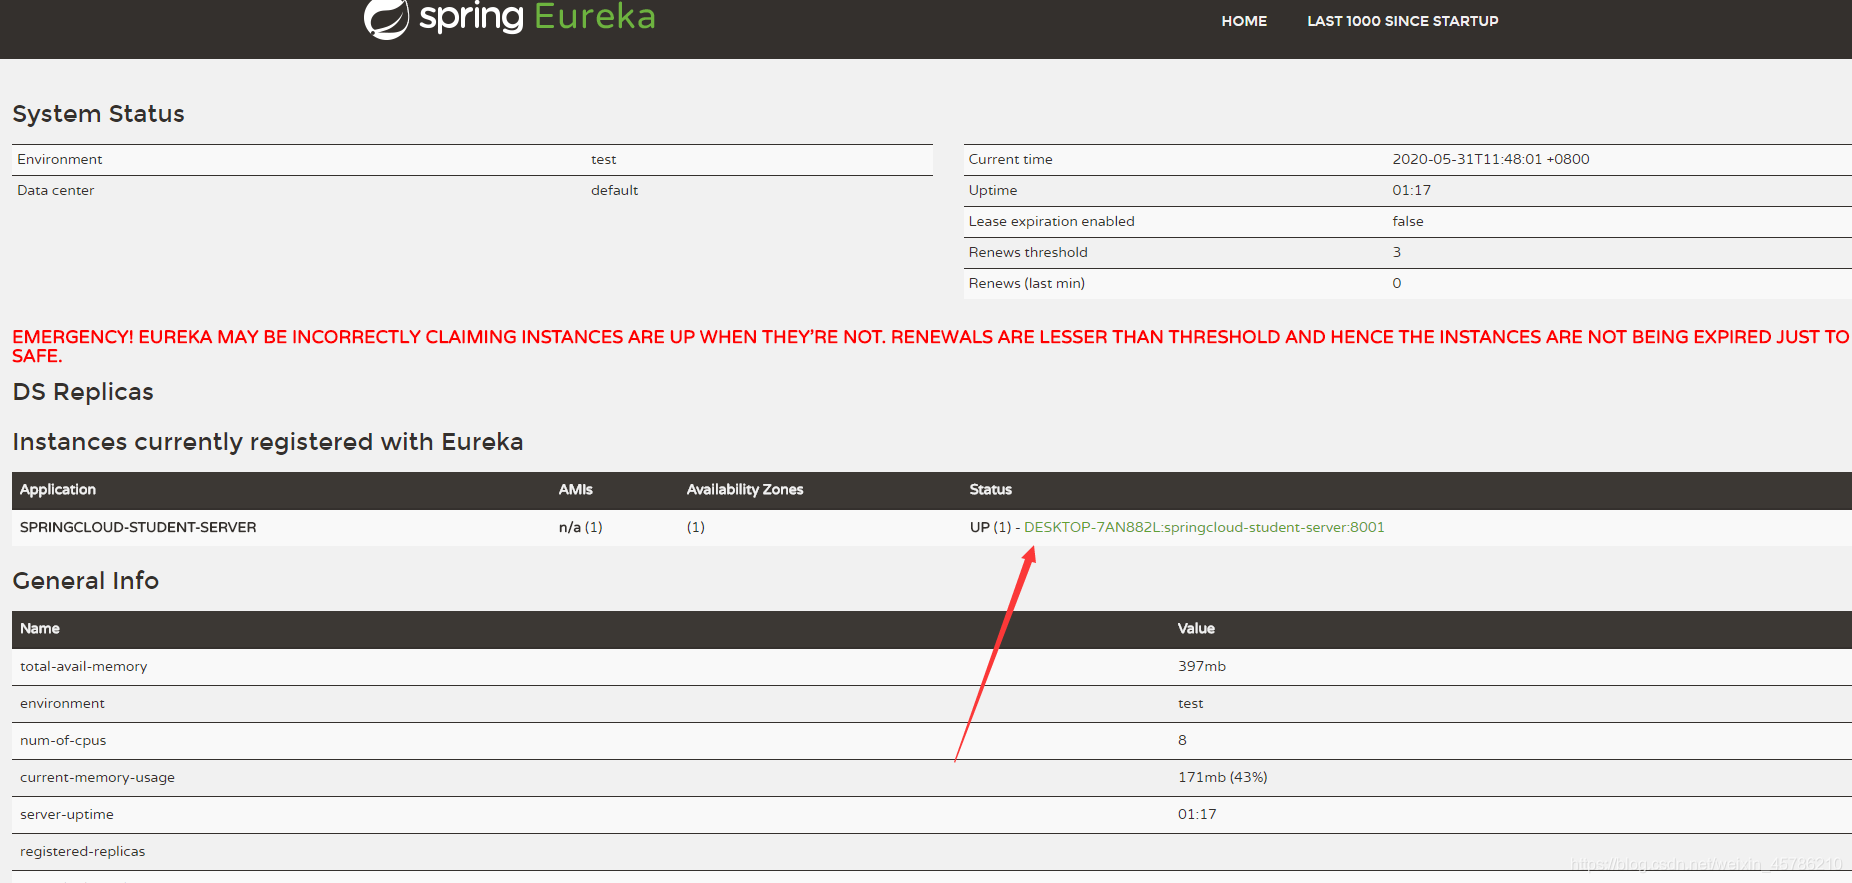
发现服务提供者注册进来了up
上面的红色字体是eureka自我保护机制不用管他
创建服务注册中心集群
原样按照:springchoud-eureka-server7001复制一份springchoud-eureka-server7002
(1)修改yml文件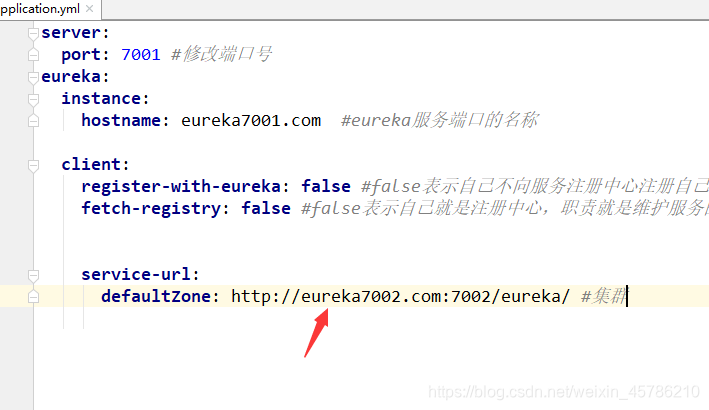
(2)在7001注册中心把:defaultZone: http://eureka7001.com:7001/eureka/改成
defaultZone: http://eureka7002.com:7002/eureka
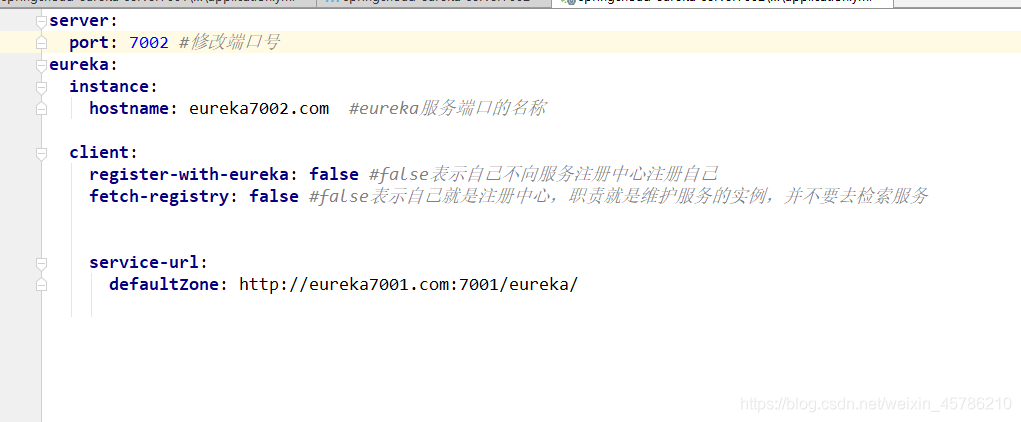
(3)同理7002注册中心把:defaultZone: http://eureka7002.com:7002/eureka/改成
defaultZone: http://eureka7001.com:7001/eureka
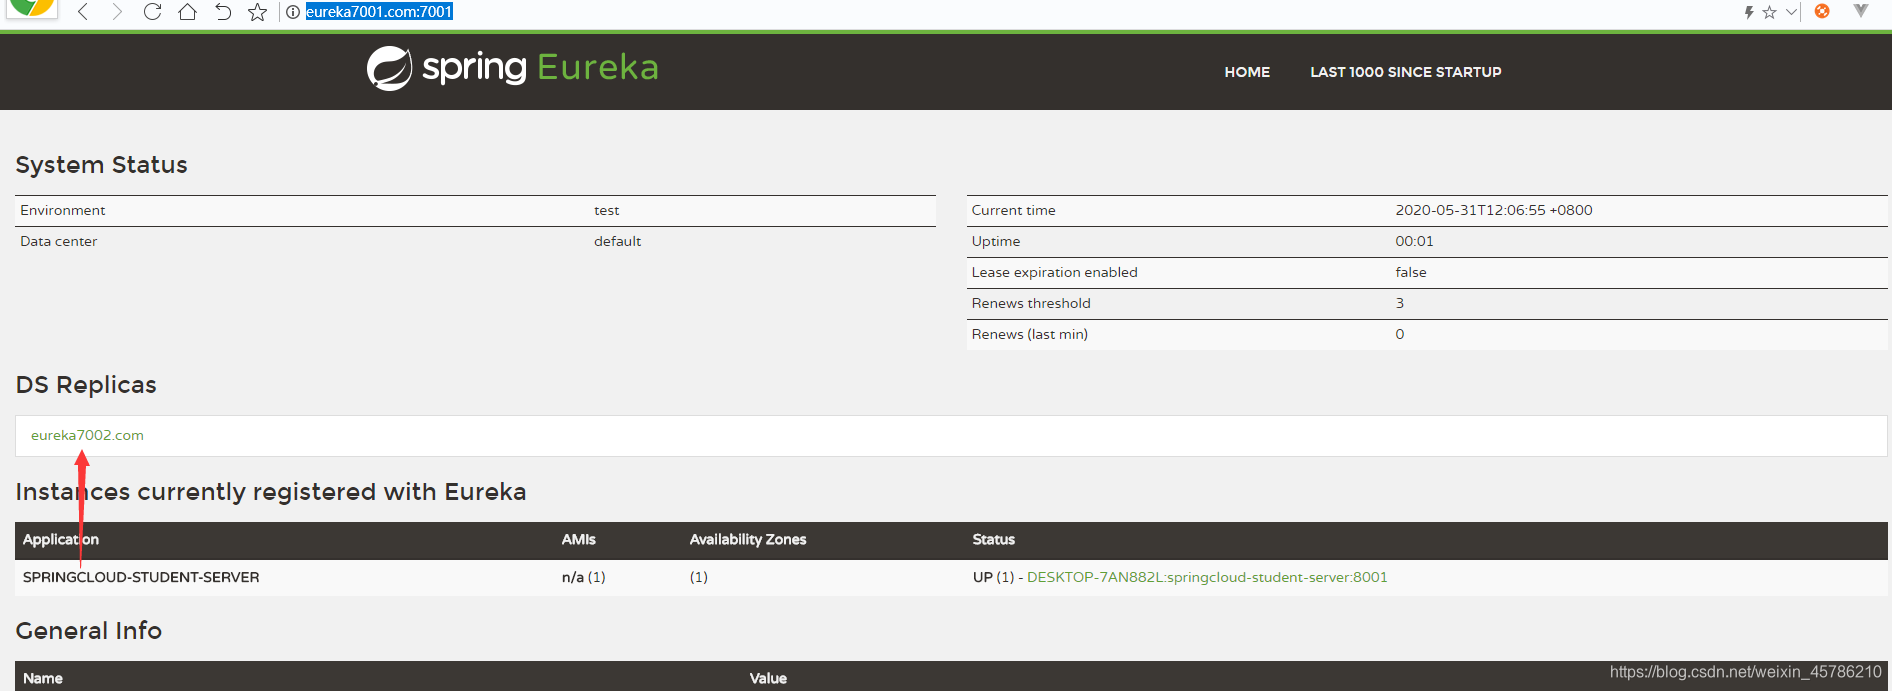
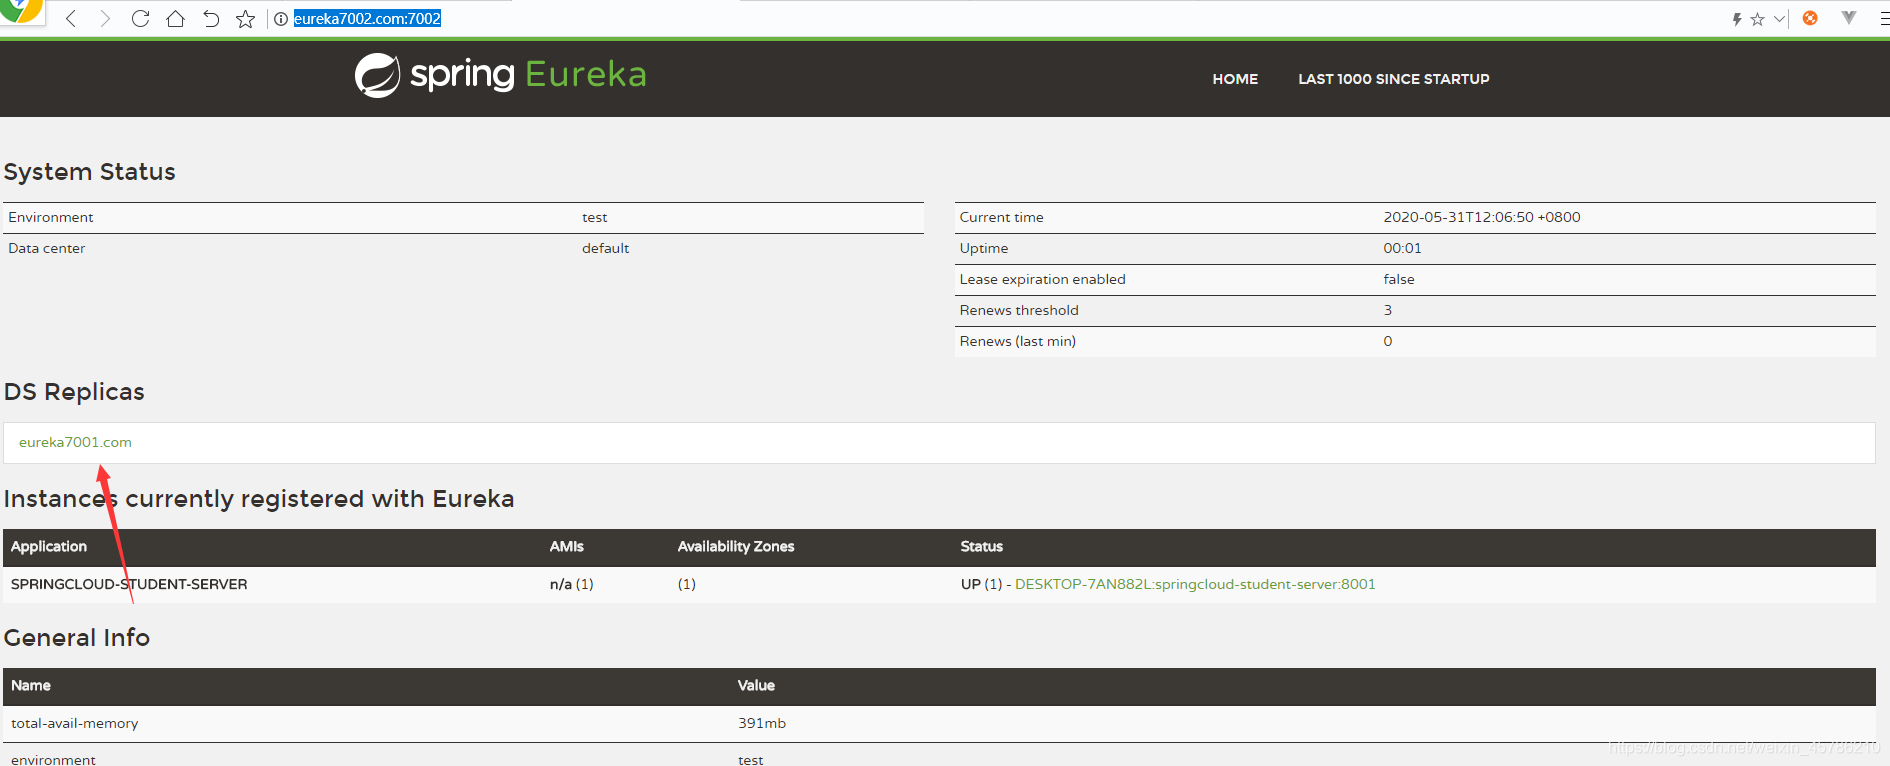
(4)测试
http://eureka7001.com:7001/
http://eureka7002.com:7002/都出现以下的页面就说明成功了
创建服务提供者集群
原样按照:springcloud-provider-student8001复制一份:springcloud-provider-student8002
在8001和8002里面的yml文件改成2个eureka的地址如果有多个的话就多个中间用逗号隔开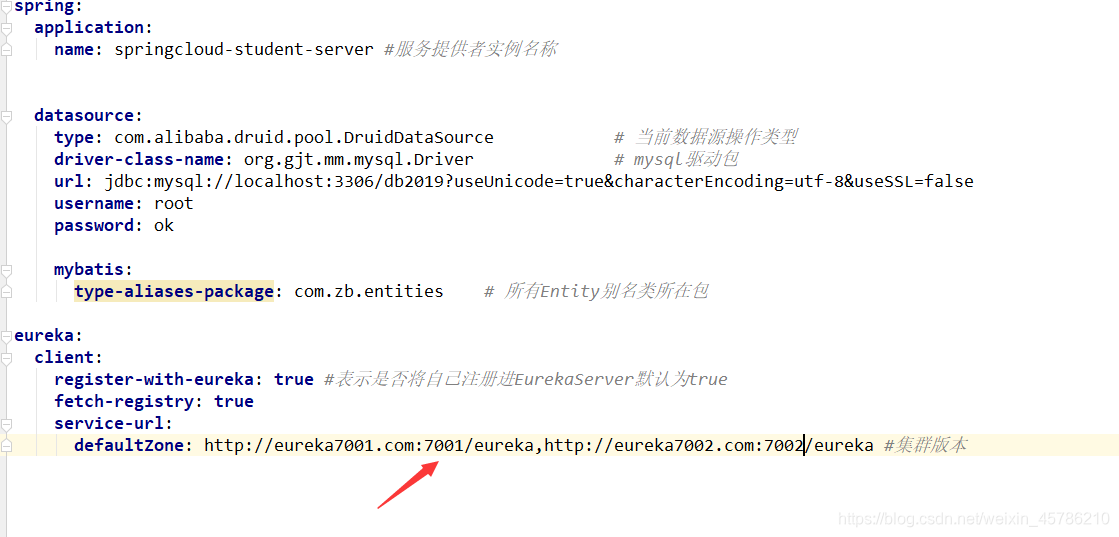
测试
注意:先启动服务注册中心在启动服务提供端
浏览器地址:http://eureka7001.com:7001/或http://eureka7002.com:7002/测试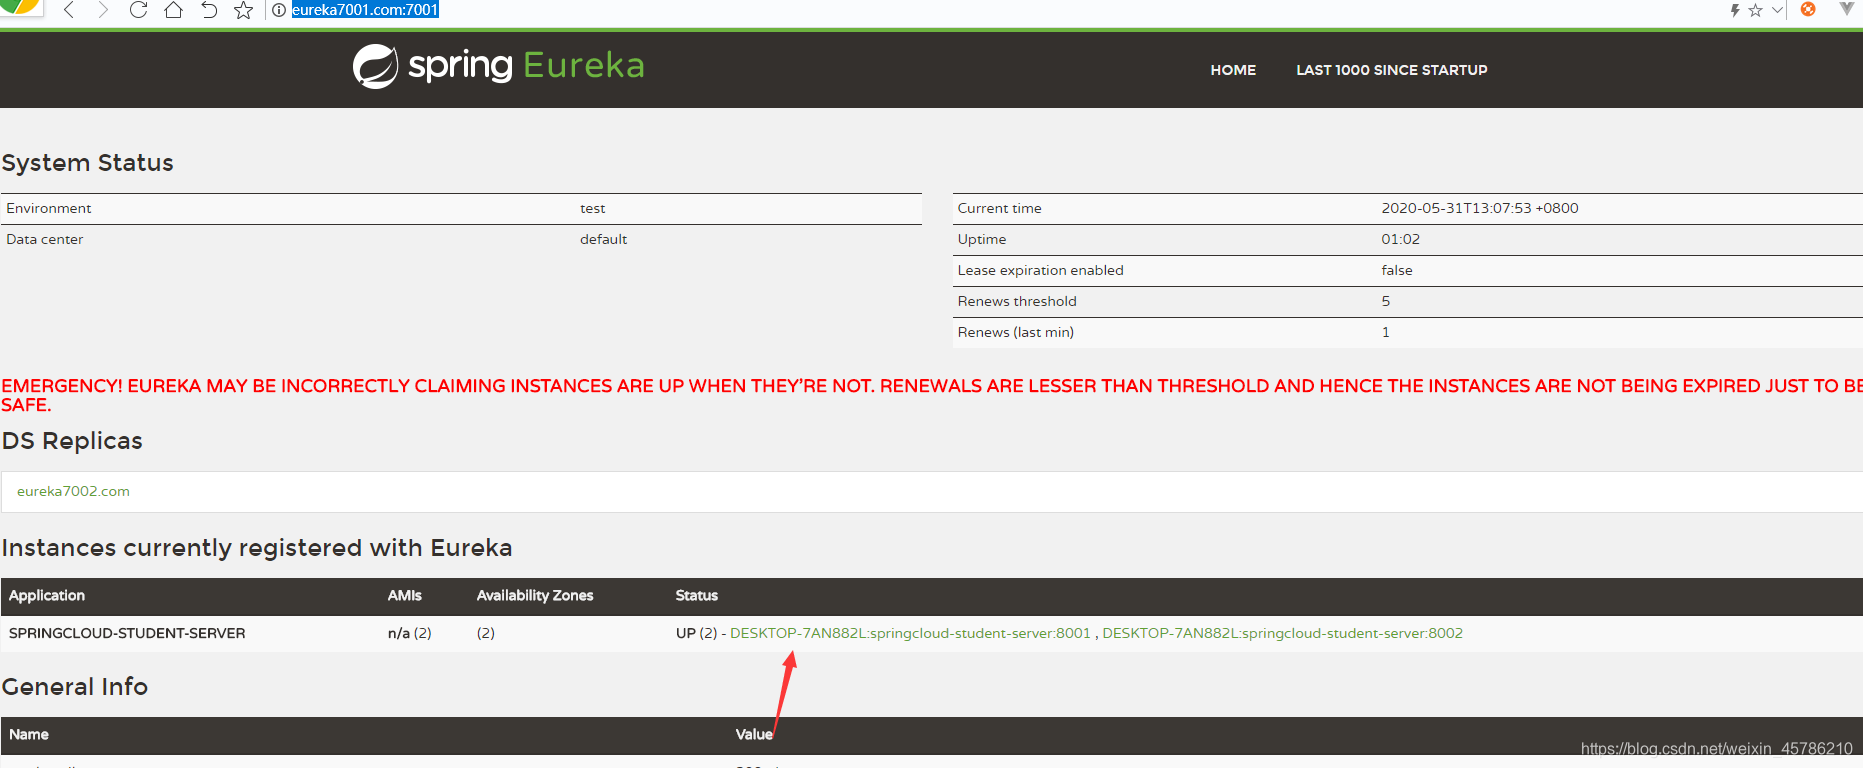
出现这个就基本完工了
用Ribbon实现负载均衡
创建消费者端:springcloud-consumer-provide80
1.添加jar包
 <dependencies>
        <!--包含了sleuth+zipkin-->
        <dependency>
            <groupId>org.springframework.cloud</groupId>
            <artifactId>spring-cloud-starter-zipkin</artifactId>
        </dependency>
        <dependency>
            <groupId>org.springframework.cloud</groupId>
            <artifactId>spring-cloud-starter-netflix-eureka-client</artifactId>
        </dependency>
        <dependency><!-- 引入自己定义的api通用包,可以使用Payment支付Entity -->
            <groupId>com.zb</groupId>
            <artifactId>springcloud-api-commons</artifactId>
            <version>${project.version}</version>
        </dependency>
        <dependency>
            <groupId>org.springframework.boot</groupId>
            <artifactId>spring-boot-starter-web</artifactId>
        </dependency>
        <dependency>
            <groupId>org.springframework.boot</groupId>
            <artifactId>spring-boot-starter-actuator</artifactId>
        </dependency>

        <dependency>
            <groupId>org.springframework.boot</groupId>
            <artifactId>spring-boot-devtools</artifactId>
            <scope>runtime</scope>
            <optional>true</optional>
        </dependency>
        <dependency>
            <groupId>org.projectlombok</groupId>
            <artifactId>lombok</artifactId>
            <optional>true</optional>
        </dependency>
        <dependency>
            <groupId>org.springframework.boot</groupId>
            <artifactId>spring-boot-starter-test</artifactId>
            <scope>test</scope>
        </dependency>
    </dependencies>
2.新建yml文件
server:
  port: 80


eureka:
  client:
    register-with-eureka: true #表示是否将自己注册进EurekaServer默认为true
    fetch-registry: true
    service-url:
      defaultZone: http://eureka7001.com:7001/eureka,http://eureka7002.com:7002/eureka #集群版本
spring:
  application:
    name: cloud-provide-service
3.创建主启动类
@SpringBootApplication
@EnableEurekaClient
@RibbonClient(name = "SPRINGCLOUD-STUDENT-SERVER")//name名字是服务注册段当初注册的名字,
public class ProvideMain80 {
    public static void main(String[] args) {
        SpringApplication.run(ProvideMain80.class,args);
    }
}
4.创建config层ApplicationContextConfig类引入ribbon的负载均衡
@Configuration
public class ApplicationContextConfig {

    @LoadBalanced  // 引入ribbon负载均衡、默认轮询算法
    @Bean
    public RestTemplate getRestTemplate(){
        return new RestTemplate();
    }
}
5.创建controller层
@RestController
public class ProviderController {


    private static final String PROVIDER_URL="http://SPRINGCLOUD-STUDENT-SERVER";//服务提供者的名字

    @Resource
    private RestTemplate restTemplate;

    @GetMapping(value = "/student/get/{id}")
    public CommonResult<Student> getStudent(@PathVariable("id") Integer id){

        return restTemplate.getForObject(PROVIDER_URL+"/student/get/"+id,CommonResult.class);

    }

    @PostMapping(value = "/student/add")
    public CommonResult<Student> insert(Student stu){
        return restTemplate.postForObject(PROVIDER_URL+"/student/add",stu,CommonResult.class);

    }

}
6.测试把所有的服务提供者打开
http://localhost/student/get/2因为是80端口默认是80所以不用写端口号了
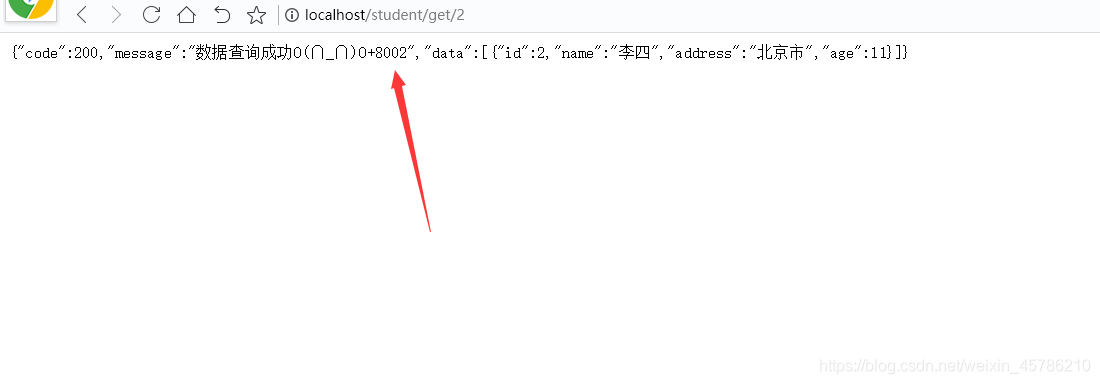
默认循环查找2个服务
用Feign实现负载均衡
1.新建module:cloud-consumer-feign-provide80
2.增添jar包
  <dependencies>
        <!--openfeign-->
        <dependency>
            <groupId>org.springframework.cloud</groupId>
            <artifactId>spring-cloud-starter-openfeign</artifactId>
        </dependency>
        <!--eureka client-->
        <dependency>
            <groupId>org.springframework.cloud</groupId>
            <artifactId>spring-cloud-starter-netflix-eureka-client</artifactId>
        </dependency>
        <!-- 引入自己定义的api通用包,可以使用Payment支付Entity -->
        <dependency>
            <groupId>com.zb</groupId>
            <artifactId>springcloud-api-commons</artifactId>
            <version>${project.version}</version>
        </dependency>
        <!--web-->
        <dependency>
            <groupId>org.springframework.boot</groupId>
            <artifactId>spring-boot-starter-web</artifactId>
        </dependency>
        <dependency>
            <groupId>org.springframework.boot</groupId>
            <artifactId>spring-boot-starter-actuator</artifactId>
        </dependency>
        <!--一般基础通用配置-->
        <dependency>
            <groupId>org.springframework.boot</groupId>
            <artifactId>spring-boot-devtools</artifactId>
            <scope>runtime</scope>
            <optional>true</optional>
        </dependency>
        <dependency>
            <groupId>org.projectlombok</groupId>
            <artifactId>lombok</artifactId>
            <optional>true</optional>
        </dependency>
        <dependency>
            <groupId>org.springframework.boot</groupId>
            <artifactId>spring-boot-starter-test</artifactId>
            <scope>test</scope>
        </dependency>
    </dependencies>
3.增添配置文件yml
server:
  port: 80


eureka:
  client:
    register-with-eureka: false #表示是否将自己注册进EurekaServer默认为true
    fetch-registry: true
    service-url:
      defaultZone: http://eureka7001.com:7001/eureka,http://eureka7002.com:7002/eureka #集群版本
4.创建主启动类
在这里插入代码片@SpringBootApplication
@EnableFeignClients
public class FeignMain80 {

    public static void main(String[] args) {
        SpringApplication.run(FeignMain80.class,args);
    }
}
5.创建service层:ProvideFeignServer接口
@Component
@FeignClient(value = "SPRINGCLOUD-STUDENT-SERVER")//服务提供者的名称
public interface ProvideFeignServer {

    @GetMapping(value = "/student/get/{id}")
    public CommonResult<Student> getByIdStu(@PathVariable("id") Integer id);
}
6.创建controller层
@RestController
public class ProvideFeignController {

    @Resource
    private ProvideFeignServer provideFeignServer;

    @GetMapping("/consumer/student/get/{id}")
    public CommonResult<Student> ProvideFeignServer(@PathVariable("id")Integer id){

        CommonResult<Student> result = provideFeignServer.getByIdStu(id);


        return result;

    }


}
7.浏览器端测试
localhost/consumer/student/get/2
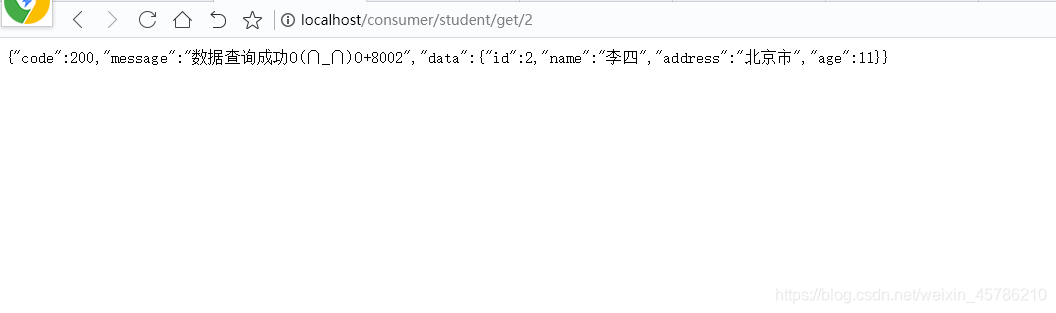
发现也可以实现负载均衡完成
用hystrix实现服务熔断降级
1.新建服务提供者Module:cloud-provider-hystrix-payment8001
2.增添jar包
  <dependencies>
        <!--hystrix-->
        <dependency>
            <groupId>org.springframework.cloud</groupId>
            <artifactId>spring-cloud-starter-netflix-hystrix</artifactId>
        </dependency>
        <!--eureka client-->
        <dependency>
            <groupId>org.springframework.cloud</groupId>
            <artifactId>spring-cloud-starter-netflix-eureka-client</artifactId>
        </dependency>
        <!--web-->
        <dependency>
            <groupId>org.springframework.boot</groupId>
            <artifactId>spring-boot-starter-web</artifactId>
        </dependency>
        <dependency>
            <groupId>org.springframework.boot</groupId>
            <artifactId>spring-boot-starter-actuator</artifactId>
        </dependency>
        <dependency><!-- 引入自己定义的api通用包,可以使用Payment支付Entity -->
            <groupId>com.zb</groupId>
            <artifactId>springcloud-api-commons</artifactId>
            <version>${project.version}</version>
        </dependency>
        <dependency>
            <groupId>org.springframework.boot</groupId>
            <artifactId>spring-boot-devtools</artifactId>
            <scope>runtime</scope>
            <optional>true</optional>
        </dependency>
        <dependency>
            <groupId>org.projectlombok</groupId>
            <artifactId>lombok</artifactId>
            <optional>true</optional>
        </dependency>
        <dependency>
            <groupId>org.springframework.boot</groupId>
            <artifactId>spring-boot-starter-test</artifactId>
            <scope>test</scope>
        </dependency>
    </dependencies>
3.新建yml配置
server:
  port: 8001


spring:
  application:
    name: cloud-provider-hystrix-payment

eureka:
  client:
    register-with-eureka: true
    fetch-registry: true
    service-url:
      defaultZone: http://eureka7001.com:7001/eureka
4.新建主启动类:StudentHystrixMain8001
@SpringBootApplication
@EnableEurekaClient
@EnableCircuitBreaker//启动服务熔断
public class StudentHystrixMain8001 {
    public static void main(String[] args) {
        SpringApplication.run(StudentHystrixMain8001.class,args);
    }


    /**
     *此配置是为了服务监控而配置,与服务容错本身无关,springcloud升级后的坑
     *ServletRegistrationBean因为springboot的默认路径不是"/hystrix.stream",
     *只要在自己的项目里配置上下面的servlet就可以了
     */
    @Bean
    public ServletRegistrationBean getServlet() {
        HystrixMetricsStreamServlet streamServlet = new HystrixMetricsStreamServlet();
        ServletRegistrationBean registrationBean = new ServletRegistrationBean(streamServlet);
        registrationBean.setLoadOnStartup(1);
        registrationBean.addUrlMappings("/hystrix.stream");
        registrationBean.setName("HystrixMetricsStreamServlet");
        return registrationBean;
    }
}
5.创建service层接口
public interface StudentService {


    public String Student_INFO_OK(Integer id);

    public String Student_INFO_Out_Time(Integer id);

    public String Student_CircuitBreaker(@PathVariable("id") Integer id);

}
6.创建实现类
@Service
public class StudentServiceImpl implements StudentService {


    /**
     * 正常访问一个方法
     * @param id
     * @return
     */
    @Override
    public String Student_INFO_OK(Integer id) {
        return "恭喜你服务调用成功"+"Student_INFO_OK+"+id;
    }


    /**
     * 线程睡眠5秒钟非正常情况下
     * @param id
     * @return
     */
    @HystrixCommand(fallbackMethod = "studentInfo_TimeOut",commandProperties = {//fallbackMethod当初出现错误主动去调用这个方法
            @HystrixProperty(name = "execution.isolation.thread.timeoutInMilliseconds",value = "3000")//修改超过3秒钟报错
    })
    @Override
    public String Student_INFO_Out_Time(Integer id) {

        try {
            Thread.sleep(5000);
        } catch (InterruptedException e) {
            e.printStackTrace();
        }

        return "服务调用失败"+"Student_INFO_Out_Time+"+id+",总共耗时3秒钟";
    }


    //当上面那个方法出错会调用此方法
    public String studentInfo_TimeOut(Integer id){
        return "服务调用失败"+"studentInfo_TimeOut+"+id+"总共耗时3秒钟请重新试试";
    }


    //=====服务熔断
    @HystrixCommand(fallbackMethod = "studenttCircuitBreaker_fallback",commandProperties = {
            @HystrixProperty(name = "circuitBreaker.enabled",value = "true"),// 是否开启断路器
            @HystrixProperty(name = "circuitBreaker.requestVolumeThreshold",value = "10"),// 请求次数
            @HystrixProperty(name = "circuitBreaker.sleepWindowInMilliseconds",value = "10000"), // 时间窗口期
            @HystrixProperty(name = "circuitBreaker.errorThresholdPercentage",value = "40"),// 失败率达到多少后跳闸
    })
    @Override
    public String Student_CircuitBreaker(@PathVariable("id") Integer id) {

        if (id<0){//id不能等于负数如果等于负数抛出一个异常
            throw new RuntimeException("id不能为负数");

        }


        return "成功调用Student_CircuitBreaker方法,id:"+id;
    }

    public String studenttCircuitBreaker_fallback(@PathVariable("id") Integer id){
        return "id不能负数,请重新试";

    }
}
7.创建controller层
@RestController
public class StudentController {

    @Value("${server.port}")
    private String severprot;

    @Resource
    private StudentService studentService;

    /**
     * 测试成功的
     * @param id
     * @return
     */
    @GetMapping("/student/hystrix/ok/{id}")
    public String Student_INFO_OK(@PathVariable("id") Integer id){
        String result = studentService.Student_INFO_OK(id);
        return result;
    }

    /**
     * 测试超时的
     * @param id
     * @return
     */
    @GetMapping("/student/hystrix/Time/{id}")
    public String Student_INFO_Out_Time(@PathVariable("id") Integer id){
        String result = studentService.Student_INFO_Out_Time(id);
        return result;
    }


    //====服务熔断
    @GetMapping("/student/circuit/{id}")
    public String paymentCircuitBreker(@PathVariable("id") Integer id){

        String result = studentService.Student_CircuitBreaker(id);
        return result;
    }

}
8.分别测试这3个方法
(1)http://localhost:8001/student/hystrix/ok/1

(2)http://localhost:8001/student/hystrix/Time/1
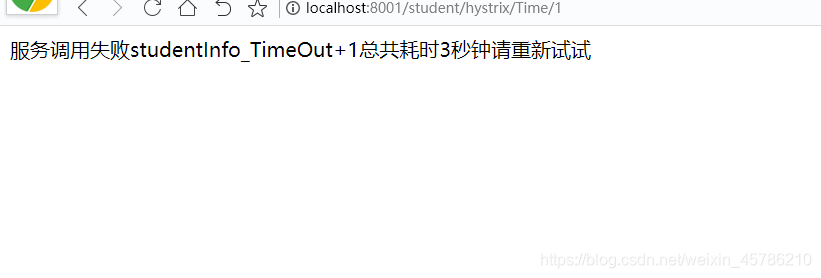
发现此方法报错,自动启动服务降级,调用备用方法
(3)http://localhost:8001/student/circuit/1
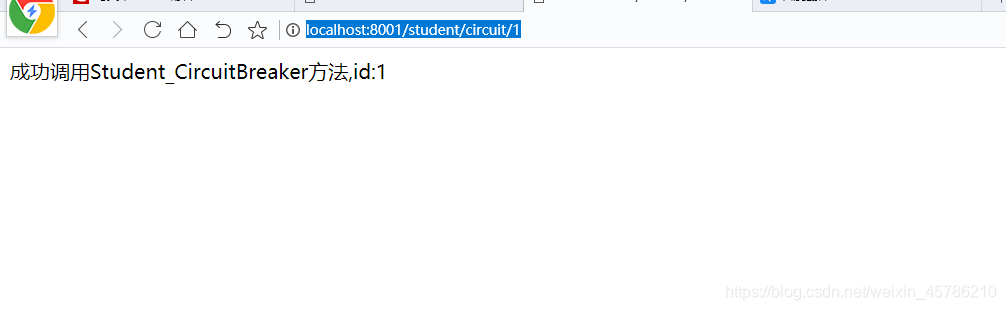
http://localhost:8001/student/circuit/-1
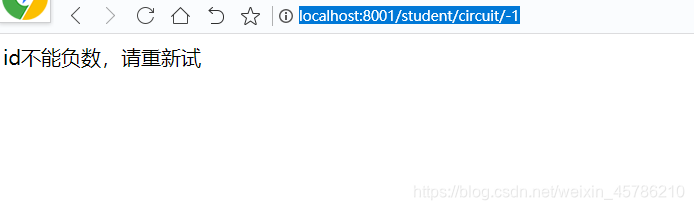
当10次里面有超过4次以上失败的话,自动启动服务熔断,相当于保险丝断了,就算访问正确的请求也访问不上去,等10秒钟后服务才能恢复正常
以上就是从服务提供者配置的服务熔断与降级服务
hystrix还可以在消费者端口也就是80端口实现:服务熔断与降级方法与上面差不多我也就不多写了
Gateway实现路由网关
因为zuul已经不更新了,我用Gateway来实现网关
1.老样子新建module:springcloud-gateway-gateway9527
2.增添jar包
 <dependencies>
        <!--gateway-->
        <dependency>
            <groupId>org.springframework.cloud</groupId>
            <artifactId>spring-cloud-starter-gateway</artifactId>
        </dependency>
        <!--eureka-client-->
        <dependency>
            <groupId>org.springframework.cloud</groupId>
            <artifactId>spring-cloud-starter-netflix-eureka-client</artifactId>
        </dependency>
        <!-- 引入自己定义的api通用包,可以使用Payment支付Entity -->
        <dependency>
            <groupId>com.zb</groupId>
            <artifactId>springcloud-api-commons</artifactId>
            <version>${project.version}</version>
        </dependency>
        <!--一般基础配置类-->
        <dependency>
            <groupId>org.springframework.boot</groupId>
            <artifactId>spring-boot-devtools</artifactId>
            <scope>runtime</scope>
            <optional>true</optional>
        </dependency>
        <dependency>
            <groupId>org.projectlombok</groupId>
            <artifactId>lombok</artifactId>
            <optional>true</optional>
        </dependency>
        <dependency>
            <groupId>org.springframework.boot</groupId>
            <artifactId>spring-boot-starter-test</artifactId>
            <scope>test</scope>
        </dependency>
    </dependencies>
3.新建yml配置文件
server:
  port: 9527

spring:
  application:
    name: springcloud-gateway
  cloud:
    gateway:
      discovery:
        locator:
          enabled: true #开启从注册中心动态创建路由的功能,利用微服务名进行路由
      routes:
        - id: payment_routh #payment_route    #路由的ID,没有固定规则但要求唯一,建议配合服务名
          #uri: http://localhost:8001          #匹配后提供服务的路由地址
          uri: lb://springcloud-student-server #匹配后提供服务的路由地址8001的服务地址名字
          predicates:
            - Path=/payment/get/**         # 断言,路径相匹配的进行路由

        - id: payment_routh2 #payment_route    #路由的ID,没有固定规则但要求唯一,建议配合服务名
          #uri: http://localhost:8001          #匹配后提供服务的路由地址
          uri: lb://springcloud-student-server #匹配后提供服务的路由地址8001的服务地址名字
          predicates:
            - Path=/payment/lb/**         # 断言,路径相匹配的进行路由
            #- After=2020-02-21T15:51:37.485+08:00[Asia/Shanghai]
            #- Cookie=username,zzyy
            #- Header=X-Request-Id, \d+  # 请求头要有X-Request-Id属性并且值为整数的正则表达式

eureka:
  instance:
    hostname: springcloud-gateway-service
  client: #服务提供者provider注册进eureka服务列表内
    service-url:
      register-with-eureka: true
      fetch-registry: true
      defaultZone: http://eureka7001.com:7001/eureka
4.创建主启动类
@SpringBootApplication
@EnableEurekaClient
public class GatewayMain9527 {
    public static void main(String[] args) {
        SpringApplication.run(GatewayMain9527.class,args);
    }
}
5.创yml配置文件
server:
  port: 9527

spring:
  application:
    name: springcloud-gateway
  cloud:
    gateway:
      discovery:
        locator:
          enabled: true #开启从注册中心动态创建路由的功能,利用微服务名进行路由
      routes:
        - id: payment_routh #payment_route    #路由的ID,没有固定规则但要求唯一,建议配合服务名
          uri: http://localhost:8001          #匹配后提供服务的路由地址
          #uri: lb://springcloud-student-server #匹配后提供服务的路由地址8001的服务地址名字
          predicates:
            - Path=/student/get/**         # 断言,路径相匹配的进行路由

        - id: payment_routh2 #payment_route    #路由的ID,没有固定规则但要求唯一,建议配合服务名
          #uri: http://localhost:8001          #匹配后提供服务的路由地址
          uri: lb://springcloud-student-server #匹配后提供服务的路由地址8001的服务地址名字
          predicates:
            - Path=/student/lb/**         # 断言,路径相匹配的进行路由
            #- After=2020-02-21T15:51:37.485+08:00[Asia/Shanghai]
            #- Cookie=username,zzyy
            #- Header=X-Request-Id, \d+  # 请求头要有X-Request-Id属性并且值为整数的正则表达式

eureka:
  instance:
    hostname: springcloud-gateway-service
  client: #服务提供者provider注册进eureka服务列表内
    service-url:
      register-with-eureka: true
      fetch-registry: true
      defaultZone: http://eureka7001.com:7001/eureka
6.完成测试
http://localhost:9527/student/get/1
http://localhost:8001/student/get/1


发现2个端口都可以实现到这基本就结束了
spring cloud config-配置中心
1.建服务端Module:springcloud-config-center-3344
2.添jar包
  <dependencies>
        <!--添加消息总线RabbitMQ支持-->
        <dependency>
            <groupId>org.springframework.cloud</groupId>
            <artifactId>spring-cloud-starter-bus-amqp</artifactId>
        </dependency>
        <dependency>
            <groupId>org.springframework.cloud</groupId>
            <artifactId>spring-cloud-config-server</artifactId>
        </dependency>
        <dependency>
            <groupId>org.springframework.cloud</groupId>
            <artifactId>spring-cloud-starter-netflix-eureka-client</artifactId>
        </dependency>
        <dependency>
            <groupId>org.springframework.boot</groupId>
            <artifactId>spring-boot-starter-web</artifactId>
        </dependency>

        <dependency>
            <groupId>org.springframework.boot</groupId>
            <artifactId>spring-boot-starter-actuator</artifactId>
        </dependency>
        <dependency>
            <groupId>org.springframework.boot</groupId>
            <artifactId>spring-boot-devtools</artifactId>
            <scope>runtime</scope>
            <optional>true</optional>
        </dependency>
        <dependency>
            <groupId>org.projectlombok</groupId>
            <artifactId>lombok</artifactId>
            <optional>true</optional>
        </dependency>
        <dependency>
            <groupId>org.springframework.boot</groupId>
            <artifactId>spring-boot-starter-test</artifactId>
            <scope>test</scope>
        </dependency>
    </dependencies>
3.增添yml配置文件
server:
  port: 3344

spring:
  application:
    name:  cloud-config-center #注册进Eureka服务器的微服务名
  cloud:
    config:
      server:
        git:
          uri: https://gitee.com/dear_yyj/springcloud.git #GitHub上面的git仓库名字
          ####搜索目录
          search-paths:
            - springcloud
      ####读取分支
      label: master


#服务注册到eureka地址
eureka:
  client:
    service-url:
      defaultZone: http://localhost:7001/eureka
4.创建主启动类
@SpringBootApplication
@EnableConfigServer
public class MainApplicationCenter3344 {
    public static void main(String[] args) {
        SpringApplication.run(MainApplicationCenter3344.class,args);
    }

}
5.测试
http://localhost:3344/master/config-test.yml
http://localhost:3344/master/config-dev.yml
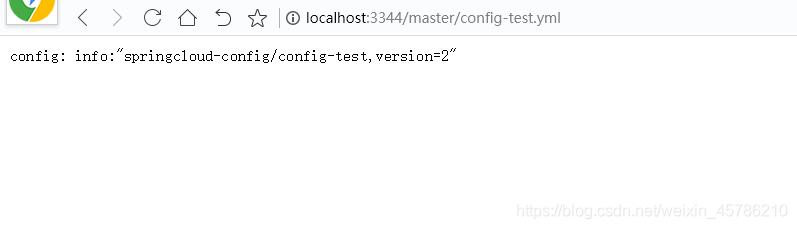
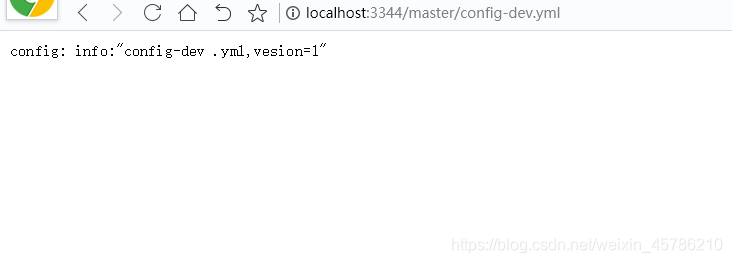
发现访问到了git上的配置文件,可以实现动态远程配置
spring cloud config-客户端
1.建module:springcloud-config-client-3355
 <dependencies>
        <!--添加消息总线RabbitMQ支持-->
        <dependency>
            <groupId>org.springframework.cloud</groupId>
            <artifactId>spring-cloud-starter-bus-amqp</artifactId>
        </dependency>
        <dependency>
            <groupId>org.springframework.cloud</groupId>
            <artifactId>spring-cloud-starter-config</artifactId>
        </dependency>
        <dependency>
            <groupId>org.springframework.cloud</groupId>
            <artifactId>spring-cloud-starter-netflix-eureka-client</artifactId>
        </dependency>
        <dependency>
            <groupId>org.springframework.boot</groupId>
            <artifactId>spring-boot-starter-web</artifactId>
        </dependency>
        <dependency>
            <groupId>org.springframework.boot</groupId>
            <artifactId>spring-boot-starter-actuator</artifactId>
        </dependency>

        <dependency>
            <groupId>org.springframework.boot</groupId>
            <artifactId>spring-boot-devtools</artifactId>
            <scope>runtime</scope>
            <optional>true</optional>
        </dependency>
        <dependency>
            <groupId>org.projectlombok</groupId>
            <artifactId>lombok</artifactId>
            <optional>true</optional>
        </dependency>
        <dependency>
            <groupId>org.springframework.boot</groupId>
            <artifactId>spring-boot-starter-test</artifactId>
            <scope>test</scope>
        </dependency>
    </dependencies>
2.新建bootstrap.yml文件注意和以前不太一样
server:
  port: 3355

spring:
  application:
    name: config-client
  cloud:
    #Config客户端配置
    config:
      label: master #分支名称
      name: config #配置文件名称
      profile: dev #读取后缀名称   上述3个综合:master分支上config-dev.yml的配置文件被读取http://config-3344.com:3344/master/config-dev.yml
      uri: http://localhost:3344 #配置中心地址k

#rabbitmq相关配置 15672是Web管理界面的端口;5672是MQ访问的端口
  rabbitmq:
    host: localhost
    port: 5672
    username: guest
    password: guest

#服务注册到eureka地址
eureka:
  client:
    service-url:
      defaultZone: http://localhost:7001/eureka

# 暴露监控端点
management:
  endpoints:
    web:
      exposure:
        include: "*"
3.创建主启动类
@SpringBootApplication
@EnableEurekaClient
public class ConfigClientMain3355 {
    public static void main(String[] args) {
        SpringApplication.run(ConfigClientMain3355.class,args);
    }
}
4.创建controller层
@RestController
@RefreshScope
public class ConfigClientController {

    @Value("${config}")
    private String configInfo;

    @GetMapping("/configInfo")
    public String getConfigInfo(){
        return configInfo;
    }


}
5.测试
http://localhost:3355/configInfo
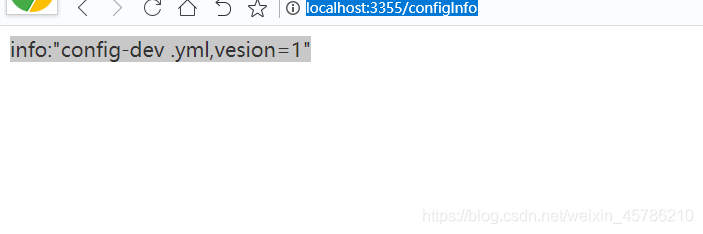
发现结果也和上面3344的结果一样所以以后可以实现动态更改配置信息
结论
以上这些是快速搭建一个分布式架构最简单的代码都是我经过自己实际测试,然后在复制粘贴上去的,如果有需要可以去码云上撸下来
https://gitee.com/dear_yyj/springcloud.git


 168万+
168万+

 被折叠的 条评论
为什么被折叠?
被折叠的 条评论
为什么被折叠?
 到【灌水乐园】发言


