


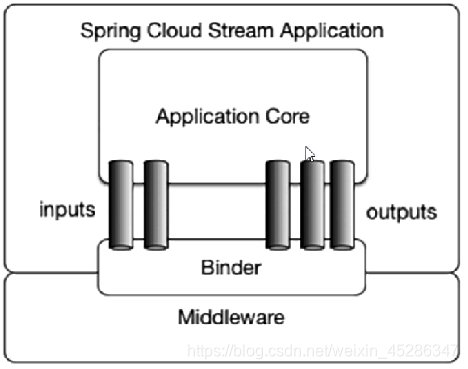
SpringCloud-Stream
标准流程套路
创建生产者module
cloud-stream-rabbitmq-provider8801
生产者端pom文件
		<dependency>
            <groupId>org.springframework.boot</groupId>
            <artifactId>spring-boot-starter-web</artifactId>
        </dependency>
        <dependency>
            <groupId>org.springframework.boot</groupId>
            <artifactId>spring-boot-starter-actuator</artifactId>
        </dependency>
        <dependency>
            <groupId>org.springframework.boot</groupId>
            <artifactId>spring-boot-starter-test</artifactId>
        </dependency>
        <dependency>
            <groupId>org.projectlombok</groupId>
            <artifactId>lombok</artifactId>
        </dependency>
		<!--eureka-client-->
        <dependency>
            <groupId>org.springframework.cloud</groupId>
            <artifactId>spring-cloud-starter-netflix-eureka-client</artifactId>
        </dependency>
        <dependency>
            <groupId>org.springframework.cloud</groupId>
            <artifactId>spring-cloud-starter-stream-rabbit</artifactId>
        </dependency>
消息驱动生产者配置文件
server:
  port: 8801

spring:
  application:
    name: cloud-stream-provider
  cloud:
    stream:
      binders: #在此处配置要绑定的rabbitmq的服务信息
        defaultRabbit: # 表示定义的名称用于binding整合
          type: rabbit #消息组件类型
          environment: #设置rabbitmq的相关环境配置
            spring:
              rabbitmq:
                host: localhost
                port: 5672
                username: guest
                password: guest
      bindings: #服务的整合处理
        output: #这个名字是一个通道的名称
          destination: studyExchange #表示要使用的Exchange名称定义
          content-type: application/json #设置消息类型, 本次为json, 文本则设置"text/plain"
          binder: defaultRabbit #设置要绑定的消息服务的具体设置
 		# binder: defaultRabbit 可能会爆红, 不过无所谓, 实在看不下去, 按下面调试
eureka:
  client: # 客户端进行Eureka注册的配置
    register-with-eureka: true
    fetch-registry: true
    service-url:
      defaultZone: http://eureka7001.com:7001/eureka/,http://eureka7002.com:7002/eureka/  #集群
  instance:
    lease-renewal-interval-in-seconds: 2 # 设置心跳的时间间隔(默认是30秒)
    lease-expiration-duration-in-seconds: 5 # 如果现在超过了5秒的间隔(默认是90秒)
    instance-id: send-8801.com  # 在信息列表时显示主机名称
    prefer-ip-address: true     # 访问的路径变为IP地址
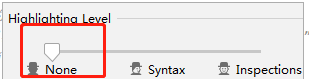
将这个调为none即可避免爆红
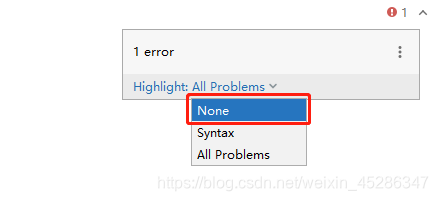
或者在这里调
主启动类
@SpringBootApplication
@EnableEurekaClient
@EnableDiscoveryClient
public class StreamMQMain8801 {
    public static void main(String[] args) {
        SpringApplication.run(StreamMQMain8801.class,args);
    }
}
service业务类
接口
public interface IMessageProvider {
    public String send();
}
实现类
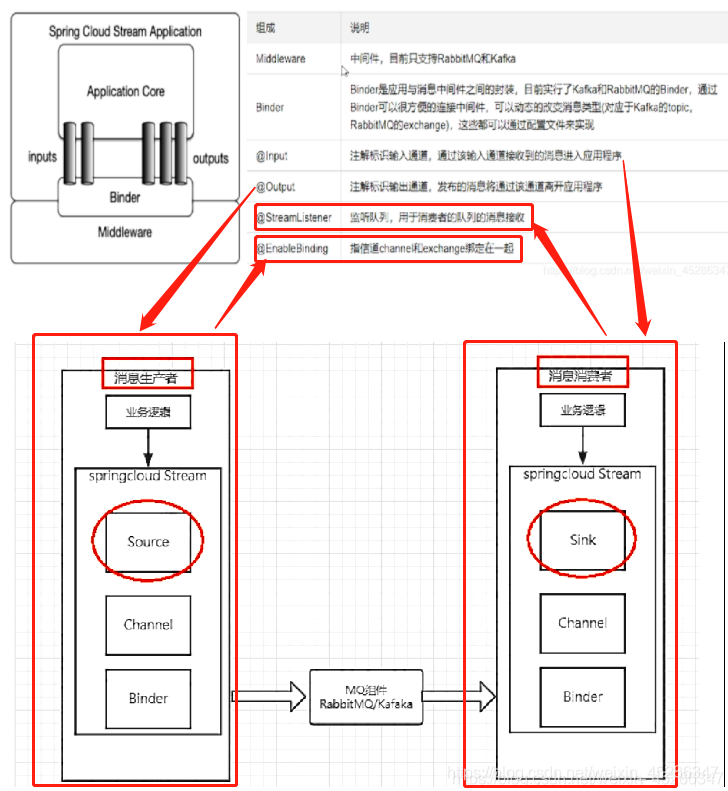
@EnableBinding(Source.class) //指信道channel和exchange绑定在一起, 定义消息的推送管道
public class IMessageProviderImpl implements IMessageProvider {
@Resource
private MessageChannel output; //消息发送管道
@Override
public String send() {
String serial= UUID.randomUUID().toString();
output.send(MessageBuilder.withPayload(serial).build());
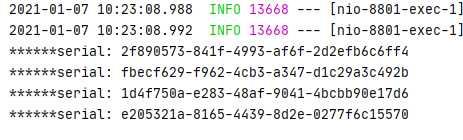
System.out.println("******serial: "+serial);
return null;
}
}
controller层
@RestController
public class SendMessageController {

    @Resource
    private IMessageProvider messageProvider;


    @GetMapping("/sendMessage")
    public String sendMessage(){
        return messageProvider.send();
    }
}
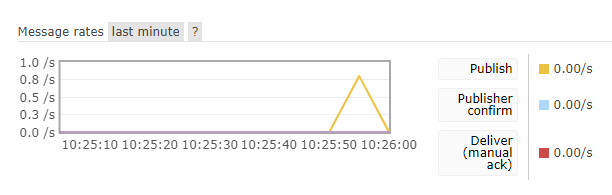
自测

创建消费者module
cloud-stream-rabbitmq-consumer8802
消息消费端pom文件
		<dependency>
            <groupId>org.springframework.boot</groupId>
            <artifactId>spring-boot-starter-web</artifactId>
        </dependency>
        <dependency>
            <groupId>org.springframework.boot</groupId>
            <artifactId>spring-boot-starter-actuator</artifactId>
        </dependency>
        <dependency>
            <groupId>org.springframework.boot</groupId>
            <artifactId>spring-boot-starter-test</artifactId>
        </dependency>
        <dependency>
            <groupId>org.projectlombok</groupId>
            <artifactId>lombok</artifactId>
        </dependency>
		<!--eureka-client-->
        <dependency>
            <groupId>org.springframework.cloud</groupId>
            <artifactId>spring-cloud-starter-netflix-eureka-client</artifactId>
        </dependency>
        <dependency>
            <groupId>org.springframework.cloud</groupId>
            <artifactId>spring-cloud-starter-stream-rabbit</artifactId>
        </dependency>
消息消费端的配置文件
server:
  port: 8802


spring:
  application:
    name: cloud-stream-consumer
  cloud:
    stream:
      binders: #在此处配置要绑定的rabbitmq的服务信息
        defaultRabbit: # 表示定义的名称用于binding整合
          type: rabbit #消息组件类型
          environment: #设置rabbitmq的相关环境配置
            spring:
              rabbitmq:
                host: localhost
                port: 5672
                username: guest
                password: guest
      bindings: #服务的整合处理
        input: #这个名字是一个通道的名称
          destination: studyExchange #表示要使用的Exchange名称定义
          content-type: application/json #设置消息类型, 本次为json, 文本则设置"text/plain"
          binder: defaultRabbit #设置要绑定的消息服务的具体设置


eureka:
  client: # 客户端进行Eureka注册的配置
    register-with-eureka: true
    fetch-registry: true
    service-url:
      defaultZone: http://eureka7001.com:7001/eureka/,http://eureka7002.com:7002/eureka/  #集群
  instance:
    lease-renewal-interval-in-seconds: 2 # 设置心跳的时间间隔(默认是30秒)
    lease-expiration-duration-in-seconds: 5 # 如果现在超过了5秒的间隔(默认是90秒)
    instance-id: receive-8802.com  # 在信息列表时显示主机名称
    prefer-ip-address: true     # 访问的路径变为IP地址
主启动类
@SpringBootApplication
public class StreamMQMain8802 {
    public static void main(String[] args) {
        SpringApplication.run(StreamMQMain8802.class,args);
    }
}
controller业务类
@Component
@EnableBinding(Sink.class)
public class ReceiveMessageListenerController {

    @Value("${server.port}")
    private String serverPort;

    @StreamListener(Sink.INPUT)
    public void input(Message<String> message){
        System.out.println("消费者1号,------>接收到的消息: "+message.getPayload()+"\t port: "+serverPort);

    }
}
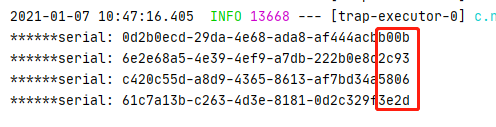
测试


消息重复消费
按照8802创建出8803
步骤省略
问题
8801发送两条数据, 8802,8803都收到两条数据


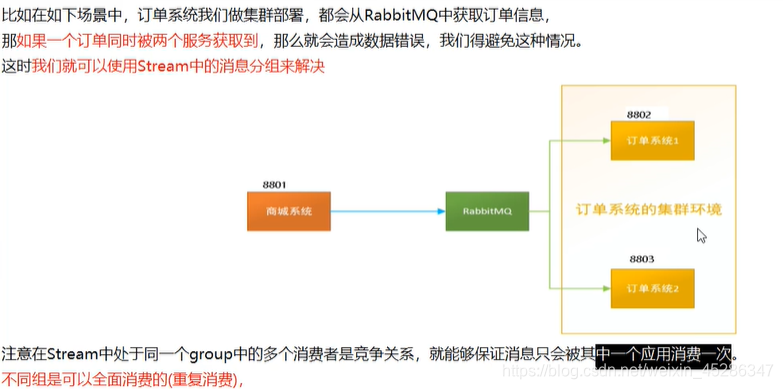

RabbitMQ默认是不同组的

如何解决重复消费问题
设置分组, 在后面添加group, 8803同下
spring:
  autoconfigure:
    exclude: #springboot排除自动配置
      - org.springframework.boot.autoconfigure.jdbc.DataSourceAutoConfiguration
      - com.alibaba.druid.spring.boot.autoconfigure.DruidDataSourceAutoConfigure
      - org.mybatis.spring.boot.autoconfigure.MybatisAutoConfiguration
  application:
    name: cloud-stream-consumer
  cloud:
    stream:
      binders: #在此处配置要绑定的rabbitmq的服务信息
        defaultRabbit: # 表示定义的名称用于binding整合
          type: rabbit #消息组件类型
          environment: #设置rabbitmq的相关环境配置
            spring:
              rabbitmq:
                host: localhost
                port: 5672
                username: guest
                password: guest
      bindings: #服务的整合处理
        input: #这个名字是一个通道的名称
          destination: studyExchange #表示要使用的Exchange名称定义
          content-type: application/json #设置消息类型, 本次为json, 文本则设置"text/plain"
          binder: defaultRabbit #设置要绑定的消息服务的具体设置
          group: lqkA #设置分组
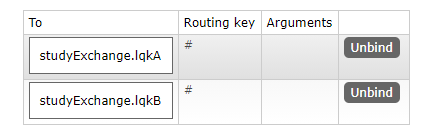
设置相同分组即可解决重复消费
8802, 8803 设置为同一个组
8801

8802

8803

消息持久化
配置了group属性会自动实现消息持久化
消息持久化就是说在消费端服务宕机的这段时间内有消息发送, 消费端服务上线会重新接受之前的消息, 如果没有配置group属性就不会消费之前的消息


 1215
1215

 被折叠的 条评论
为什么被折叠?
被折叠的 条评论
为什么被折叠?
 到【灌水乐园】发言


